- 📖 Geeky Medics OSCE Book
- ⚡ Geeky Medics Bundles
- ✨ 1300+ OSCE Stations
- ✅ OSCE Checklist PDF Booklet
- 🧠 UKMLA AKT Question Bank
- 💊 PSA Question Bank
- 💉 Clinical Skills App
- 🗂️ Flashcard Collections | OSCE, Medicine, Surgery, Anatomy
- 💬 SCA Cases for MRCGP
To be the first to know about our latest videos subscribe to our YouTube channel 🙌
Diabetic foot examination frequently appears in OSCEs. You’ll be expected to pick up the relevant clinical signs of diabetic foot disease using your examination skills. This diabetic foot examination OSCE guide provides a clear step-by-step approach to examining the diabetic foot, with an included video demonstration.
Gather equipment
The following pieces of equipment may be required:
- Monofilament
- Tuning fork (128 Hz)
- Tendon hammer
Introduction
Wash your hands and don PPE if appropriate.
Introduce yourself to the patient including your name and role.
Confirm the patient’s name and date of birth.
Briefly explain what the examination will involve using patient-friendly language.
Gain consent to proceed with the examination.
Adequately expose the patient’s lower limbs.
Position the patient on the bed, with the head of the bed at 45°.
Ask the patient if they have any pain before proceeding with the clinical examination.
Inspection
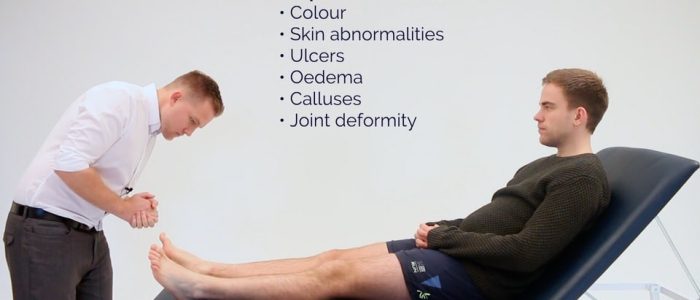
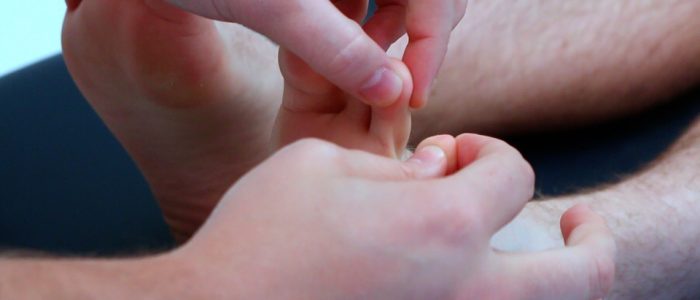
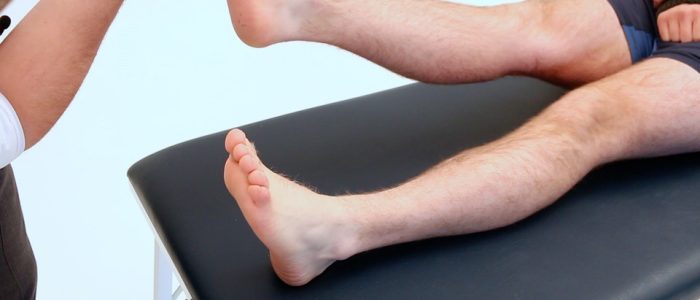
Inspect the lower limbs for relevant pathology, making sure to look at the posterior aspect of each leg and between each of the toes for hidden ulcers:
- Peripheral cyanosis: bluish discolouration of the skin associated with low SpO2 in the affected tissues (e.g. may be present in PVD due to poor perfusion).
- Peripheral pallor: a pale colour of the skin that can indicate poor perfusion.
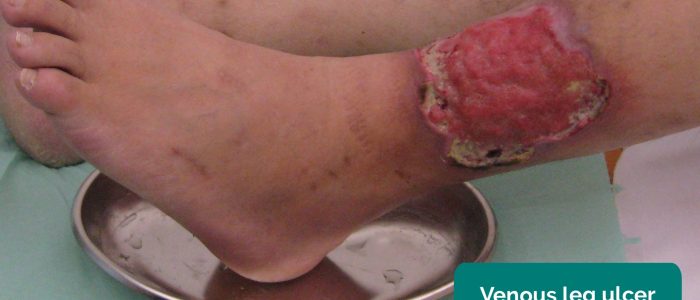
- Venous ulcers: typically large and shallow ulcers with irregular borders that are only mildly painful. These ulcers most commonly develop over the medial aspect of the ankle.
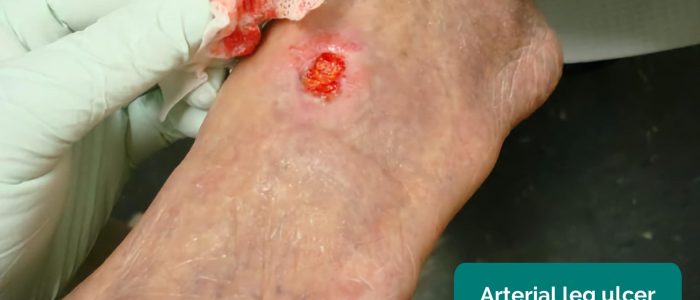
- Arterial ulcers: typically small, well-defined, deep ulcers that are very painful. These ulcers most commonly develop in the most peripheral regions of a limb (e.g. the ends of digits).
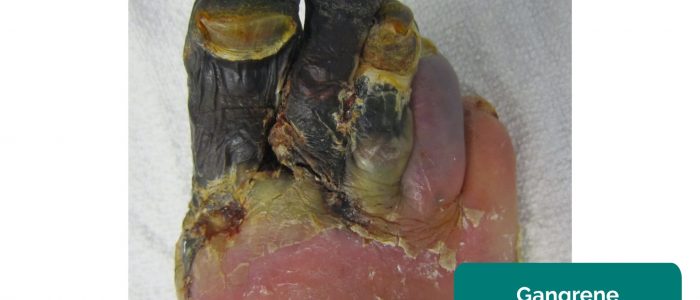
- Gangrene: tissue necrosis secondary to inadequate perfusion. Typical appearances include a change in skin colour (e.g. red, black) and breakdown of the associated tissue.
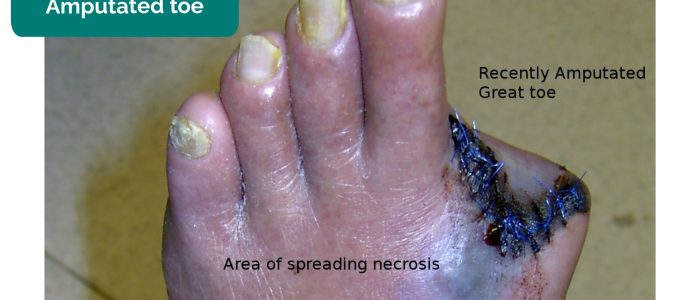
- Missing limbs, toes, fingers: due to amputation secondary to critical ischaemia.
- Scars: may indicate previous surgical procedures (e.g. bypass surgery) or healed ulcers.
- Hair loss: occurs due to chronic impairment of tissue perfusion in PVD.
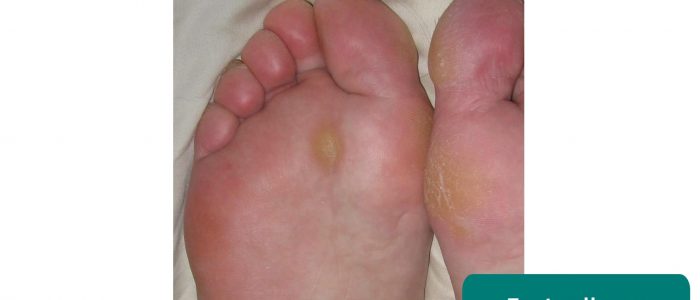
- Foot calluses: often caused by an abnormal gait and/or poorly fitting footwear.
- Venous guttering: veins that have very little blood within them due to poor blood supply to the limb, hence the “guttered” appearance
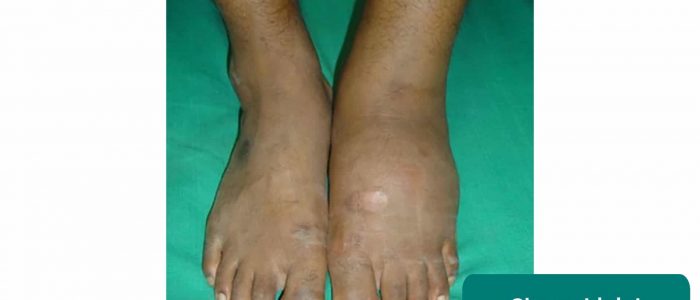
Charcot arthropathy
Charcot arthropathy involves the progressive degeneration of a weight-bearing joint due to peripheral neuropathy.
The typical clinical features of a Charcot’s joint include:
- Effusion
- Distortion
- Overlying erythema
- Loss of joint function
Palpation
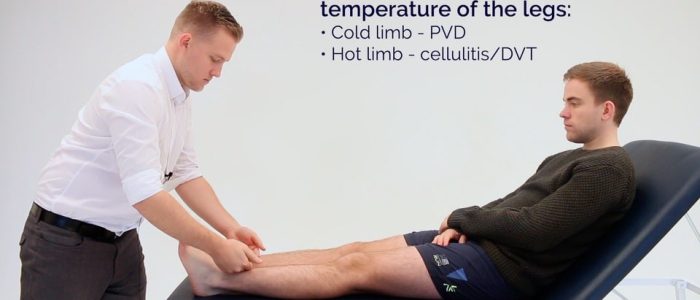
Temperature
Place the dorsal aspect of your hand onto the patient’s lower limbs to assess and compare temperature:
- In healthy individuals, the lower limbs should be symmetrically warm, suggesting adequate perfusion.
- A cool and pale limb is indicative of poor arterial perfusion.
Pulses
Palpate the posterior tibial and dorsalis pedis pulse to briefly assess peripheral perfusion. Absence of peripheral pulses is suggestive of peripheral vascular disease.
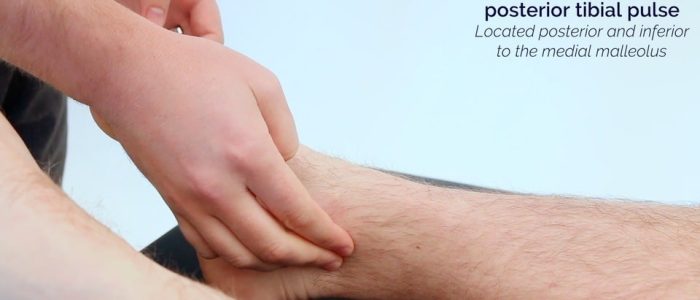
Posterior tibial pulse
Palpate the posterior tibial pulse:
- The posterior tibial pulse can be located posterior to the medial malleolus of the tibia.
- Palpate the pulse to confirm its presence and then compare pulse strength between the feet.
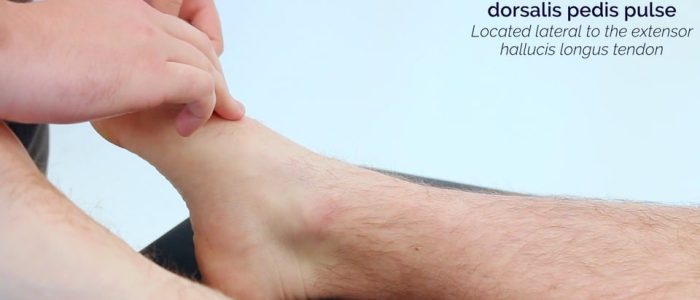
Dorsalis pedis pulse
Palpate the dorsalis pedis pulse:
- The dorsalis pedis pulse can be located over the dorsum of the foot, lateral to the extensor hallucis longus tendon, over the second and third cuneiform bones.
- Palpate the pulse to confirm its presence and then compare pulse strength between the feet.
Sensation
Monofilament
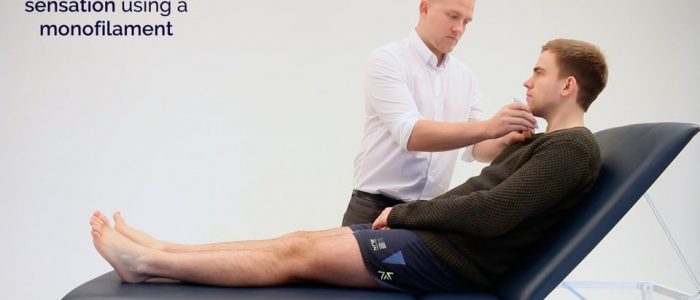
1. Provide an example of the monofilament sensation on the patient’s arm or sternum.
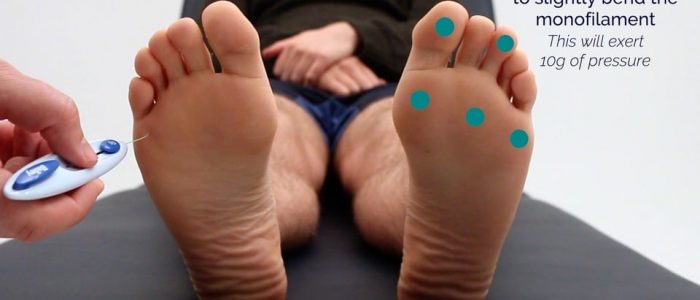
2. With the patient’s eyes closed, apply the monofilament to each of the following locations in turn:
- The pulp of the hallux.
- The pulp of the third digit.
- Metatarsophalangeal joints 1, 3 and 5.
3. When applying the monofilament to each area:
- Ask the patient to report when they feel the monofilament touch their foot.
- Press the monofilament against the skin until it bends slightly (this will ensure that only 10g of pressure is applied).
- Hold the monofilament against the skin for 1-2 seconds.
- Avoid calluses and scars as they have a reduced level of sensation that is not representative of the surrounding tissue.
Gait
Peripheral neuropathy associated with diabetic foot disease can result in the development of an abnormal gait. Patients with peripheral neuropathy may demonstrate a conservative gait strategy in which their walking speed is reduced and their foot stance is broadened. The development of foot drop is also more common in diabetic patients, which can result in a high-stepping gait.
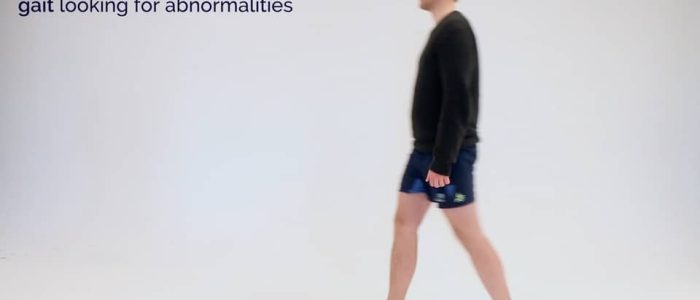
Assess the patient’s gait
Patients with diabetic foot disease are often at an increased risk of falls so make sure to remain close to the patient during the assessment so that you are able to intervene if required.
Ask the patient to walk to the end of the examination room and then turn and walk back whilst you observe their gait paying attention to:
- Speed: gait speed may be reduced significantly in patients with advanced peripheral neuropathy.
- Stance: a broad-based gait may be associated with advanced peripheral neuropathy to increase stability.
- Steps: high-stepping may indicate the presence of foot drop.
- Turning: patients with peripheral neuropathy can find turning difficult and they may look down at their feet whilst turning due to impairment of sensation and proprioception.
Examine the patient’s footwear
The use of appropriate footwear is particularly important for diabetic patients due to the presence of impaired sensation and poor peripheral perfusion. Inappropriately fitting footwear or foreign objects within a shoe can result in significant tissue injury and the formation of a diabetic foot ulcer.
Inspect the patient’s footwear:
- Note the pattern of wear on the soles (asymmetrical wearing may indicate an abnormal gait).
- Check that the shoes are the correct size for the patient.
- Ensure there are no materials within the shoe that could cause foot injury.
Other assessments to consider
If abnormalities are identified during the assessment of sensation with the monofilament, consider carrying out the further tests shown below (these are no longer performed routinely in a diabetic foot assessment).
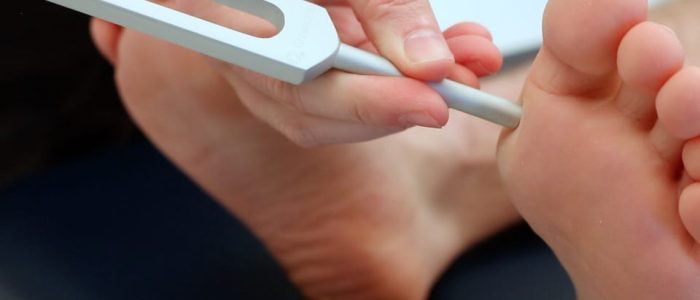
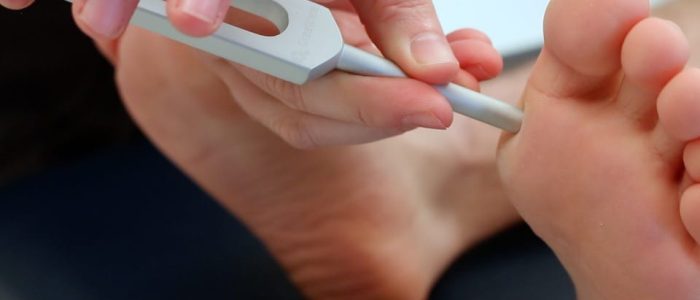
Vibration sensation
Vibration sensation involves the dorsal columns.
1. Ask the patient to close their eyes and to let you know both when they can detect vibration and when it stops.
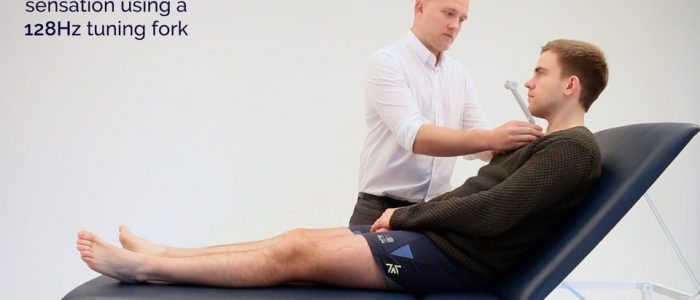
2. Tap a 128 Hz tuning fork and place onto the patient’s sternum to check they are able to feel it vibrating. Then grasp the ends of the tuning fork to cease vibration and see if the patient is able to accurately identify that it has stopped.
3. Tap the tuning fork again and place onto the interphalangeal joint of the patient’s big toe. If the patient is able to accurately identify when the vibration begins and when it stops at this point in both lower limbs, the assessment is complete.
4. If vibration sensation is impaired at the interphalangeal joint of the patient’s big toe, continue to sequentially assess more proximal joints (e.g. metatarsophalangeal joint of the big toe → ankle joint → knee joint) until the patient is able to accurately identify vibration.
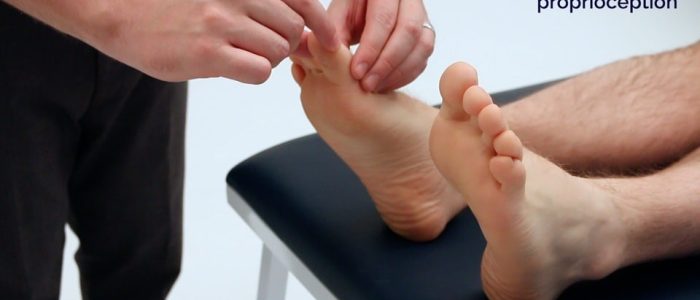
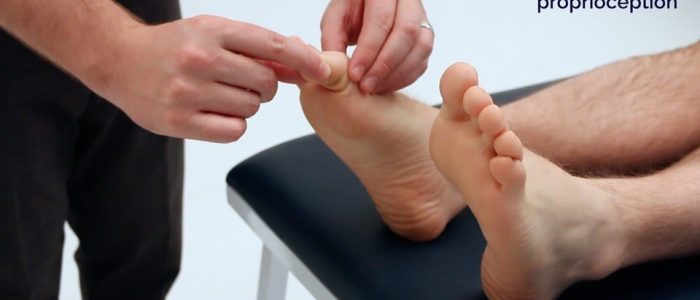
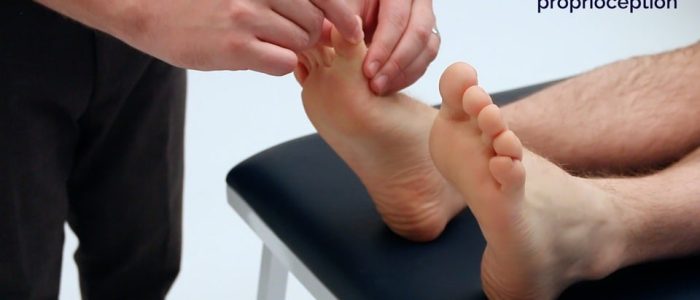
Proprioception
Proprioception, also known as joint position sense, involves the dorsal columns.
1. Begin assessment of proprioception at the interphalangeal joint of the big toe by holding the distal phalanx of the big toe by its sides (avoid holding the nail bed as this can allow the patient to determine direction based on pressure).
2. Demonstrate movement of the big toe “upwards” and “downwards” to the patient whilst they watch.
3. Ask the patient to close their eyes and state if you are moving their big toe up or down.
4. Move the big toe up or down 3-4 times in a random sequence to see if the patient is able to accurately identify joint position with their eyes closed.
5. If the patient is unable to correctly identify the direction of movement, continue to sequentially assess more proximal joints (e.g. metatarsophalangeal joint of the big toe → ankle joint → knee joint).
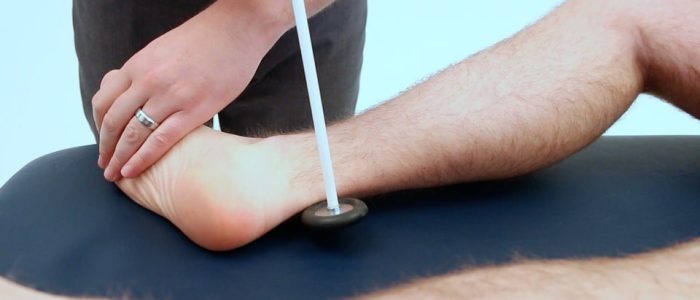
Ankle-jerk reflex
Assess the ankle-jerk reflex (S1) in each of the patient’s lower limbs.
There are several methods for eliciting the ankle-jerk reflex, with two of the most common explained below.
The ankle jerk reflex may be absent in advanced peripheral neuropathy.
Method 1
1. With the patient on the examination couch support their leg so that their hip is slightly abducted, the knee is flexed and the ankle is dorsiflexed.
2. Tap the Achille’s tendon with the tendon hammer and observe for a contraction in the gastrocnemius muscle with associated plantarflexion of the foot.
Method 2
1. Ask the patient to kneel on a chair and hold the back of it to steady themselves.
2. Tap the Achille’s tendon with the tendon hammer and observe for a contraction in the gastrocnemius muscle with associated plantarflexion of the foot.
To complete the examination…
Explain to the patient that the examination is now finished.
Thank the patient for their time.
Dispose of PPE appropriately and wash your hands.
Summarise your findings.
Example summary
“Today I examined Mr Smith, a 64-year-old male. On general inspection, the patient appeared comfortable at rest and there were no objects or medical equipment around the bed of relevance.”
“Both lower limbs were cool below the knee with weak dorsalis pedis and posterior tibial pulses. A 1 x 1cm deep well-defined ulcer was noted between the 2nd and 3rd toe on the right foot. There was a loss of sensation in both lower limbs distal to the ankle joint.”
“The patient’s gait was slow and broad-based on assessment however footwear was appropriate.”
“In summary, these findings suggest the presence of significant diabetic foot disease including peripheral arterial insufficiency and peripheral neuropathy.”
“For completeness, I would like to perform the following further assessments and investigations.”
Further assessments and investigations
Suggest further assessments and investigations to the examiner:
- Bedside capillary blood glucose: if there is concern that the patient is currently hyperglycaemic or hypoglycaemic.
- Serum HbA1c: to aid assessment of blood glucose control over the previous three months.
- Lower limb neurological examination: if diabetic foot examination reveals neurological deficits.
- Peripheral arterial examination: if diabetic foot examination identifies clinical signs suggestive of arterial disease.
- Venous examination of the lower limbs: if diabetic foot examination identified clinical signs suggestive of venous disease.
- Foot care advice: including regular podiatry input and appropriate footwear.
- Calculation of diabetic foot risk using assessment tool: based on the clinical findings of the diabetic foot examination.
Reviewer
Dr Simon Ashwell
Consultant Endocrinologist
References
- Milorad Dimić M.D. Adapted by Geeky Medics. Venous ulcer. Licence: CC BY 3.0.
- Jonathan Moore. Adapted by Geeky Medics. Arterial ulcer. Licence: CC BY 3.0.
- James Heilman, MD. Adapted by Geeky Medics. Gangrene. Licence: CC BY-SA.
- Drgnu23. Adapted by Geeky Medics. Amputated toe. Licence: CC BY-SA.
- Jmarchn. Adapted by Geeky Medics. Foot calluses. Licence: CC BY-SA.
- J. Terrence Jose Jerome. Adapted by Geeky Medics. Licence: CC BY.


