

- 📖 Geeky Medics OSCE Book
- ⚡ Geeky Medics Bundles
- ✨ 1300+ OSCE Stations
- ✅ OSCE Checklist PDF Booklet
- 🧠 UKMLA AKT Question Bank
- 💊 PSA Question Bank
- 💉 Clinical Skills App
- 🗂️ Flashcard Collections | OSCE, Medicine, Surgery, Anatomy
- 💬 SCA Cases for MRCGP
To be the first to know about our latest videos subscribe to our YouTube channel 🙌
This intramuscular injection guide provides a step-by-step approach to performing an intramuscular injection in an OSCE setting, with an included video demonstration. This should not be used as a guide to administering injections to actual patients without first consulting your local medical school or hospital guidelines and undertaking the necessary training.
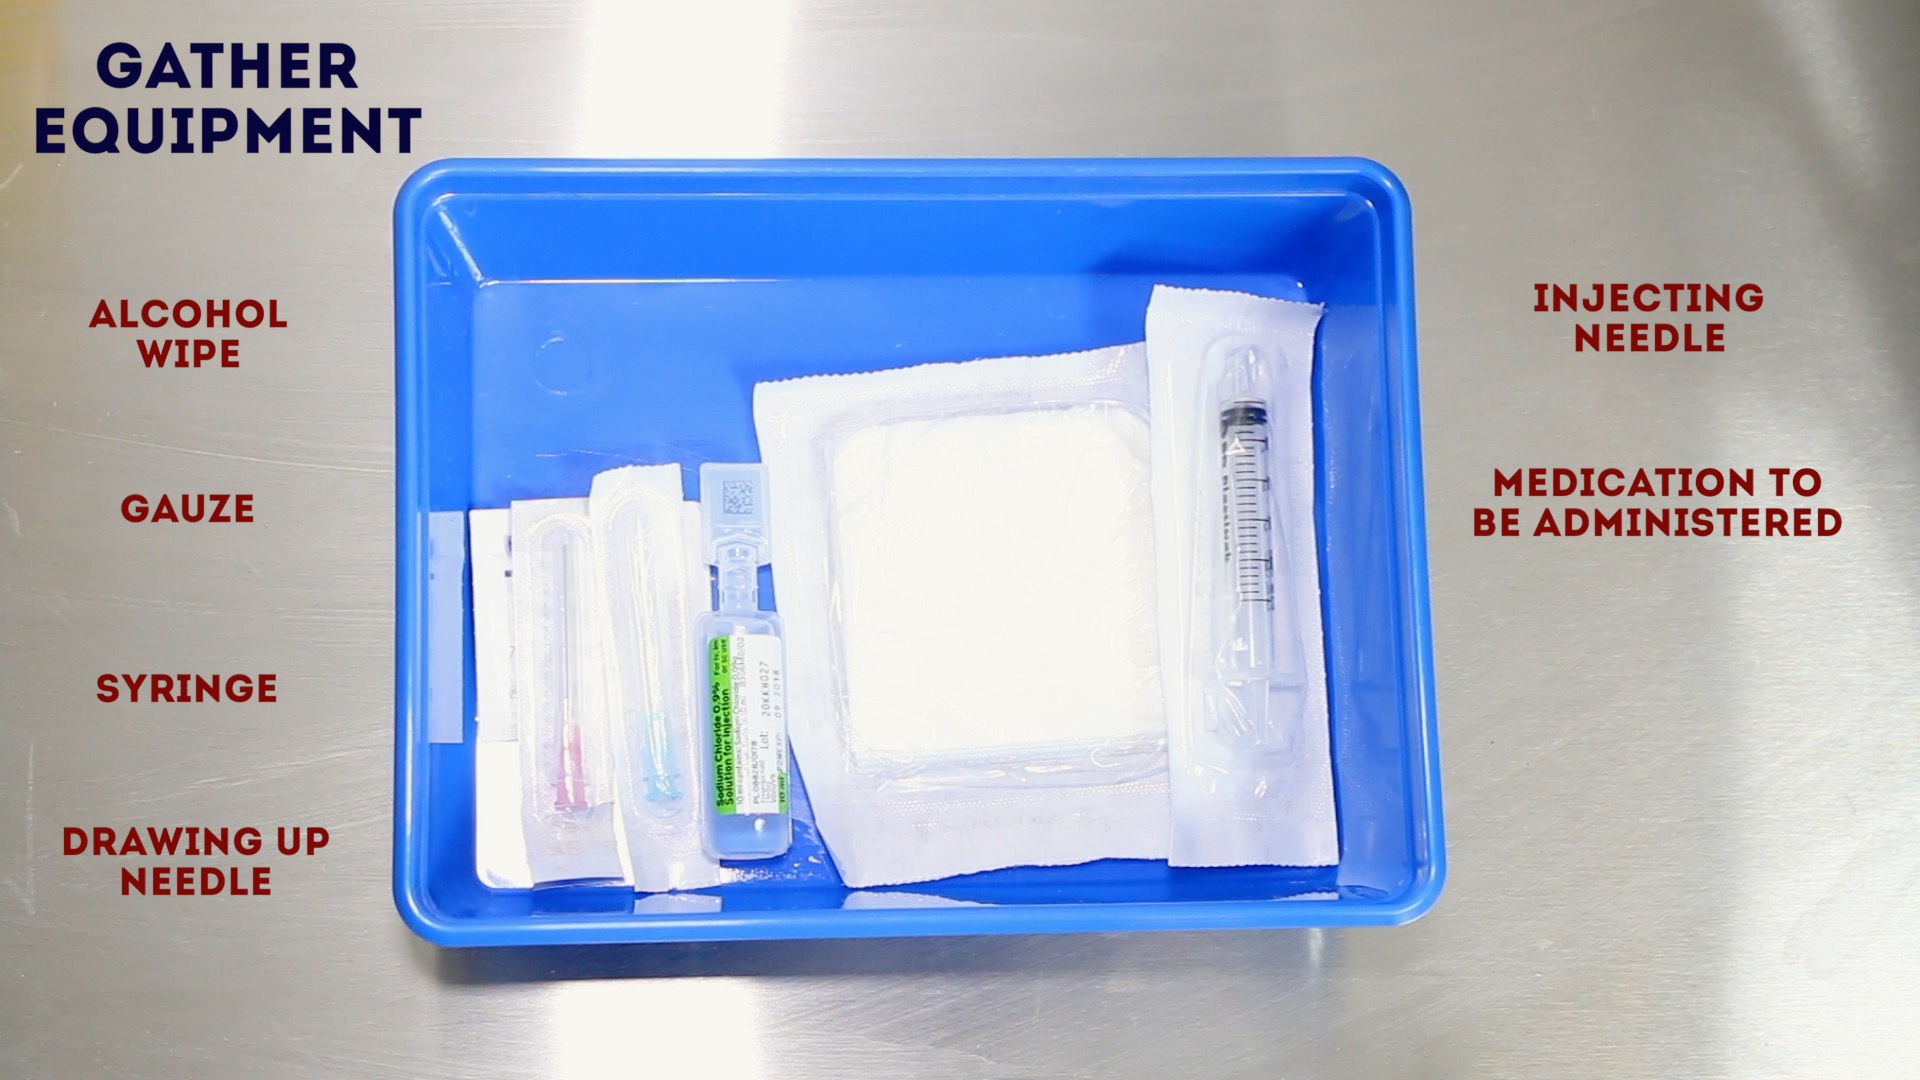
Gather equipment
Gather the appropriate equipment:
- Non-sterile gloves
- Apron
- Equipment tray
- Syringe (the smallest syringe that will accommodate the medication volume)
- Injecting needle (21–23 gauge): a standard length is 25mm.
- Drawing-up needle (also known as a blunt filter needle): filters out sub-visible particles of glass, rubber and other residues when drawing up medications from ampoules.
- Alcohol wipe (70% isopropyl)
- Gauze or cotton swab
- Sharps container
- The medication to be administered
- The patient’s prescription
 Gather equipment
Introduction
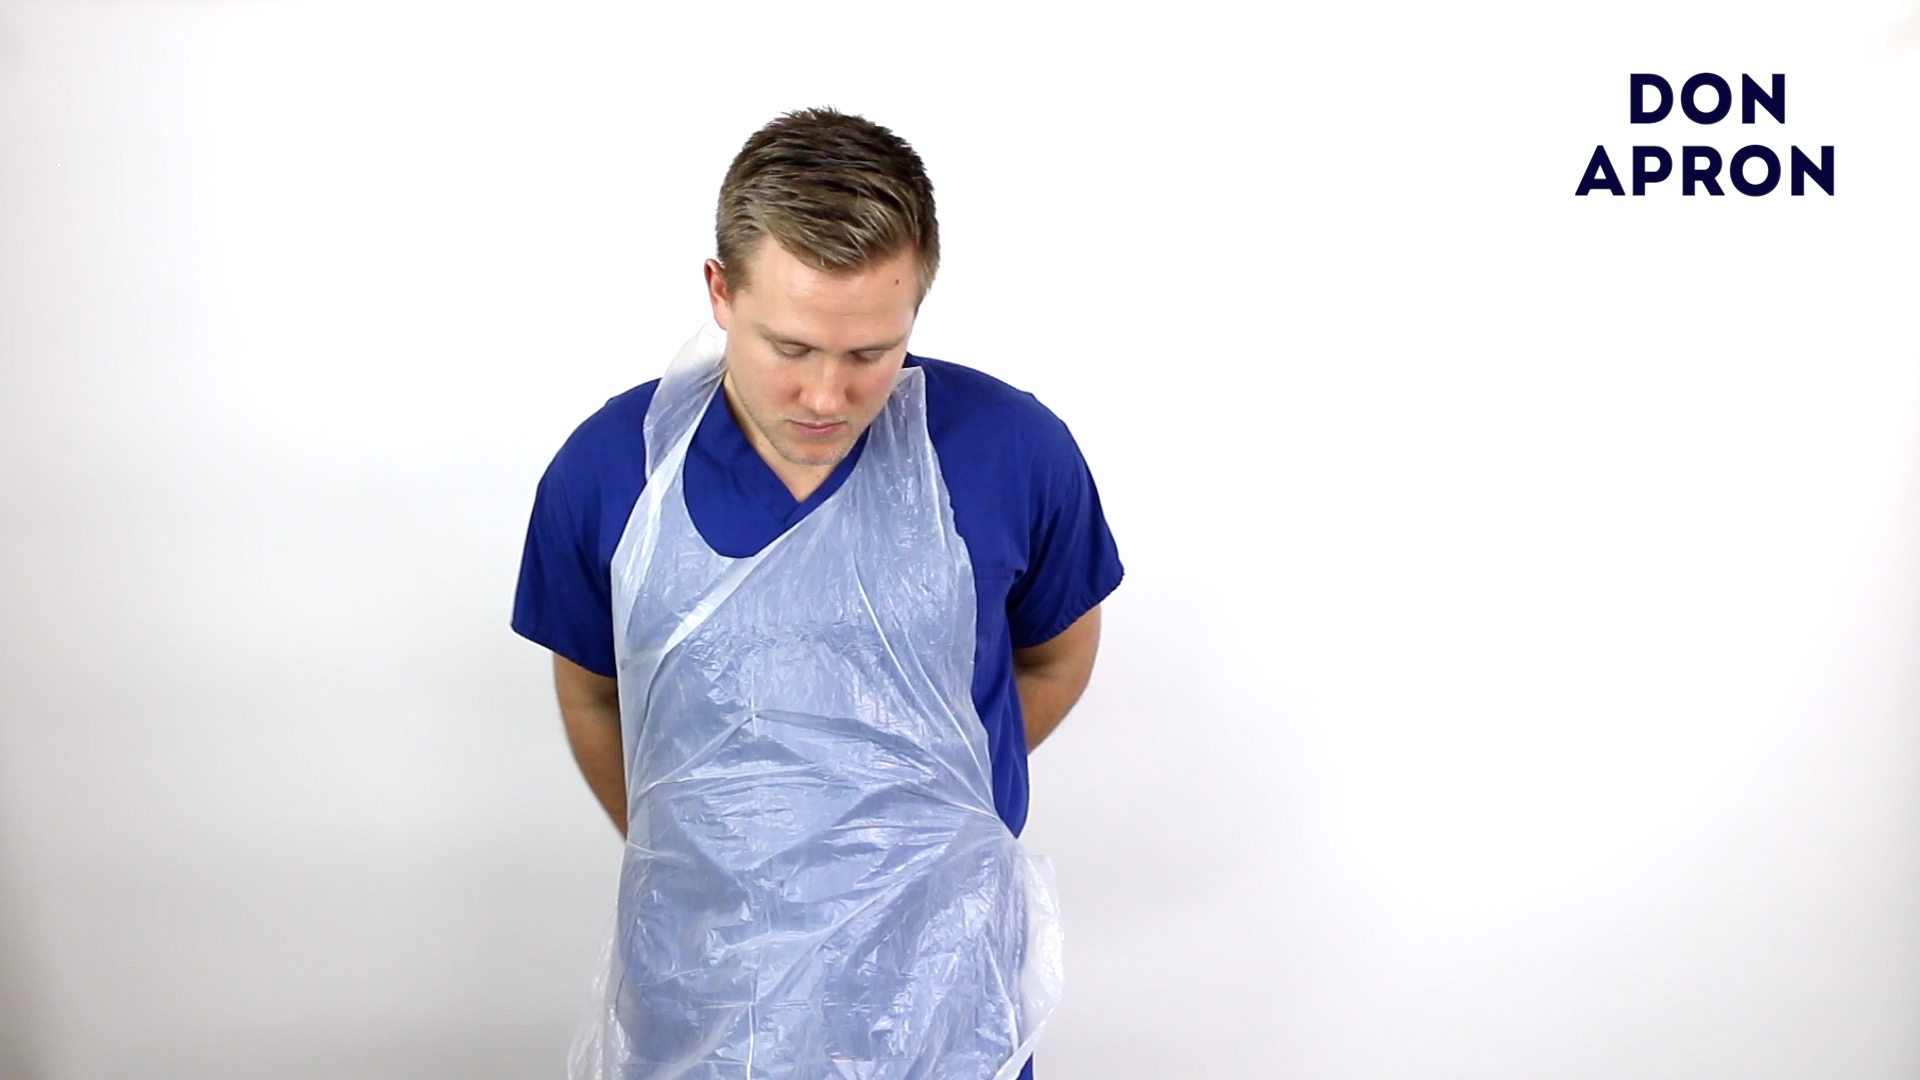
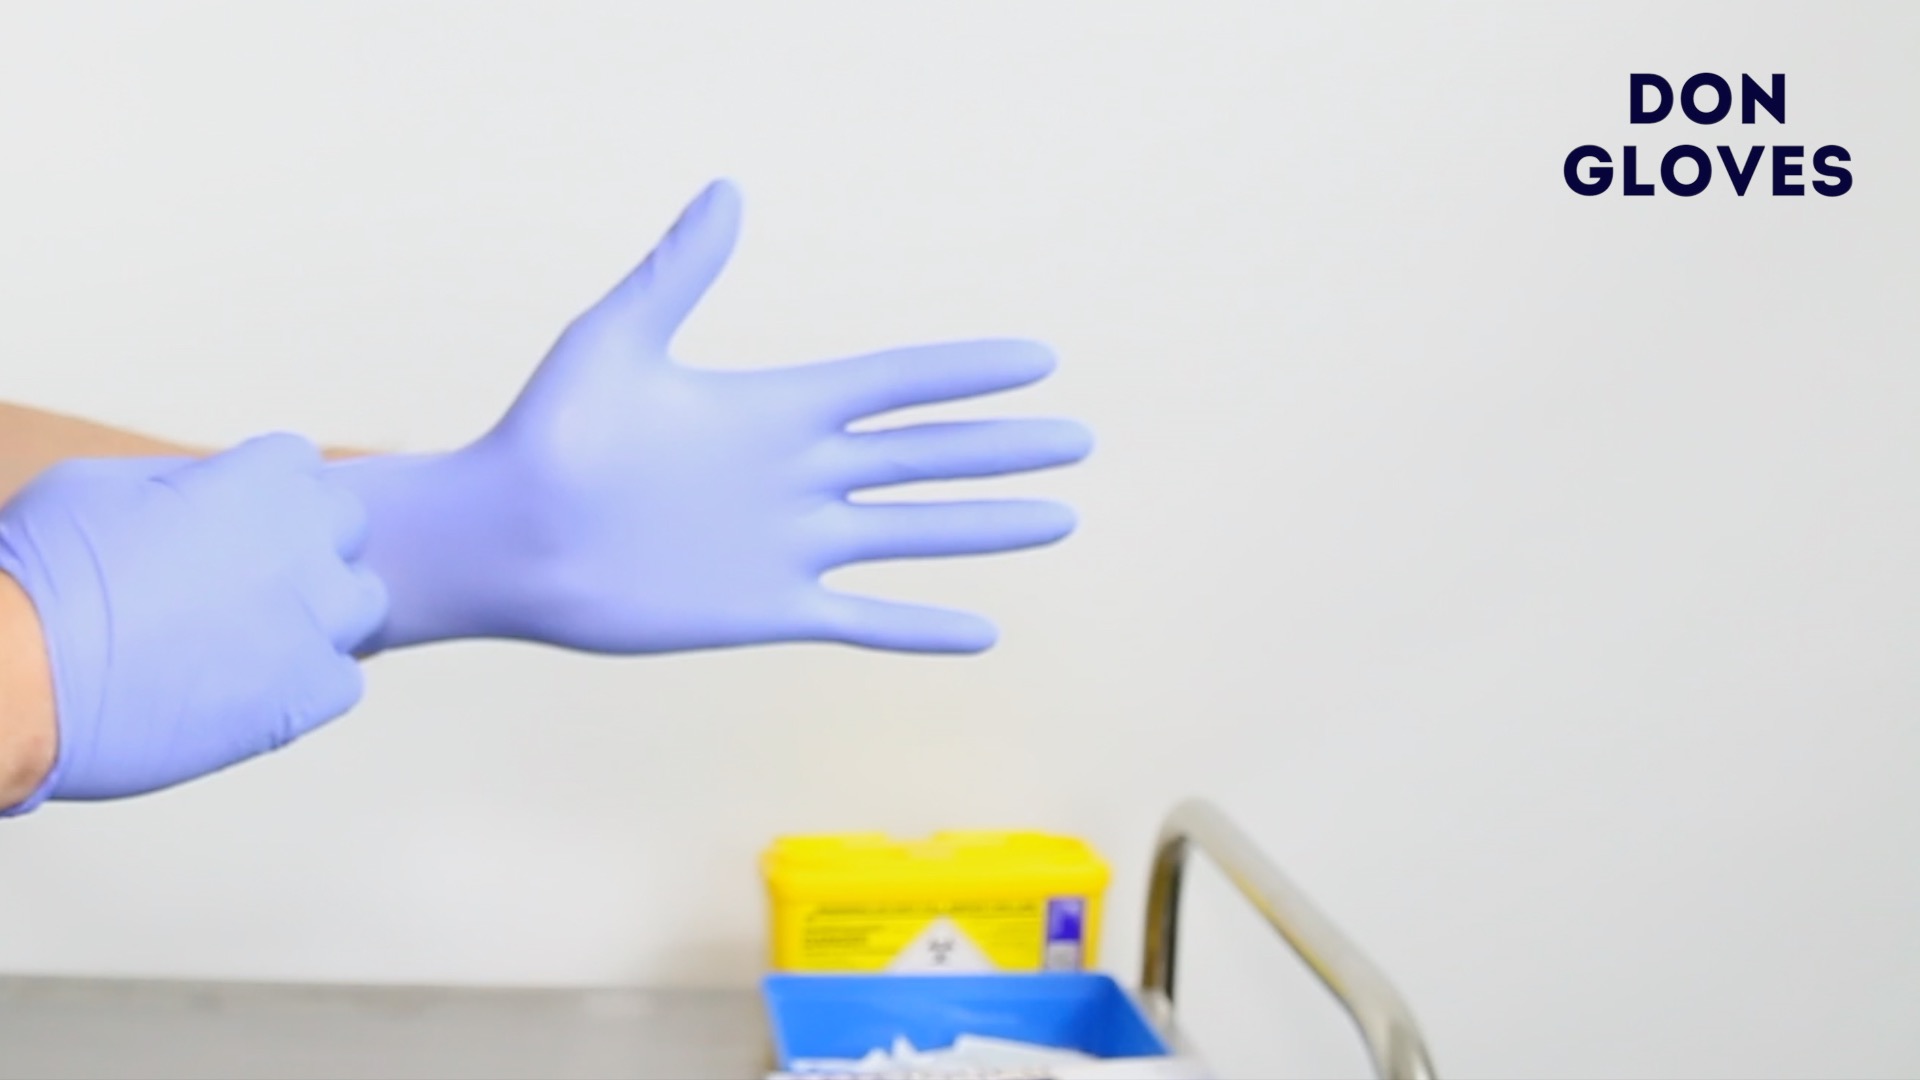
Wash your hands and don PPE if appropriate.
Introduce yourself to the patient including your name and role.
Confirm the patient’s name and date of birth.
Briefly explain what the procedure will involve using patient-friendly language: “Today I need to administer some medication, this will involve an injection into your muscle. You may briefly experience a sharp scratch as the needle is inserted. The procedure does involve some risks which include bleeding, bruising, a persistent lump at the injection site and a small chance of infection or serious allergic reaction.”
Check the patient’s understanding of the medication being administered and explain the indication for the treatment.
Gain consent to proceed with the intramuscular injection.
Check for any contraindications to performing an intramuscular injection:
- Bleeding disorders (e.g. haemophilia)
- Anticoagulant use (e.g. warfarin, apixaban)
Check if the patient has any allergies.
Ask if the patient has a preferred injection site. If the patient is receiving regular intramuscular injections, ensure that the injection sites are rotated.
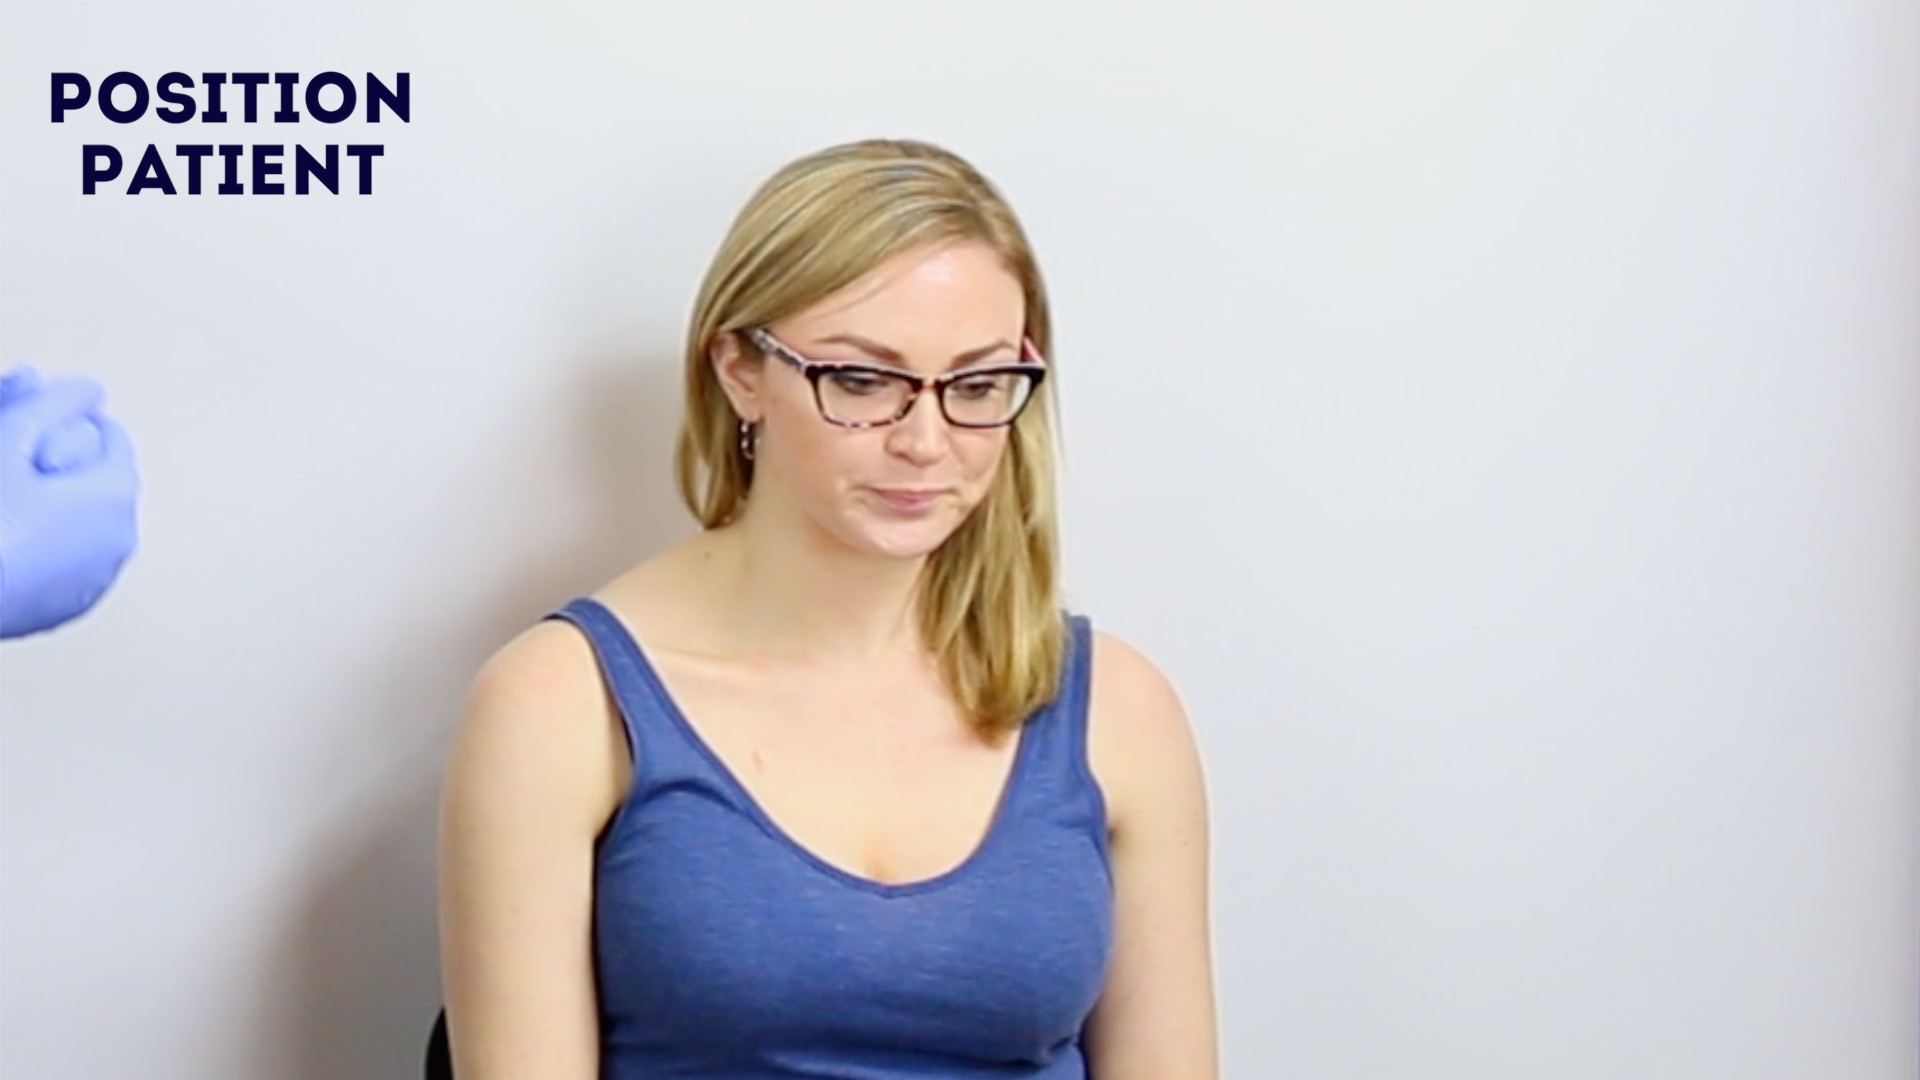
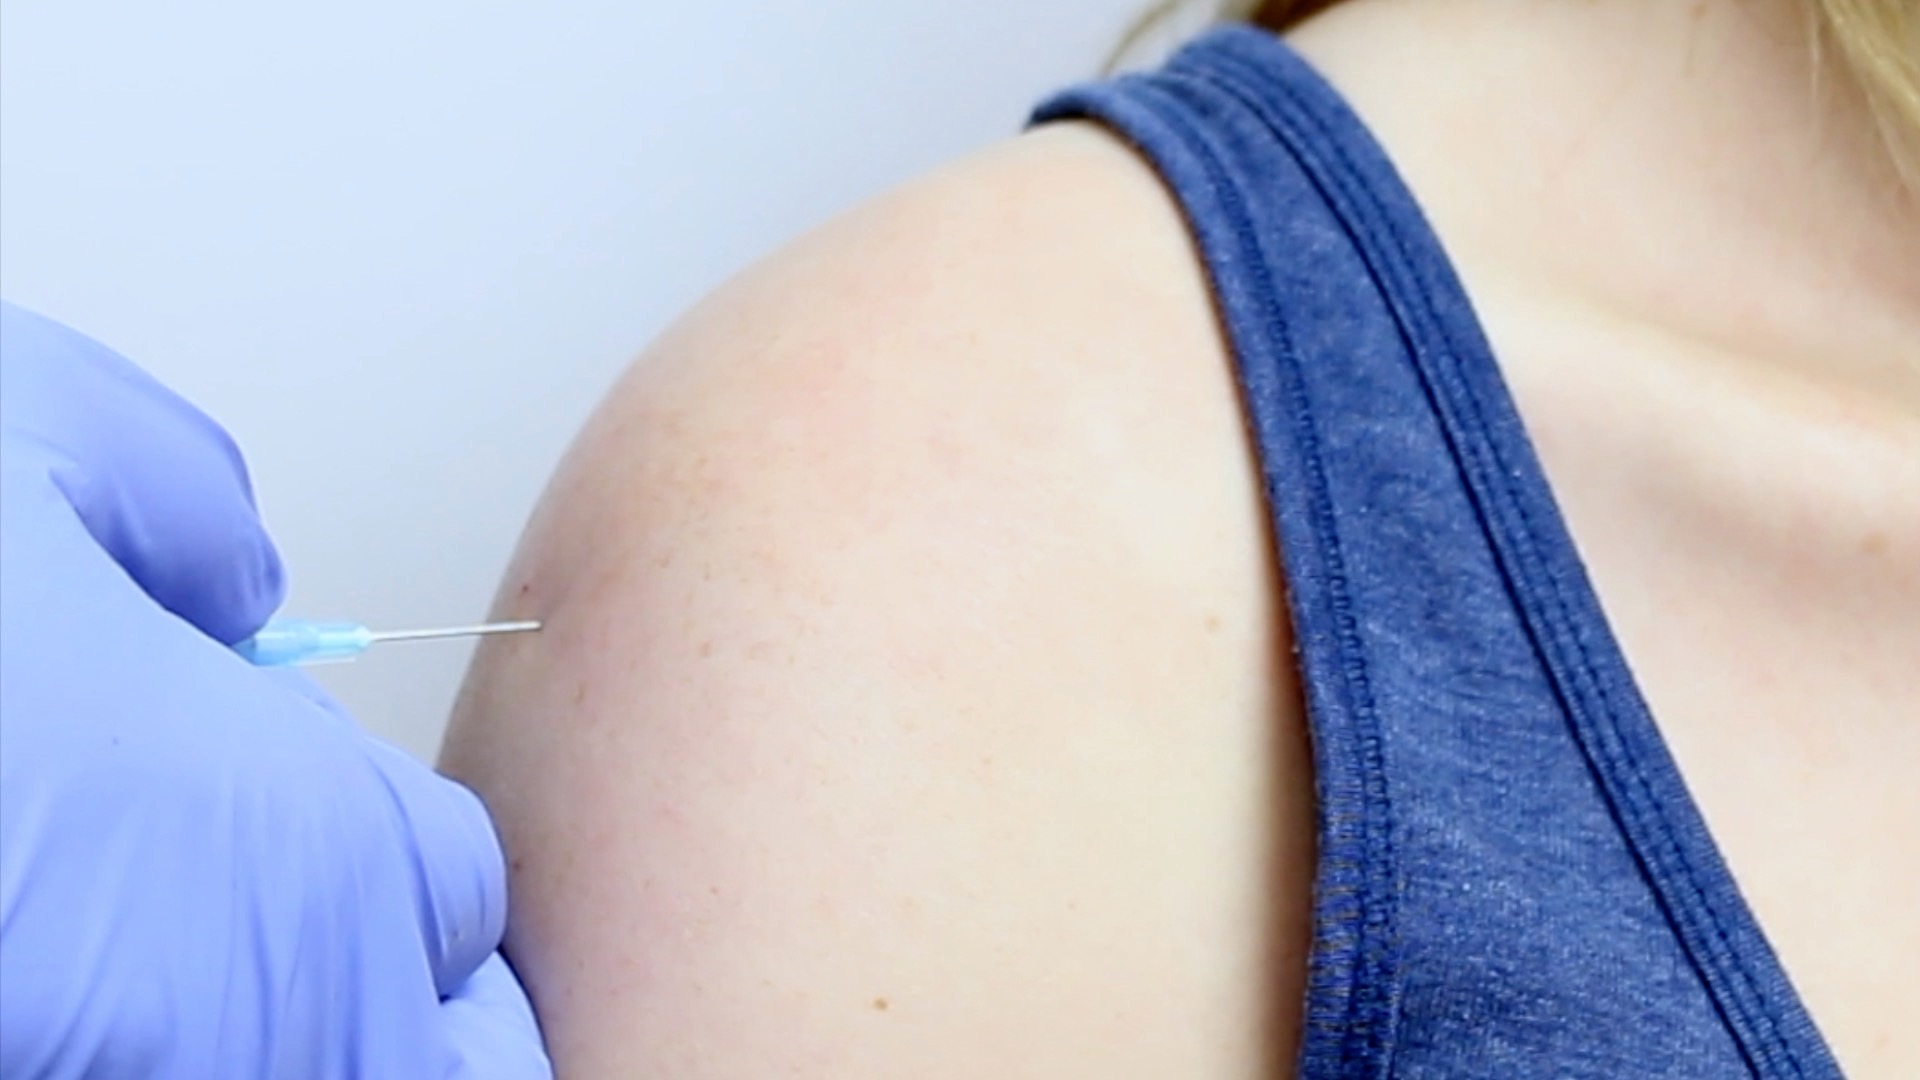
Adequately expose the planned injection site for the procedure (e.g. deltoid).
Position the patient so that they are sitting comfortably.
Ask the patient if they have any pain before continuing with the clinical procedure.
Final checks
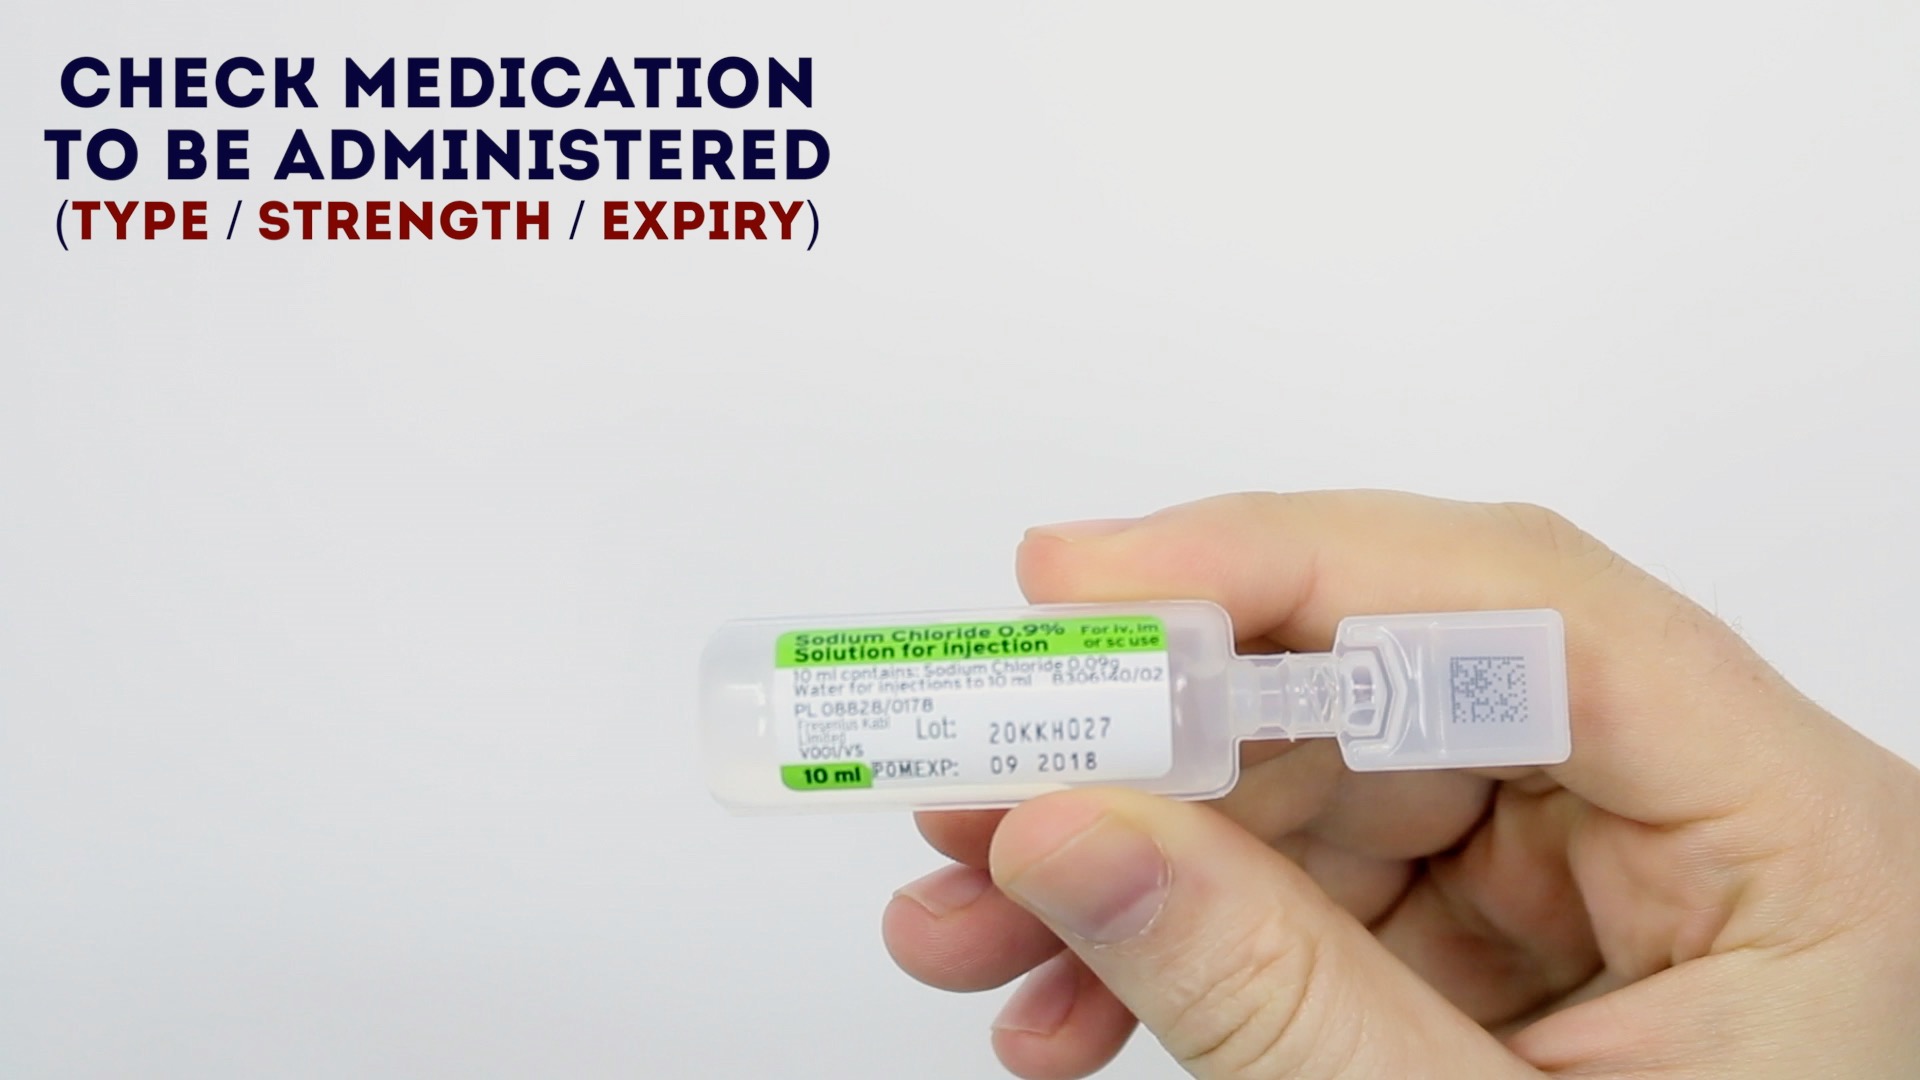
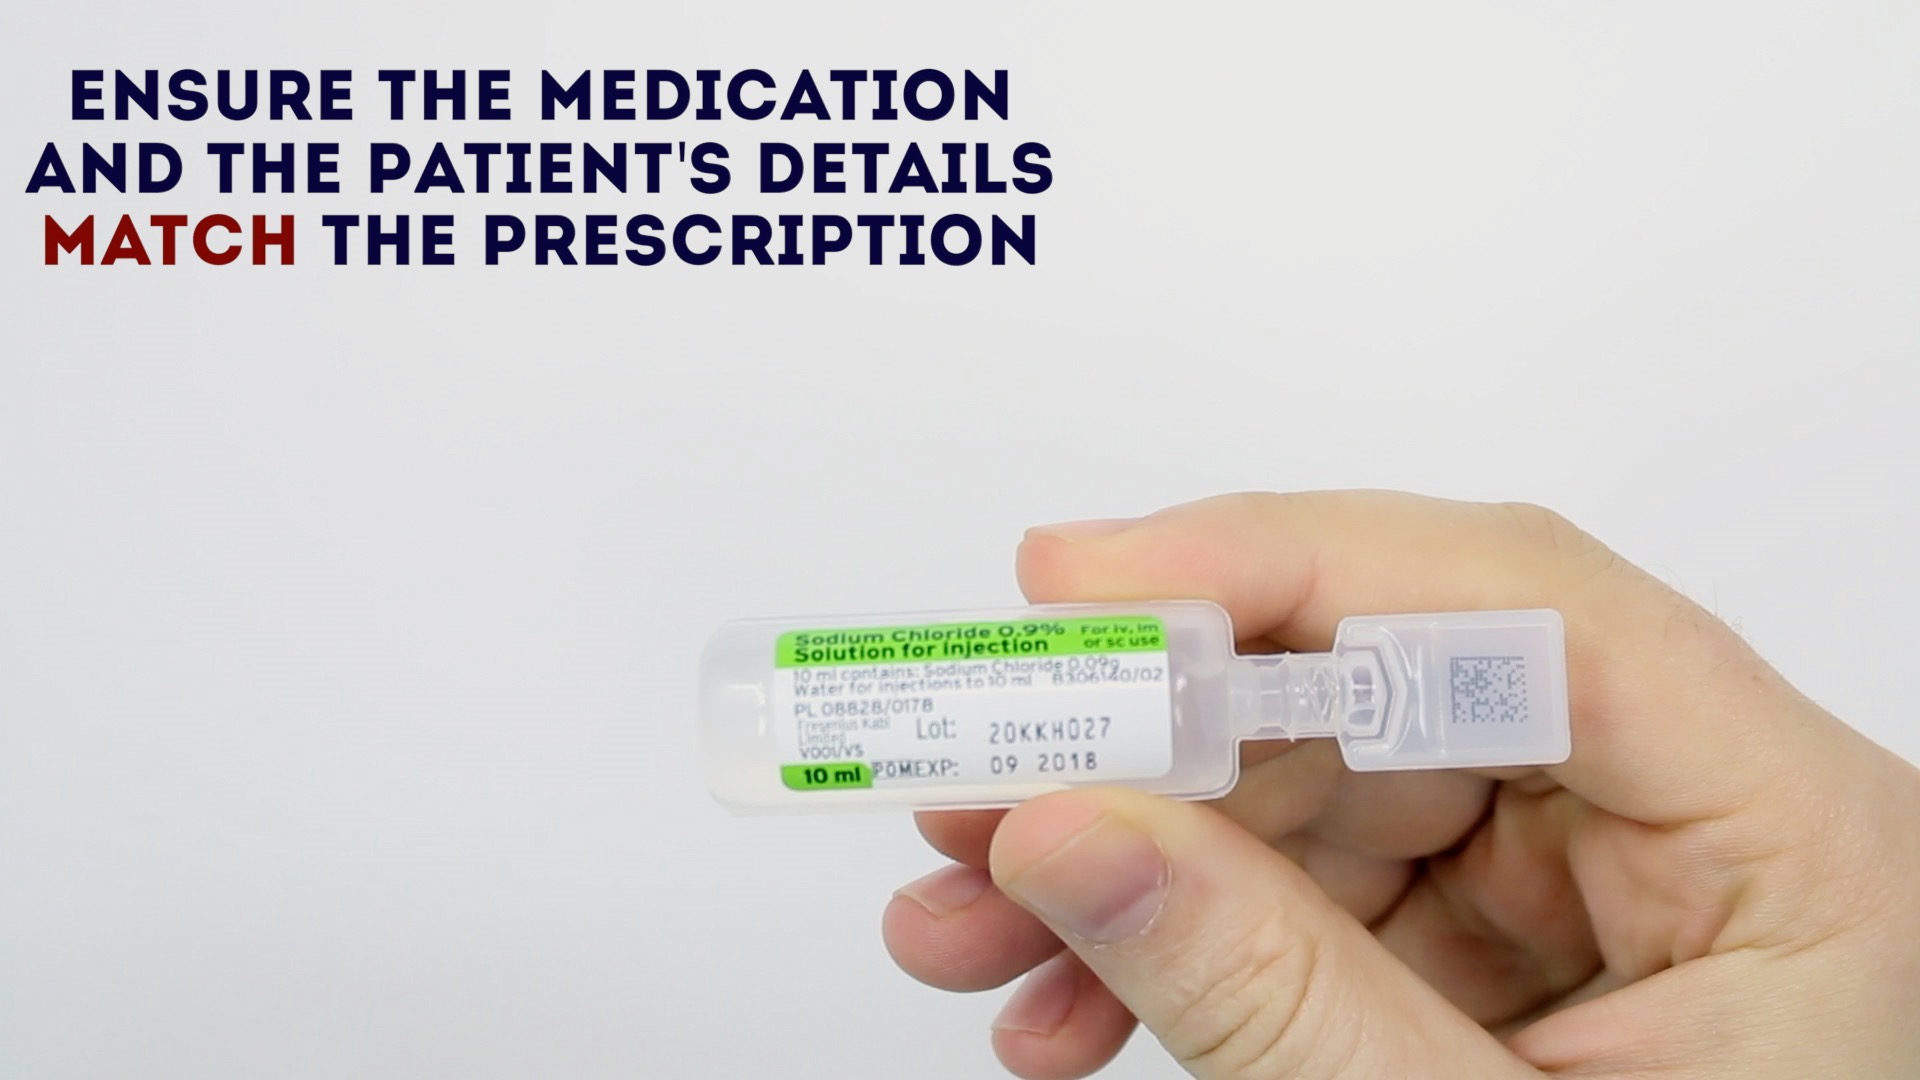
Before proceeding, check the seven rights of medication administration.
1. Right person: ask the patient to confirm their details and then compare this to the patient’s wrist band (if present) and the prescription. You should use at least two identifiers.
2. Right drug: check the labelled drug against the prescription and ensure the medication hasn’t expired.
3. Right dose: check the drug dose against the prescription to ensure it is correct.
4. Right time: confirm the appropriate time to be administering the medication and check when the patient received a previous dose if relevant.
5. Right route: check that the planned route is appropriate for the medication you are administering.
6. Right to refuse: ensure that valid consent has been gained prior to medication administration.
7. Right documentation of the prescription and allergies: ensure that the prescription is valid and check the patient isn’t allergic to the medication you are going to administer.
Once all of the above have been confirmed prepare the medication.
Performing the intramuscular injection
1. Wash your hands and don some gloves and an apron (if not already done).
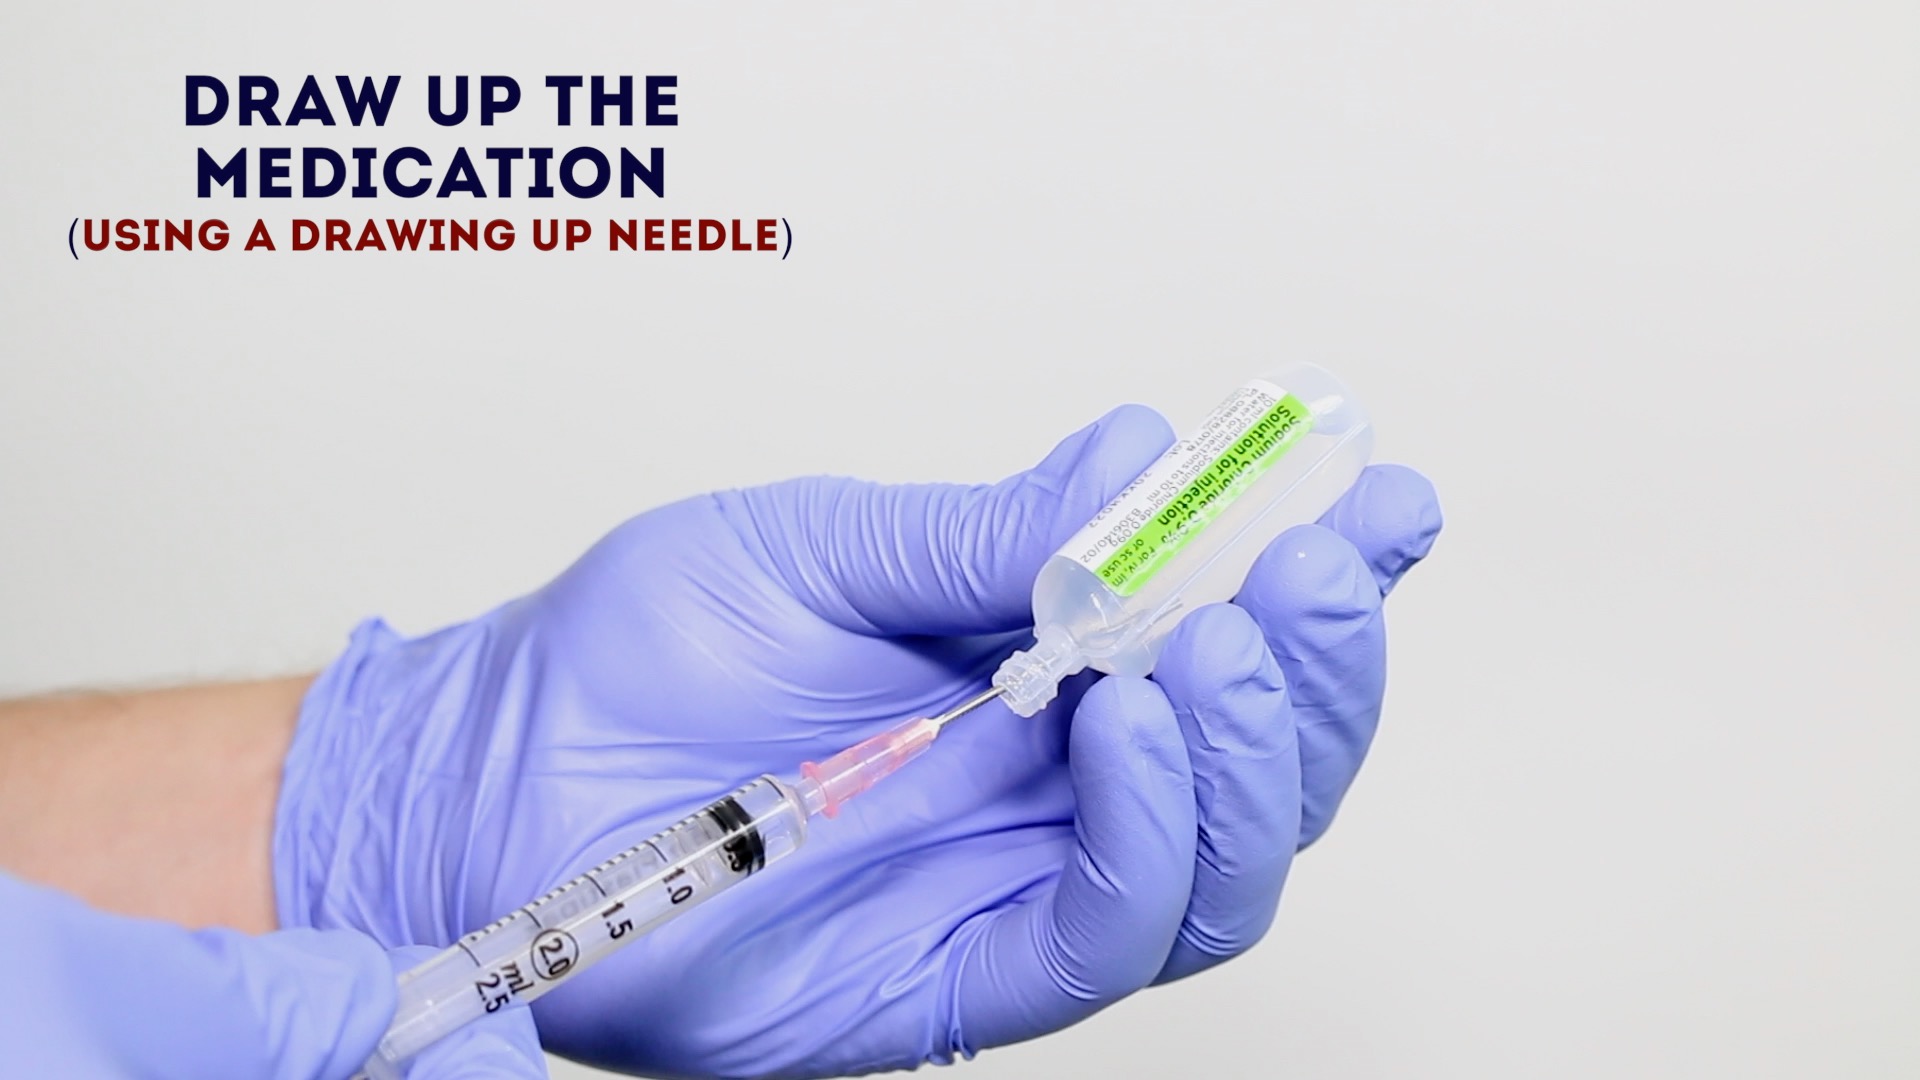
2. Draw-up the appropriate medication into the syringe using a drawing-up needle.
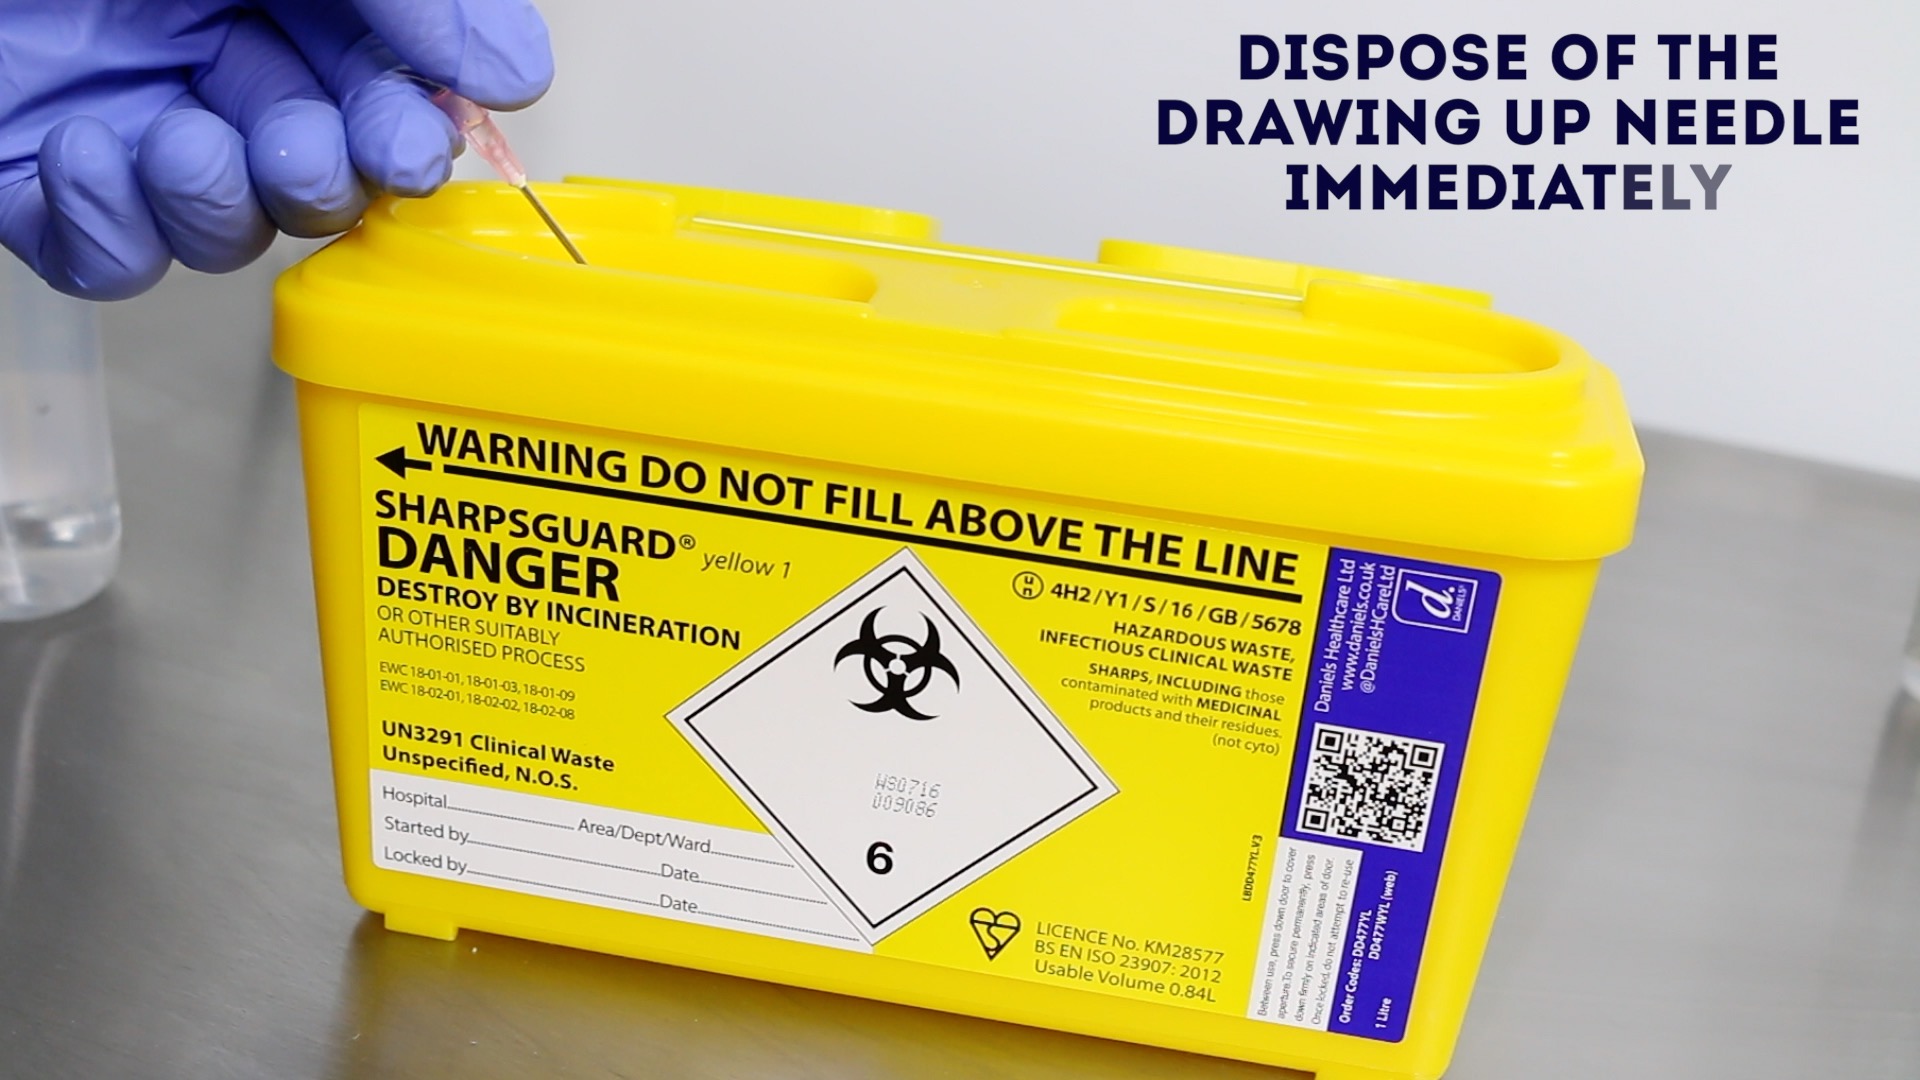
3. Remove the drawing-up needle and immediately dispose of it into a sharps bin, then attach the needle to be used for performing the injection.
4. Choose an appropriate site for the injection such as:
- Deltoid
- Ventrogluteal
- Vastus lateralis
- Do NOT use a site that is scarred, inflamed, irritated or bruised.
See the end of the guide for further information regarding the most commonly used injection sites.
If multiple injections need to be administered, use different sites for each subsequent injection. If frequent injections are administered, rotate injection sites.
5. Position the patient to provide optimal access to your chosen site.
6. Cleaning the site:
- When administering a vaccination, the site does not need to be routinely cleaned prior to injection unless the skin is visibly soiled (in which case you would need to clean the site with soap and water). 1
- There is some debate as to whether the skin should be cleaned with an alcohol wipe prior to administration of intramuscular medication, with WHO stating that cleaning is likely unnecessary. Many hospitals, however, still recommend routinely cleaning with an alcohol wipe to reduce the risk of hospital-acquired infections, so you should adhere to your local medical school and hospital guidelines.
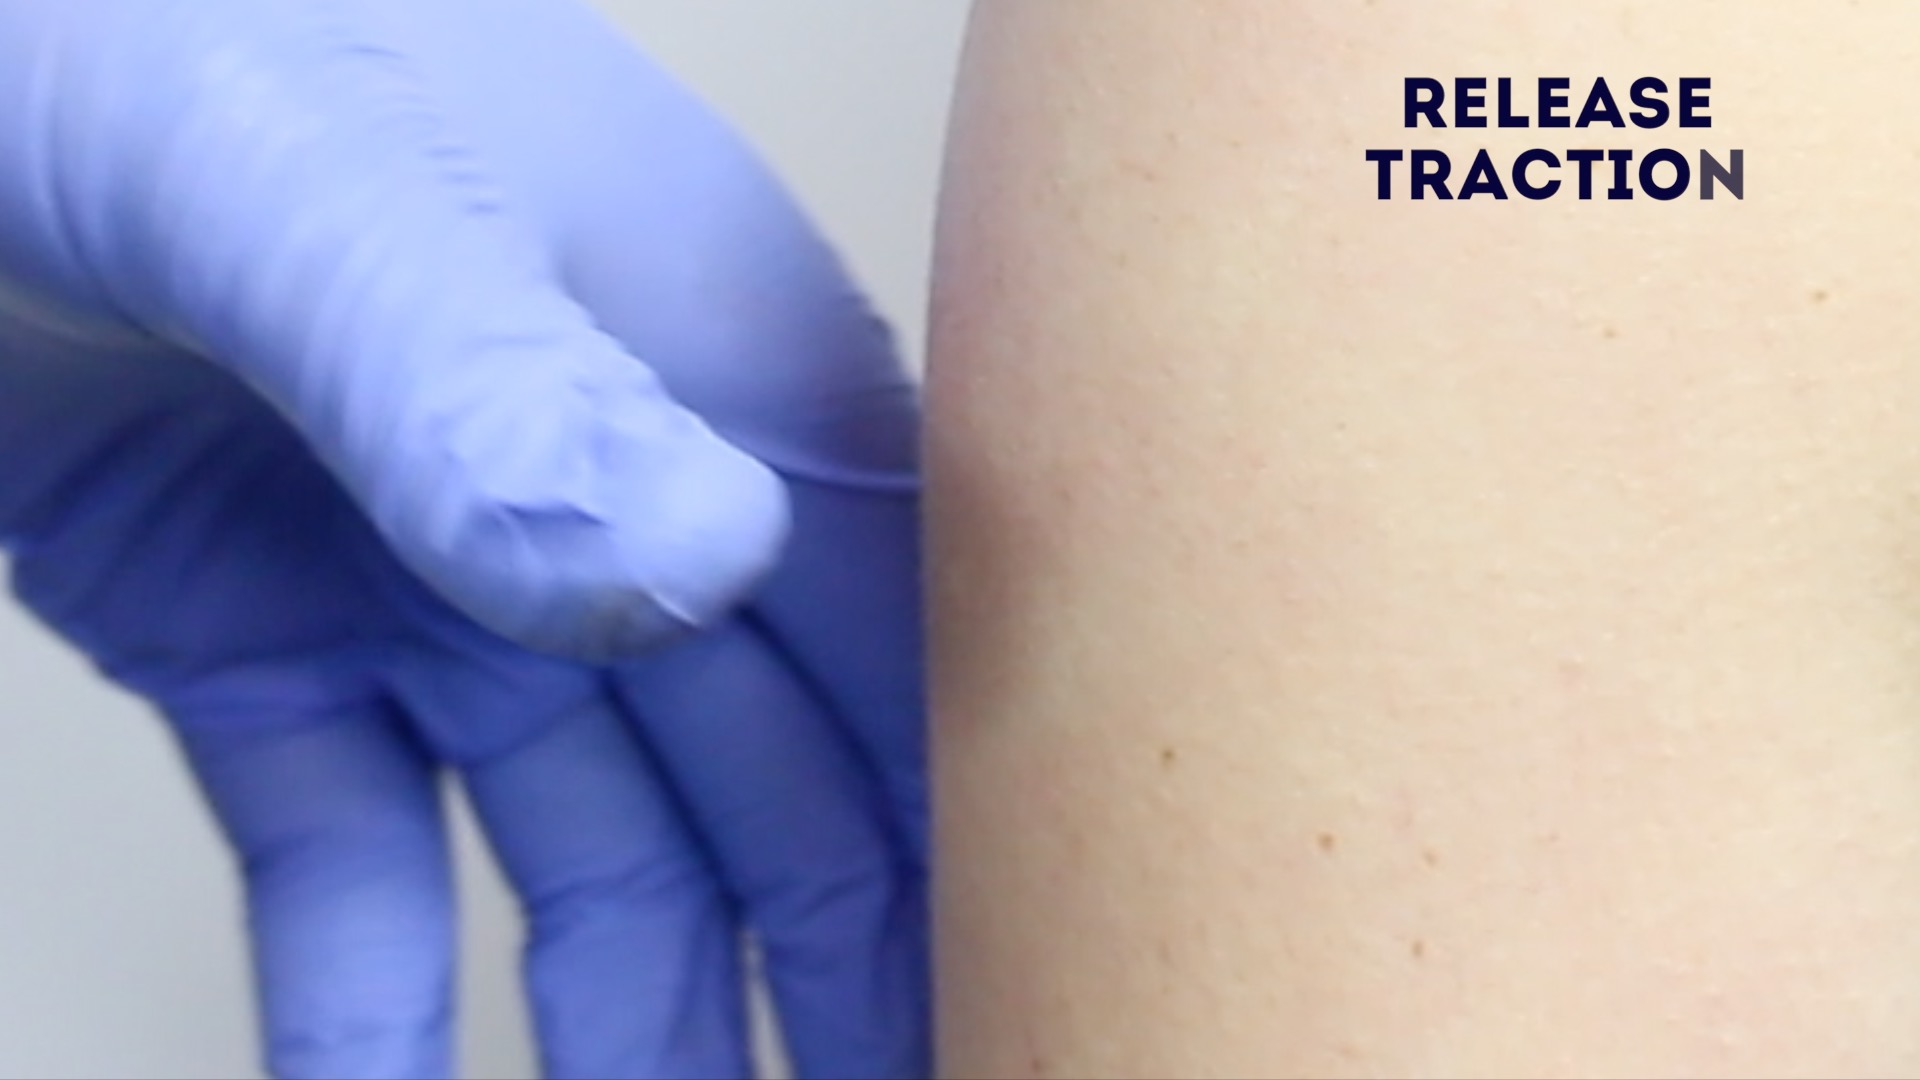
7. Gently place traction on the skin with your non-dominant hand away from the injection site, continuing the traction until the needle has been removed from the skin. This application and subsequent removal of traction is known as the ‘Z-track technique’ and helps to keep the administered medication within the muscle. When the traction applied to the skin is released, the alignment of the subcutaneous and muscle layers shifts, locking the medication into the muscle layer.
If the patient is elderly with reduced muscle mass or the patient is emaciated, do not apply traction, instead, bunch the muscle up to ensure adequate bulk before injecting.
8. Warn the patient of a sharp scratch.
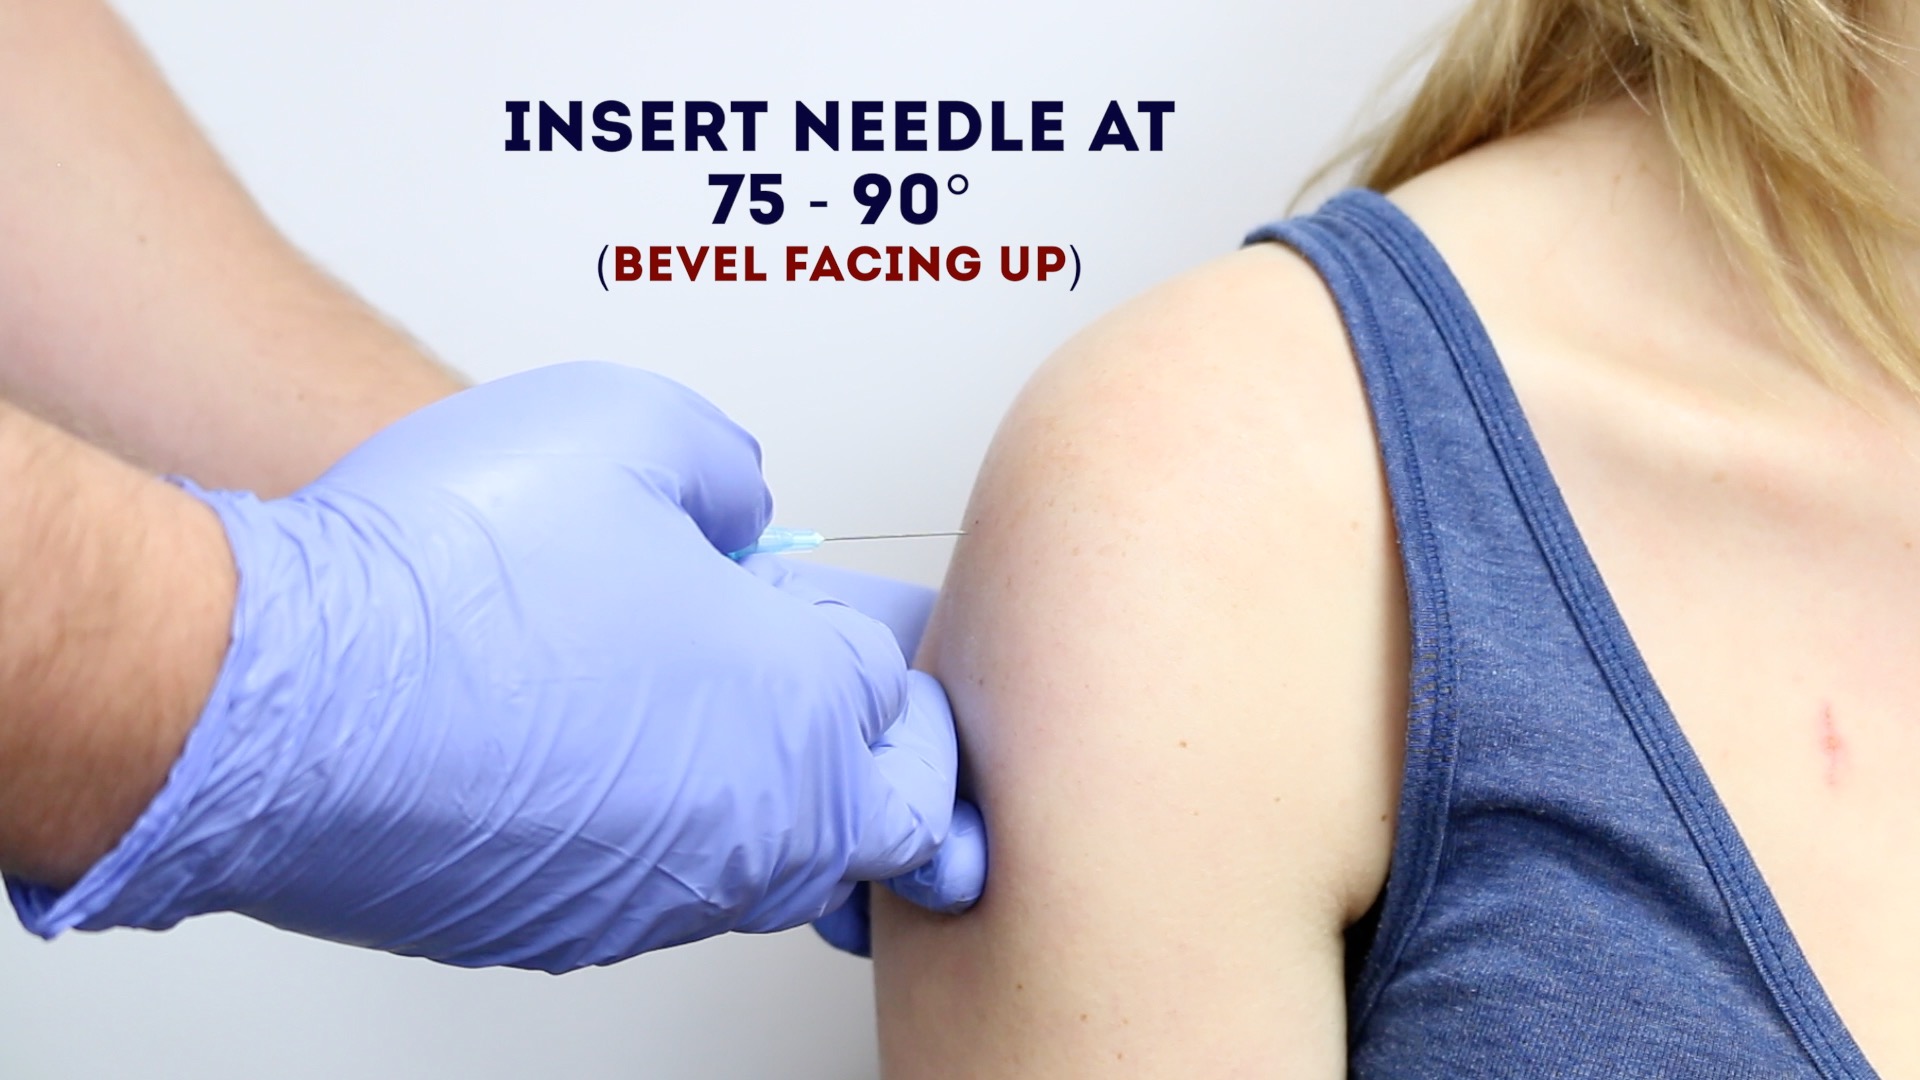
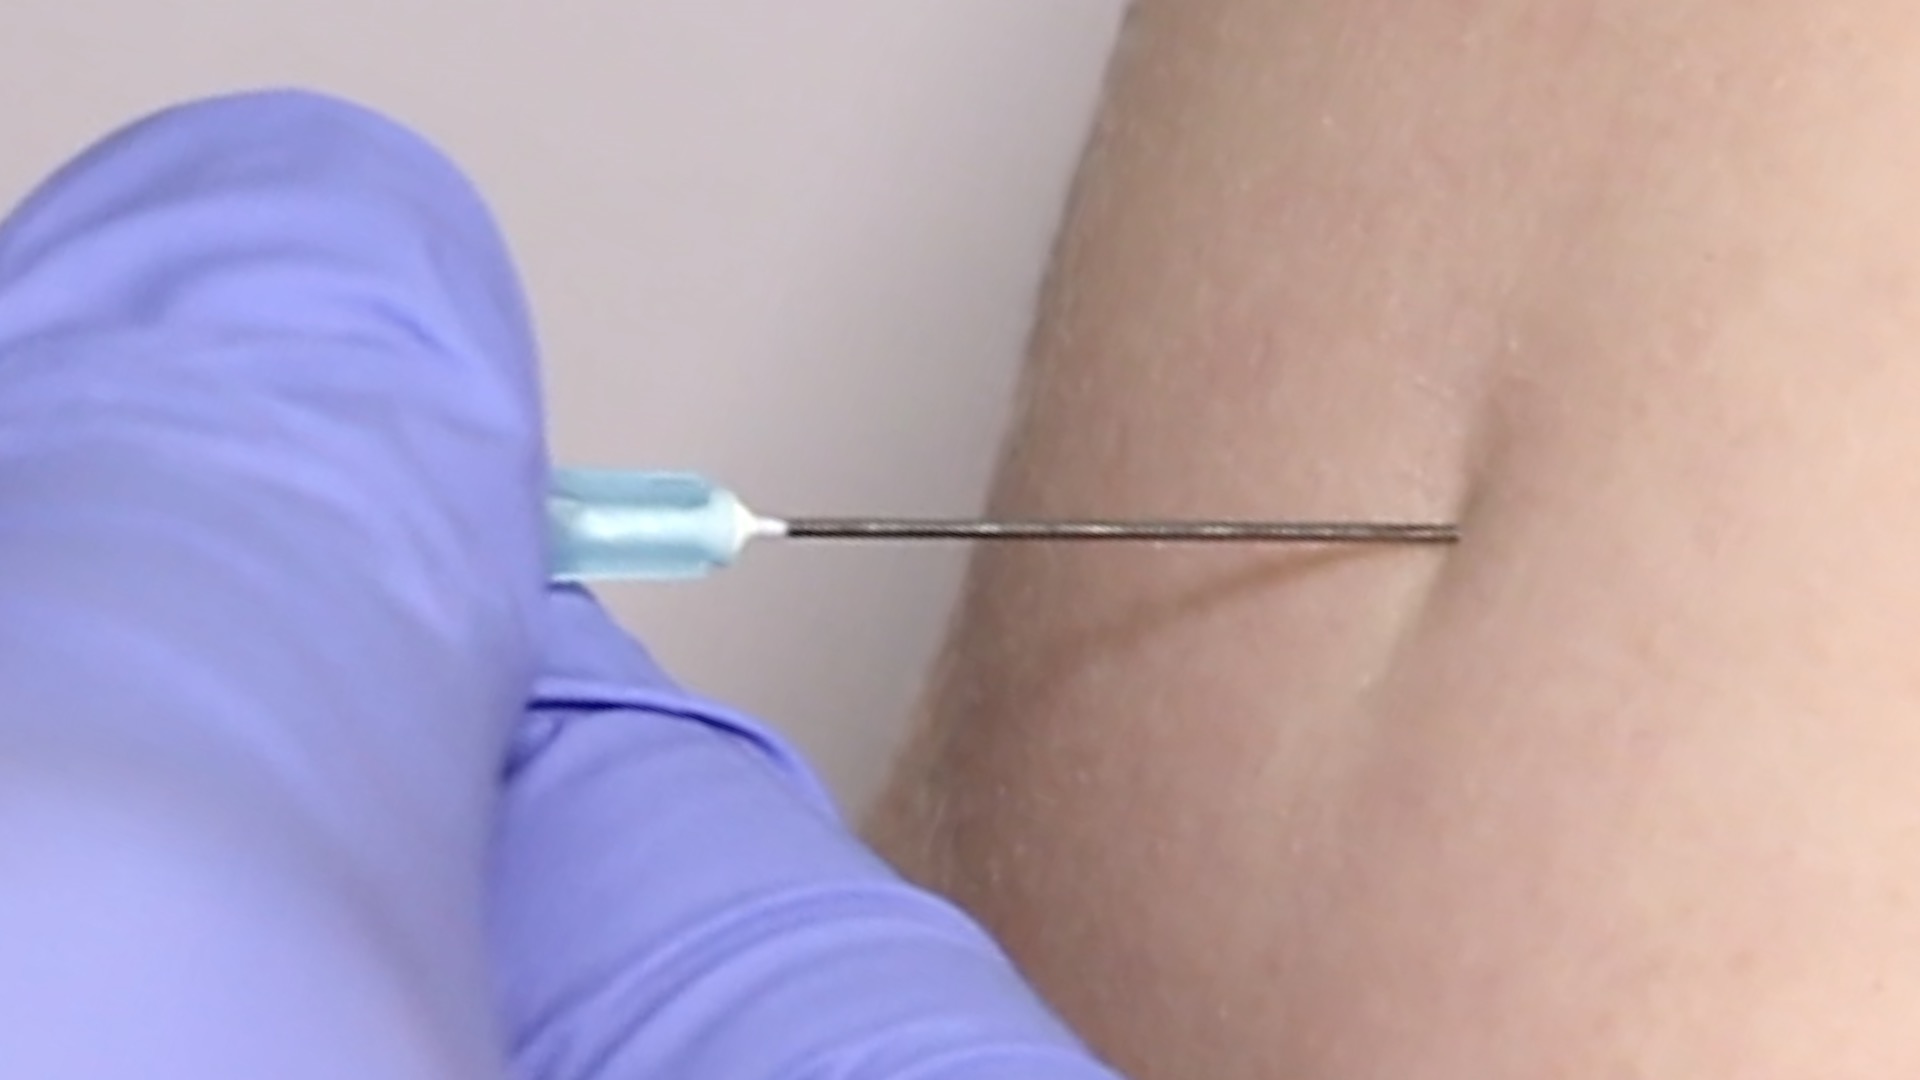
9. Holding the syringe like a dart in your dominant hand, pierce the skin at a 75-90° angle. Insert the needle quickly and firmly, with the bevel facing upwards, leaving approximately one-third of the shaft exposed (however this varies between sites and patients).
10. Aspirate to ensure the needle is not placed within a blood vessel:
- If blood appears, remove the syringe and prepare a new injection (explaining the reason for this to the patient).
- It is recommended that you aspirate before performing deep intramuscular injections, such as those involving medications, as they are associated with a higher risk intravascular administration.
- If administering a vaccination via a shallow intramuscular injection, UK guidance suggests there is no need to aspirate prior to injection of the vaccine. 3
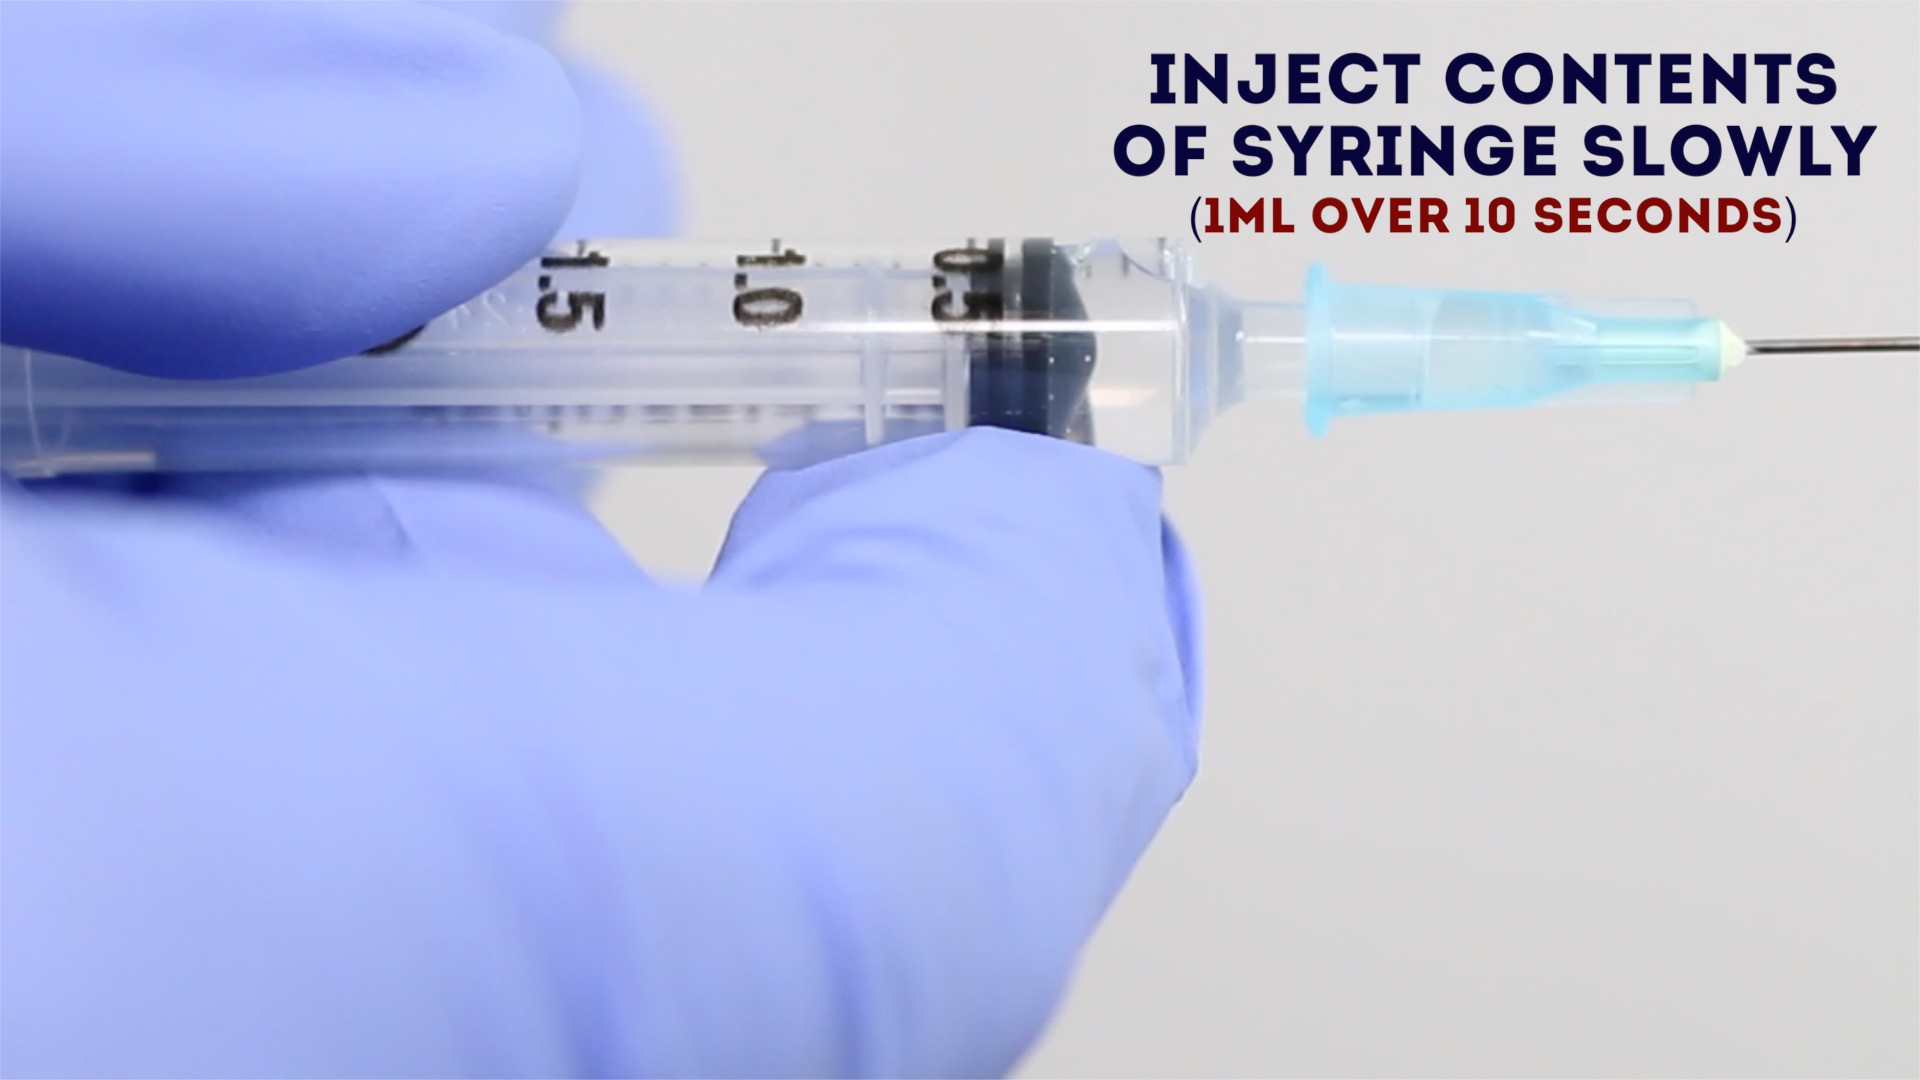
11. If aspiration does not reveal evidence of intravascular needle placement, inject the contents of the syringe whilst holding the barrel firmly. Inject the medication slowly at a rate of approximately 1ml every 10 seconds.
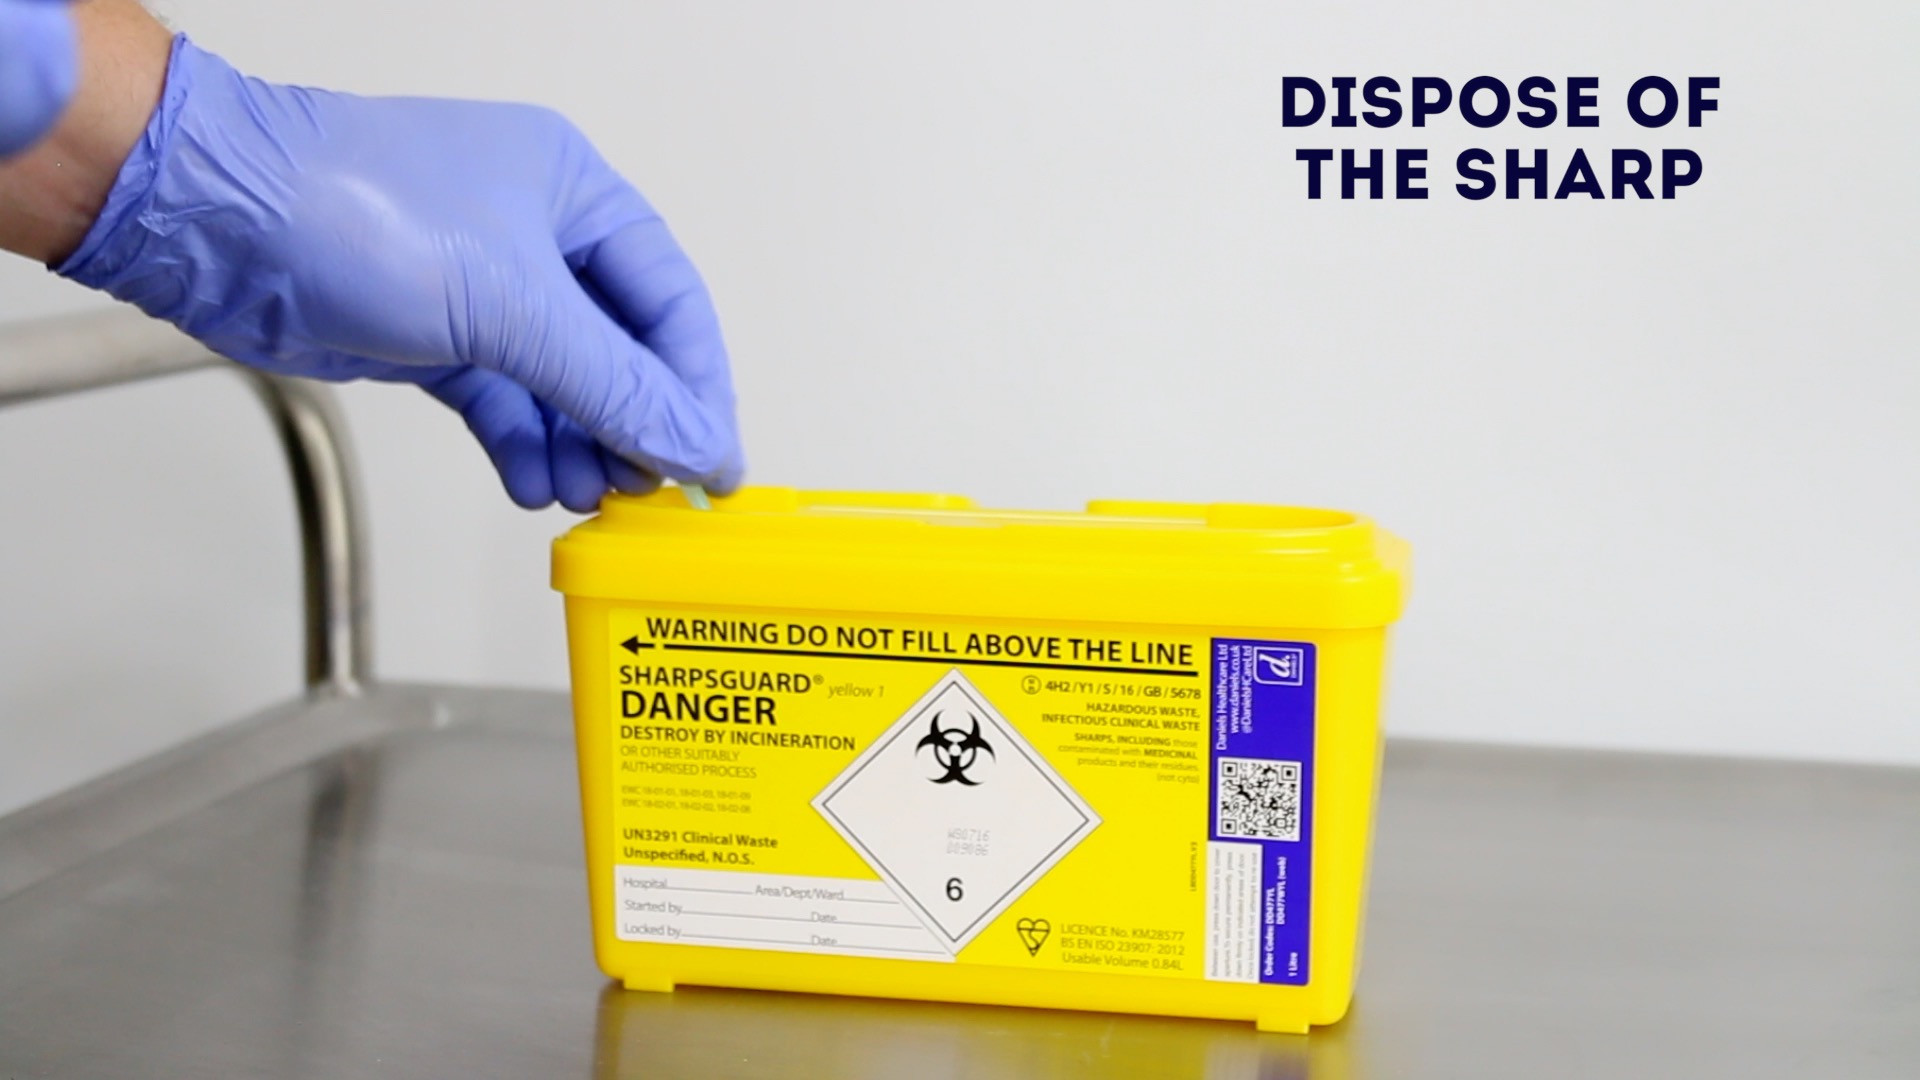
12. Remove the needle and immediately dispose of it into a sharps container.
13. Release the traction you were applying to the skin, locking the medication into the muscle layer (Z-track technique).
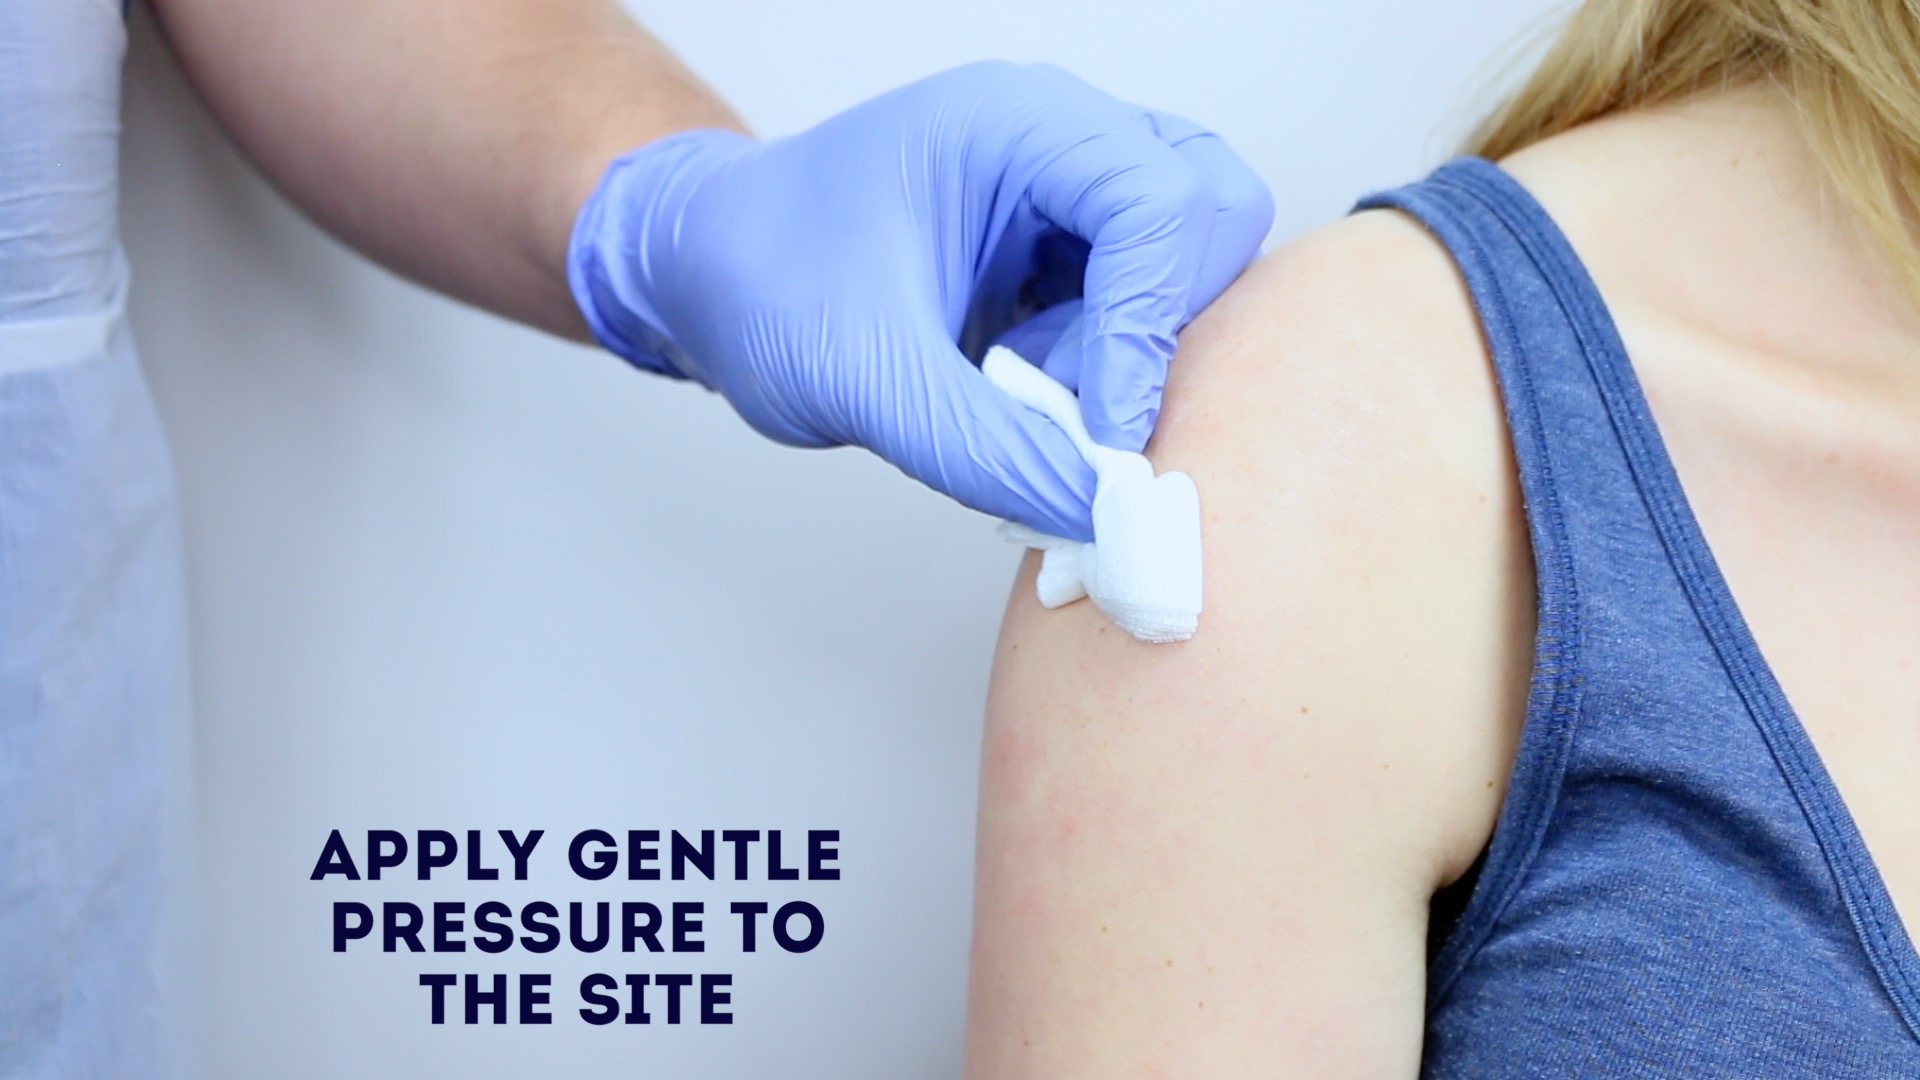
14. Apply gentle pressure over the injection site with a cotton swab or gauze and avoid rubbing the site.
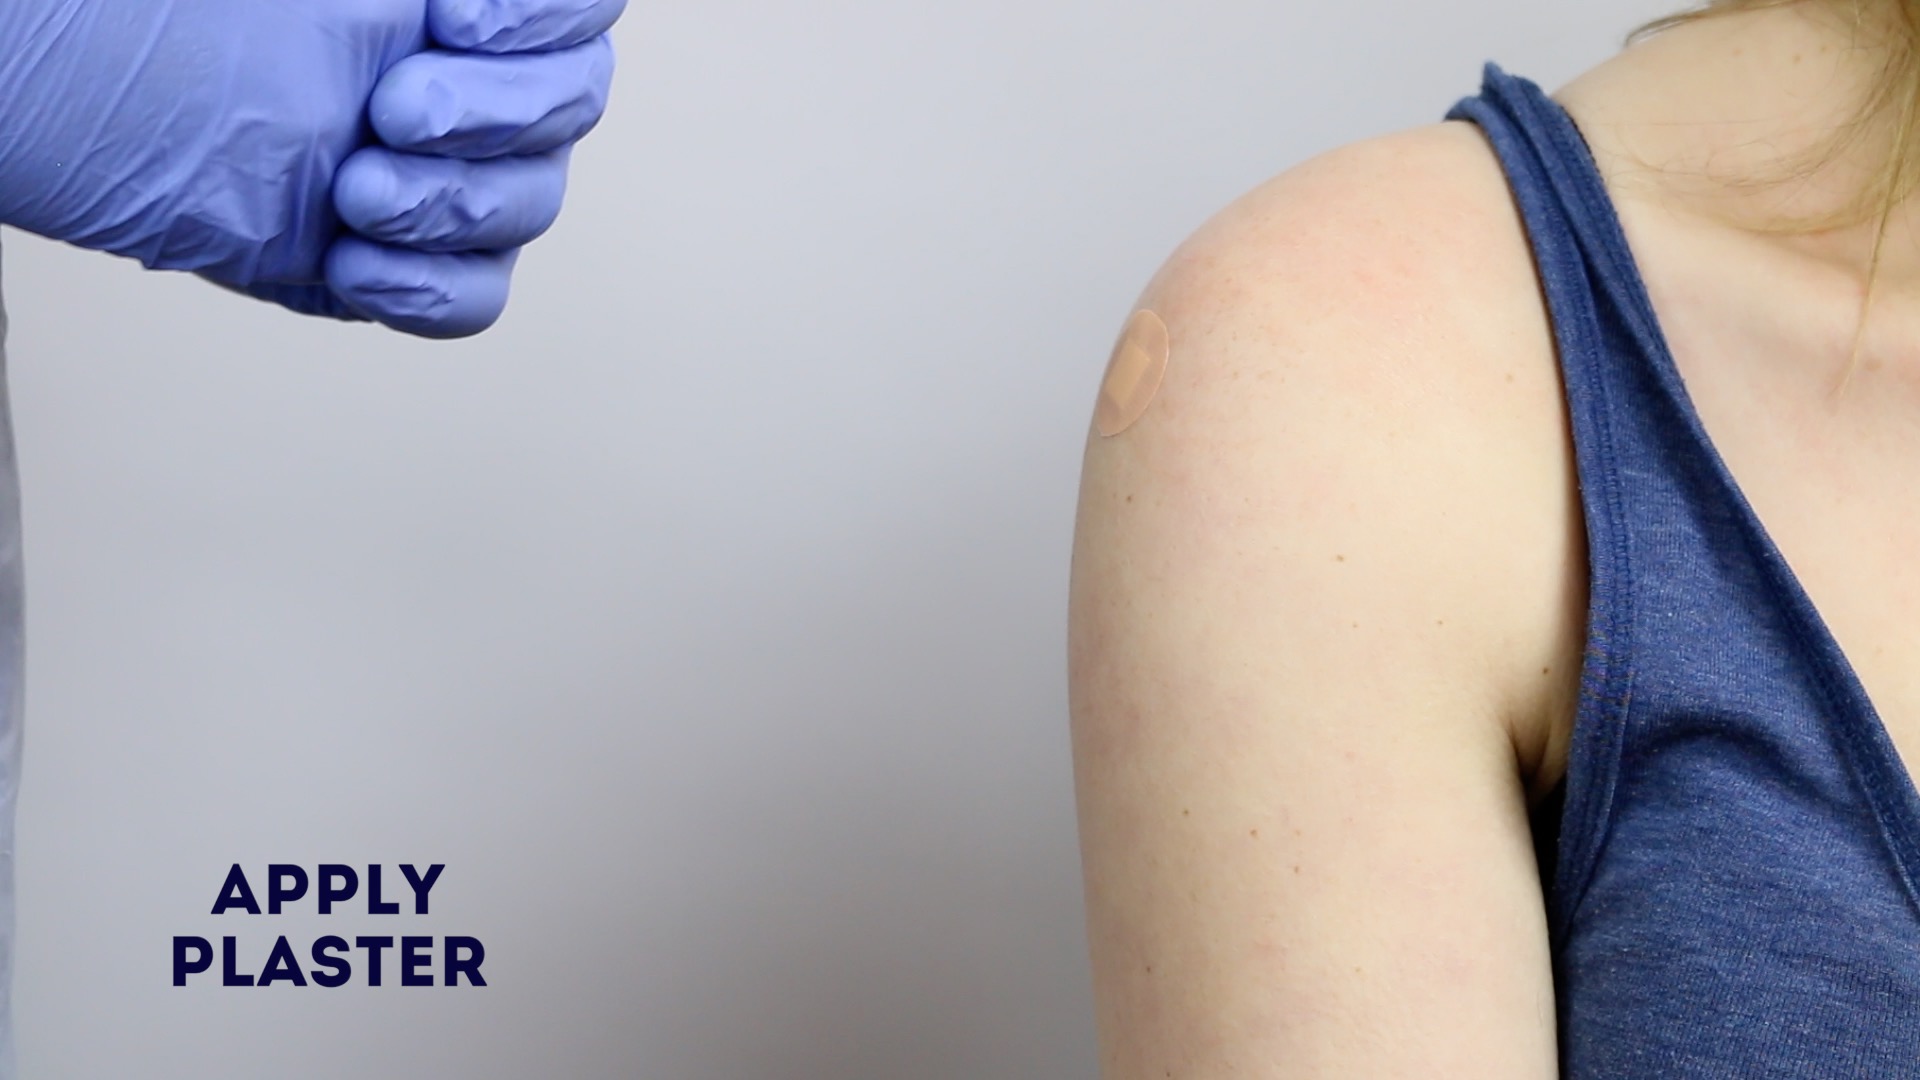
15. Replace the gauze with a plaster.
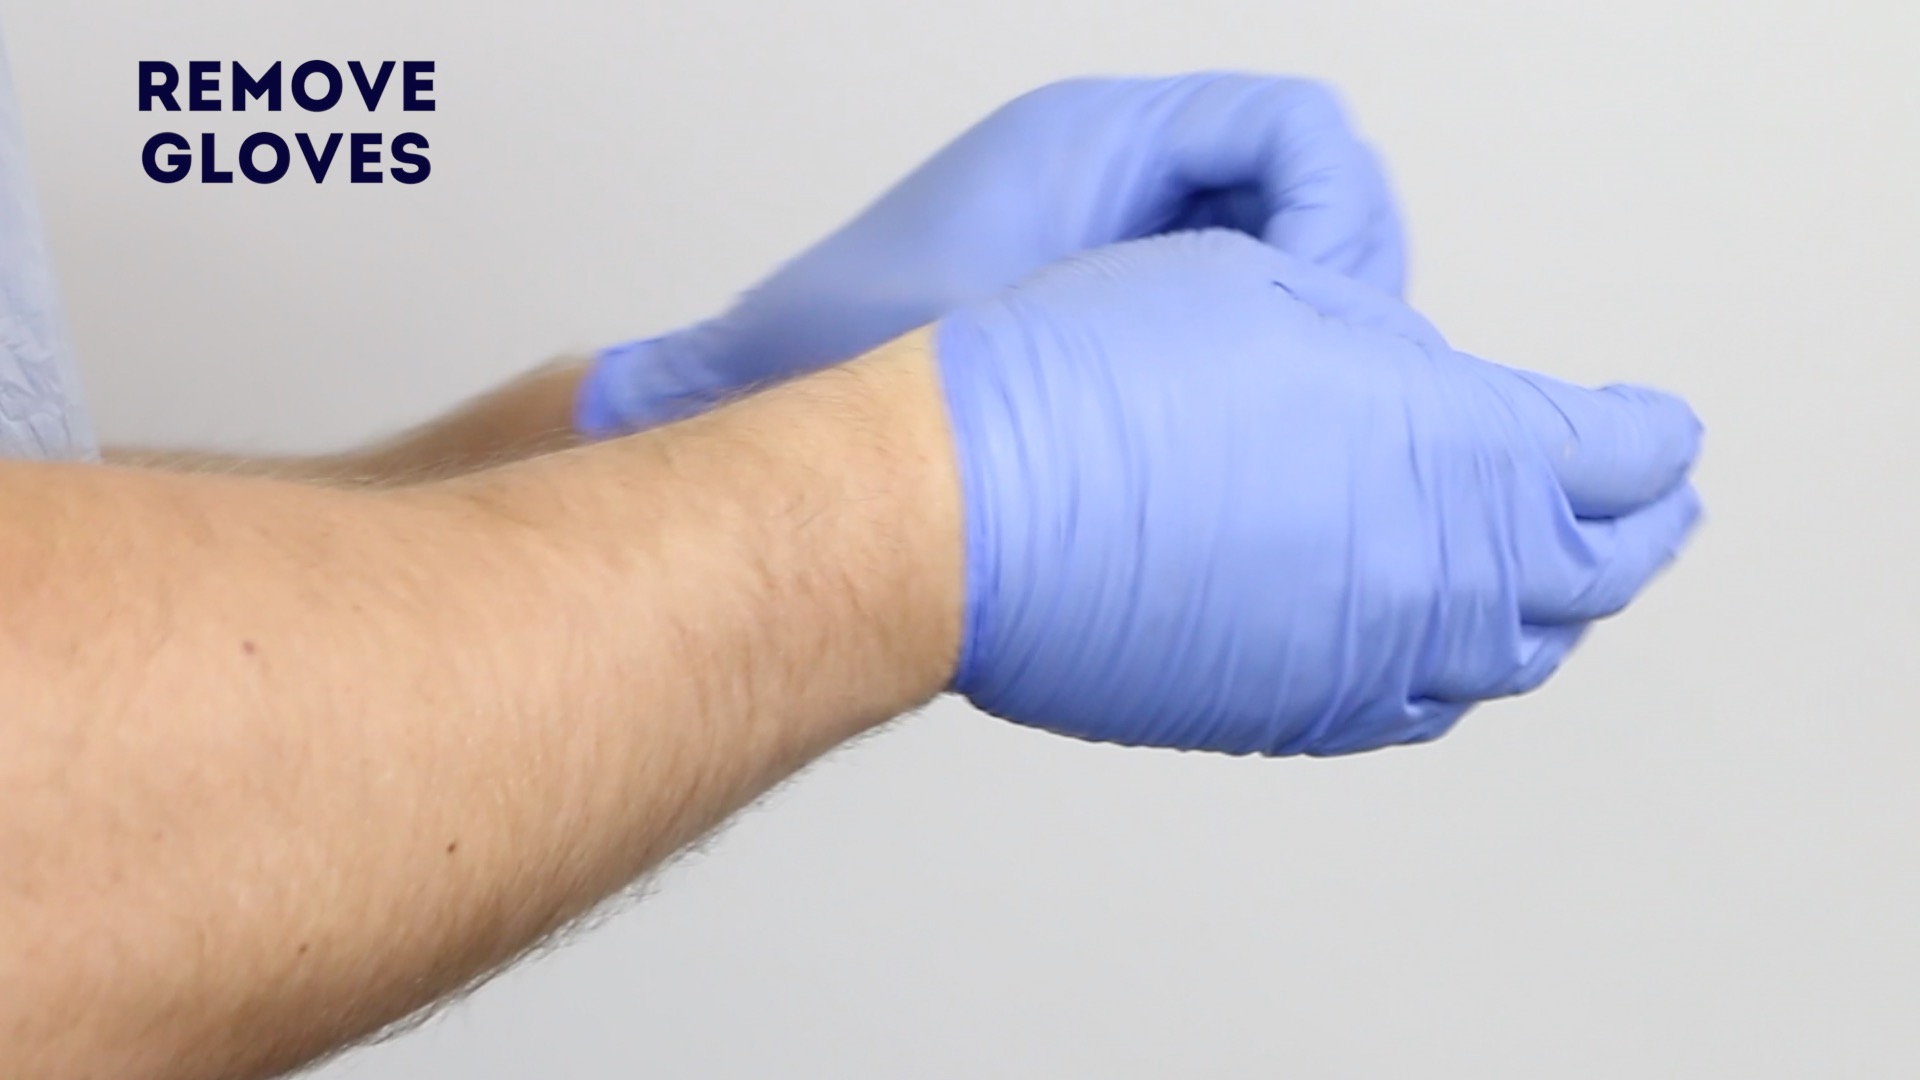
16. Dispose of your used clinical equipment into an appropriate clinical waste bin.
- Wash hands again


To complete the procedure…
Explain to the patient that the procedure is now complete.
Thank the patient for their time.
Discuss post-injection care:
- Warn the patient that it is normal for the injection site to be sore for one or two days. Advise that if they experience worsening pain after 48 hours they should seek medical review.
- Reiterate the potential complications of intramuscular injections including haematoma formation, persistent nodules, local irritation and rarely anaphylaxis.
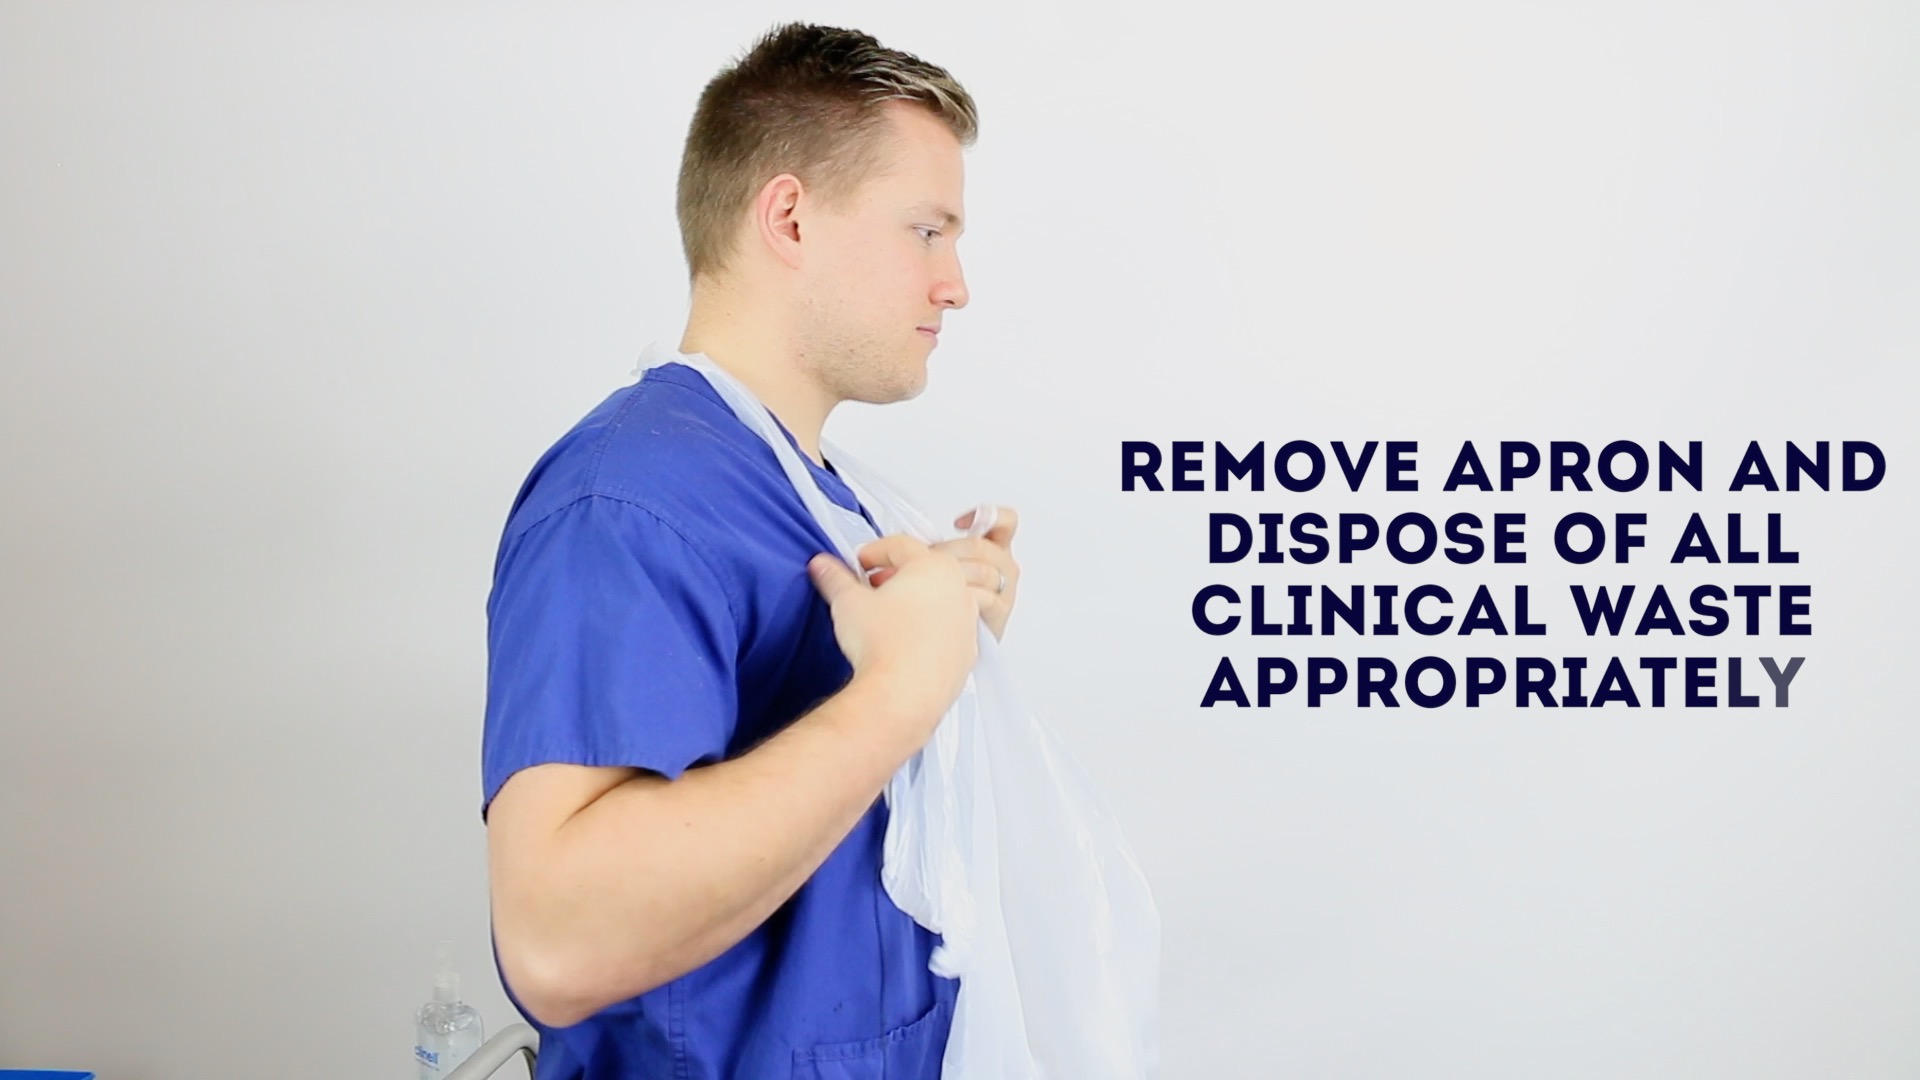
Dispose of PPE appropriately and wash your hands.
Document the details of the procedure and the medication administered.
Injection sites
Below is a brief overview of the common sites used for intramuscular injections.
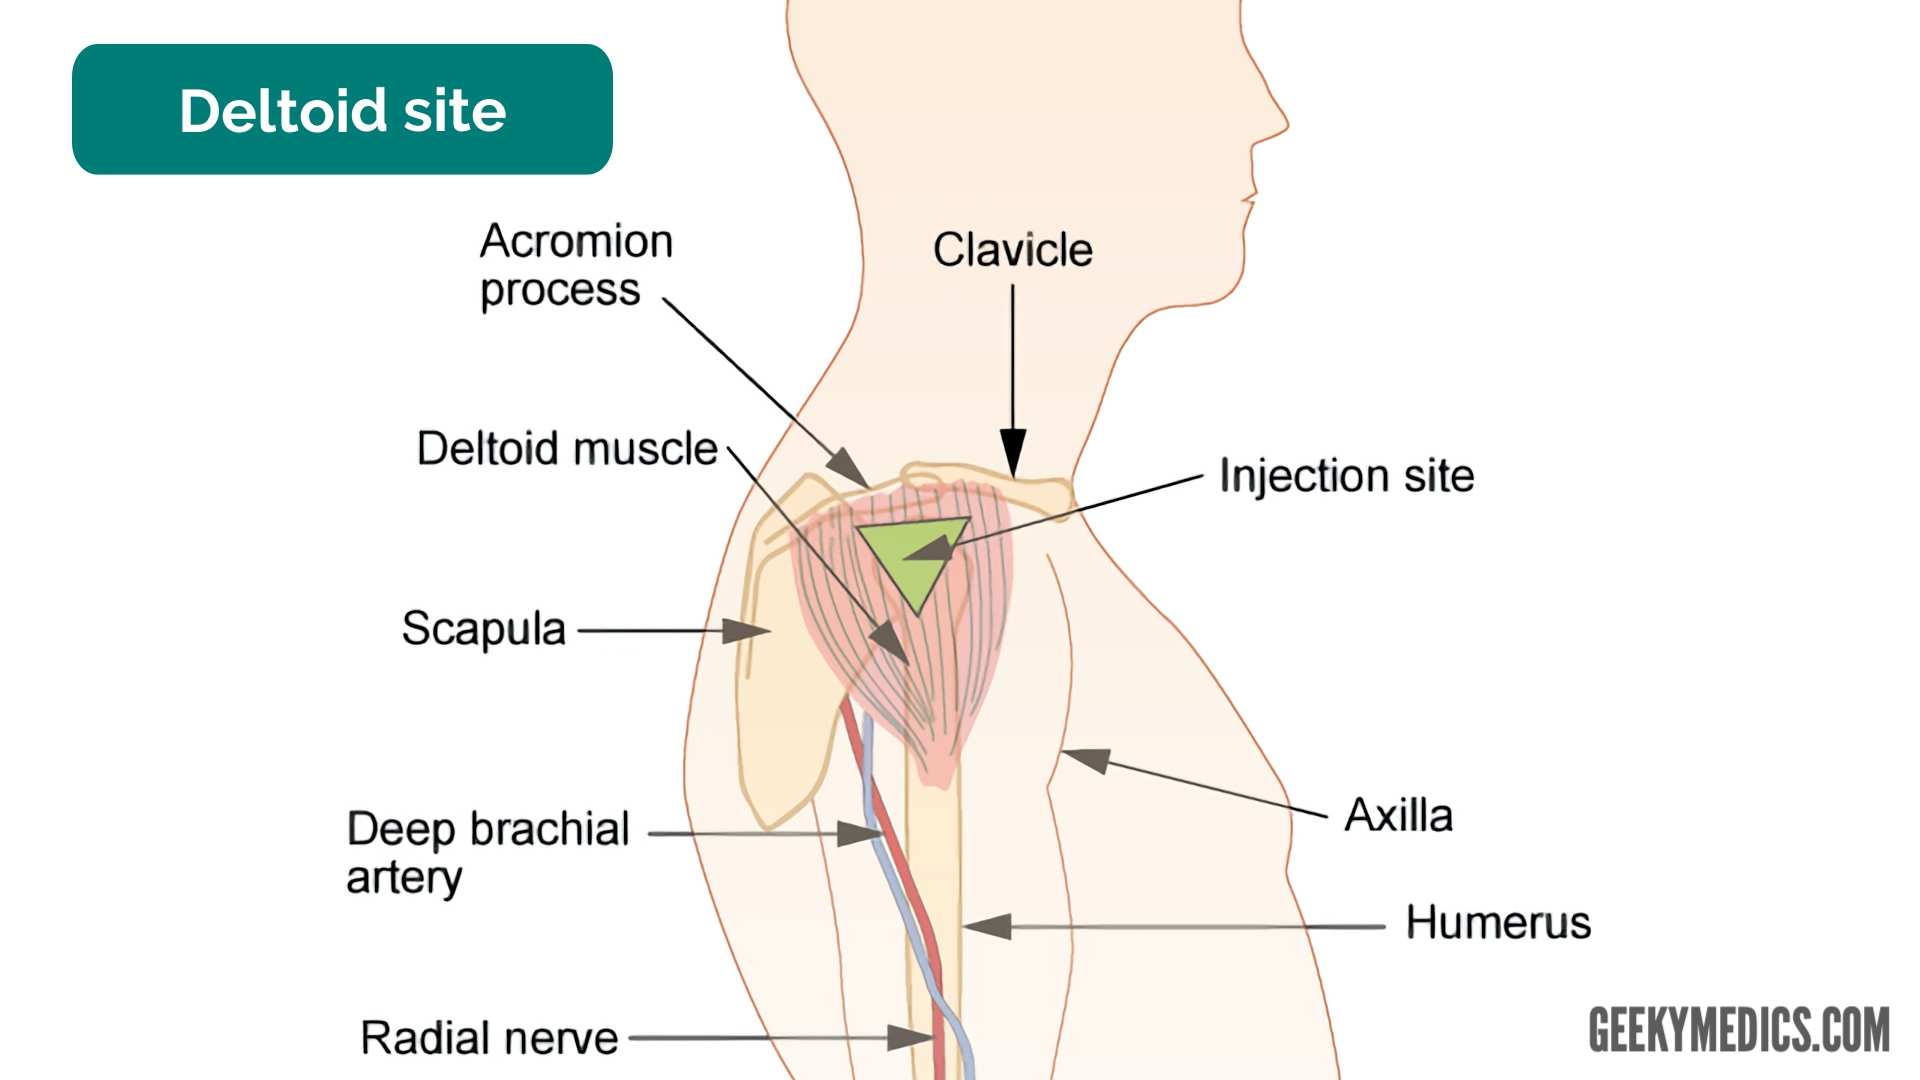
Deltoid site
The deltoid muscle is relatively easy to locate and access, making it an ideal site for intramuscular injections. The deltoid site is most commonly used for the administration of small volume intramuscular injections such as vaccines.
Procedure
1. Position the patient sitting on a chair with their arm relaxed.
2. Expose the patient’s upper arm and shoulder.
3. Palpate the lower edge of the acromial process and administer the intramuscular injection approximately 2.5cm below this.
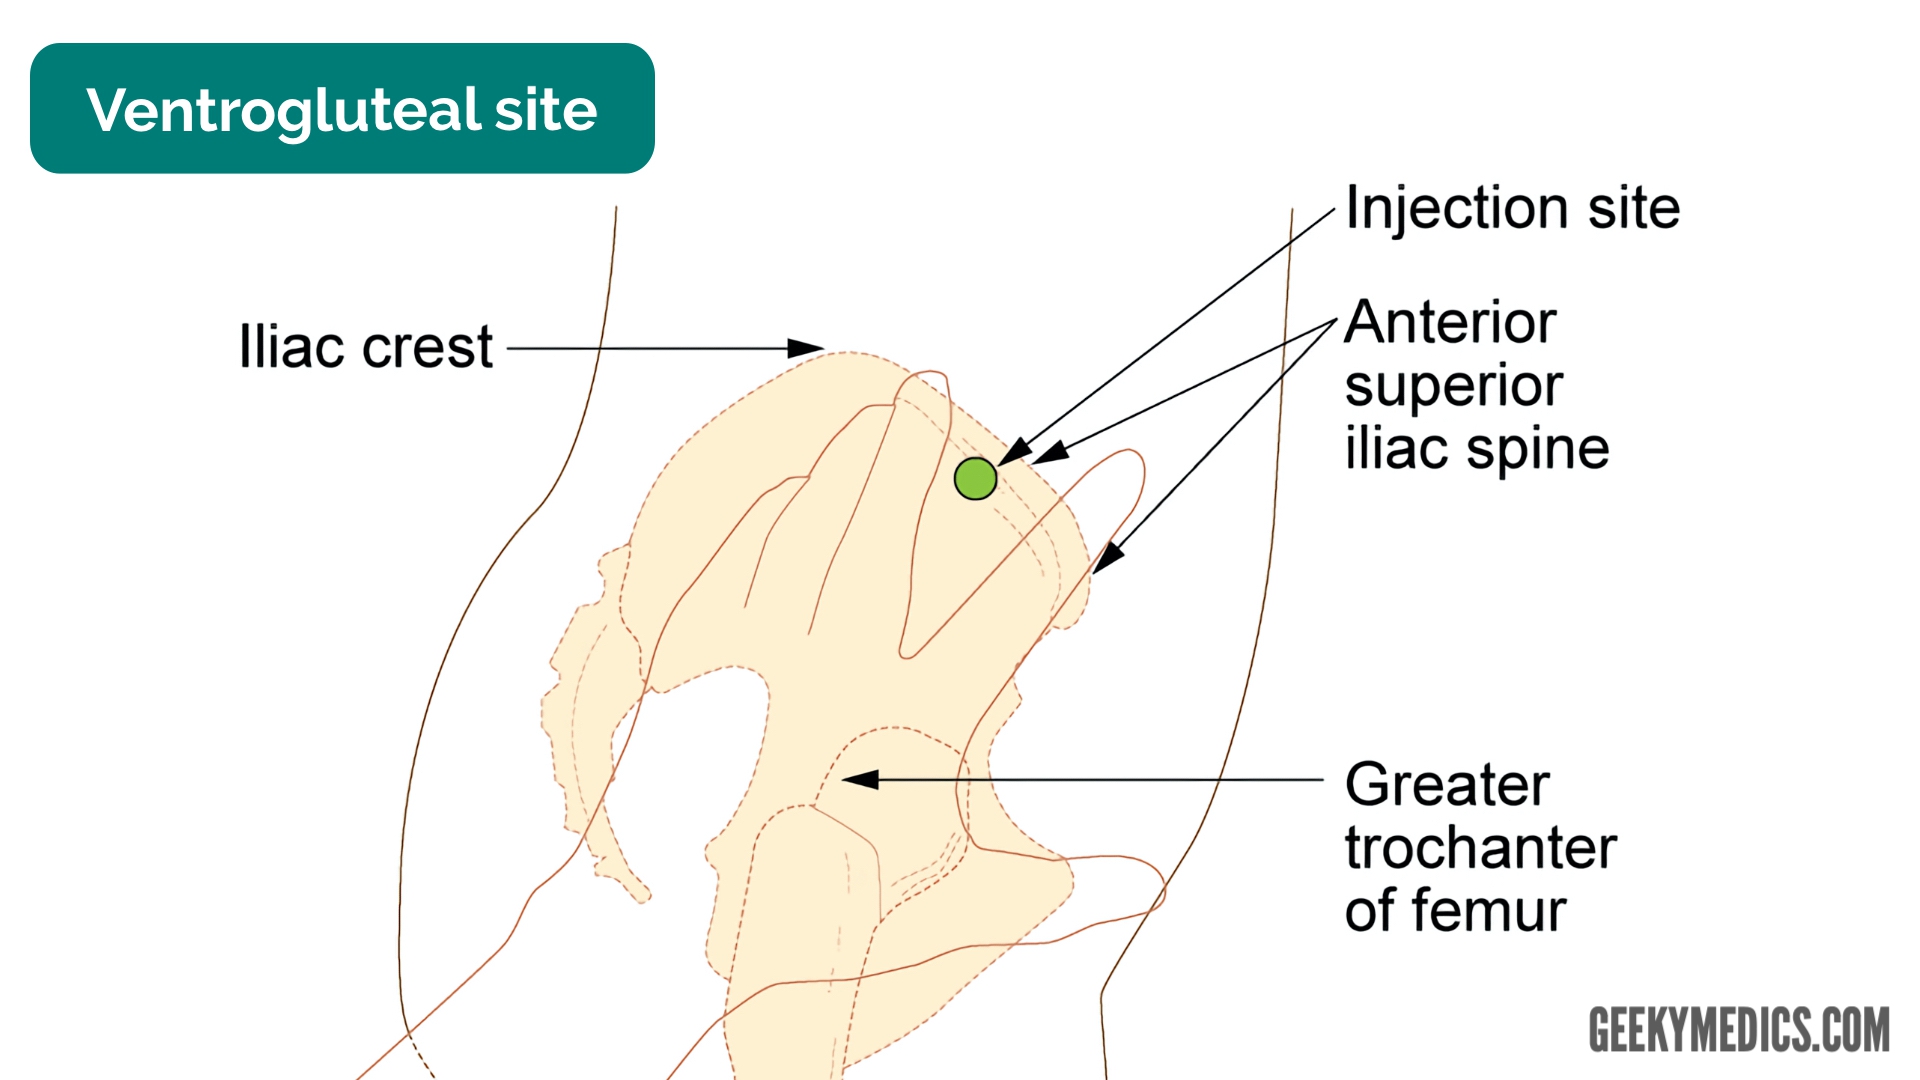
Ventrogluteal site
The ventrogluteal site provides access to the gluteus medius and minimus muscles whilst avoiding nerves and blood vessels, making it an ideal candidate for most intramuscular injections including those involving higher volumes of medication.
Procedure
1. The patient can be positioned prone, semi-prone or supine for this procedure, so choose whichever is most comfortable for the patient.
2. Place the palm of your hand over the greater trochanter of the patient’s hip, with your thumb pointing anteriorly.
3. Extend your index finger to touch the anterior superior iliac crest and point your middle finger towards the iliac crest to form a V-shape.
4. Insert the needle between your index and middle fingers (i.e. within the V-shape).
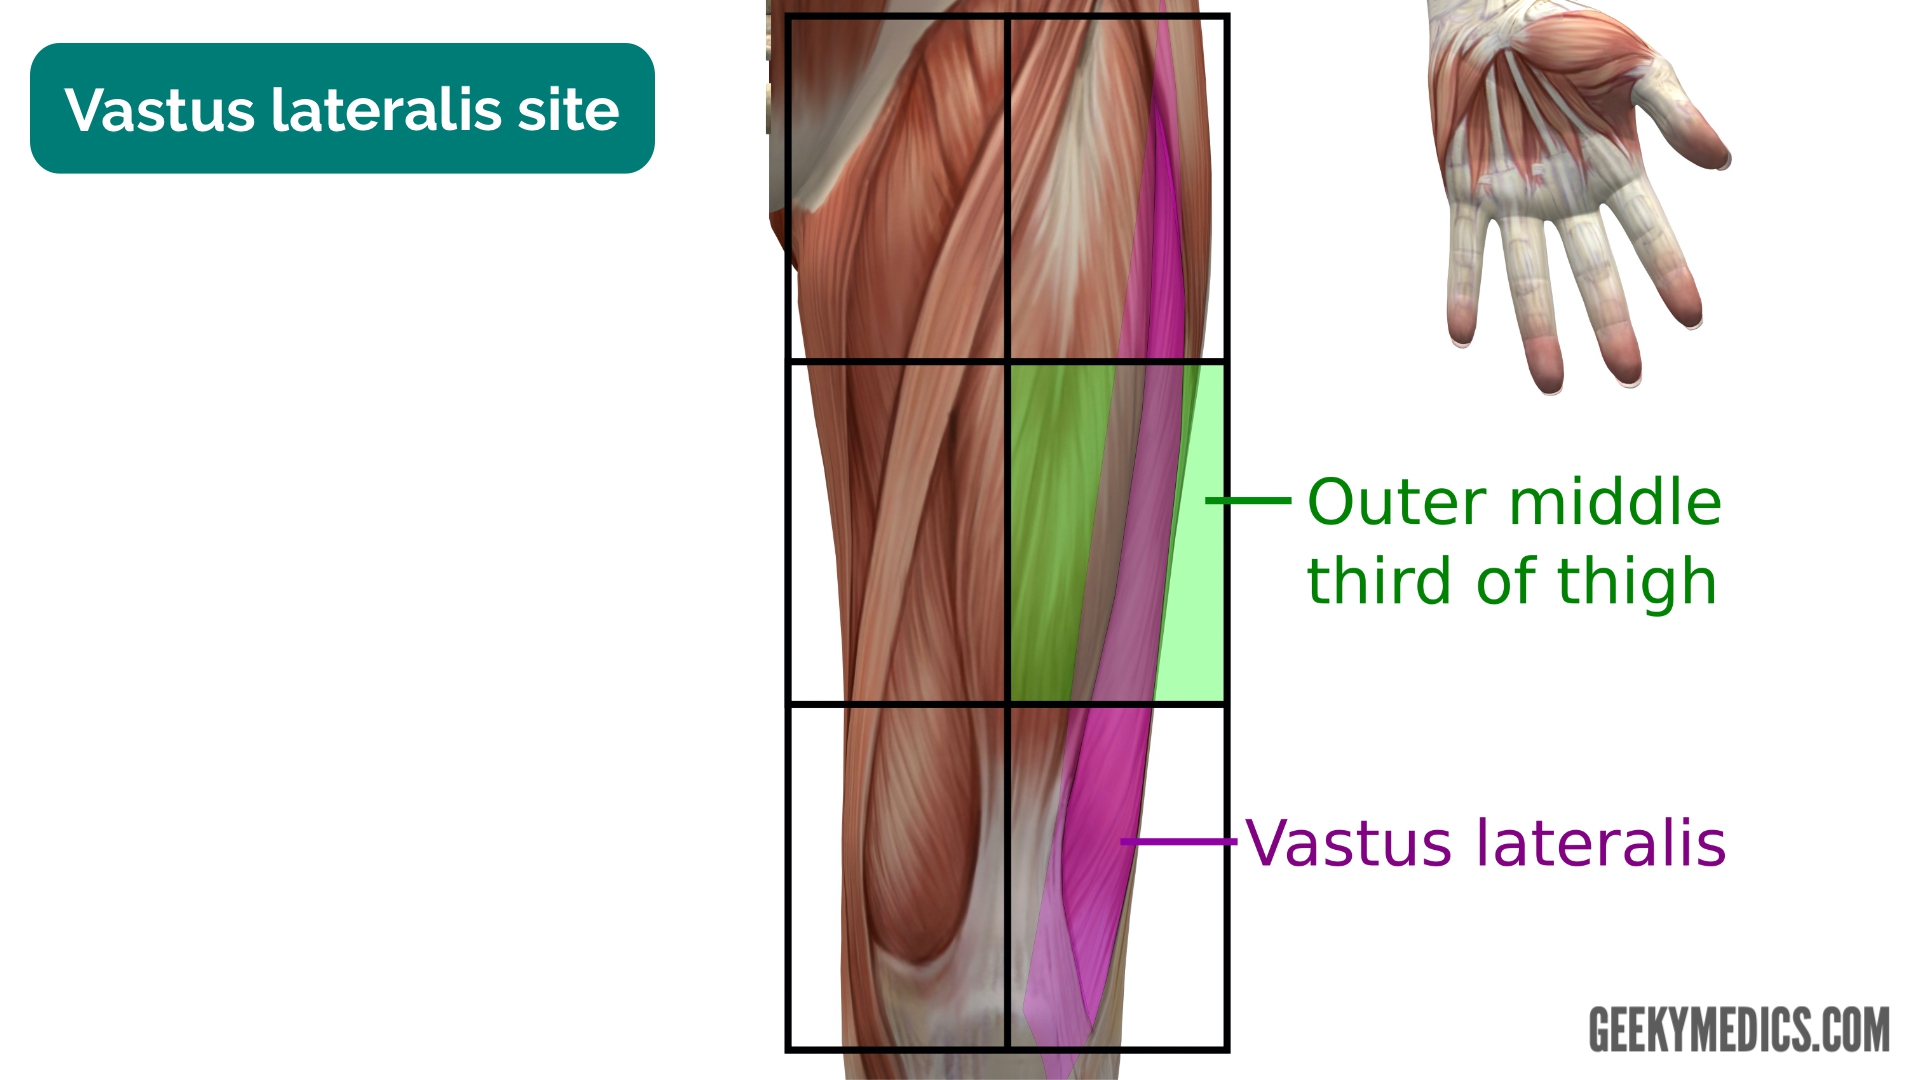
Vastus lateralis site
The vastus lateralis muscle is relatively easy to locate and access making it an ideal site for intramuscular injections. The vastus lateralis site is most commonly used for immunisations in infants up to the age of 7 months. Patient’s at risk of anaphylaxis are also often taught to use this site for administering adrenaline intramuscular injections (i.e. Epipen).
Procedure
1. To locate the site, divide the front thigh into thirds vertically and horizontally to make nine squares and inject into the outer middle square. 4
Reviewer
Graham Bone
Senior Clinical Lecturer in Medical Education
References
- World Health Organisation. WHO Best Practices for Injections and Related Procedures Toolkit. Available from: [LINK].
- Best infection control practices for intradermal, subcutaneous, and intramuscular needle injections. Yvan Hutin et al. 2003. Available from: [LINK].
- Immunisation procedures: the green book, chapter 4. Public Health England. Published 20th March 2013. Accessed 20th March 2017. Available from: [LINK].
- Taylor, C. R., Lillis, C., LeMone, P., Lynn, P. (2011) Fundamentals of nursing: The art and science of nursing care. Philadelphia: Lippincott Williams & Wilkins, page 751.
- British Columbia Institute of Technology (BCIT). Adapted by Geeky Medics. Intramuscular injection sites. Download this book for free at: [LINK]. Licence: CC BY.
- Mikael Häggström, M.D. Adapted by Geeky Medics. Vastus lateralis injection site. Licence: CC0. Available from: [LINK].
