

- 📖 Geeky Medics OSCE Book
- ⚡ Geeky Medics Bundles
- ✨ 1300+ OSCE Stations
- ✅ OSCE Checklist PDF Booklet
- 🧠 UKMLA AKT Question Bank
- 💊 PSA Question Bank
- 💉 Clinical Skills App
- 🗂️ Flashcard Collections | OSCE, Medicine, Surgery, Anatomy
- 💬 SCA Cases for MRCGP
To be the first to know about our latest videos subscribe to our YouTube channel 🙌
Arterial cannulation is a procedure that is commonly performed in emergency and critical care. It allows invasive blood pressure monitoring and accessible blood sampling. Common sites which can be used include the radial, brachial and femoral arteries.
This guide provides a step-by-step approach to inserting an arterial line into the radial artery in an OSCE setting, it is NOT intended to be used to guide patient care.
Indications and contra-indications
Indications for inserting an arterial line include:1
- Beat-to-beat blood pressure monitoring
- Arterial blood gas sampling
- Haemodynamic instability or rapid changes in blood pressure
- Inaccurate non-invasive blood pressure monitoring (e.g. morbid obesity, arrhythmias)
- Titration of vasoactive drugs
- Frequent blood sampling
Absolute contraindications to inserting an arterial line include:
- Absent pulse
- Raynaud’s syndrome
- Buerger’s disease
- Poor perfusion
Gather equipment
Gather the appropriate equipment to insert an arterial line:
- Arterial catheter*
- Drape*
- Swabs*
- Dressing*
- 5ml syringe*
- Hypodermic needle 25G*
- Chlorhexidine 2% stick*
- Local anaesthetic (e.g lidocaine 1% 2ml ampule)
- Filter needle (for local anaesthetic)
- Sterile gloves
- Tape (to secure the hand in position)
- Trolley
- Arterial line flush bag with transducer
*These items of equipment may be found in an arterial line pack.
Ultrasound (if required)
Some patients may have poorly palpable arteries or have had difficult arterial cannulations in the past. If suitably trained, ultrasound will aid with the procedure. A sterile ultrasound probe cover should be used.
Introduction
Wash your hands using alcohol gel. If your hands are visibly soiled, wash them with soap and water.
Don PPE if appropriate.
Introduce yourself to the patient including your name and role.
Confirm the patient’s name and date of birth.
Explain what the procedure will involve using patient-friendly language: “This procedure is to place an arterial line. This is a small plastic tube which is inserted into a blood vessel in your wrist that lets us measure your blood pressure and take blood samples. I will use a local anaesthetic to numb the area so that it will be less painful for you. The main risks to you include bleeding and rarely infection or bruising (haematoma), which is a lump below the insertion site.”
Gain consent to proceed with the insertion of an arterial line.
Check if the patient has an allergy to local anaesthetic (if requested) or to the skin preparation agent.
Check for any contraindications.
Initial palpation
One of the most important parts of the procedure is the set-up and ensuring you palpate both radial arteries.
Traditional teaching suggests performing Allen’s test, but in practice this is rare. It is important to check and follow local guidelines for arterial line insertion.
To perform a modified Allen’s test:
1. Ask the patient to clench their fist.
2. Apply pressure over the radial and ulnar arteries to occlude both vessels.
3. Ask the patient to open their hand, which should now appear blanched. If the hand does not appear blanched, it suggests you are not completely occluding the arteries with your fingers.
4. Remove the pressure from the ulnar artery whilst maintaining pressure over the radial artery.
5. If there is adequate blood supply from the ulnar artery, the normal colour should return to the entire hand within 5-15 seconds. If the return of colour takes longer, this suggests poor collateral circulation.
Position patient and set up equipment
Position the patient’s arm in an appropriate position. Place a pillow and absorbable pad below their wrist and raise the bed to a comfortable height.
Use tape to aid the patient in keeping their wrist steady during the procedure.
Place the arterial line pack (or individual pieces of equipment) on a clean trolley.
Wash your hands using a surgical scrubbing method.
Open the arterial line pack and don sterile gloves.
Prepare the insertion site
Clean the site and the surrounding area thoroughly using chlorhexidine solution and allow it to dry.
Place the sterile drape over the insertion site.
Local anaesthetic
Check the expiry date of the local anaesthetic.
Prepare and administer lidocaine subcutaneously using an orange needle (25G) over the planned puncture site (create a bleb). Aspirate to ensure you are not in a blood vessel.
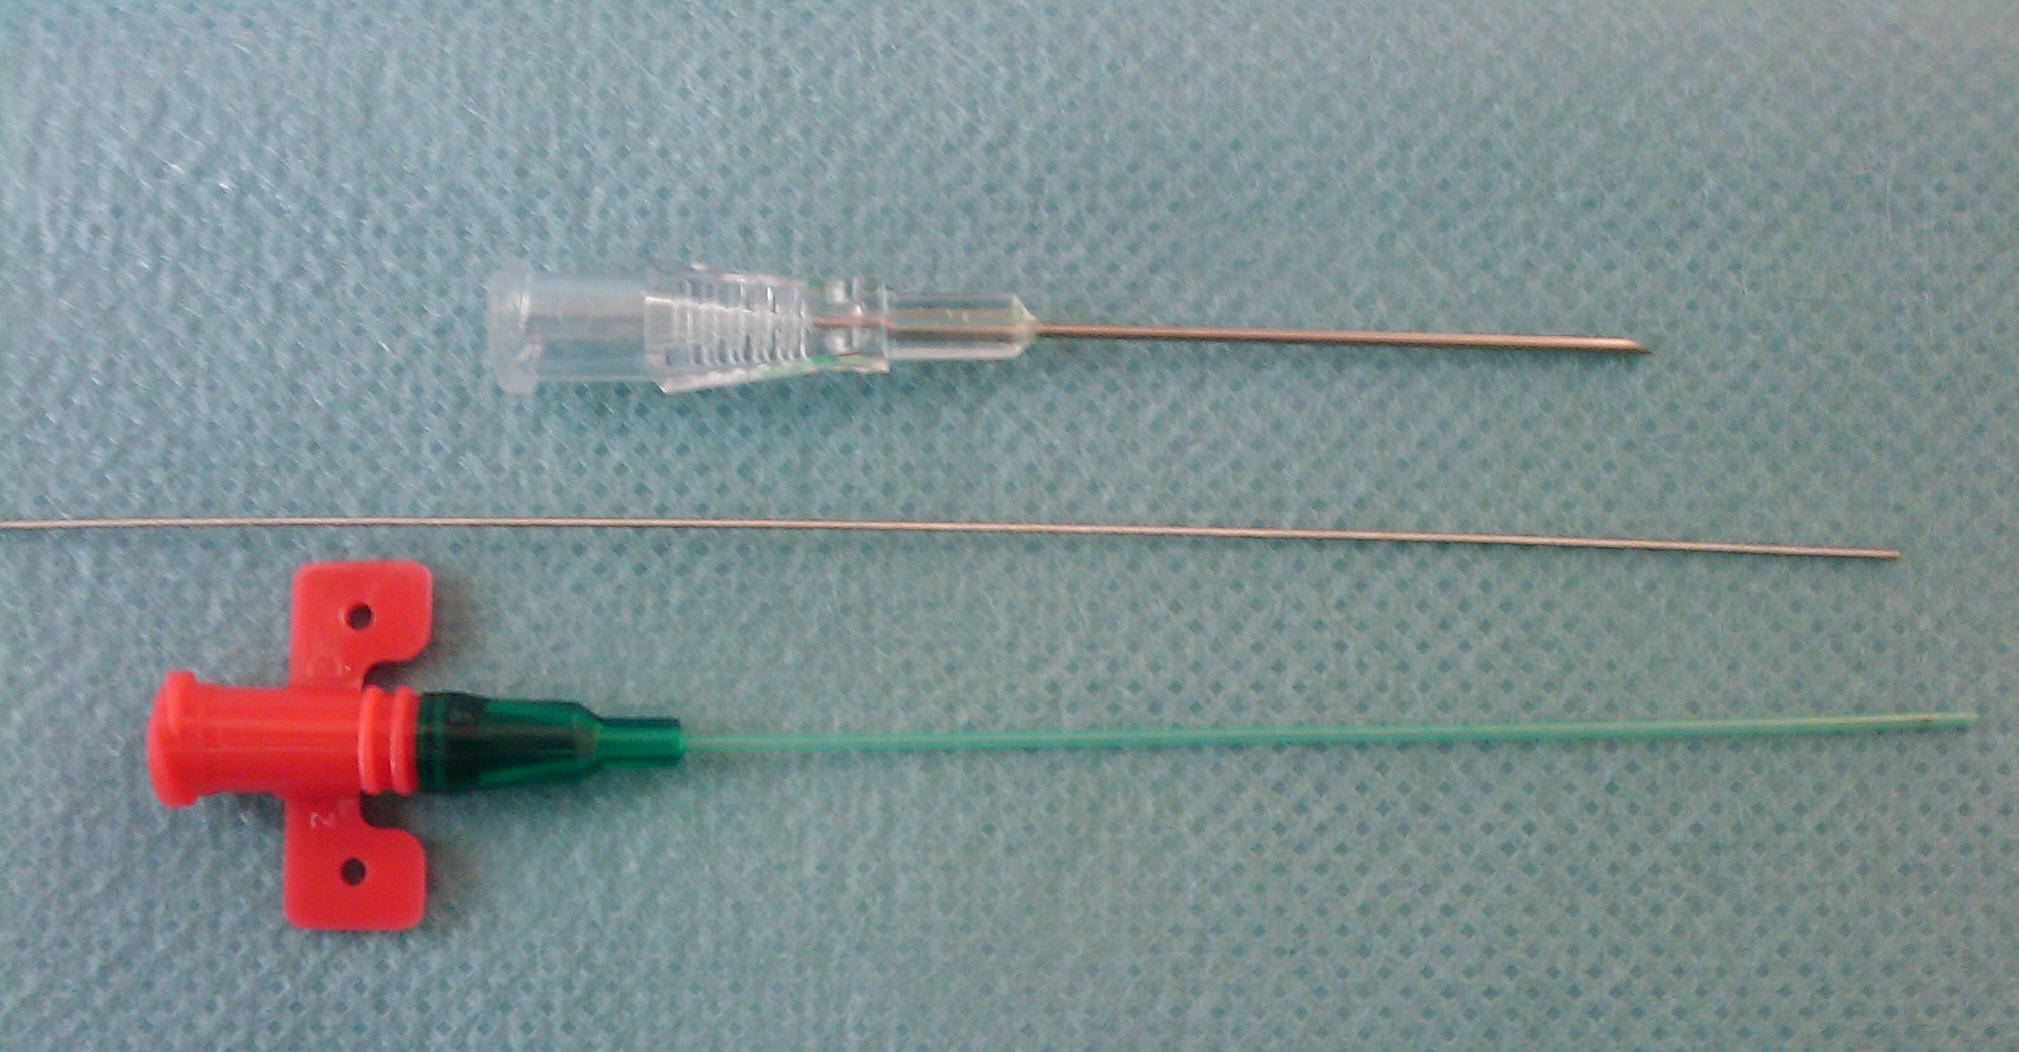
Insert the arterial line
1. Insert the needle at a 30-45 degree angle where you palpated the radial artery. You will see a flashback when you are successful.
2. Thread the guidewire through the introducer needle. If there is any resistance, remove the guidewire and inspect for flashback to ensure you are still within the vessel.
3. Keeping one hand on the guidewire at all times, remove the introducer needle and thread the arterial cannula over the guidewire.
4. Hold the top of the guidewire and using a twist and push technique, advance the cannula until flush to the skin. Remove the guidewire and observe for flashback.
5. Attach the flush bag and connective tubing to the end of the cannula.
6. Connect the transducer and observe for an arterial trace (Figure 2).
7. Secure with cannulation dressing, or stitch in place and cover with a dressing.

To complete the procedure…
Explain to the patient that the procedure is now complete.
Thank the patient for their time.
Dispose of PPE and other clinical waste into an appropriate clinical waste bin.
Wash your hands.
Document the details of the procedure including:
- Whether local anaesthetic was used
- Any immediate post-procedure concerns or complications
Reviewer
Dr Claire Mitchell
ST7 ICM/Anaesthesia
Editor
Dr Chris Jefferies
References
- Heather H. Hager; Bracken Burns. Artery Cannulation. 2022. Available from: [LINK]
Image references
- Figure 1. Privatarchiv Foto von MrArifnajafov. Arterial line catheter. Licence: [CC BY 3.0]
- Figure 2. Lupino. Arterial waveform. Licence: [Public domain]
