
Having a standardised approach to the style and format of articles ensures that readers have a consistent experience and that the website, as a whole, feels cohesive. As a result, we’ve created some guidelines to assist you when writing your article.
Here is a list of other guidelines which may be of relevance:
- Clinical topic summary guidelines: a guide to writing clinical topic summaries.
- Anatomy article writing guidelines: a guide to writing anatomy articles.
- Physiology article writing guidelines: a guide to writing physiology articles.
Key points
- Articles should provide a succinct overview of the relevant topic to aid students in their revision.
- Excessive amounts of detail can make articles harder to read and less useful as a revision aid, so make sure the article is focused.
- Articles should be written in full sentences and not simply as a list of bullet points. The aim is to create an article that is enjoyable to read.
- UK spelling should be adopted for all articles.
- Avoid the use of UK centric hospital slang (e.g. “SHO”, “Datix”, “A&E) to minimise confusion for international readers.
- Use plain formatting in Word when writing your article to make the import process easier. Don’t try to emulate the appearance of articles on the website in Word (e.g. you don’t need to insert horizontal lines, add colours to headings etc) as we will do this during the editing process.
- Make sure to read our guidelines on bullet points, capitalisation and text styling below as it’s important these remain consistent between articles.
- Articles need to be referenced appropriately: read our guidelines below for more details.
- Images included in your article need to have an appropriate licence that allows re-use, see our guidelines below for finding appropriately licenced images.
- All articles should be reviewed by a senior wherever possible.
Avoiding excessive detail
It is essential that you avoid including excessive amounts of detail in your article. Your article should provide a succinct overview which is ideal for medical students wanting to quickly revise a specific topic. Make sure to keep your reader and the purpose of your article in mind throughout the writing process.
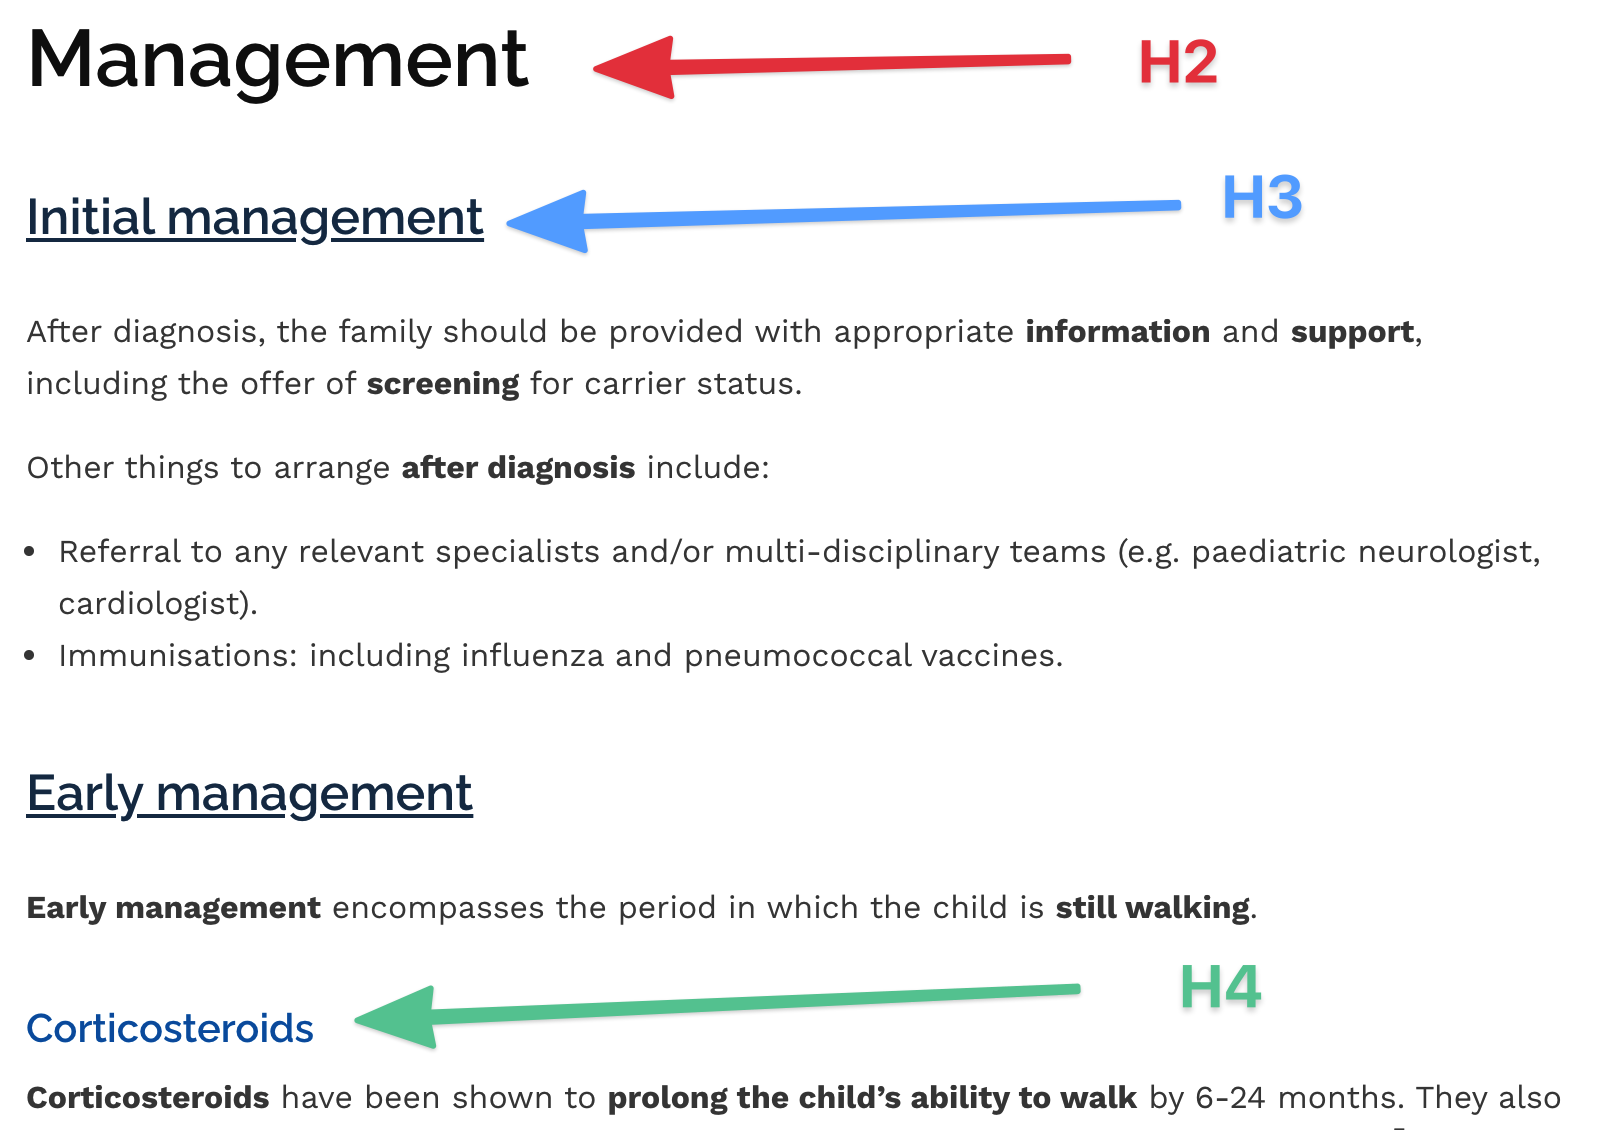
Headings (H2)
Each major section of your article should have a main heading (we’ll call this “H2”).
Sub-headings (H3)
You can then use sub-headings to further break down major sections (“H3”).
A sub-heading, within a sub-heading (H4)
If required, you can use smaller sub-headings to break down content beneath a sub-heading even further (“H4” ).
No further headings
You should avoid using any further levels of sub-headings (e.g. “H5”).
Tips:
- You don’t need to include “H2/3/4” next to your titles in your draft, this is just to help explain the different levels of heading to you in this guide.
- You also don’t need to insert horizontal lines between sections or underline/change the colour of the font in your Word version, as we’ll do this when we bring your article into the website.
Capitalisation
Heading 2 (H2), Heading 3 (H3) and Heading 4 (H4) should only have the first word capitalised.
Avoid capitalising other words unless it is warranted:
- Generic drugs (e.g. aspirin) do not need to be capitalised, unless at the beginning of a sentence.
- Medical conditions do not need to be capitalised, unless they are eponymous (e.g. Conn’s syndrome).
- Phrases for which there is a commonly used acronym do not need to be capitalised (e.g. write “disseminated intravascular coagulation” and not “Disseminated Intravascular Coagulation”).
Image captions only require the first word of the sentence capitalising.
General text styling
Avoid the use of coloured fonts.
Only use italics for the names of micro-organisms.
When writing a “for example” abbreviation use this format: “e.g.” (not “eg”).
Use the bold function to highlight keywords/phrases (but use this sparingly, as it loses its purpose if most things are bold).
Write out numbers under 10 as words (e.g. one, two, three, four).
Lists
Both numbered lists and bullet lists can be used in articles, but they should not be the predominant method of writing out information.
If you want to add some more details about a list item, you can add a colon after it and then continue with the rest of the information.
Bedside investigations for ectopic pregnancy include:
- Urine pregnancy test (hCG urine dipstick): to rule pregnancy in or out. This test would be positive in the context of ectopic pregnancy.
- Urinalysis: to rule out a urinary tract infection. If findings suggest a urinary tract infection, ectopic pregnancy would still need ruling out (as the patient may have both).
Things to avoid
Avoid overuse of lists (e.g. bullet points or numbered lists) in your article and instead opt for complete sentences. We want to avoid articles that are essentially just a collection of bullet points. Bullet points and numbered lists can be used, but they should not be the predominant method of writing out information.
Don’t use full stops at the end of list items if the list item isn’t a full sentence (e.g. if one list item is the word ‘prednisolone’, you wouldn’t include a full stop after that word).
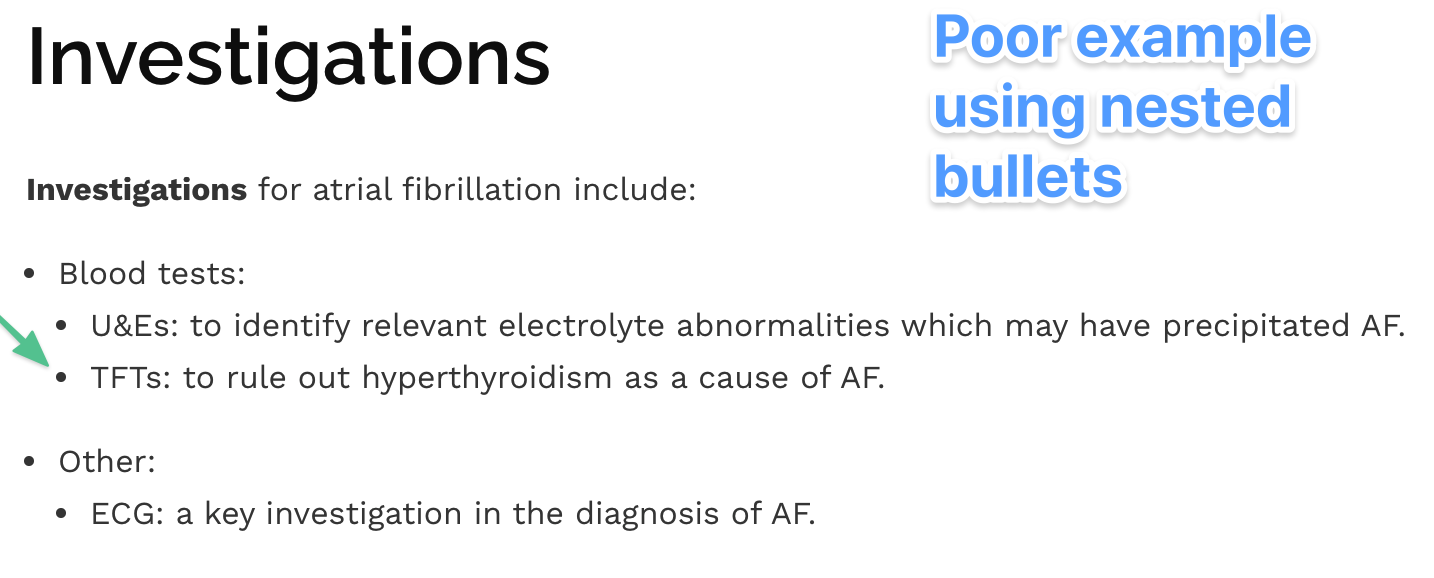
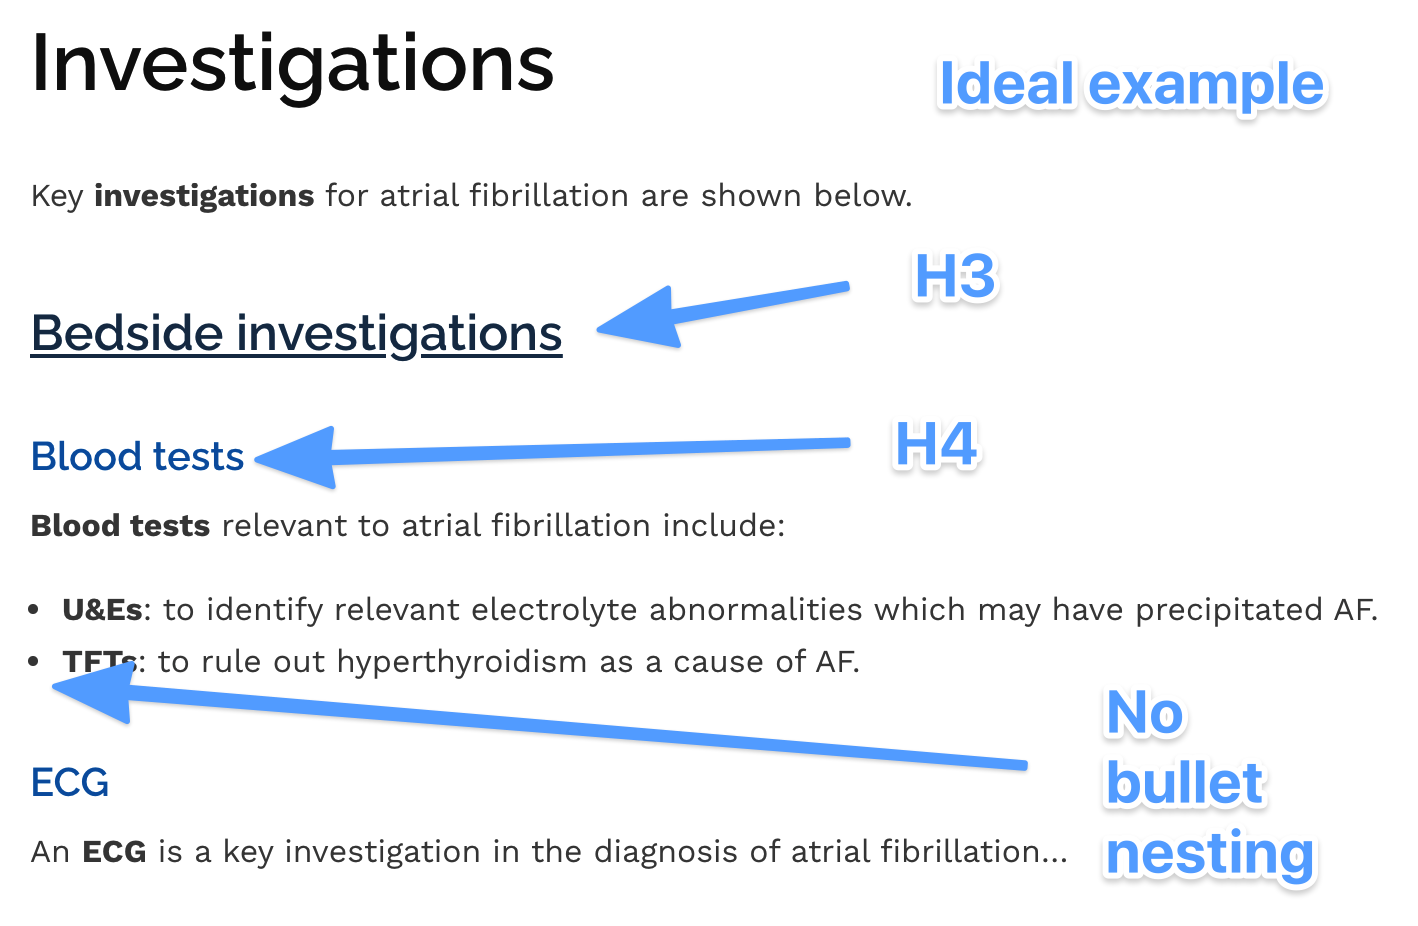
Avoid multiple levels of list nesting (see example below) as we find this makes articles harder to read and often there are better ways to structure the information (e.g. using heading 3 and heading 4 instead).
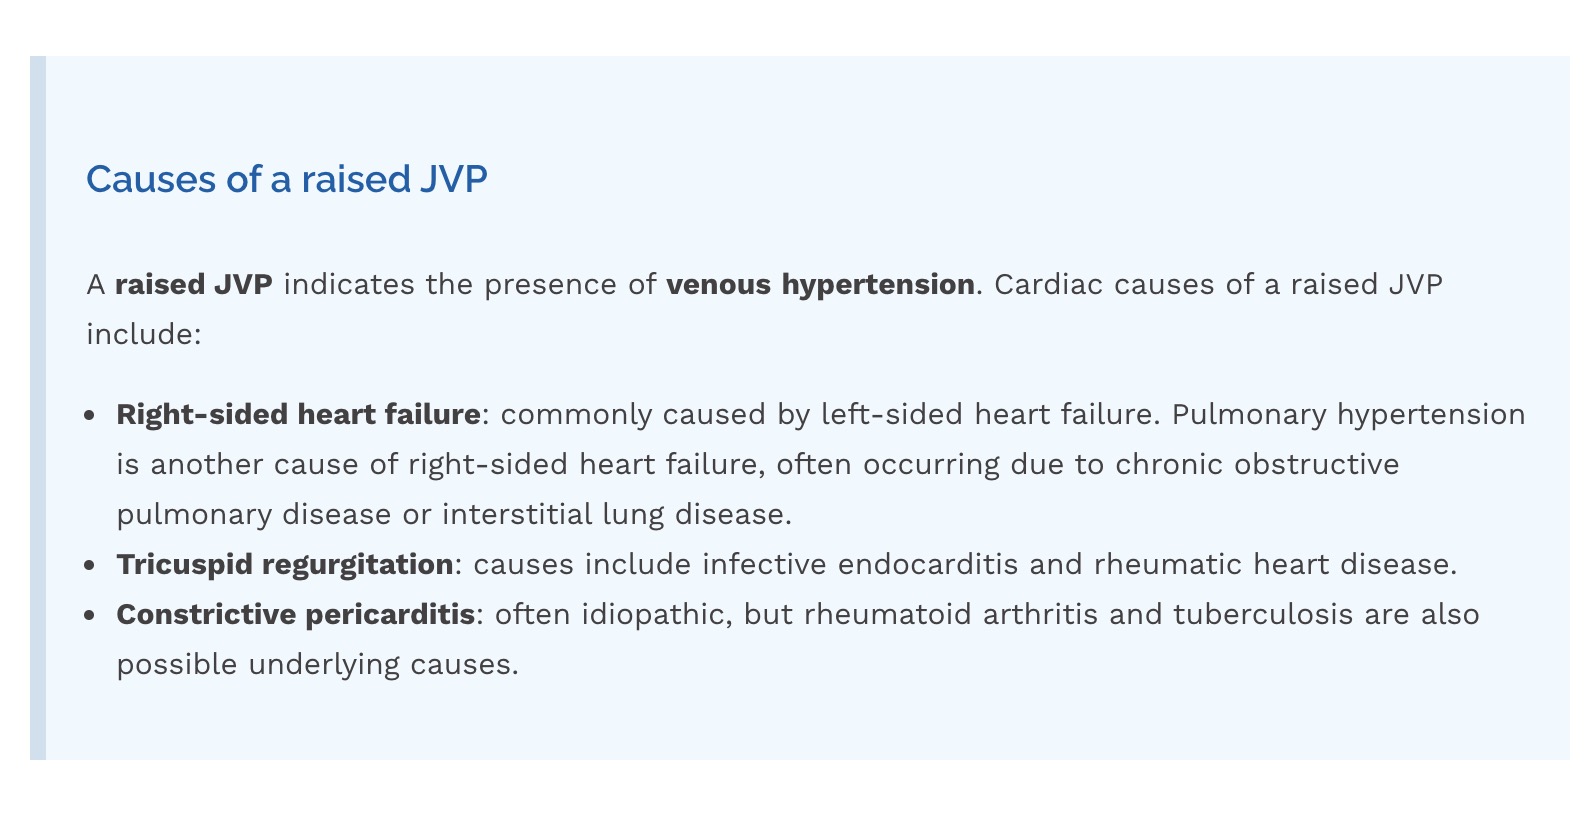
Blocks
If you’d like one of our Editors to apply a blue block around a segment of content, highlight that content in your Word document with the highlighter. These blocks can be useful for highlighting a segment of information that is particularly important (e.g. an acronym or some background information relevant to the section).
References
To reference a piece of text, use the superscript format (see example at the end of this sentence) to add a number that refers to your references section at the end of the article.¹
Avoid using superscript numbers in main headings (H2).
Superscript numbers should be placed after punctuation:
- This is an example of the correct way to reference a sentence.¹
- This is an example of the incorrect way to reference a sentence¹.
You should add a references section at the end of your article and include a numbered list of references that relate to the superscript numbers throughout the post.
Reference images by adding the relevant superscript number to the text you want to be included in the image’s caption.
References should be added in the order they appear in the article (e.g. reference 1 is the first reference of the article and reference 10 is the last).
How standard references should be structured
- Author/organisation. Title of article/paper. Date of publication. Available from: [Link to the source].
Here is an example…
- Geeky Medics. Cardiovascular Examination – OSCE Guide. Published in 2011. Available from: [LINK].
How image references should be structured
- Author/organisation. Title/explanation of what image shows. Licence: [Image licence, including a link to the terms of the licence].
Here is an example…
- AfroBrazilian. Hinged forceps. Licence: [CC BY-SA].
Images
Sending images to us
If possible, you should include the original versions of the images you have imported into your article as separate attachments in your email to us. This makes it easier for us to add these images to the web version of your article (rather than us trying to extract them from a Word document).
Finding images with appropriate licencing
If images are included, it’s important that references are provided (using the superscript method mentioned above).
Image licence types
Creative Commons (CC) licencing: there are several subtypes of CC licencing, most of which are fine to use on Geeky Medics and allow you to adapt the images (e.g. highlighting structures, annotating etc). When sourcing images the licence is usually clearly stated and the terms are linked to, so it’s easy to check (see below for details on how to find appropriately licenced images quickly using Google). All CC licenced images will require a reference in the article you are using them in (see above for referencing examples).
Public domain images are free for anyone to use for any purpose.
Finding images with appropriate licencing
When adding an image to an article, it is best to use Google image search as this allows you to search for images with the appropriate rights:
1. When using Google image search, there is a menu item called “Tools.”
2. If you click “Tools” you’ll be presented with a sub-menu which has an option for “Usage rights.”
3. Choose the “Creative Commons” filter from the list, which will exclude any images which are not appropriate to use.
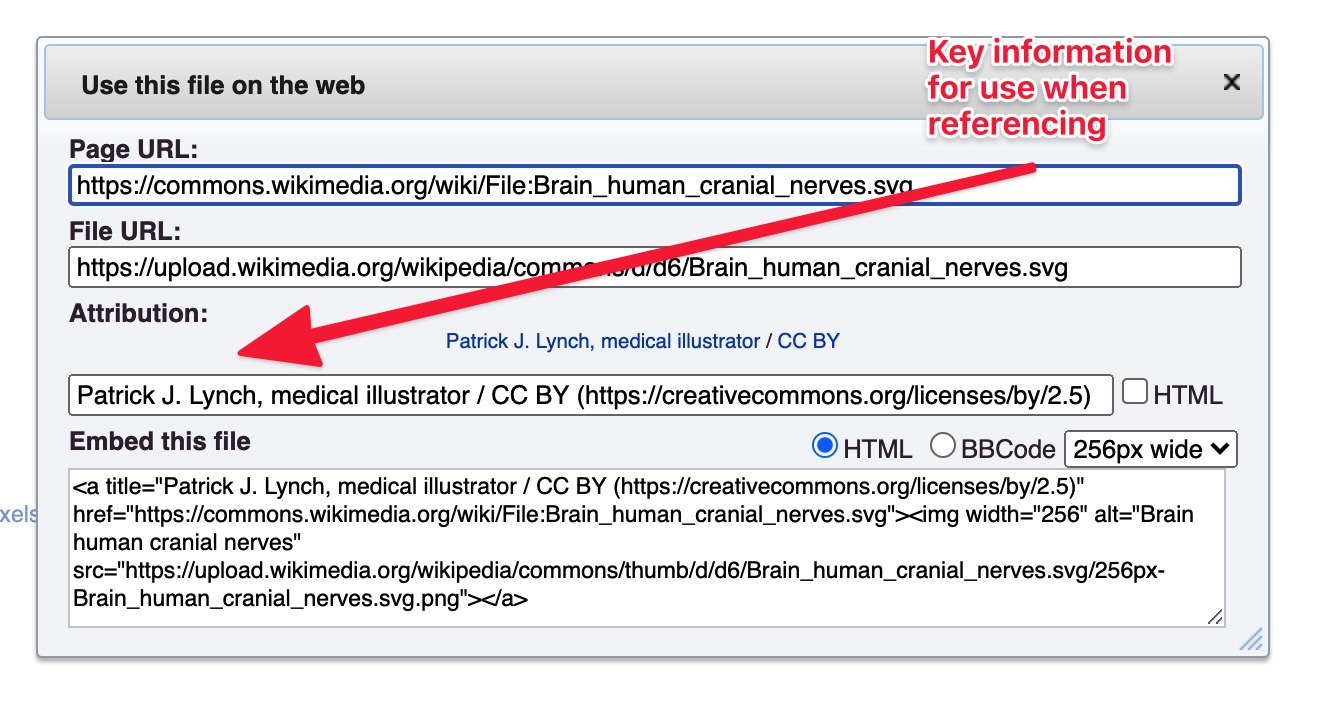
4. When you locate an appropriate image, check the attribution details which you’ll need for referencing. Wikipedia-based images usually have a “Use this file on the Web” button, which will produce suggested reference text you can use when clicked (see image example below).

Seeking a senior review
To improve the quality of our resources, we require a senior review of all articles. If you can arrange for someone senior (e.g. a Registrar or Consultant in the relevant specialty) to read through your article, this will increase the chances of your article being published and expedite the publishing process. The reviewer can also have their name included in the article (should they wish).
Sending your final draft
Once you’ve written your article and you’ve had someone senior review it, you can email it to us via [email protected]. We’ll then review the article and begin to format it for the website. The time between when you submit the article and when it is published on the site varies depending on the amount of further editing that is required and the number of submissions at that time.
In some cases, we will not publish an article if we feel it doesn’t meet an appropriate standard of quality.