
- 📖 Geeky Medics OSCE Book
- ⚡ Geeky Medics Bundles
- ✨ 1300+ OSCE Stations
- ✅ OSCE Checklist PDF Booklet
- 🧠 UKMLA AKT Question Bank
- 💊 PSA Question Bank
- 💉 Clinical Skills App
- 🗂️ Flashcard Collections | OSCE, Medicine, Surgery, Anatomy
- 💬 SCA Cases for MRCGP
To be the first to know about our latest videos subscribe to our YouTube channel 🙌
This basic life support (BLS) OSCE guide aims to provide an overview of performing cardiopulmonary resuscitation (CPR) in a hospital setting. The guide is based on the Resuscitation Council (UK) in-hospital resuscitation guidance and is intended only for students preparing for their OSCE exams and not for patient care.
These guidelines assume competence in basic airway manoeuvres and checking for signs of life. The European Resuscitation Council’s (ERC) basic life support (BLS) guidelines focus on early recognition of cardiac arrest and prompt initiation of good-quality CPR. They do not advocate that bystanders perform airway manoeuvres or check for signs of life if not trained to do so
Chain of survival
The chain of survival refers to a series of actions that, properly executed, reduce the mortality associated with cardiac arrest. Like any chain, the chain of survival is only as strong as its weakest link.
The four interdependent links in the chain of survival are:
- Early recognition and call for help
- Early CPR
- Early defibrillation
- Early advanced cardiac life support
Ensure personal safety
Check the patient’s surroundings are safe before approaching (if you injure yourself, you will not be able to help the patient, so take this seriously).
Put on gloves (and other personal protective equipment) as soon as possible.
Be careful with sharps during resuscitation.
Check the patient for a response
The first step is to assess for a response.
Gently shake the patient’s shoulders and ask loudly “Hello can you hear me?” or “Are you alright?”.
If they respond, the patient then needs an urgent medical review with a full ABCDE assessment (see our emergency assessment guides).
No response from the patient
Get help
If there is no response from the patient you need to shout for help. This is absolutely essential, as you will not be able to effectively assess and treat the patient alone.
Position the patient and inspect the airway
Position the patient on their back.
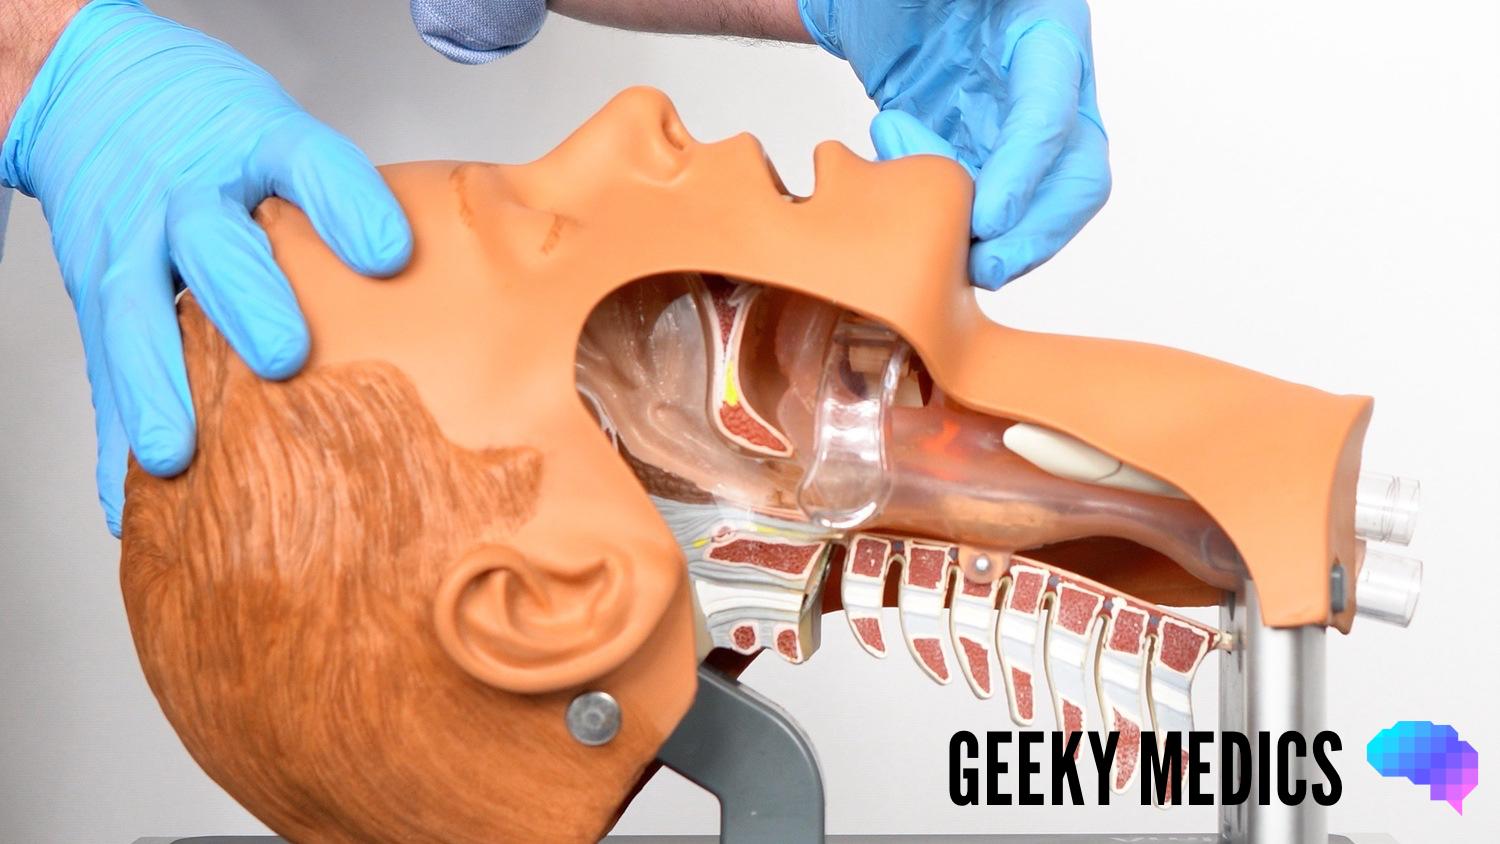
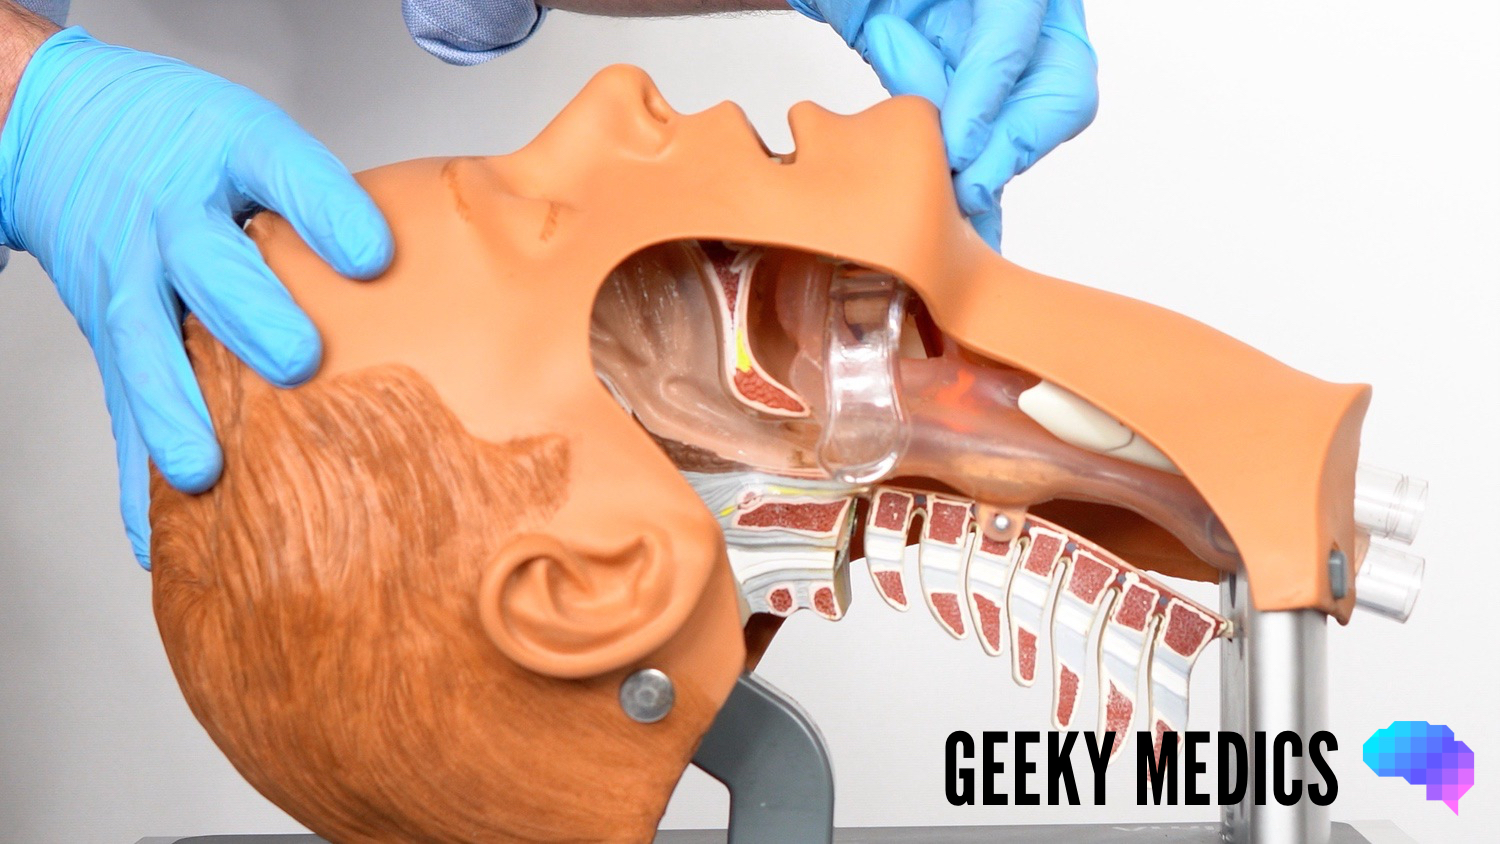
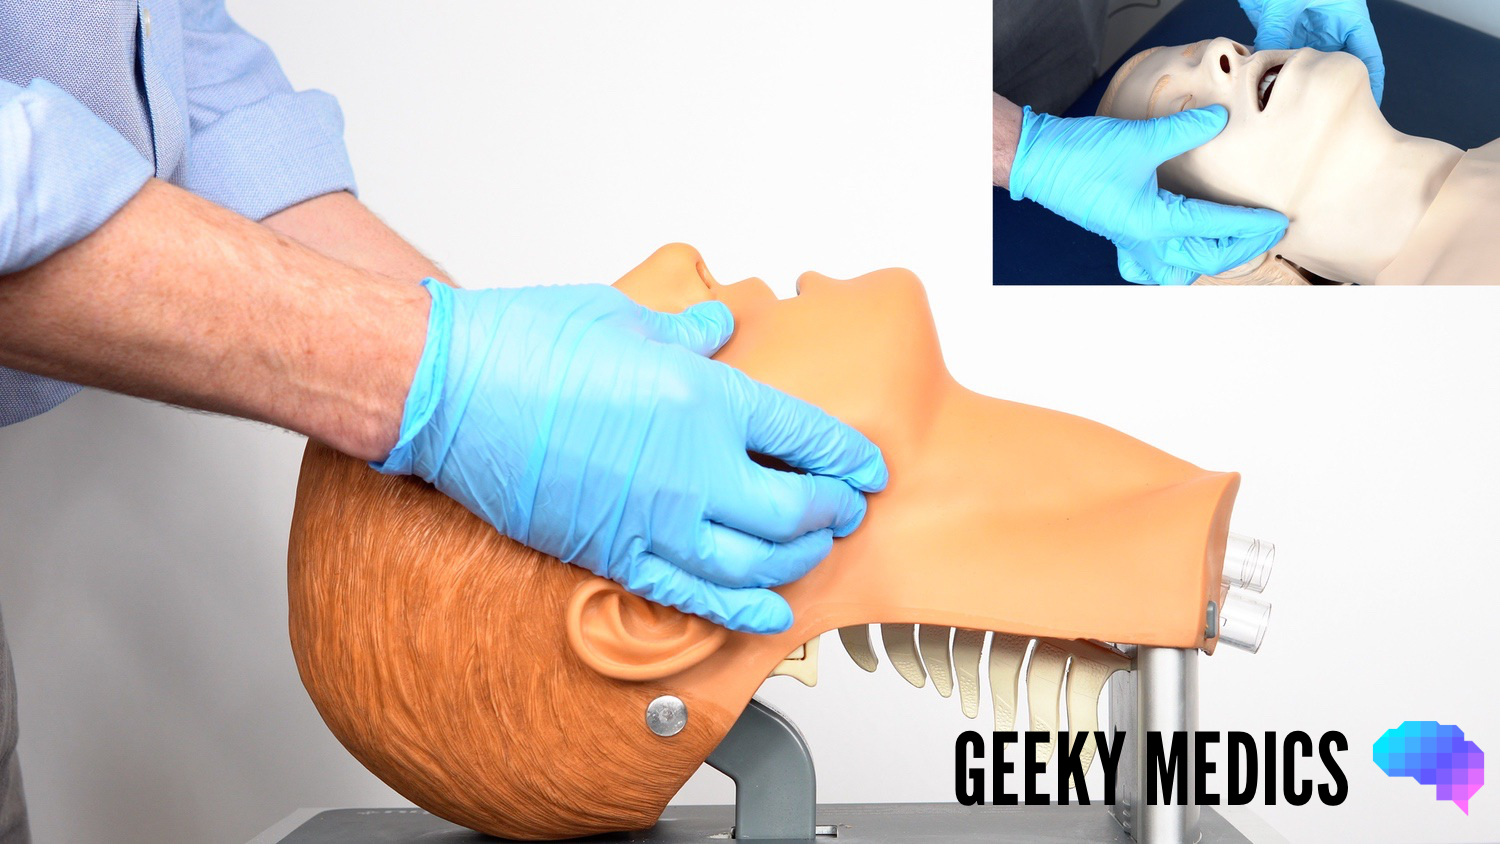
Head-tilt chin-lift manoeuvre
Open their airway using a head-tilt chin-lift manoeuvre:
1. Place one hand on the patient’s forehead and the other under the chin.
2. Tilt the forehead back whilst lifting the chin forwards to extend the neck.
Inspect the airway for obvious obstruction. If an object is seen to be obstructing the airway, use a finger sweep or suction to remove obstructions that are in the line of sight.
Assess for signs of life
With the airway held open (using the head-tilt and chin-lift manoeuvre), position your head looking down towards the chest, with your cheek above the patient’s mouth.
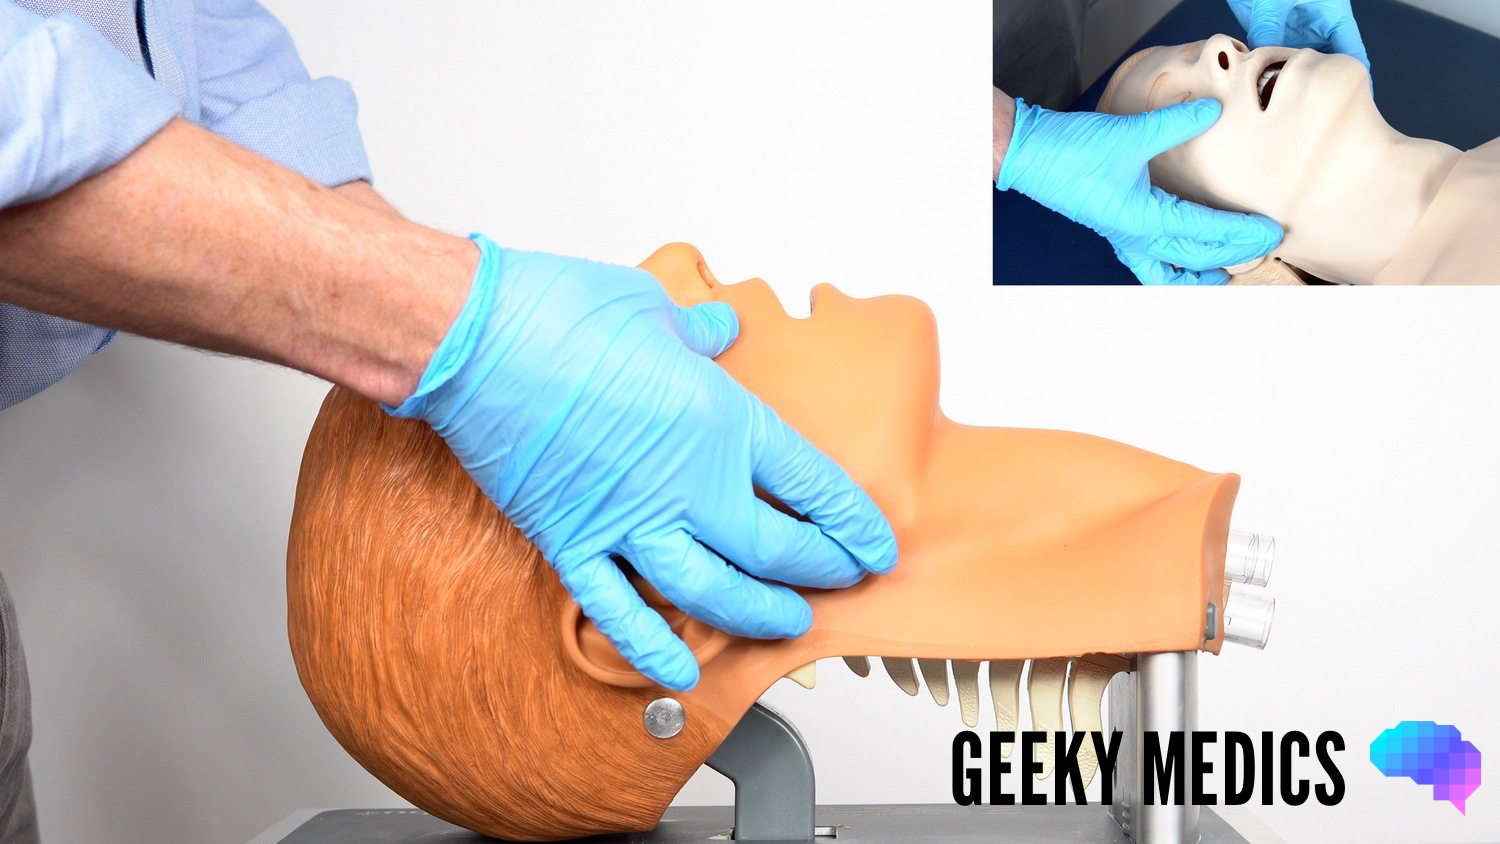
Jaw thrust
If the patient is suspected to have suffered significant trauma (with potential spinal involvement) perform a jaw-thrust rather than a head-tilt chin-lift manoeuvre:
1. Identify the angle of the mandible.
2. With the index and other fingers placed behind the angle of the mandible, apply steady upwards and forward pressure to lift the mandible.
3. Using the thumbs, slightly open the mouth by downward displacement of the chin.
Carotid pulse check
Place two fingers over the carotid artery to assess for a pulse at the same time (you will likely need another person to help do this if you are trying to perform a jaw thrust).
Assess breathing
Look, listen and feel to assess if the patient is breathing for 10 seconds (ideally, you should expose the chest to assess breathing):
- Observe for the chest rising and falling.
- Listen for any evidence of breath sounds.
- Feel for air blowing against your cheek.
- Look for any other signs of life (e.g. movement).
Agonal breathing
If the patient has occasional, irregular gasps of breath, this does not qualify as a sign of life as it commonly occurs in cardiac arrest and is referred to as agonal breathing.
Recognising cardiac arrest
The ERC advises that CPR should be started in an unresponsive patient with absent or abnormal breathing or slow and laboured breathing (agonal breathing).
A short period of seizure activity can also occur at the beginning of cardiac arrest, and the patient’s breathing should be reassessed after the seizure has stopped. If unresponsive and with absent or abnormal breathing, CPR should be commenced. Bystanders are not required to formally check for signs of life if they are not trained to do so.
A pulse is present, but the respiratory rate is low
If the respiration rate is below 12 – assist ventilation with bag valve mask (BVM) to maintain 10 breaths/min (re-checking the pulse every minute to ensure it is still present).
You will likely need two people to perform effective ventilation with a BVM (one ensuring a good seal over the face and the other compressing the bag to deliver the oxygen).
The BVM should ideally be connected to high-flow oxygen as soon as possible.
Note: If not trained to detect a pulse or look for signs of life, start CPR in any unresponsive patient with slow and laboured breathing.
A pulse is present and the respiratory rate is acceptable
If you feel a pulse or evidence of genuine breathing, the patient would need urgent medical assessment (using an ABCDE approach) to stabilise them before further deterioration.
No signs of life
Call the resuscitation team (a.k.a. crash team)
If there are no signs of life, you need to call for help from the resuscitation team and commence CPR.
If more than one person is present, you can do these tasks simultaneously, however, if you are alone, you should leave the patient and get help first (as this will ensure the resuscitation team attend and can commence advanced life support).
In a hospital, calling for help involves calling 2222 to request urgent input from the resuscitation team. When calling 2222 it is important to clearly state your location (e.g. ward) and the type of cardiac arrest (e.g. adult or paediatric) as this will inform which team members attend.
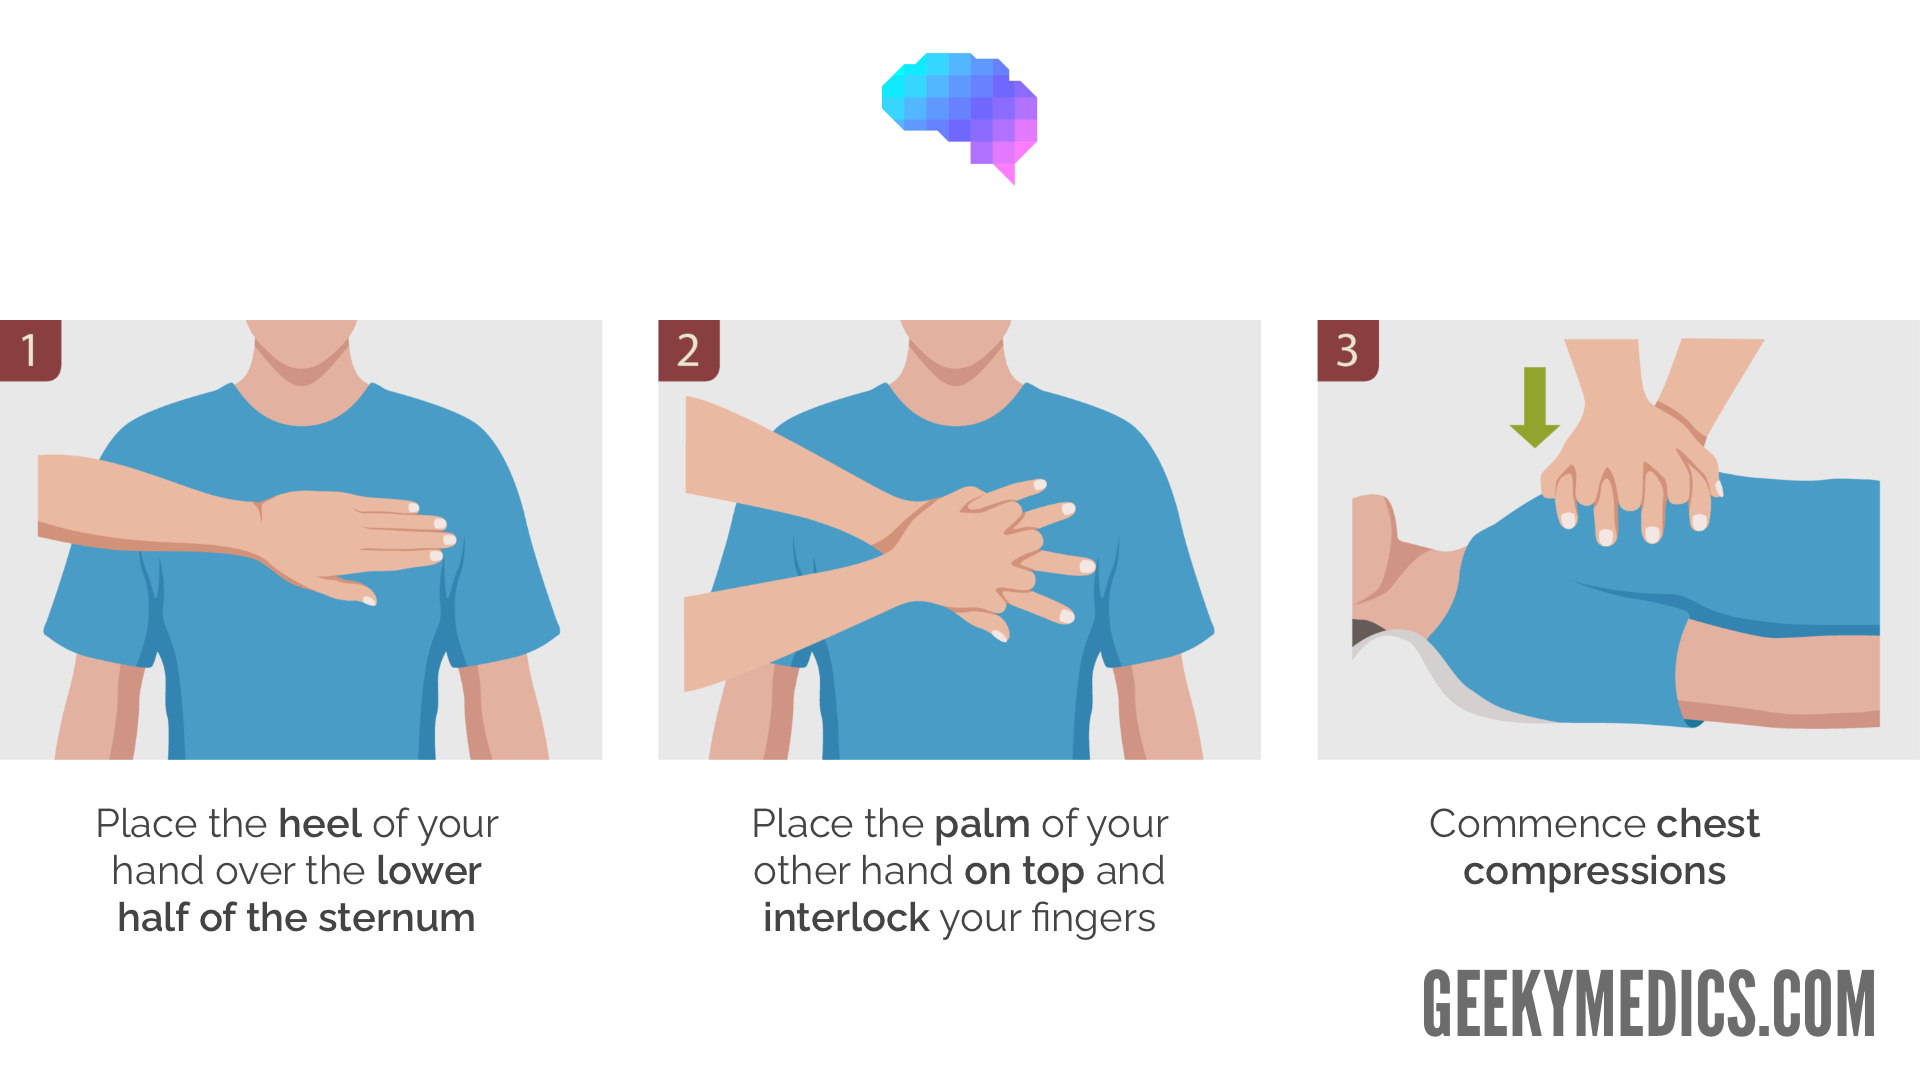
Perform chest compressions
The patient needs to be positioned on a flat, hard surface for effective compressions to be possible.
Deliver 30 chest compressions followed by 2 ventilations and repeat.
Place one hand on top of the other in the centre of the lower half of the sternum.
Aim to compress the chest by approximately one-third of the depth of the chest wall (5-6cm), as this allows for sufficient emptying of the cardiac ventricles.
Perform compressions at approximately 100-120 compressions per minute.
Make sure to allow the chest to fully recoil, this allows enough time for the heart’s chambers to refill before the next compression.
It is absolutely essential to minimise interruptions to chest compressions.
Alternate the person performing chest compressions at 2-minute intervals (if enough team members are present).
If tracheal intubation is performed, chest compressions should then be continued without any interruption at a rate of 100-120 a minute.
Ventilate the patient
Perform a head-tilt chin-lift manoeuvre to open the airway and allow effective ventilation.
Pinch the nostrils closed with your thumb and index finger.
Place your mouth tightly over the patient’s mouth (or use a pocket-mask or bag-valve-mask if available).
Deliver 2 breaths (with an inspiratory time of approximately 1 second) and watch for the patient’s chest rising (which confirms you are ventilating them).
Release the nostrils and observe for the patient’s chest falling as the air is exhaled.
You should then begin performing another 30 chest compressions.
Add supplemental oxygen as soon as you are able to.
Mouth-to-mouth ventilation
In clinical settings, mouth-to-mouth ventilation may not be performed due to concerns regarding infectious diseases or because airway equipment is available (e.g. pocket-mask, bag-mask or anaesthetic input for tracheal intubation).
If there are clinical reasons to avoid mouth-to-mouth ventilation, perform chest compressions until help and airway equipment arrives.
Defibrillation
Attach the AED
Once an automated external defibrillator (AED) arrives, it is import to attach the 2 self-adhesive pads immediately to the patient’s chest (as labelled):
- ADHESIVE PAD 1: the right of the sternum below the clavicle.
- ADHESIVE PAD 2: the mid-axillary line, with its long axis vertical and sufficiently lateral.
If the patient is hairy, you may need to shave the areas to allow adequate contact between the pads and the skin. Check for and remove any piercings as these can cause burns to the patient during defibrillation (doing this should not significantly delay defibrillation).
Turn on the AED
Turn on the AED and follow the audio-visual instructions:
- Typically the AED will ask you to pause chest compressions whilst it performs a rhythm check.
- It will then indicate if the rhythm is shockable or non-shockable and instruct you to deliver a shock if it is the former.
- If a shock needs to be delivered, ensure you and no one else is in contact with the patient and press the deliver shock button on the AED.
- Re-commence CPR after the shock is delivered and follow further instructions from the AED (which will typically involve another rhythm check in 2 minutes).
Advanced life support would be commenced once the resuscitation team arrives.
If signs of life are present or the patient responds to treatment
Arrange an urgent medical assessment
Call for urgent medical assessment which may be the same resuscitation team as for cardiac arrest, or a dedicated medical emergency team.
Assess ABCDE
Re-assess the patient using a structured ABCDE approach:
- Airway: ensure the airway is patent.
- Breathing: administer oxygen and monitor SpO2 using pulse oximetry.
- Circulation: record blood pressure, obtain venous access and attach ECG monitoring.
- Disability: assess AVPU/GCS and check the patient’s capillary blood glucose.
- Exposure: inspect for evidence of trauma or other pathology (e.g. rash or bleeding).
Handover
Prepare to hand over to the attending medical teams using an SBAR structure.
Reviewer
Dr Michael Hardman
Emergency medicine registrar
References
- Resuscitation Council (UK). Resuscitation Guidelines 2015. Authors: Carl Gwinnutt, Robin Davies, Jasmeet Soar. Accessed August 15th 2018. Available from: [LINK].
