

- 📖 Geeky Medics OSCE Book
- ⚡ Geeky Medics Bundles
- ✨ 1300+ OSCE Stations
- ✅ OSCE Checklist PDF Booklet
- 🧠 UKMLA AKT Question Bank
- 💊 PSA Question Bank
- 💉 Clinical Skills App
- 🗂️ Flashcard Collections | OSCE, Medicine, Surgery, Anatomy
- 💬 SCA Cases for MRCGP
To be the first to know about our latest videos subscribe to our YouTube channel 🙌
As a junior doctor, you will spend a lot of time writing out history and examination findings, so getting to grips with the basics of documentation is essential. This guide will help you decipher all the symbols, diagrams and shorthand you’re likely to come across when reading patients notes, and should hopefully provide you with a structure to effectively start clerking.
Documentation basics
What should I use to write with?
You need to use a pen with black ink, as this is the most legible if notes are photocopied.
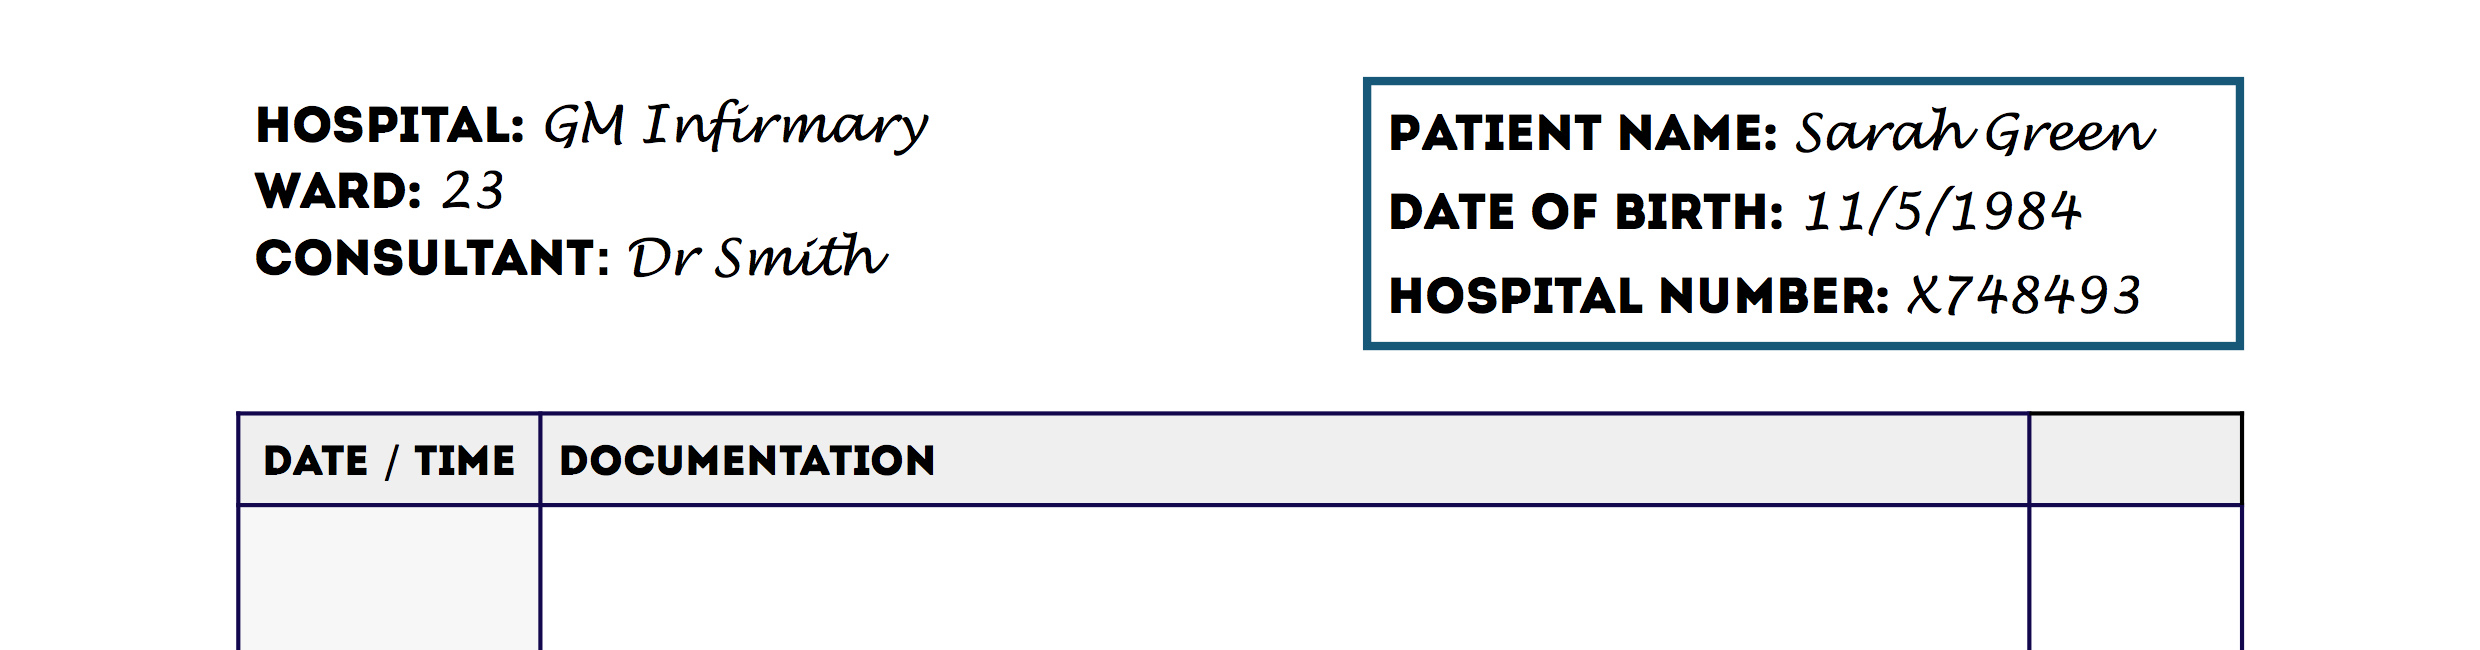
Patient details
For every new sheet of paper your first task should be to document at least three key identifiers for the relevant patient:
- Full name
- Date of birth
- Unique patient identifier
- Home address
If a patient label containing at least three identifiers is available, then this can be used instead of writing out the information manually.
Location details
You should indicate the patient’s current location on the continuation sheet:
- Hospital
- Ward
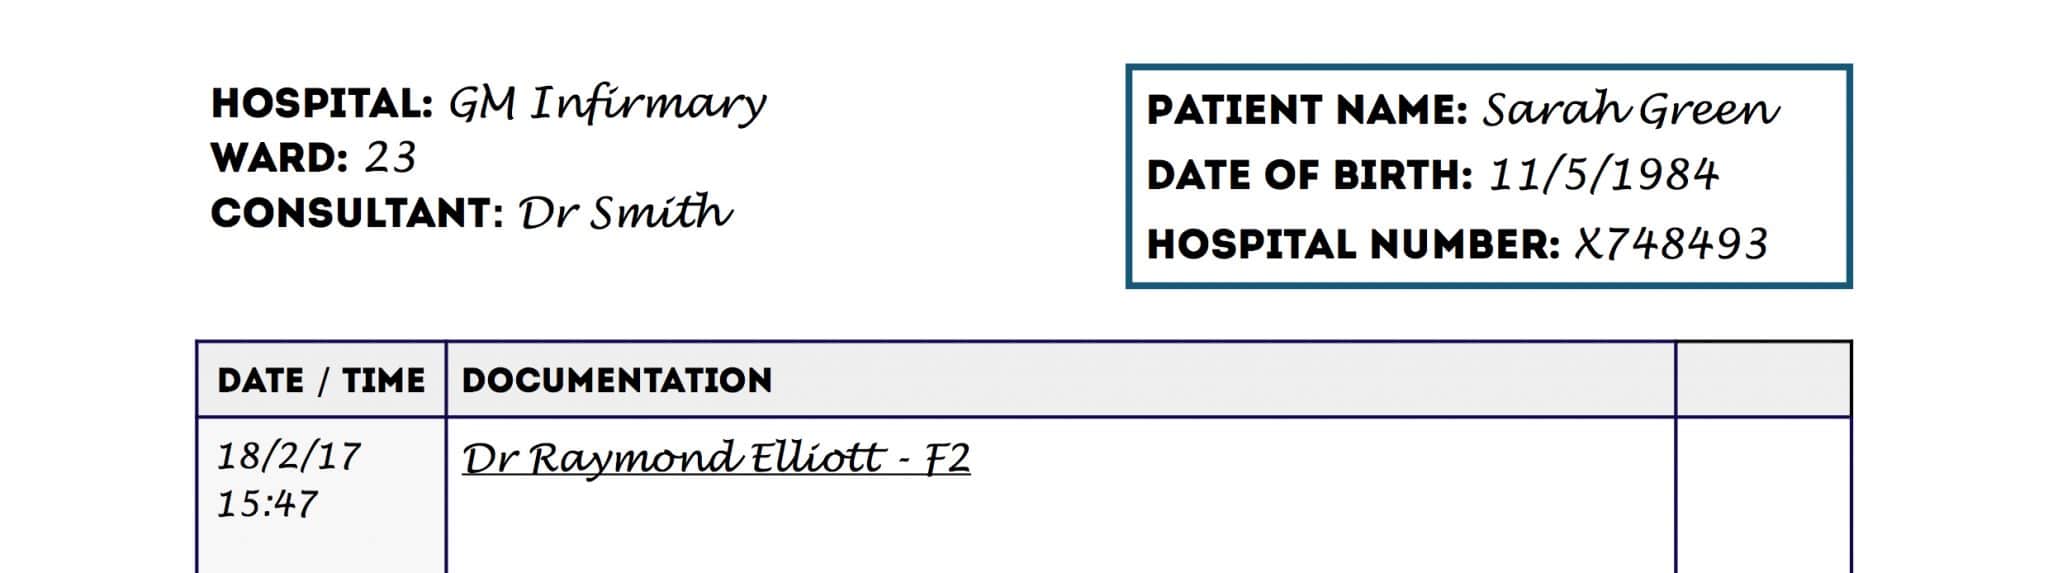
Beginning your entry in the notes
At this point, you should already be holding a pen with black ink and you should have ensured the continuation sheet has at least three key patient identifiers at the top.
The next documentation steps include:
1. Adding the date and time (in 24-hour format) of your entry.
2. Writing your name and role as an underlined heading.
3. Adding your entry in the notes below this heading (see the next section for details).
Documenting the history
When documenting a history, it’s important to apply a structured approach. Some people document a patient’s history as they take it, whereas others may summarise after they’ve spoken with a patient. If the sections of your documented history are in a different order to what is advised below, it doesn’t matter too much, just make sure you have clear headings so they’re easy to spot. Some people also find it easier to write out all the headings before they start – but you need to make sure you give yourself enough room to include all the relevant details.
Presenting complaint (PC)
The presenting complaint should be a few words describing the specific issue the patient has presented with (e.g. “chest pain”).
Make this short and to the point, there is space in the next section to expand further.
History of presenting complaint (HPC)
This section allows you to expand on the presenting complaint.
If the symptom is some kind of pain you might use the SOCRATES structure to gather more details about it:
- Site: clarify the location of the pain (e.g. central chest).
- Onset: determine if the pain has come on suddenly or gradually.
- Character: assess the type of pain (e.g. burning, sharp or aching in nature).
- Radiation: ask if the pain moves anywhere else (e.g. radiation to the arm from the chest in myocardial infarction).
- Associated symptoms: ask about other symptoms which are associated with the pain (e.g. fever, shortness of breath)
- Time course: clarify the duration of the pain (e.g. hours, days, weeks or months).
- Exacerbating/relieving factors: ask if anything makes the pain better or worse.
- Severity: assess the patient’s subjective experience of the pain’s severity on a scale of 0-10.
Past medical and surgical history (PMH)
The past medical and surgical history section is where you document any medical conditions the patient is known to have, any significant hospital admissions and any surgical history (e.g. operations/procedures).
Drug history (DHx)
This drug history section is where you document:
- Medications the patient is currently prescribed
- Medications the patient is buying over the counter (often referred to as ‘OTC’)
- Drug allergies
- Any compliance issues (e.g. if the patient is prescribed something but actually has chosen not to take it)
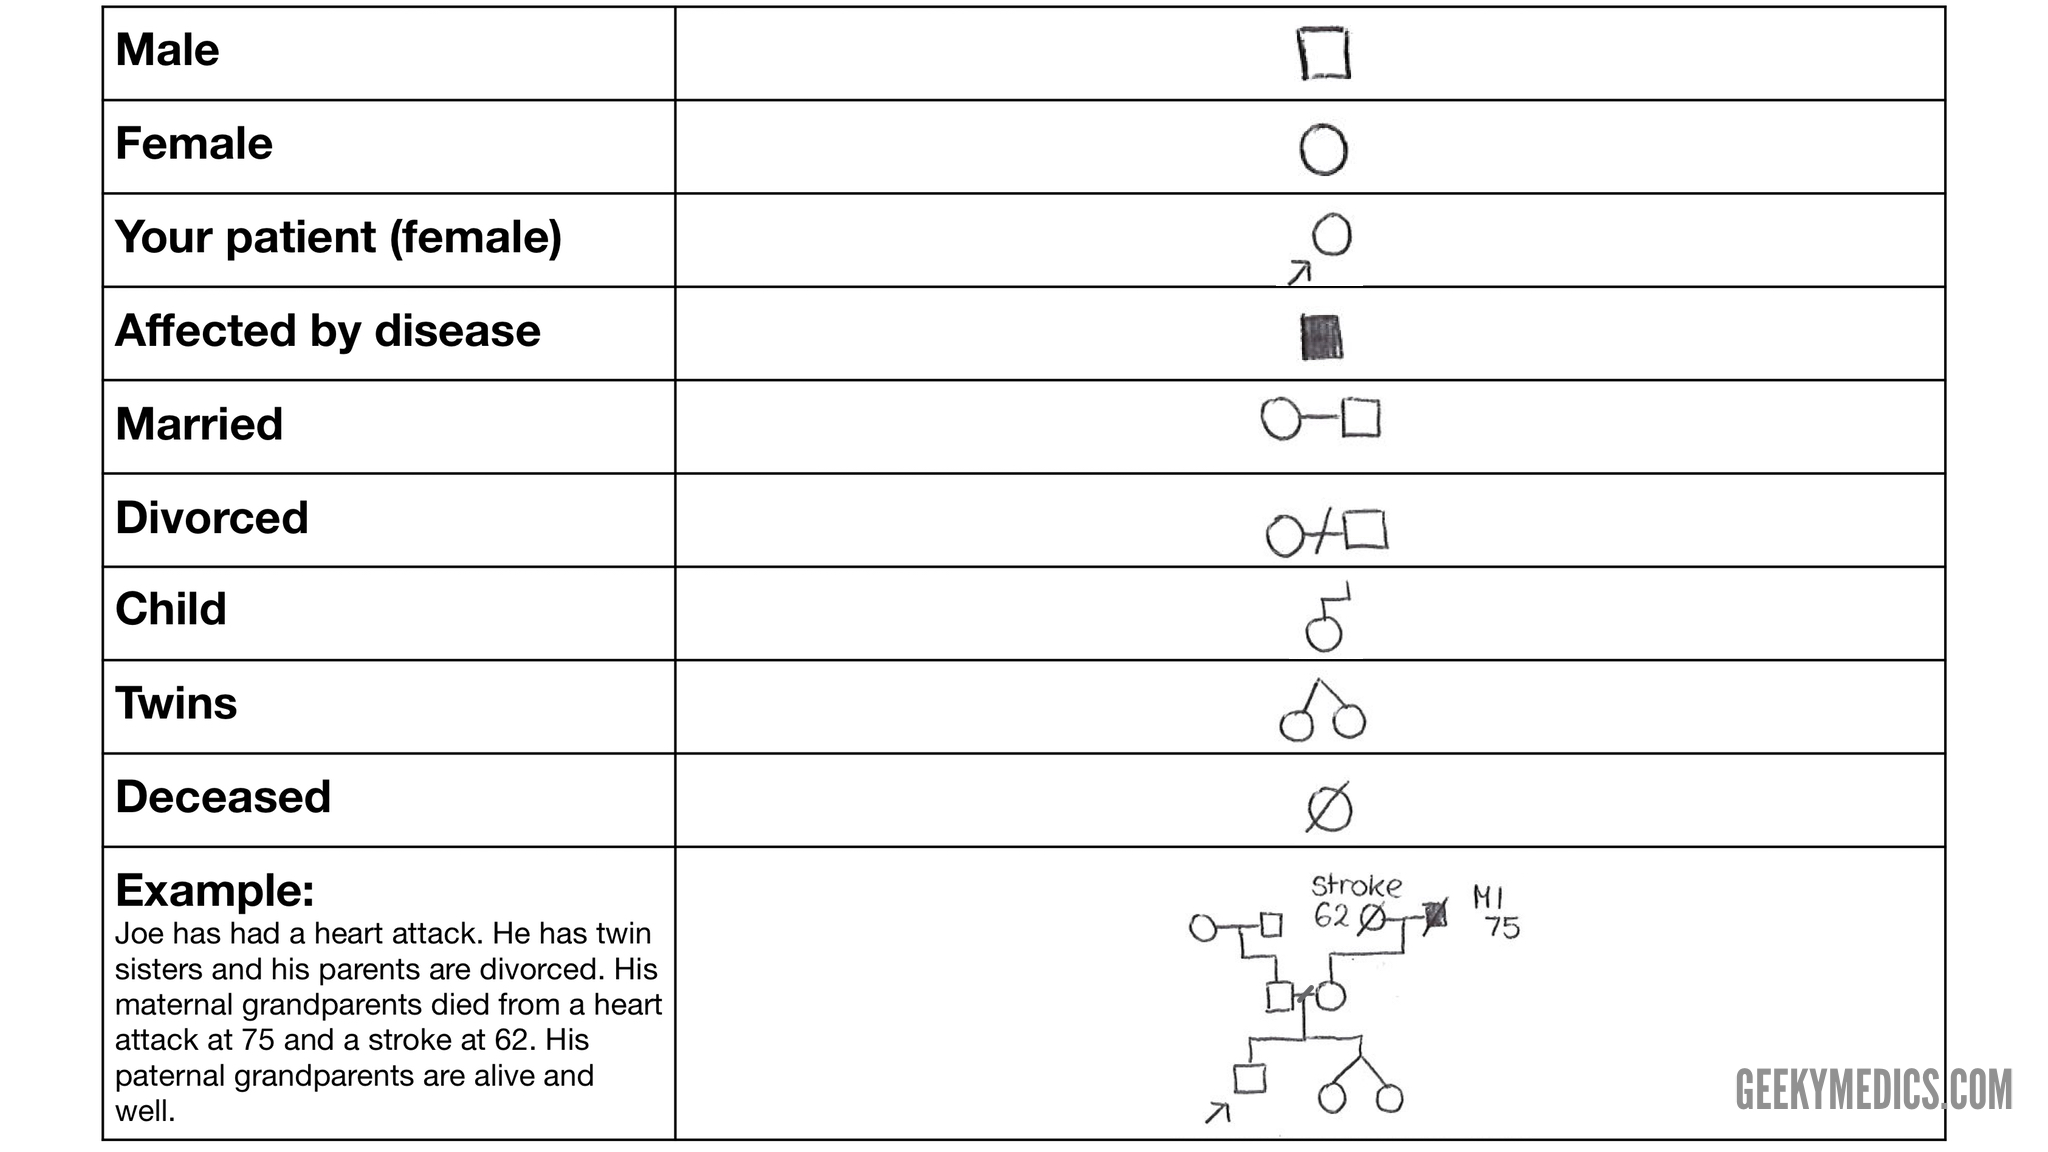
Family history (FHx)
The family history section is where you document any diseases that run in a patient’s family (generally the focus should be on first-degree relatives).
Drawing out a family tree can be useful to identify patterns of inheritance if the disease is genetic (see below).
Social history (SHx)
The social history section is where you document the various social aspects of the patient’s life that may be relevant to their condition (e.g. health risk factors) and their safety at home.
Topics can include:
- Who the patient lives with
- Details of the patients home (e.g. whether they have stairs)
- Smoking history
- Alcohol history
- Recreational drug use
- Occupation
Systems review (SR)
A systems review involves screening for symptoms in other body systems which may or may not relate to their presenting complaint. It may be useful to start at the top of the body and move down, or you may have your own structure, do whatever works best for you.
History abbreviations
You’re probably thinking – all this writing is going to take forever, there must be a better way. Some common abbreviations will help, but in general, you just get quicker at writing (this may be why doctors have such terrible handwriting…).
There are a lot of abbreviations, but there will always be some variation, especially with acronyms. To be as clear as possible, always write it out in full the first time with the acronym in brackets.
History sections
- PC = Presenting complaint
- HPC = History of presenting complaint
- PMHx = Past medical history
- SR = Systems review
- DHx = Drug history
- FHx = Family history
- SHx = Social history
Time abbreviations
- Number of days = number of days/7 – (e.g. 3/7 = 3 days)
- Number of weeks = number of weeks/52 – (e.g. 4/52 = 4 weeks)
- Number of hours = Xº – (e.g. 8º = 8 hours)
Medication abbreviations
Common abbreviations used for medications
- OD = Once daily
- BD = Twice daily
- TDS = Three times daily
- QDS = Four times daily
- PRN = As required
- SC = Subcutaneous
- IM = Intramuscular
- IV = Intravenous
Family tree symbols
Symbols commonly used when drawing a family tree are shown below.
Documenting the clinical examination
On examination (O/E)
Start by documenting your general inspection (e.g. “The patient was laid on the bed and appeared to be in significant pain”).
Observations (Obs/Vitals)
This is where you document the patient’s current observations/vital signs (e.g. BP/Pulse/Respiratory rate/Oxygen saturation/Temperature).
Fluid balance
If the patient’s fluid balance is being monitored write down the input (drinking/IV/NG) and output (urine/stools/drains) that has been measured.
Focused clinical examination findings
Here you can document the focused system examinations you have performed, with the associated findings.
Examples of focused system examinations include:
- Cardiovascular examination (CVS)
- Respiratory examination (Resp)
- Gastrointestinal examination (G.I.)
- Neurological examination (Neuro)
Examination abbreviations
Some common abbreviations used when documenting clinical examination include:
- O/E = On examination
- BP = Blood pressure
- RR = Respiratory rate
- Sats = Oxygen saturation
- RA = Room air (when placed next to oxygen saturation)
- I + II + 0 = Heart sounds 1 and 2 heard, with no added sounds
- II + II + I = Heart sounds 1 and 2 heard, with an additional sound (e.g. murmur)
- BS = Bowel sounds
- RUL/LUL = Right upper limb/Left upper limb
- RLL/LLL = Right lower limb/Left lower limb
- CN = Cranial nerve (usually followed by a number e.g. CN 1)
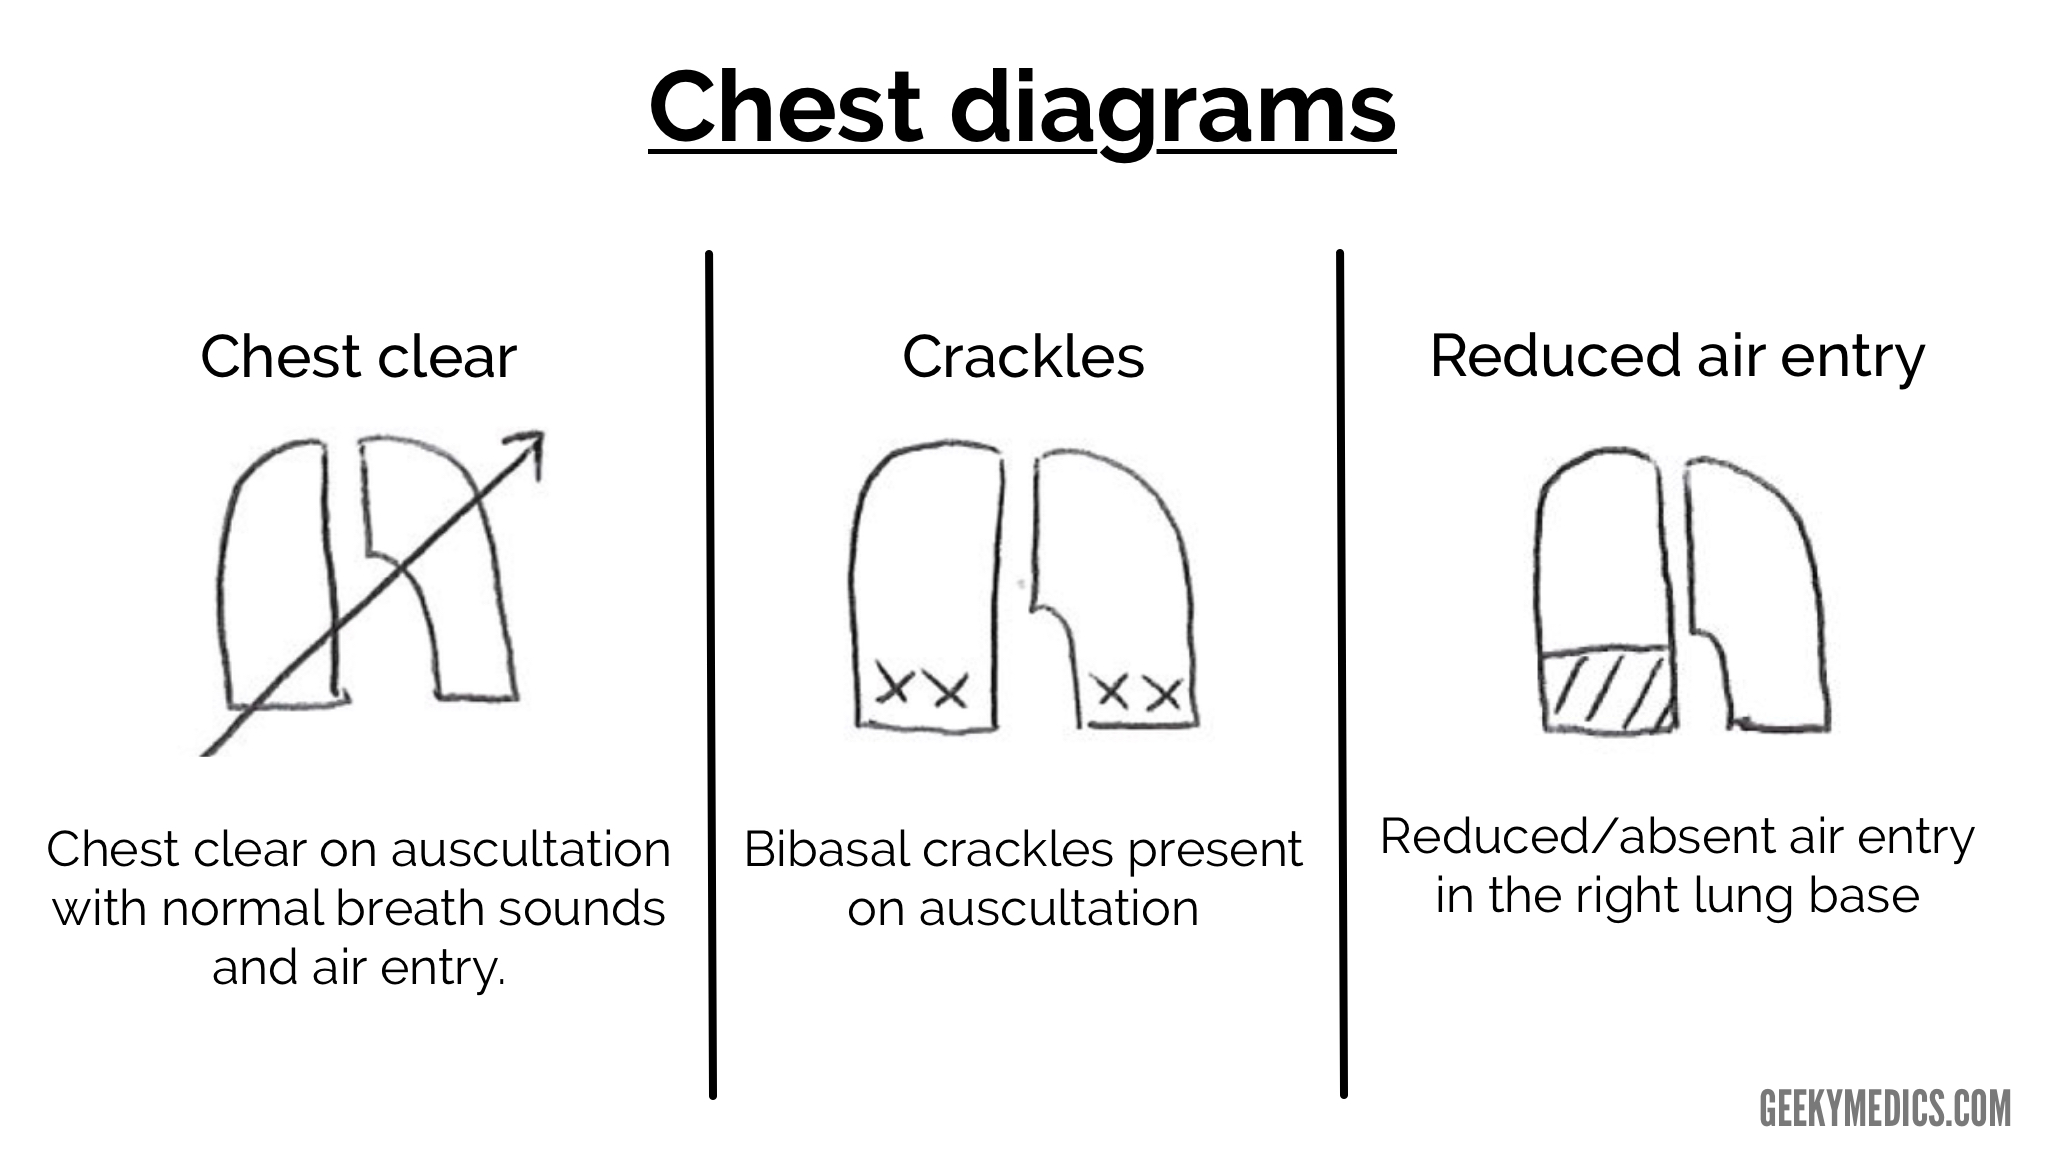
Examination diagrams
Below are some common diagrams used when documenting clinical examination. You should avoid relying purely on diagrams to document your findings as these can be sometimes misinterpreted. Ideally, you should write out your findings beside a diagram to avoid misinterpretation. If you can’t draw something, then don’t, it’s much better to describe your findings in writing if this is the case.
Chest diagrams
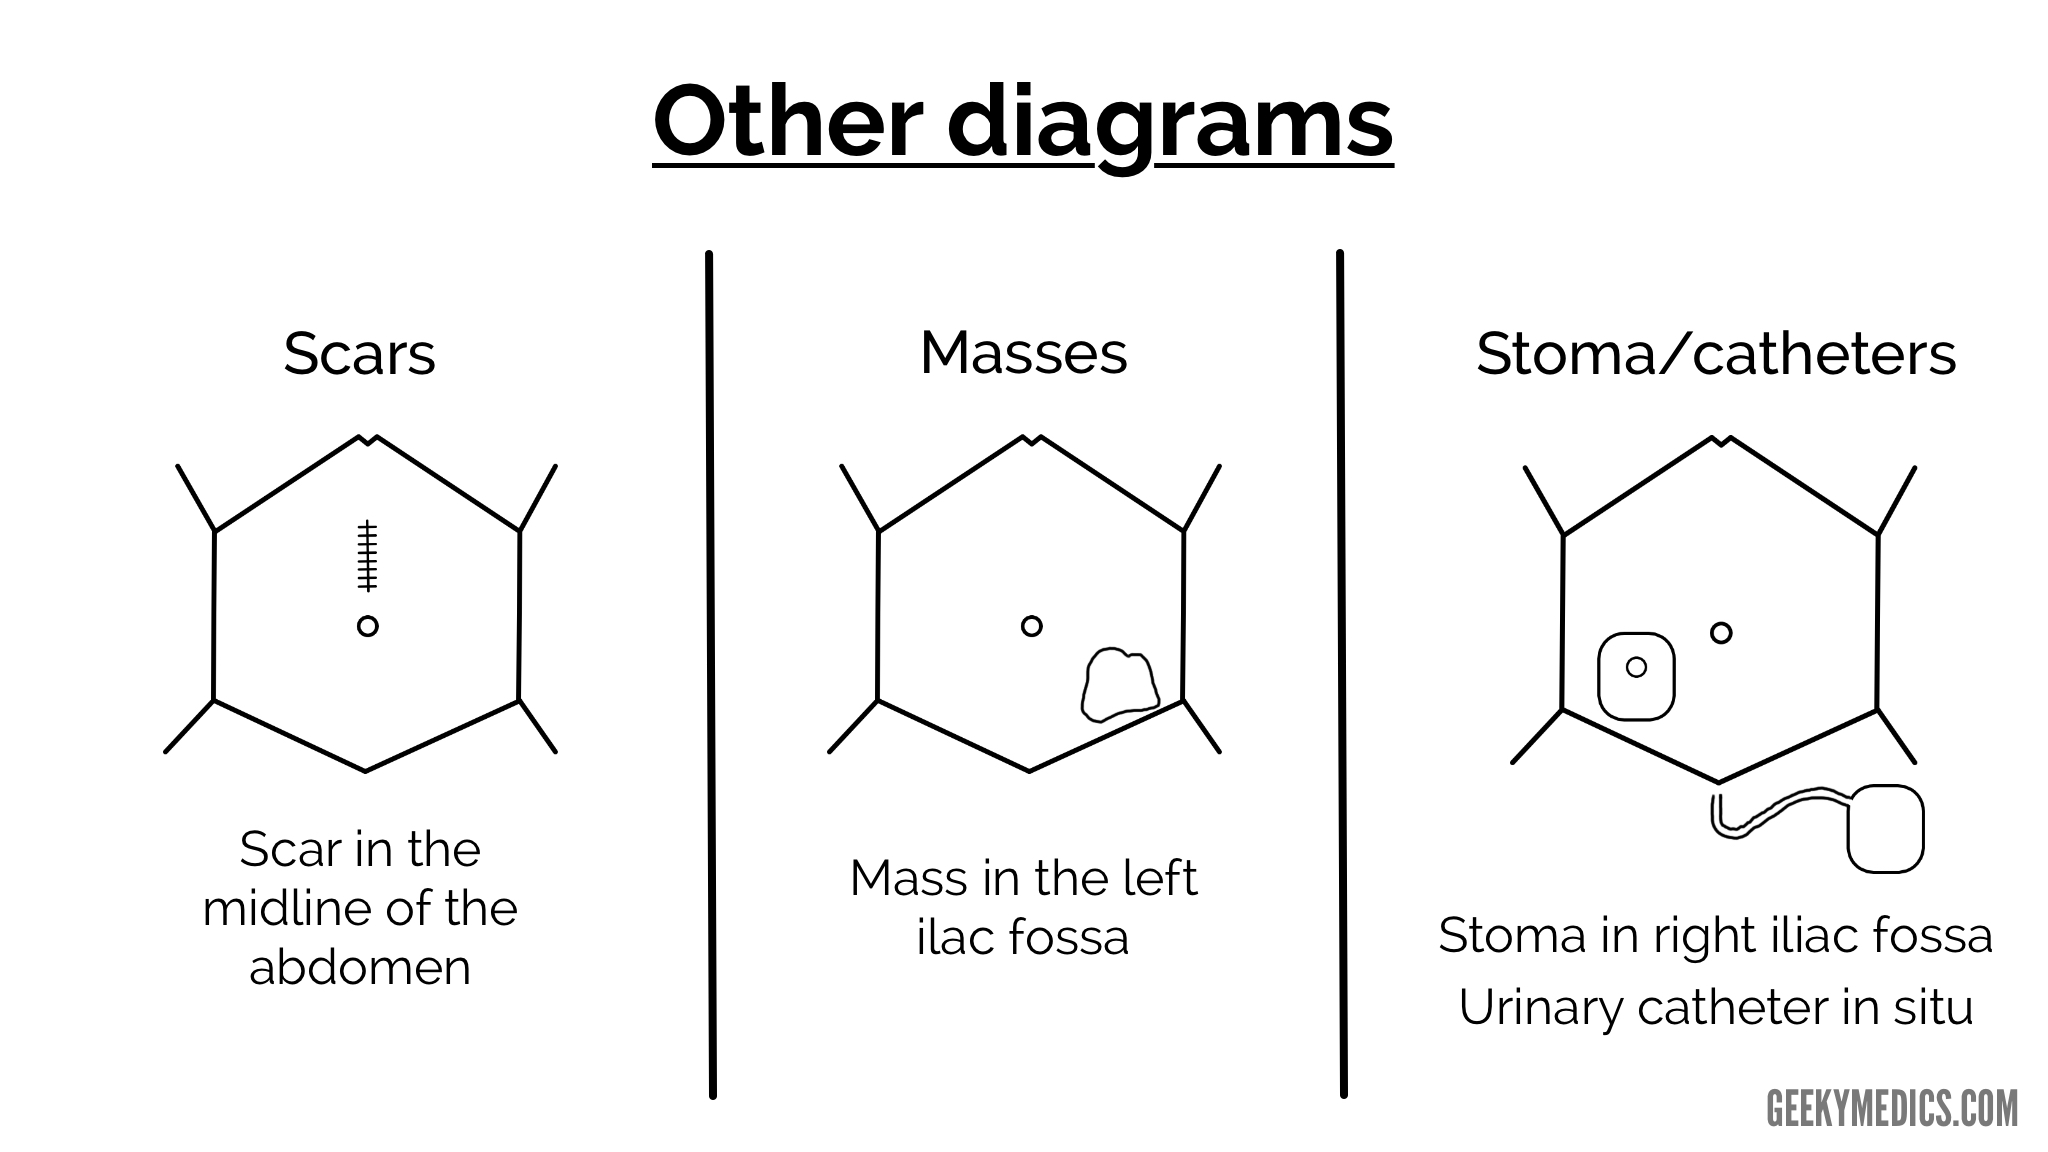
Abdominal diagrams
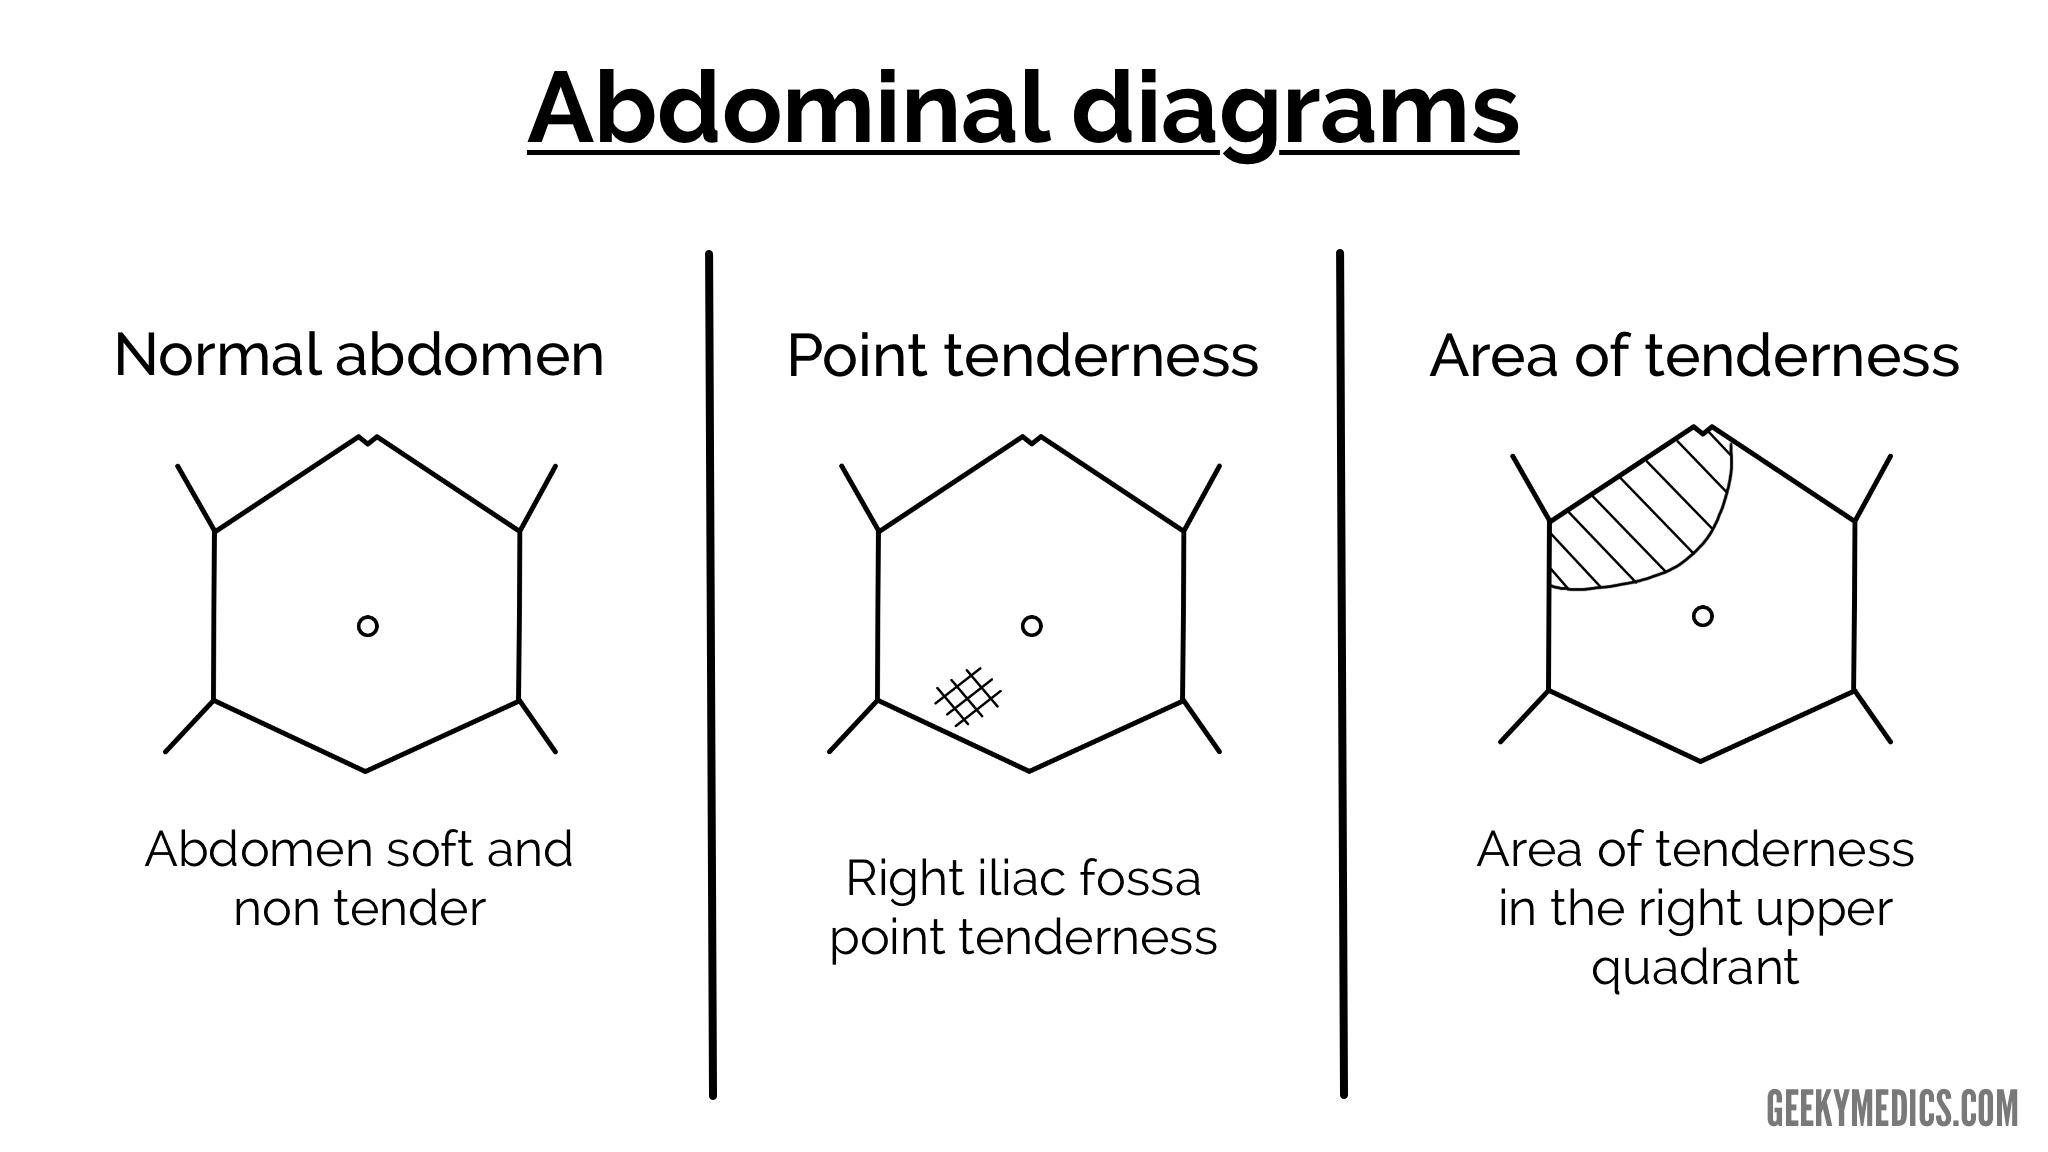
Documenting the diagnosis/differential diagnosis
In this section of the clerking, you need to document a diagnosis or suggest a differential diagnosis.
Most of the time when you clerk a patient you won’t have a confirmed diagnosis and therefore you’ll need to document some possible differential diagnoses.
The symbol for a diagnosis is a singular triangle.
The symbol for differential diagnosis is two triangles next to each other.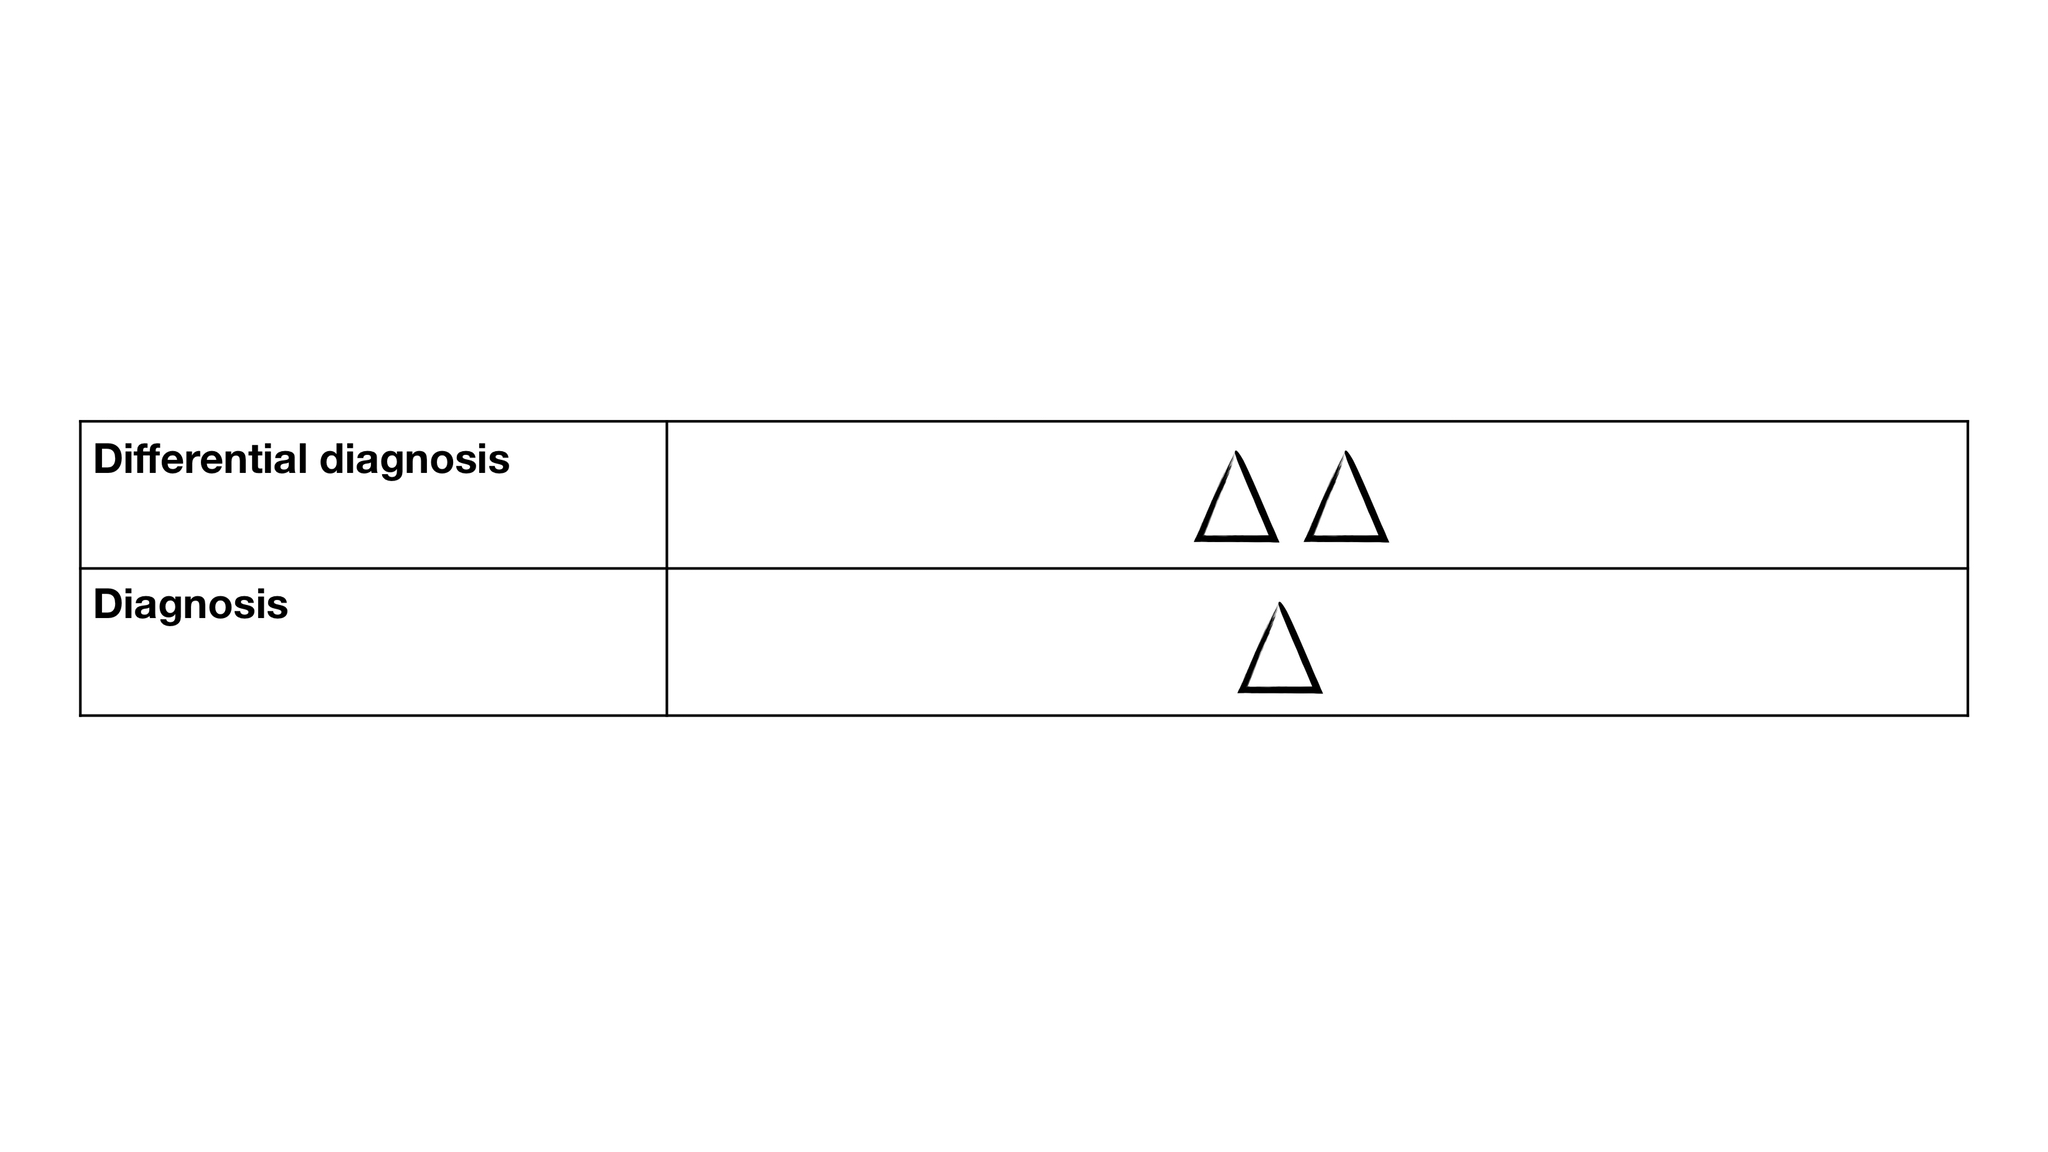
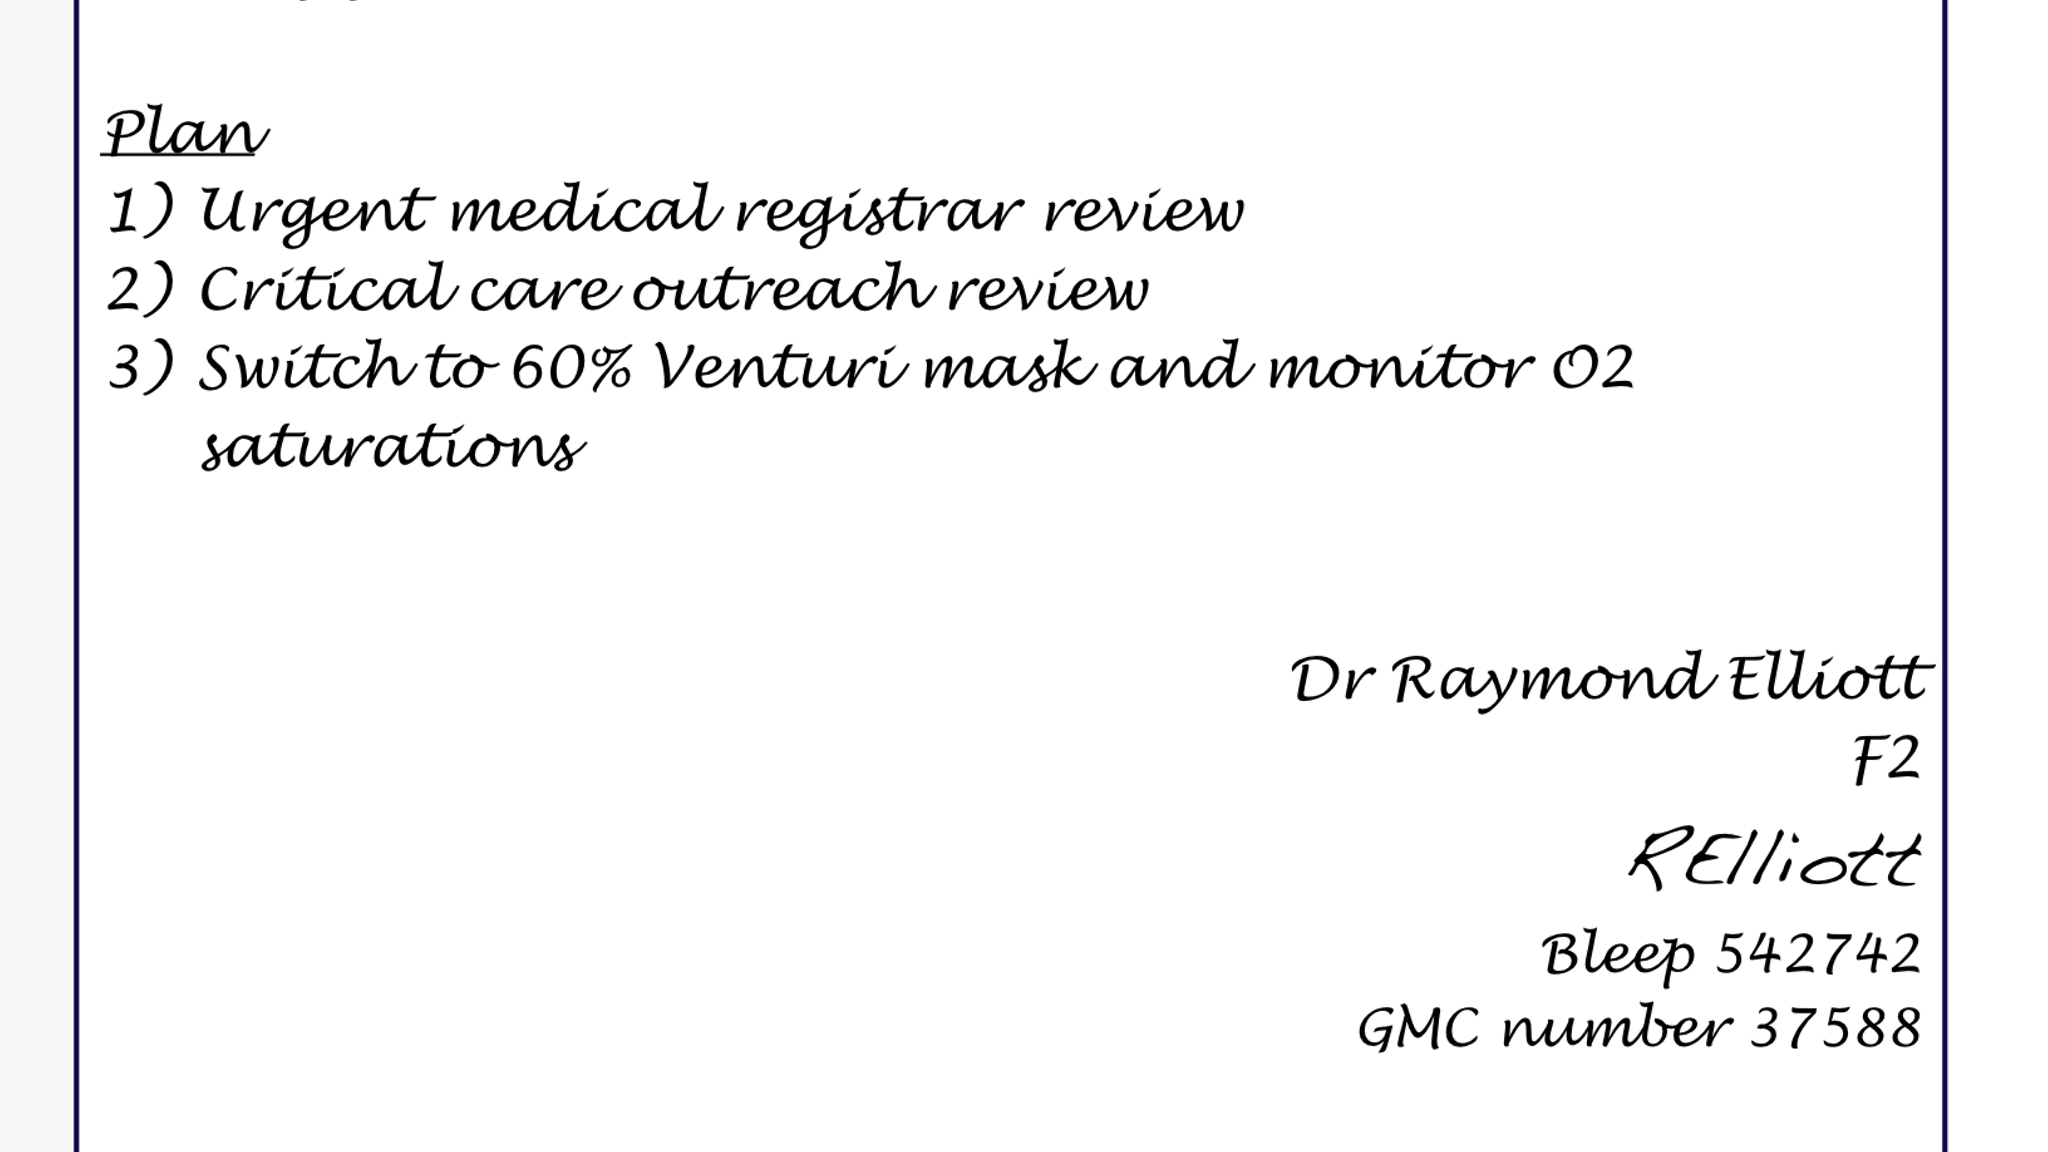
Documenting the management plan
In this section, you need to document your plan in the form of a list.
This makes it clear to others reading the notes which investigations are underway and what interventions are planned.

Completing the entry in the notes
At the end of your entry to need to include the following:
- Your full name
- Your grade/role (e.g. Medical student/F2/Respiratory Registrar)
- Your signature
- Your professional registration number (e.g. GMC number)
- Your contact number (e.g. phone/bleep)
References
- Royal College of Physicians. General medical record-keeping standards. Available from: [LINK].
