- 📖 Geeky Medics OSCE Book
- ⚡ Geeky Medics Bundles
- ✨ 1300+ OSCE Stations
- ✅ OSCE Checklist PDF Booklet
- 🧠 UKMLA AKT Question Bank
- 💊 PSA Question Bank
- 💉 Clinical Skills App
- 🗂️ Flashcard Collections | OSCE, Medicine, Surgery, Anatomy
- 💬 SCA Cases for MRCGP
To be the first to know about our latest videos subscribe to our YouTube channel 🙌
Lower limb neurological examination frequently appears in OSCEs and you’ll be expected to identify the relevant clinical signs using your examination skills. This lower limb neurological examination OSCE guide provides a clear step-by-step approach to examining the neurology of the lower limbs, with an included video demonstration.
Upper vs lower motor neuron lesions
The main purpose of a neurological examination is to localise where in the nervous system the problem is. This can seem daunting, but with practice, it is relatively straightforward. The most basic localisation question you have to think about during the upper and lower limb examination is:
- Is there an upper (i.e. brain or spinal cord) or lower (i.e. nerve roots, peripheral nerve, neuromuscular junction or muscle) motor neuron lesion?
The table below provides a summary of key upper motor neuron (UMN) and lower motor neuron (LMN) signs you may identify in a lower limb neurological examination.
| UMN signs | LMN signs | |
| Inspection | No fasciculation or significant wasting (there may however be some disuse atrophy or contractures) | Wasting and fasciculation of muscles |
| Tone | Increased (spasticity or rigidity) +/- ankle clonus | Decreased (hypotonia) or normal |
| Power | Classically a “pyramidal” pattern of weakness (extensors weaker than flexors in arms, and vice versa in legs) | Different patterns of weakness, depending on the cause (e.g. classically a proximal weakness in muscle disease, a distal weakness in peripheral neuropathy) |
| Reflexes | Exaggerated or brisk (hyperreflexia) | Reduced or absent (hyporeflexia or areflexia) |
| Plantar reflexes | Upgoing/extensor (Babinski positive) | Normal (downgoing/flexor) or mute (i.e. no movement) |
Gather equipment
Gather the appropriate equipment:
- Tendon hammer
- Neurotip
- Cotton wool
- Tuning fork (128Hz)
Introduction
Wash your hands and don PPE if appropriate.
Introduce yourself to the patient including your name and role.
Confirm the patient’s name and date of birth.
Briefly explain what the examination will involve using patient-friendly language.
Gain consent to proceed with the examination.
Adequately expose the patient’s legs (typically this involves the patient wearing only their underwear) and provide a blanket to cover the patient when not being examined.
Position the patient appropriately on an examination couch (typically with the headrest elevated to 30-45°).
Ask the patient if they have any pain before proceeding with the clinical examination.
General inspection
Clinical signs
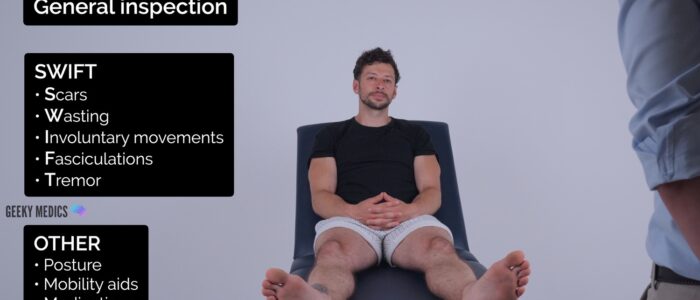
Perform a brief general inspection of the patient, looking for clinical signs suggestive of underlying pathology:
- Scars: may provide clues regarding previous spinal or lower limb surgery.
- Wasting of muscles: suggestive of lower motor neuron lesions or disuse atrophy.
- Tremor: there are several subtypes including resting tremor and intention tremor.
- Fasciculations: small, local, involuntary muscle contraction and relaxation which may be visible under the skin. Associated with lower motor neuron pathology (e.g. amyotrophic lateral sclerosis).
- Pseudoathetosis: abnormal writhing movements (typically affecting the fingers) caused by a failure of proprioception.
- Chorea: brief, semi-directed, irregular movements that are not repetitive or rhythmic but appear to flow from one muscle to the next. Patients with Huntington’s disease typically present with chorea.
- Myoclonus: brief, involuntary, irregular twitching of a muscle or group of muscles. All individuals experience benign myoclonus on occasion (e.g. whilst falling asleep) however persistent widespread myoclonus is associated with several specific forms of epilepsy (e.g. juvenile myoclonic epilepsy).
- Tardive dyskinesia: involuntary, repetitive body movements which can include protrusion of the tongue, lip-smacking and grimacing. This condition can develop secondary to treatment with neuroleptic medications including antipsychotics and antiemetics.
- Hypomimia: a reduced degree of facial expression associated with Parkinson’s disease.
- Ptosis and frontal balding: typically associated with myotonic dystrophy.
- Ophthalmoplegia: weakness or paralysis of one or more extraocular muscles responsible for eye movements. Ophthalmoplegia can be caused by a wide range of neurological disorders including multiple sclerosis and myasthenia gravis.
Objects or equipment
Look for objects or equipment on or around the patient that may provide useful insights into their medical history and current clinical status:
- Walking aids: the ability to walk can be impacted by a wide range of neurological pathology.
- Prescriptions: prescribing charts or personal prescriptions can provide useful information about the patient’s recent medications.
Gait
Assess the patient’s gait
Patients with neurological disease are often at an increased risk of falls so make sure to remain close to the patient during the assessment so that you are able to intervene if required.
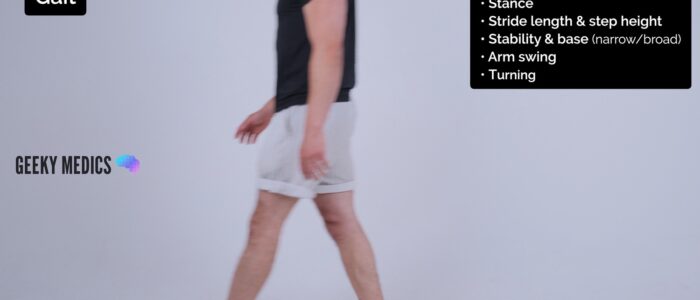
Ask the patient to walk to the end of the examination room and then turn and walk back whilst you observe their gait paying attention to:
- Stance: observe the patient’s posture for asymmetries which may indicate weakness, abnormalities of proprioception or cerebellar pathology.
- Base: a broad-based ataxic gait is typically associated with midline cerebellar pathology (e.g. a lesion in multiple sclerosis or degeneration of the cerebellar vermis secondary to chronic alcohol excess).
- Stability: a staggering, slow and unsteady gait is typical of cerebellar pathology. In unilateral cerebellar disease, patients will veer towards the side of the lesion.
- Arm swing: often absent or reduced in Parkinson’s disease (typically unilateral initially).
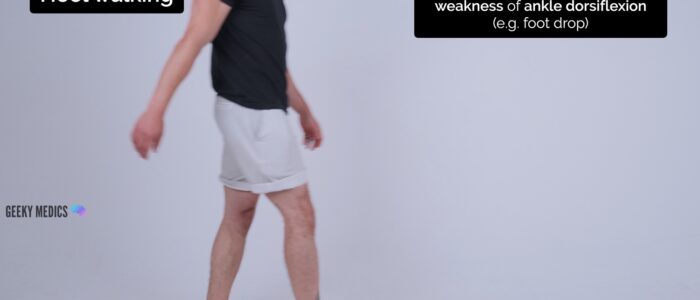
- Stride length and step height: small, shuffling steps are characteristic of Parkinson’s disease. High-stepping may indicate the presence of foot drop.
- Turning: patients with cerebellar disease will find the turning manoeuvre particularly difficult.
Tandem (‘heel-to-toe’) gait
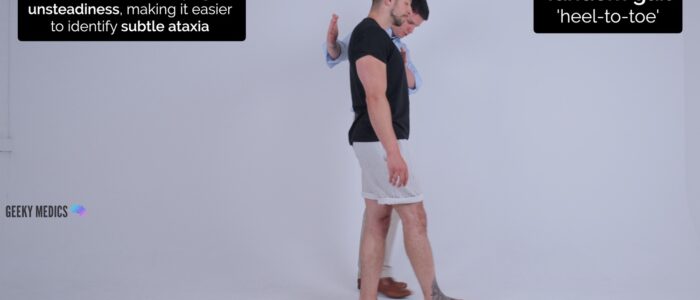
Ask the patient to walk to the end of the examination room and back with their heels to their toes (known as ‘tandem gait’). Heel-to-toe walking exacerbates underlying unsteadiness making it easier to identify more subtle ataxia.
Tandem gait is particularly sensitive at identifying dysfunction of the cerebellar vermis (e.g. alcohol-induced cerebellar degeneration). Difficulties with heel-to-toe walking may also suggest weakness of the flexors muscles of the leg or sensory ataxia.
Gait abnormalities
- Ataxic gait: broad-based, unsteady and associated with either cerebellar pathology or sensory ataxia (e.g. vestibular or proprioceptive dysfunction). In the context of proprioceptive sensory ataxia, patients typically watch their feet intently to compensate for the proprioceptive loss. If a cerebellar lesion is present the patient may veer to the side of the lesion.
- Parkinsonian gait: small, shuffling steps, stooped posture and reduced arm swing (initially unilateral). The patient will require several small steps to turn around. The gait appears rushed (festinating) and may get stuck (freeze). Hand tremor may also be noticeable.
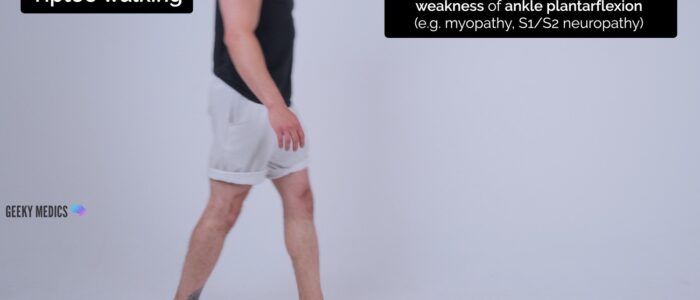
- High-stepping gait: can be unilateral or bilateral and is typically caused by foot drop (weakness of ankle dorsiflexion). The patient also won’t be able to walk on their heel(s).
- Waddling gait: shoulders sway from side to side, legs lifted off ground with the aid of tilting the trunk. Waddling gait is commonly caused by proximal lower limb weakness (e.g. myopathy).
- Hemiparetic gait: one leg held stiffly and swings round in an arc with each stride (circumduction). This type of gait is commonly associated with individuals who have had a stroke.
- Spastic paraparesis: similar to hemiparetic gait but bilateral, with both legs stiff and circumducting. The patient’s feet may be inverted and “scissor”. This type of gait is typically associated with hereditary spastic paraplegia.
Romberg’s test
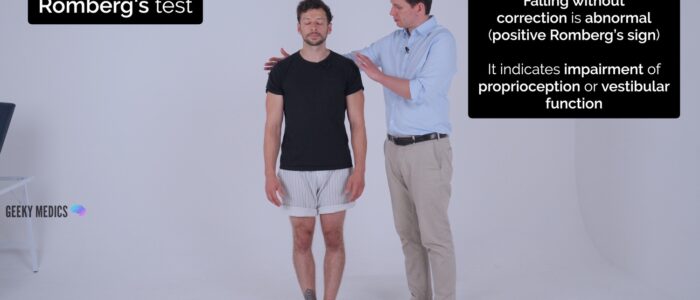
Romberg’s test is used to assess for loss of proprioceptive or vestibular function (known as sensory ataxia). The test does not assess cerebellar function and instead is used to quickly screen for evidence of sensory ataxia (i.e. non-cerebellar causes of balance issues).
Romberg’s test is based on the premise that a patient requires at least two of the following three senses to maintain balance whilst standing:
- Proprioception: the awareness of one’s body position in space.
- Vestibular function: the ability to know one’s head position in space.
- Vision: the ability to see one’s position in space.
Romberg’s test involves removing the sense of vision by asking the patient to close their eyes. As a result, if the patient has a deficit in proprioception or vestibular function they will struggle to remain standing without visual input.
Assessment
1. Position yourself within arms reach of the patient to allow you to intervene should they begin to fall.
2. Ask the patient to put their feet together and keep their arms by their sides (be aware that patients with truncal ataxia may struggle to do this, however, this type of unsteadiness is not the same as a positive Romberg’s sign).
3. Ask the patient to close their eyes.
Interpretation
Falling without correction is abnormal and referred to as a positive Romberg’s sign. This indicates unsteadiness is due to sensory ataxia (i.e. a deficit of proprioceptive or vestibular function, rather than cerebellar function). Causes of proprioceptive dysfunction include joint hypermobility (e.g. Ehlers-Danlos syndrome), B12 deficiency, Parkinson’s disease and ageing (known as presbypropria). Causes of vestibular dysfunction include vestibular neuronitis and Ménière’s disease.
Swaying with correction is not a positive result and often occurs in cerebellar disease due to truncal ataxia.
Tone
Leg roll and leg lift
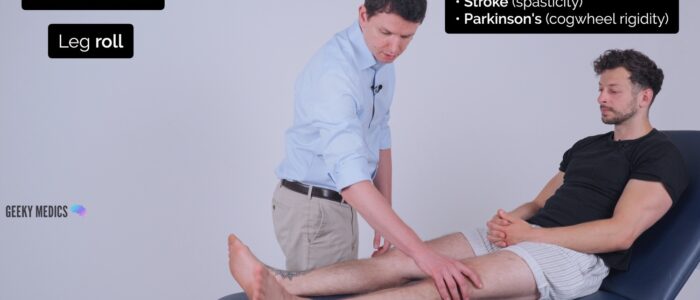
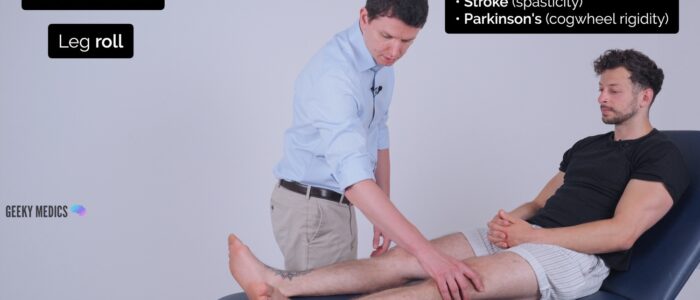
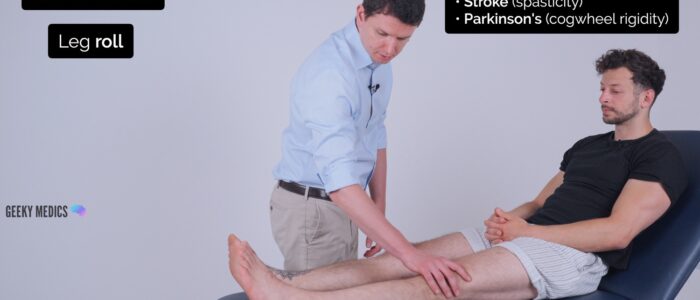
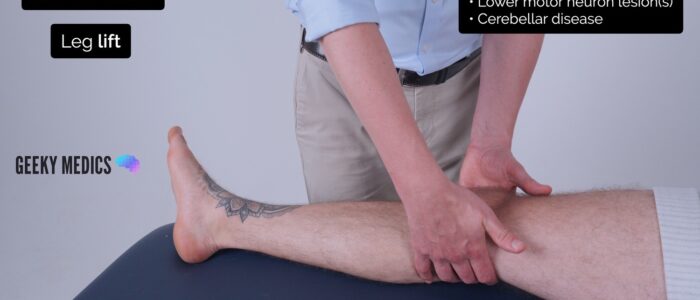
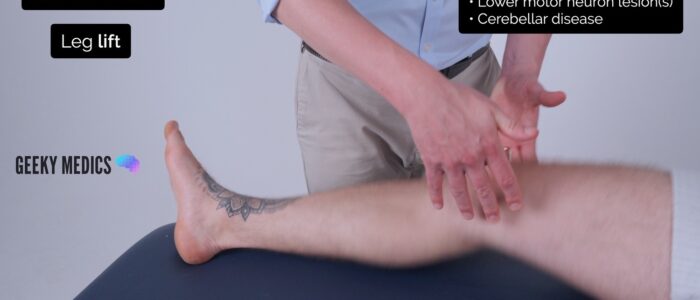
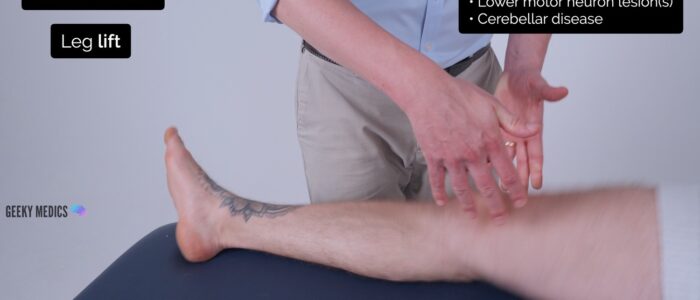
Briefly assess tone in the muscle groups of the hip, knee and ankle on each leg, comparing each side as you go. Ask the patient to keep their legs fully relaxed throughout the assessment.
1. With the patient lying on the examination couch, roll each leg to assess tone in the muscles responsible for the rotation of the hip.
2. Lift each knee briskly off the bed (warning the patient first) and observe the movement of the leg. In patients with normal tone, the knee should rise whilst the heel remains in contact with the bed (the heel will typically lift off the bed if there is increased tone).
Ankle clonus
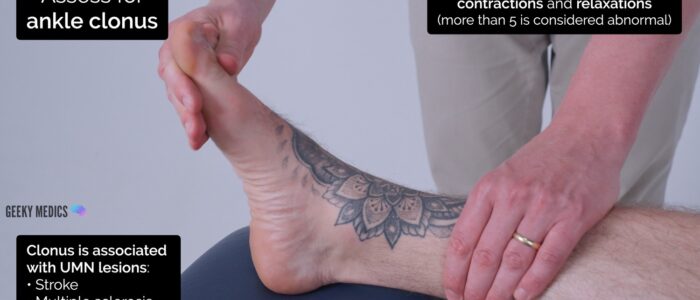
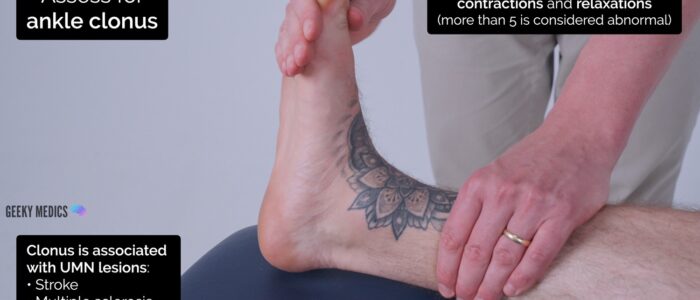
Clonus is a series of involuntary rhythmic muscular contractions and relaxations that is associated with upper motor neuron lesions of the descending motor pathways (e.g. stroke, multiple sclerosis, cerebral palsy).
1. Position the patient’s leg so that the knee and ankle are slightly flexed, supporting the leg with your hand under their knee, so they can relax.
2. Rapidly dorsiflex and partially evert the foot to stretch the gastrocnemius muscle.
3. Keep the foot in this position and observe for clonus. Clonus is felt as rhythmic beats of dorsiflexion and plantarflexion. If more than 5 beats of clonus are present, this would be classed as an abnormal finding.
Spasticity vs rigidity
Spasticity is associated with pyramidal tract lesions (e.g. stroke) and rigidity is associated with extrapyramidal tract lesions (e.g. Parkinson’s disease). Spasticity and rigidity both involve increased tone, so it’s important to understand how to differentiate them clinically.
Spasticity is “velocity-dependent”, meaning the faster you move the limb, the worse it is. There is typically increased tone in the initial part of the movement which then suddenly reduces past a certain point (known as “clasp knife spasticity”). Spasticity is also typically accompanied by weakness.
Rigidity is “velocity independent” meaning it feels the same if you move the limb rapidly or slowly. There are two main sub-types of rigidity:
- Cogwheel rigidity involves a tremor superimposed on the hypertonia, resulting in intermittent increases in tone during movement of the limb. This subtype of rigidity is associated with Parkinson’s disease.
- Lead pipe rigidity involves uniformly increased tone throughout the movement of the muscle. This subtype of rigidity is typically associated with neuroleptic malignant syndrome.
Power
Assess the power of the patient’s lower limbs by working through the sequence of assessments below.
You must stabilise and isolate the relevant joint for each assessment to ensure you can accurately measure and compare muscle strength. As a result, you should only assess one side at a time.
At each stage in the assessment, you should compare like for like.
Use the MRC muscle power assessment scale for scoring muscle strength (details below).
You need to communicate clear instructions to the patient during each stage of the assessment. Demonstrating each position you want the patient to assume can aid understanding.
Hip
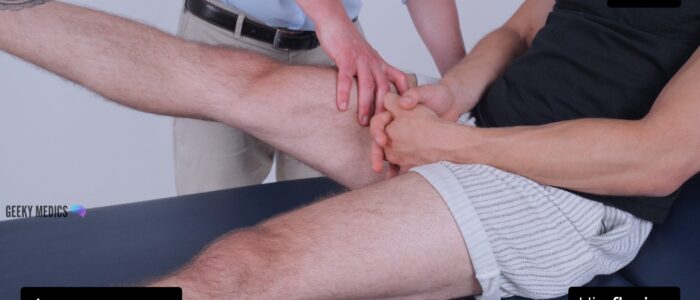
Hip flexion
Myotome assessed: L1/2
Muscles assessed: iliopsoas
Instructions: Ask the patient to raise their leg off the bed and apply downward resistance over the anterior thigh: “Lift your leg off the bed and don’t let me push your leg down.”
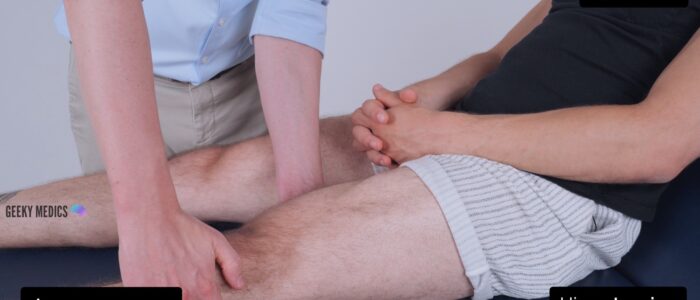
Hip extension
Myotome assessed: L5/S1/S2 (inferior gluteal nerve)
Muscles assessed: gluteus maximus
Instructions: Place your hand under the patient’s thigh and ask them to resist you trying to lift their leg: “Don’t let me lift your leg off the bed.”
Knee
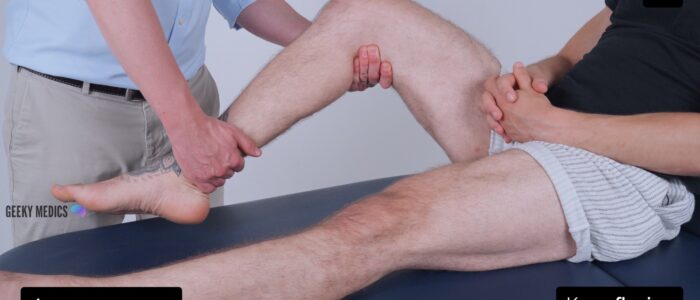
Knee flexion
Myotome assessed: S1 (sciatic nerve)
Muscles assessed: hamstrings
Instructions: Ask the patient to flex their knee so that their foot is flat on the bed and then apply resistance by pulling the lower leg towards you: “Bend your knee so that your foot is flat on the bed and then don’t let me pull your leg towards me.”
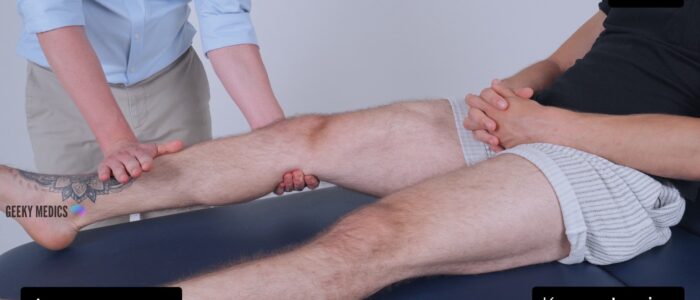
Knee extension
Myotome assessed: L3/4 (femoral nerve)
Muscles assessed: quadriceps
Instructions: With the patient’s knee still flexed, position your hand over the anterior portion of the lower leg and ask the patient to try and straighten their leg: “Try and straighten your leg whilst I try to stop you.”
Ankle
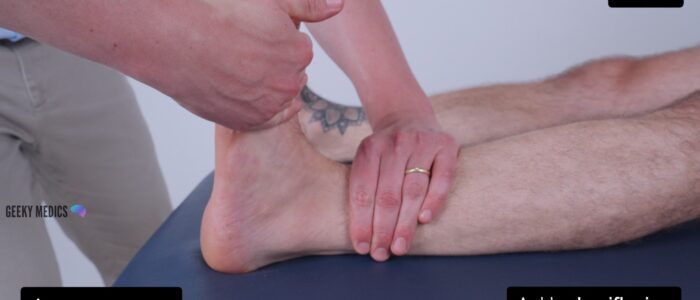
Ankle dorsiflexion
Myotome assessed: L4/5 (deep peroneal nerve)
Muscles assessed: tibialis anterior
Instructions: Ask the patient to position their legs flat on the bed, dorsiflex their foot and resist you trying to push their foot downwards: “Put your legs flat on the bed, cock your foot backwards and don’t let me push your foot down.”
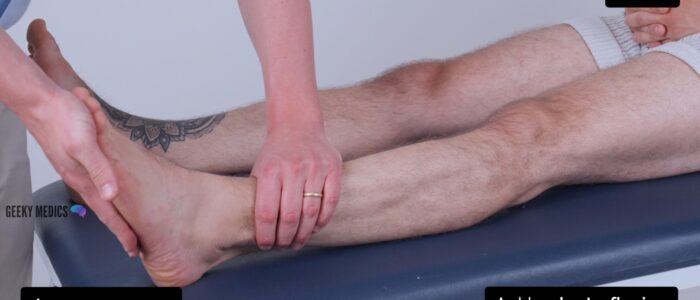
Ankle plantarflexion
Myotome assessed: S1/2 (tibial nerve)
Muscles assessed: gastrocnemius, soleus
Instructions: With the patient’s legs still flat on the bed, ask them to plantarflex their foot and resist you trying to pull their foot upwards: “Point your foot downwards like you’re pushing a car pedal and don’t let me pull it up.”
Big toe
Big toe extension
Myotome assessed: L5 (deep peroneal nerve)
Muscles assessed: extensor hallucis longus
Instructions: With the patient’s legs still flat on the bed, ask them to extend their big toe and resist you trying to push it down: “Point your big toe up towards your head and don’t let me push it down.”
Patterns of muscle weakness
Upper motor neuron lesions cause a ‘pyramidal’ pattern of weakness that disproportionately affects lower limb flexors and upper limb extensors (i.e. lower limb flexors are weaker than extensors in a lower limb neurological assessment).
Lower motor neuron lesions cause a focal pattern of weakness, with only the muscles directly innervated by the damaged neurones affected.
MRC muscle power assessment scale
The MRC scale of muscle strength uses a score of 0 to 5 to grade the power of a particular muscle group in relation to the movement of a single joint.
| Score | Description |
| 0 | No contraction |
| 1 | Flicker or trace of contraction |
| 2 | Active movement, with gravity eliminated |
| 3 | Active movement against gravity |
| 4 | Active movement against gravity and resistance |
| 5 | Normal power |
Reflexes
Explain to the patient that you are now going to assess their reflexes by tapping gently on their legs with a tendon hammer (it is useful to show the patient the tendon hammer at this stage).
For each of the reflexes, the patient’s lower limb needs to be completely relaxed.
Make sure to hold the tendon hammer handle at its end to allow gravity to aid a good swing.
If a reflex appears absent make sure the patient is fully relaxed and then perform a reinforcement manoeuvre by asking the patient to clench their teeth together whilst you simultaneously tap the tendon.
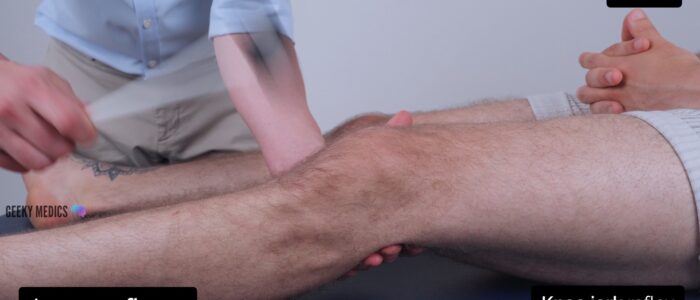
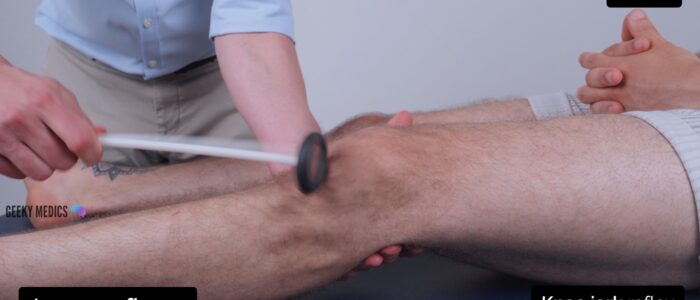
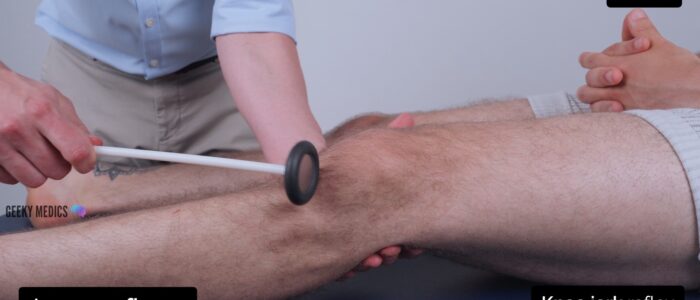
Knee-jerk reflex
Assess the knee-jerk reflex (L3, L4) in each of the patient’s lower limbs.
1. Remove the weight from the patient’s lower limb by either supporting it or asking the patient to hang their legs over the side of the bed. Ensure the patient’s lower limb is completely relaxed before assessing the knee-jerk reflex.
2. Tap the patellar tendon with the tendon hammer (making sure to hold the tendon hammer handle at its end to allow gravity to aid a good swing).
3. If a reflex appears absent make sure the patient is fully relaxed and then perform a reinforcement manoeuvre.
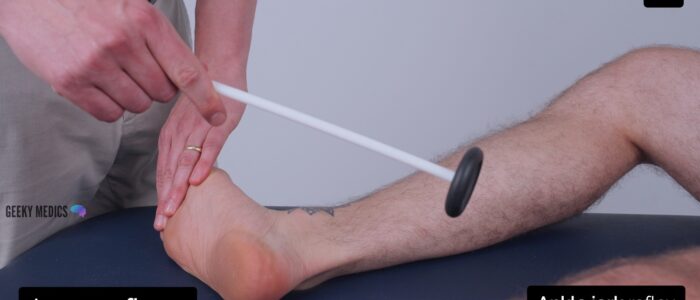
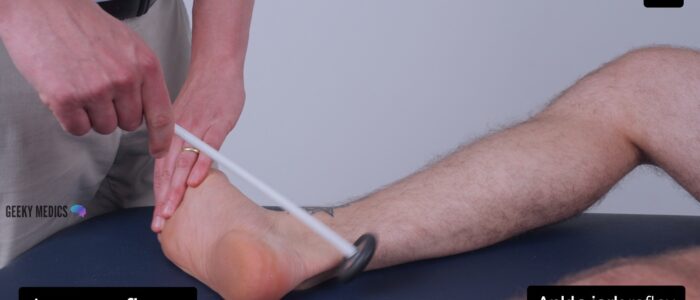
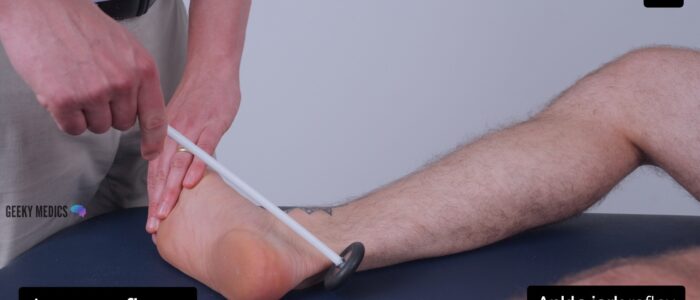
Ankle-jerk reflex
Assess the ankle-jerk reflex (S1) in each of the patient’s lower limbs.
There are several methods for eliciting the ankle-jerk reflex, with two of the most common explained below.
Method 1
1. With the patient on the examination couch support their leg so that their hip is slightly abducted, the knee is flexed and the ankle is dorsiflexed.
2. Tap the Achilles tendon with the tendon hammer and observe for a contraction in the gastrocnemius muscle with associated plantarflexion of the foot.
Method 2
1. Ask the patient to kneel on a chair and hold the back of it to steady themselves.
2. Tap the Achilles tendon with the tendon hammer and observe for a contraction in the gastrocnemius muscle with associated plantarflexion of the foot.
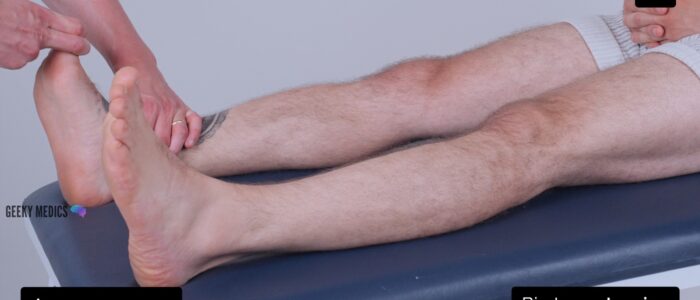
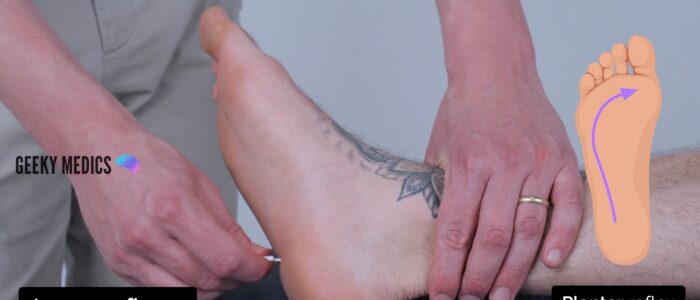
Plantar reflex
Assess the plantar reflex (L5, S1) in each of the patient’s lower limbs.
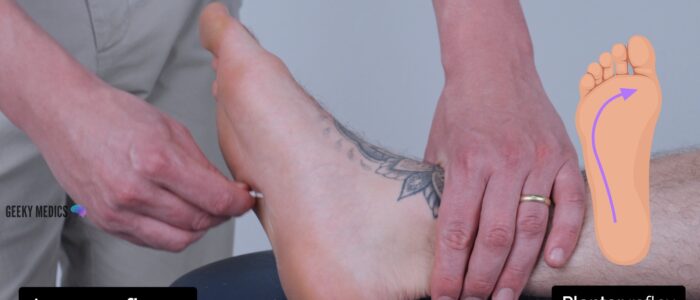
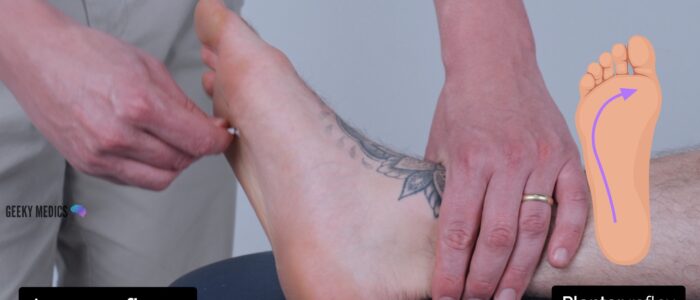
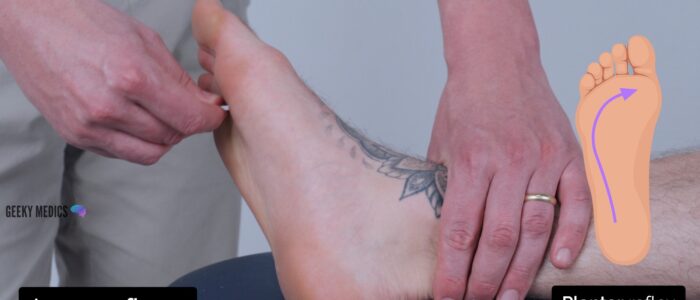
1. With the patient positioned laying on the examination couch, explain that you are going to scratch the foot with a blunt stick (typically an orange stick) and that this will feel briefly uncomfortable. Ensure the patient consents before proceeding.
2. Fix the foot in position by holding the ankle (if the left foot is being assessed, use your left hand to hold the ankle and vice versa).
3. Run the blunt object along the lateral edge of the sole of the foot, moving towards the base of the little toe and then turn medially to run across the transverse arch of the foot under the toes.
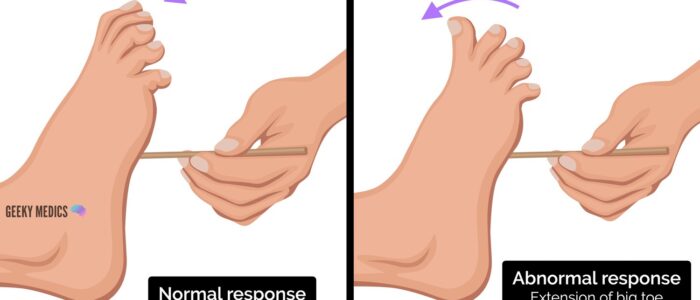
4. Observe the big toe:
- Normal result: flexion of the big toe and flexion of the other toes.
- Abnormal (Babinski sign): extension of the big toe and spread of the other toes (suggestive of an upper motor neuron lesion).
Hyperreflexia vs hyporeflexia
Hyperreflexia is typically associated with upper motor neuron lesions (e.g. stroke, spinal cord injury) due to the loss of inhibition from higher brain centres which normally exert a degree of suppression over the lower motor neuron reflex arc.
Hyporeflexia is typically associated with lower motor neuron lesions (e.g. brachial plexus pathology or other peripheral nerve injuries) due to loss of the efferent and afferent branches of the normal reflex arc.
In cerebellar disease, reflexes are described as ‘pendular’, which means less brisk and slower in their rise and fall. This sign is, however, very subjective and often reflexes appear to be ‘normal’ in cerebellar disease.
Sensation
It’s easy to get bogged down in examining sensation, but the key points are as follows:
- Check at least one modality each from the dorsal columns and spinothalamic tracts.
- Ensure the patient has their eyes closed for the assessment.
- Demonstrate normal sensation on the patient’s sternum.
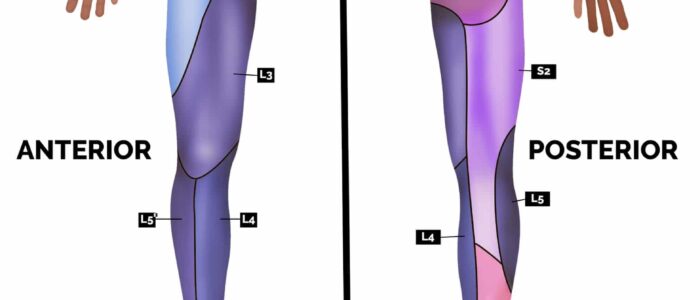
- Assess sensation across each of the lower limb dermatomes (see below), comparing left to right at equivalent regions as you progress.
Dermatomes
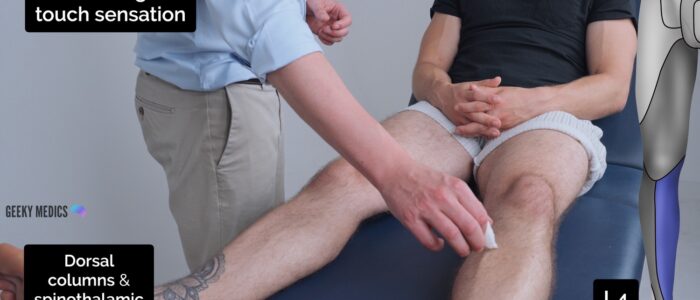
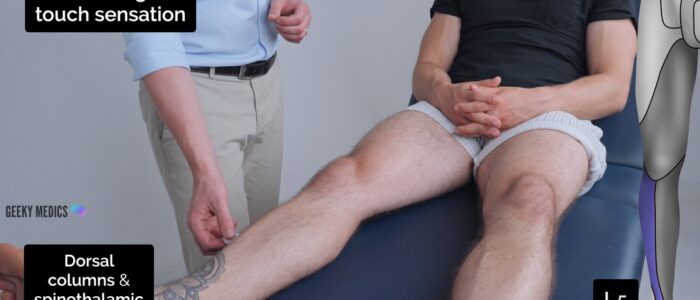
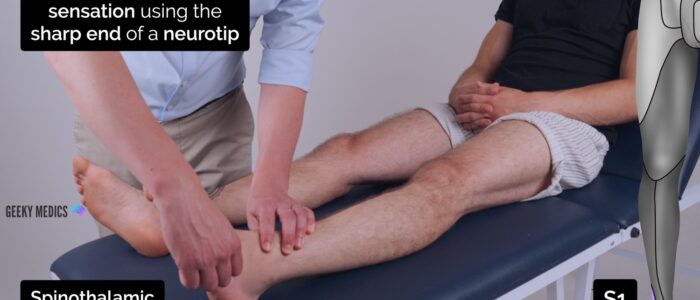
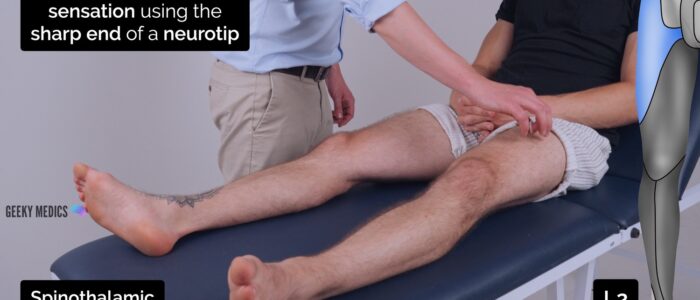
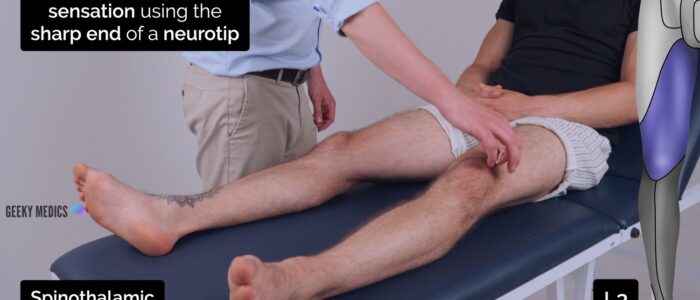
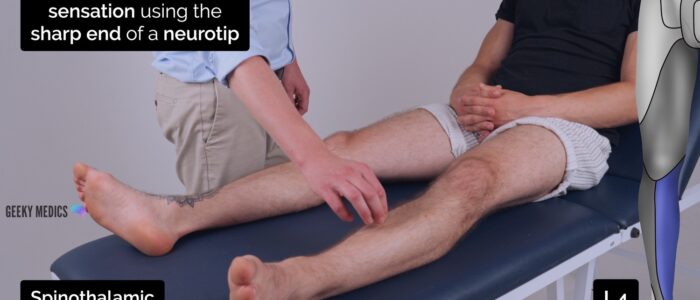
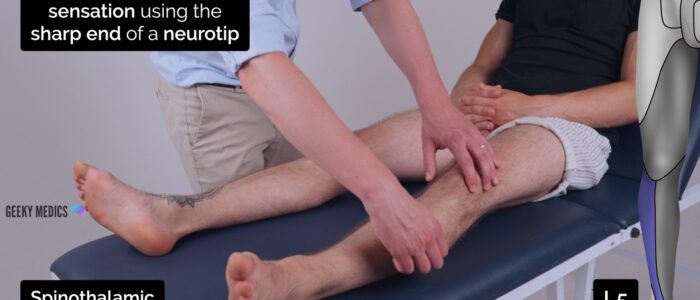
It’s important to avoid assessing sensation close to dermatomal boundaries to minimise the risk of misinterpretation. Here are some locations you can use to assess each of the lower limb dermatomes:
- L1: inguinal region and the very top of the medial thigh
- L2: middle and lateral aspect of the anterior thigh
- L3: medial aspect of the knee
- L4: medial aspect of the lower leg and ankle
- L5: dorsum and medial aspect of the big toe
- S1: dorsum and lateral aspect of the little toe
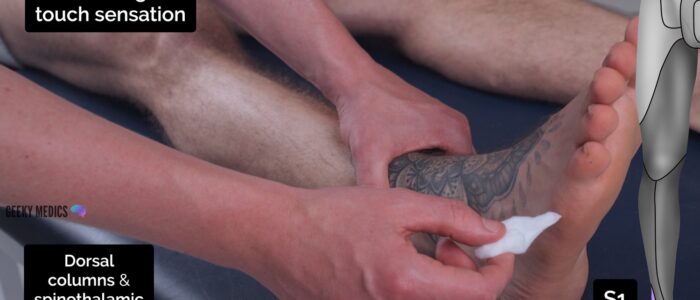
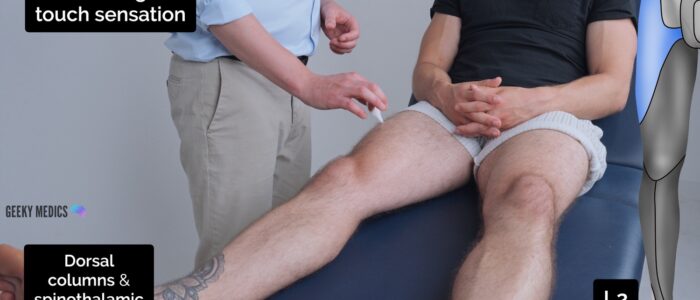
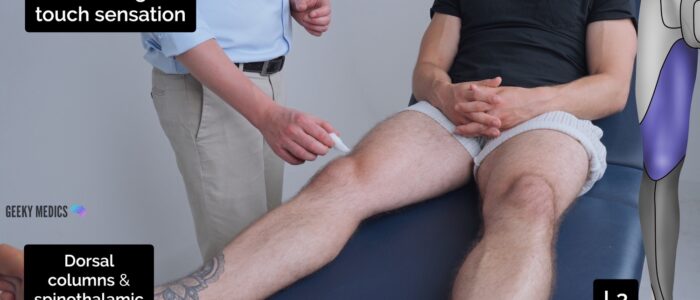
Light touch sensation
Light touch sensation involves both the dorsal columns and spinothalamic tracts.
1. Ask the patient to close their eyes and touch their sternum with the wisp of cotton wool to provide an example of light touch sensation.
2. Ask the patient to say “yes” when they feel the sensation.
3. Using the wisp of cotton wool, begin to assess light touch sensation across each of the lower limb dermatomes, comparing each side as you go by asking the patient if it feels the same.
Pin-prick sensation
Pin-prick (pain) sensation involves the spinothalamic tracts.
Repeat the previous assessment steps used for light touch sensation, but this time using the sharp end of a neuro-tip.
If loss of sensation is noted distally, test for “stocking” distribution of sensory loss (associated with peripheral neuropathy) by moving distal to proximal. If necessary, keep going all the way up the leg and trunk until an area of normal sensation is identified. This may reveal a “sensory level”, which is suggestive of a spinal lesion (e.g. if there is abnormal sensation up to the level of the umbilicus, this suggests a spinal lesion at around T10).
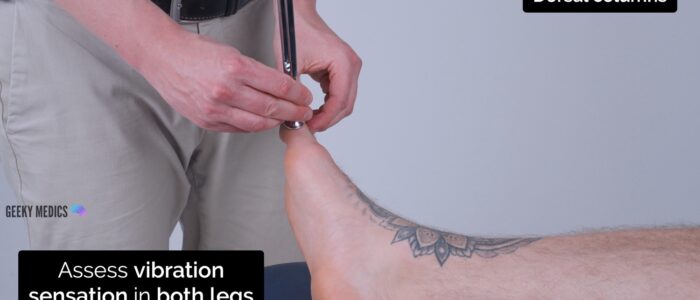
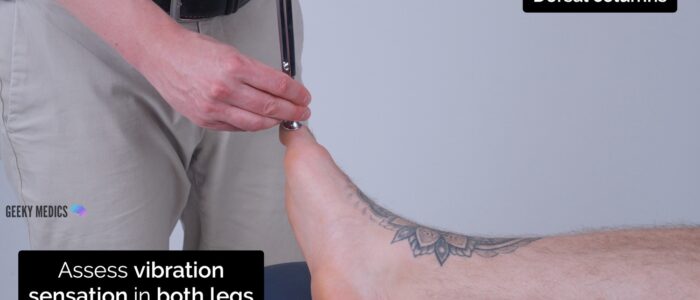
Vibration sensation
Vibration sensation involves the dorsal columns.
1. Ask the patient to close their eyes and to let you know both when they can detect vibration and when it stops.
2. Tap a 128 Hz tuning fork and place onto the patient’s sternum to check they are able to feel it vibrating. Then grasp the ends of the tuning fork to cease vibration and see if the patient is able to accurately identify that it has stopped.
3. Tap the tuning fork again and place onto the interphalangeal joint of the patient’s big toe. If the patient is able to accurately identify when the vibration begins and when it stops at this point in both lower limbs, the assessment is complete.
4. If vibration sensation is impaired at the interphalangeal joint of the patient’s big toe, continue to sequentially assess more proximal joints (e.g. metatarsophalangeal joint of the big toe → ankle joint → knee joint) until the patient is able to accurately identify vibration.
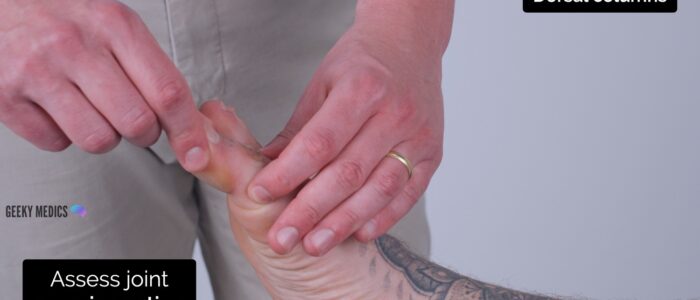
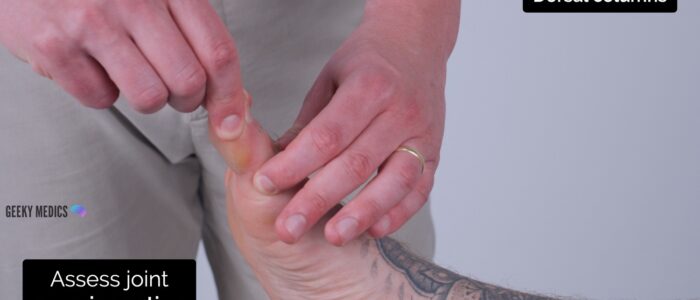
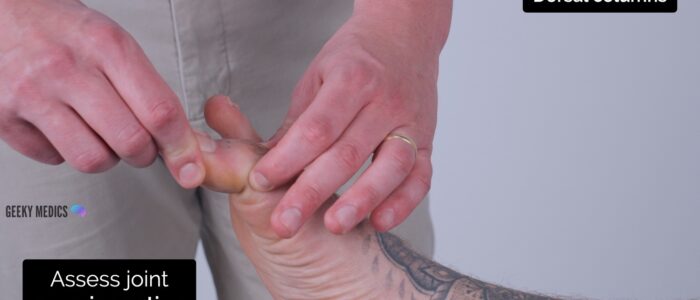
Proprioception
Proprioception, also known as joint position sense, involves the dorsal columns.
1. Begin assessment of proprioception at the interphalangeal joint of the big toe by holding the distal phalanx of the big toe by its sides (avoid holding the nail bed as this can allow the patient to determine direction based on pressure).
2. Demonstrate movement of the big toe “upwards” and “downwards” to the patient whilst they watch.
3. Ask the patient to close their eyes and state if you are moving their big toe up or down.
4. Move the big toe up or down 3-4 times in a random sequence to see if the patient is able to accurately identify joint position with their eyes closed.
5. If the patient is unable to correctly identify the direction of movement, continue to sequentially assess more proximal joints (e.g. metatarsophalangeal joint of the big toe → ankle joint → knee joint).
Co-ordination
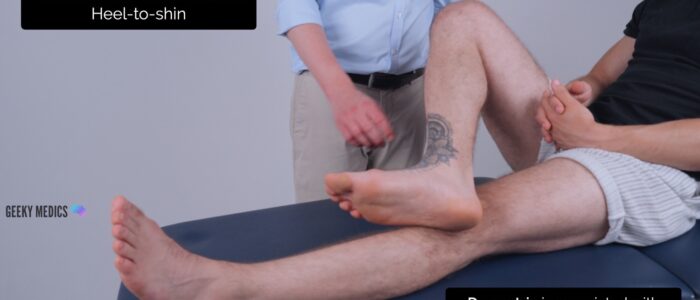
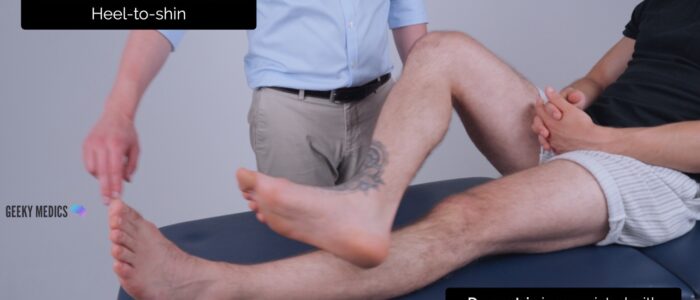
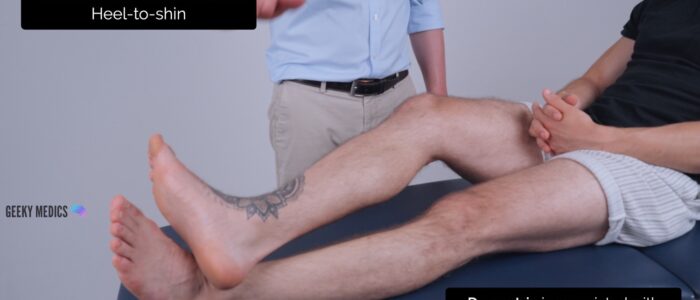
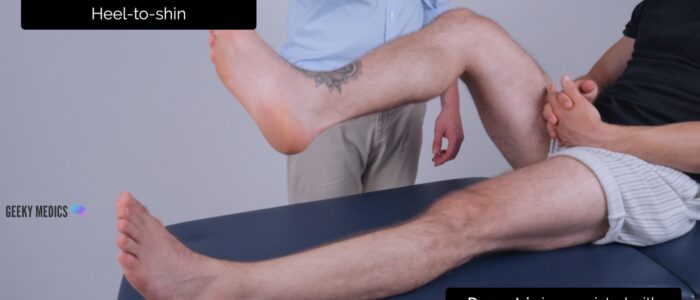
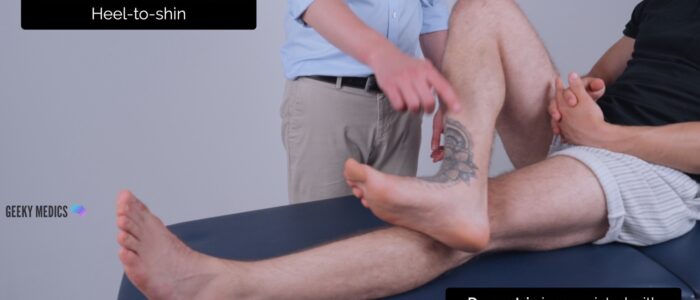
Heel-to-shin test
Assessment
The heel-to-shin test is a convenient method of assessing lower limb co-ordination:
1. Ask the patient to place their left heel on their right knee and then run it down their shin in a straight line.
2. Then ask them to return their left heel to the starting position over the right knee.
3. Now ask them to repeat this sequence of movements in a smooth motion until you tell them to stop.
4. Repeat the assessment with the right heel on the left leg.
Interpretation
Dysmetria (i.e. incoordination) whilst attempting to perform this task is suggestive of ipsilateral cerebellar pathology.
A note of caution: weakness (e.g. from an upper motor neuron lesion) can also produce apparent incoordination of this movement. As a result, power should be assessed before any diagnostic conclusions are drawn.
To complete the examination…
Explain to the patient that the examination is now finished.
Thank the patient for their time.
Dispose of PPE appropriately and wash your hands.
Summarise your findings.
Example summary
“Today I examined Mr Smith, a 32-year-old male. On general inspection, the patient appeared comfortable at rest, with normal speech and no other stigmata of neurological disease. There were no objects or medical equipment around the bed of relevance.”
“Assessment of the lower limbs revealed normal gait, tone, power, reflexes, sensation and coordination.”
“In summary, these findings are consistent with a normal lower limb neurological examination.”
“For completeness, I would like to perform the following further assessments and investigations.”
Further assessments and investigations
- Full neurological examination including the cranial nerves, upper limbs and cerebellar assessment.
- Neuroimaging (e.g. MRI spine and head).
Reviewer
Dr David Bargiela
Neurologist


