- 📖 Geeky Medics OSCE Book
- ⚡ Geeky Medics Bundles
- ✨ 1300+ OSCE Stations
- ✅ OSCE Checklist PDF Booklet
- 🧠 UKMLA AKT Question Bank
- 💊 PSA Question Bank
- 💉 Clinical Skills App
- 🗂️ Flashcard Collections | OSCE, Medicine, Surgery, Anatomy
- 💬 SCA Cases for MRCGP
To be the first to know about our latest videos subscribe to our YouTube channel 🙌
Peripheral vascular examination frequently appears in OSCEs. You’ll be expected to pick up the relevant clinical signs of peripheral vascular disease (PVD) using your examination skills. This peripheral vascular examination OSCE guide provides a clear step-by-step approach to examining the peripheral vascular system, with an included video demonstration.
Introduction
Wash your hands and don PPE if appropriate.
Introduce yourself to the patient including your name and role.
Confirm the patient’s name and date of birth.
Briefly explain what the examination will involve using patient-friendly language.
Gain consent to proceed with the examination.
Adequately expose the patient’s limbs and abdomen for the examination (offer a blanket to allow exposure only when required).
Position the patient on the bed, with the head of the bed at 45°.
Ask the patient if they have any pain before proceeding with the clinical examination.
General inspection
Clinical signs
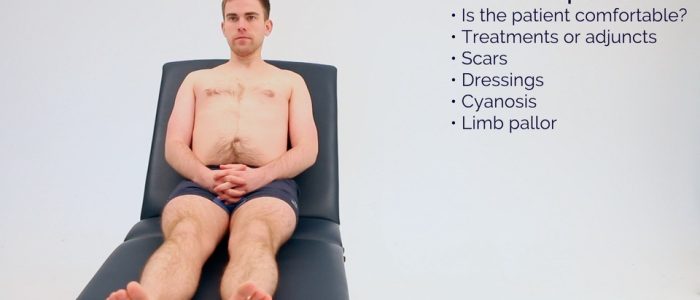
Inspect the patient from the end of the bed whilst at rest, looking for clinical signs suggestive of underlying pathology:
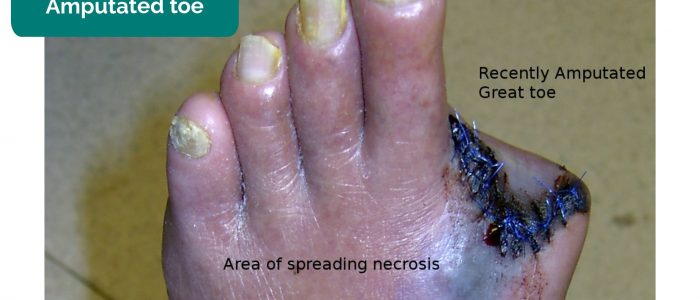
- Missing limbs/digits: may be due to amputation secondary to critical ischaemia.
- Scars: may indicate previous surgical procedures (e.g. bypass surgery) or healed ulcers.
Objects and equipment
Look for objects or equipment on or around the patient that may provide useful insights into their medical history and current clinical status:
- Medical equipment: note any dressings and limb prosthesis.
- Mobility aids: items such as wheelchairs and walking aids give an indication of the patient’s current mobility status.
- Vital signs: charts on which vital signs are recorded will give an indication of the patient’s current clinical status and how their physiological parameters have changed over time.
- Prescriptions: prescribing charts or personal prescriptions can provide useful information about the patient’s recent medications.
Upper limbs
Inspection
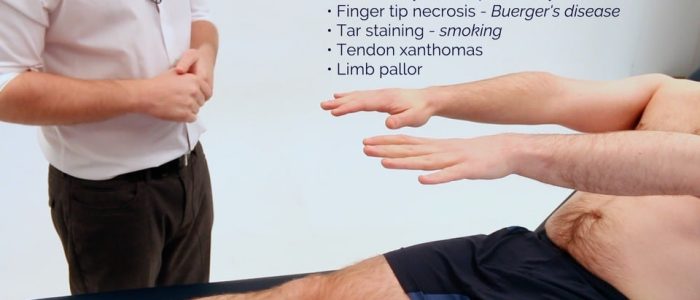
Inspect and compare the upper limbs:
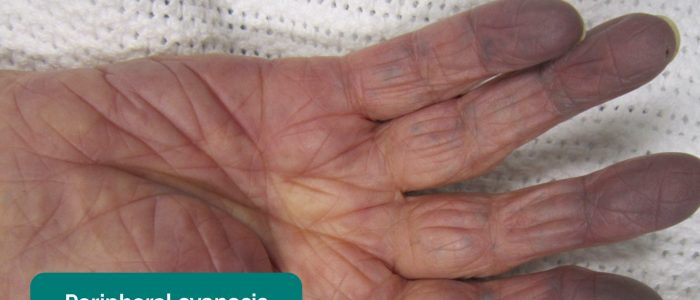
- Peripheral cyanosis: bluish discolouration of the skin associated with low SpO2 in the affected tissues (e.g. may be present in the peripheries in PVD due to poor perfusion).
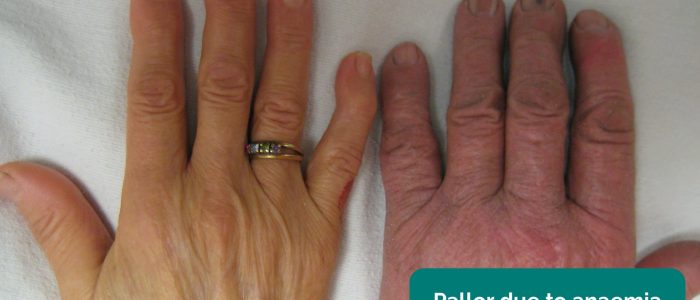
- Peripheral pallor: a pale colour of the skin that can suggest poor perfusion (e.g. PVD).
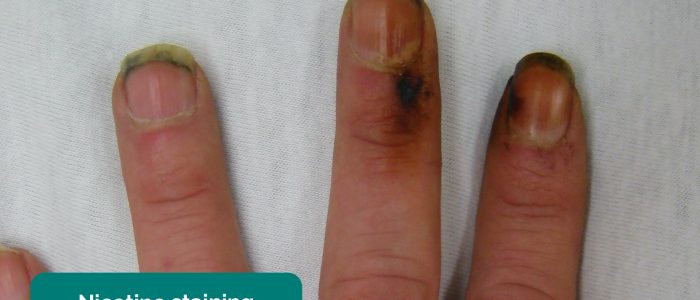
- Tar staining: caused by smoking, a significant risk factor for cardiovascular disease (e.g. PVD, coronary artery disease, hypertension).
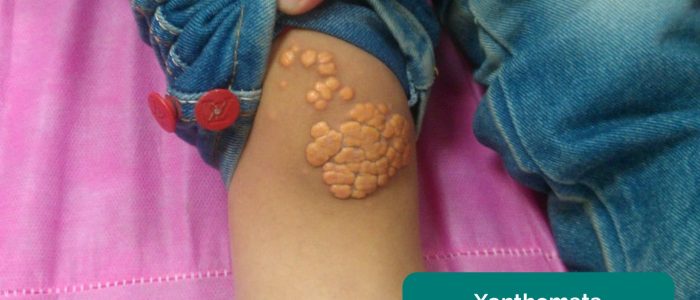
- Xanthomata: raised yellow cholesterol-rich deposits that are often noted on the palm, tendons of the wrist and elbow. Xanthomata are associated with hyperlipidaemia (typically familial hypercholesterolaemia), another important risk factor for cardiovascular disease.
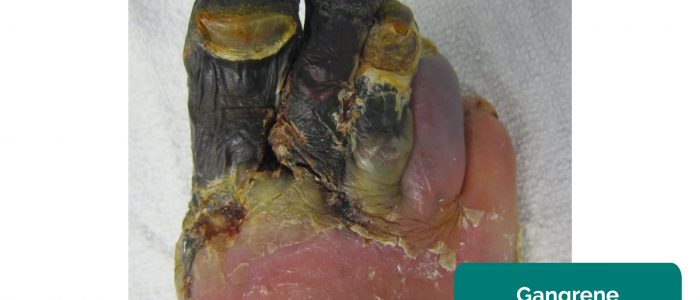
- Gangrene: tissue necrosis secondary to inadequate perfusion. Typical appearances include a change in skin colour (e.g. red, black) and breakdown of the associated tissue.
Temperature and capillary refill time (CRT)
Temperature
Place the dorsal aspect of your hand onto the patient’s upper limbs to assess temperature:
- In healthy individuals, the upper limbs should be symmetrically warm, suggesting adequate perfusion.
- A cool and pale limb is indicative of poor arterial perfusion.
Capillary refill time (CRT)
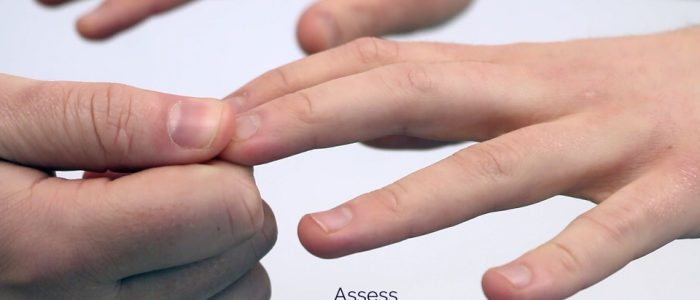
Measuring capillary refill time (CRT) in the hands is a useful way of assessing peripheral perfusion:
- Apply five seconds of pressure to the distal phalanx of one of a patient’s fingers and then release.
- In healthy individuals, the initial pallor of the area you compressed should return to its normal colour in less than two seconds.
- A CRT that is greater than two seconds suggests poor peripheral perfusion.
- Prior to assessing CRT, check that the patient does not currently have pain in their fingers.
Pulses
Radial pulse
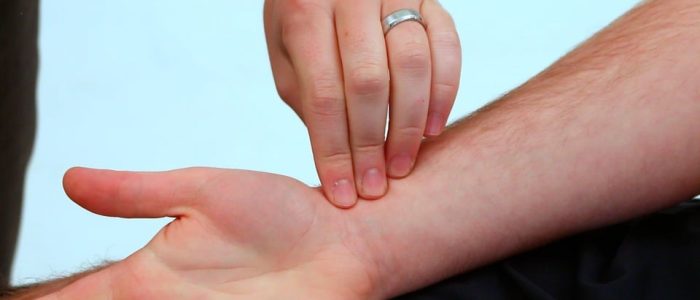
Palpate the patient’s radial pulse, located at the radial side of the wrist, with the tips of your index and middle fingers aligned longitudinally over the course of the artery.
Once you have located the radial pulse, assess the rate and rhythm, palpating for at least 5 cardiac cycles.
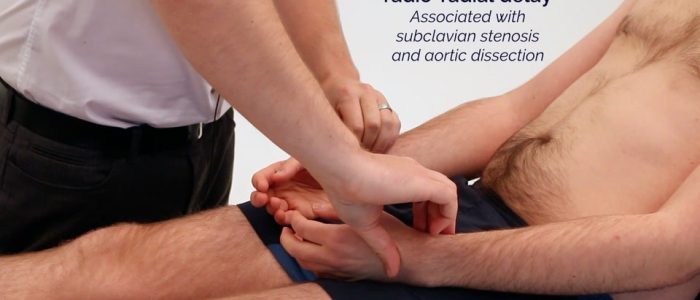
Radio-radial delay
Radio-radial delay describes a loss of synchronicity between the radial pulse on each arm.
To assess for radio-radial delay:
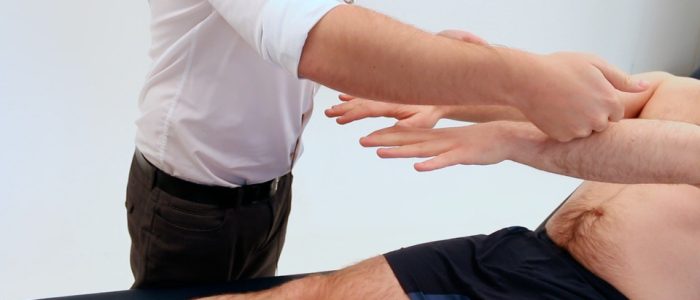
- Palpate both radial pulses simultaneously.
- In healthy individuals, the pulses should occur at the same time.
- If the radial pulses are out of sync, this would be described as radio-radial delay.
Causes of radio-radial delay include:
- Subclavian artery stenosis (e.g. compression by a cervical rib)
- Aortic dissection
Brachial pulse
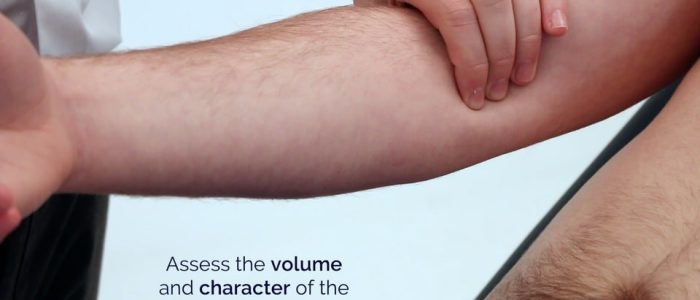
Palpate the brachial pulse in each arm, assessing volume and character:
- Support the patient’s right forearm with your left hand.
- Position the patient so that their upper arm is abducted, their elbow is partially flexed and their forearm is externally rotated.
- With your right hand, palpate medial to the biceps brachii tendon and lateral to the medial epicondyle of the humerus.
- Deeper palpation is required (compared to radial pulse palpation) due to the location of the brachial artery.
Blood pressure (BP)
Measure the patient’s blood pressure in both arms (see our blood pressure guide for more details).
- Wide pulse pressure (more than 100 mmHg of difference between systolic and diastolic blood pressure) can be associated with aortic regurgitation and aortic dissection.
- A more than 20 mmHg difference in BP between arms is abnormal and is associated with aortic dissection.
In a PVE OSCE station, you are unlikely to be expected to carry out a thorough blood pressure assessment due to time restraints, however, you should demonstrate that you have an awareness of what this would involve.
Carotid pulse
The carotid pulse can be located between the larynx and the anterior border of the sternocleidomastoid muscle.
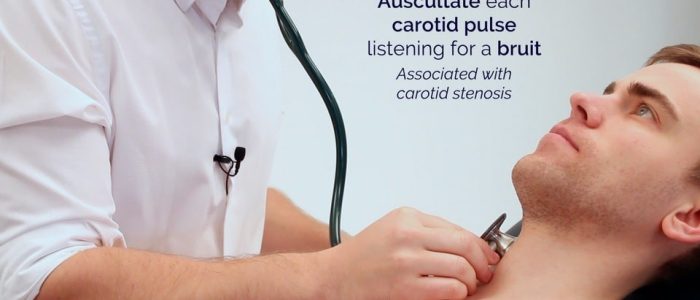
Auscultate the carotid artery
Prior to palpating the carotid artery, you need to auscultate the vessel to rule out the presence of a bruit. The presence of a bruit suggests underlying carotid stenosis, making palpation of the vessel potentially dangerous due to the risk of dislodging a carotid plaque and causing an ischaemic stroke.
Place the diaphragm of your stethoscope between the larynx and the anterior border of the sternocleidomastoid muscle over the carotid pulse and ask the patient to take a deep breath and then hold it whilst you listen.
Be aware that at this point in the examination, the presence of a ‘carotid bruit’ may, in fact, be a radiating cardiac murmur (e.g. aortic stenosis).
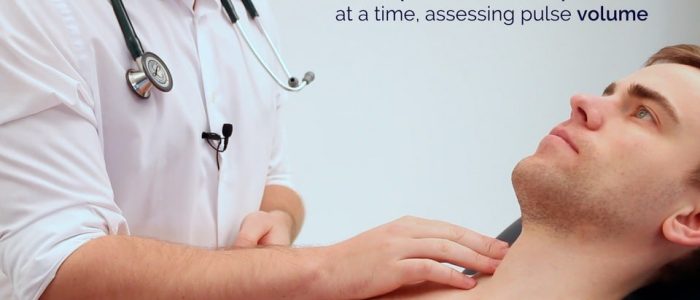
Palpate the carotid pulse
If no bruits were identified, proceed to carotid pulse palpation:
1. Ensure the patient is positioned safely on the bed, as there is a risk of inducing reflex bradycardia when palpating the carotid artery (potentially causing a syncopal episode).
2. Gently place your fingers between the larynx and the anterior border of the sternocleidomastoid muscle to locate the carotid pulse.
3. Assess the character (e.g. slow-rising, thready) and volume of the pulse.
Abdomen
Ensure there is adequate exposure for abdominal examination: if the patient is wearing shorts, the waistband should be positioned to be at the level of the pubic symphysis.
Inspection
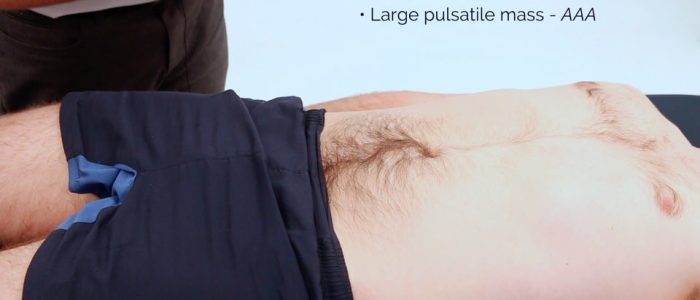
Inspect the abdomen looking for any obvious pulsation. The abdominal aorta can be located in the midline of the epigastrium.
Palpation
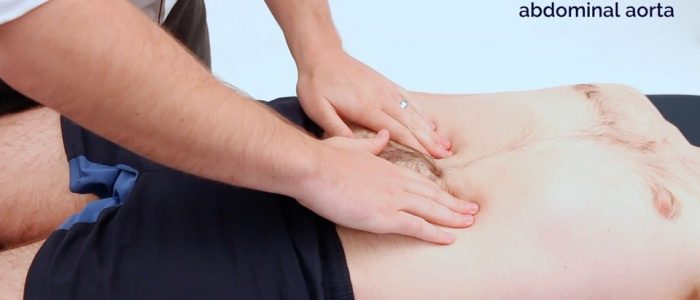
Palpate the aorta
1. Using both hands perform deep palpation just superior to the umbilicus in the midline.
2. Note the movement of your fingers:
- In healthy individuals, your hands should begin to move superiorly with each pulsation of the aorta.
- If your hands move outwards, it suggests the presence of an expansile mass (e.g. abdominal aortic aneurysm).
This is a crude clinical test and further investigations would be required before a diagnosis of an abdominal aortic aneurysm was made.
Auscultation
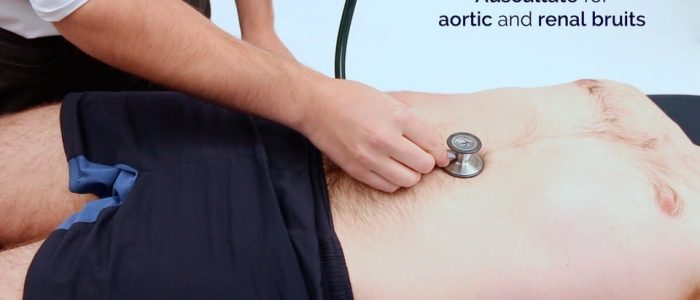
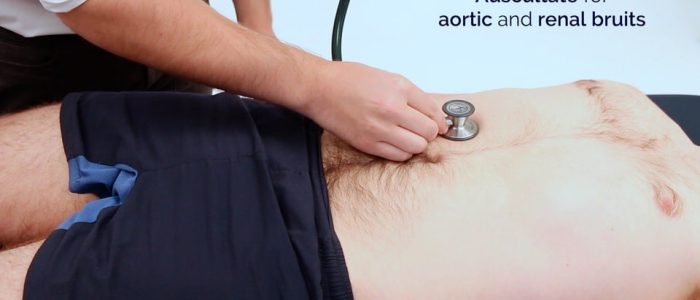
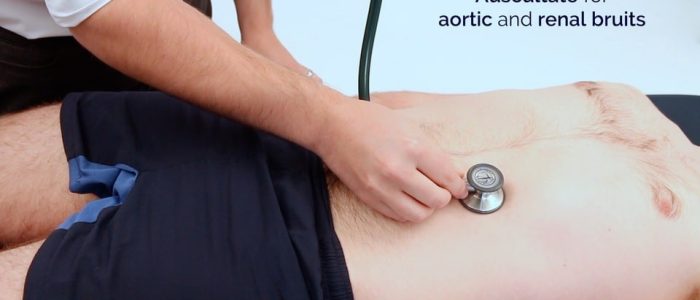
Auscultate the aorta and renal arteries
Auscultate over the aorta and renal arteries to identify vascular bruits suggestive of turbulent blood flow:
- Aortic bruits: auscultate 1-2 cm superior to the umbilicus, a bruit here may be associated with an abdominal aortic aneurysm.
- Renal bruits: auscultate 1-2 cm superior to the umbilicus and slightly lateral to the midline on each side. A bruit in this location may be associated with renal artery stenosis.
Lower limbs
Inspection
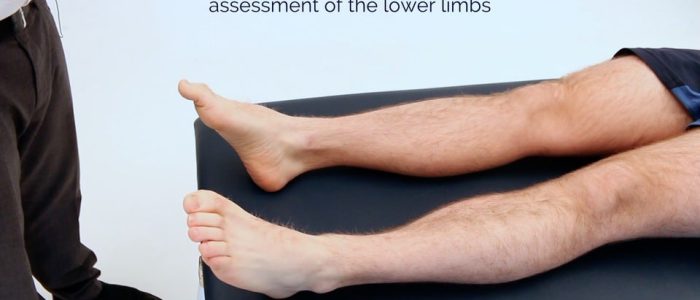
Inspect and compare the lower limbs:
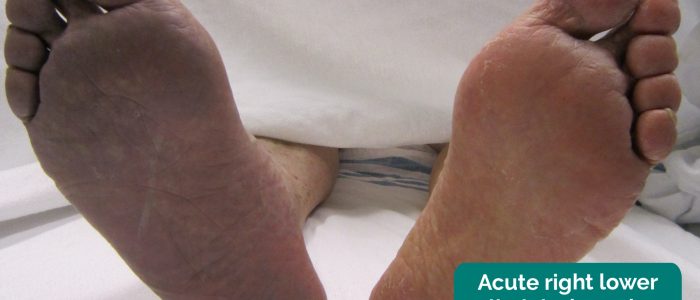
- Peripheral cyanosis: bluish discolouration of the skin associated with low SpO2 in the affected tissues (e.g. may be present in the peripheries in PVD due to poor perfusion).
- Peripheral pallor: a pale colour of the skin that can suggest poor perfusion.
- Ischaemic rubour: a dusky-red discolouration of the leg that typically develops when the limb is dependent. Ischaemic rubour occurs due to the loss of capillary tone associated with PVD.
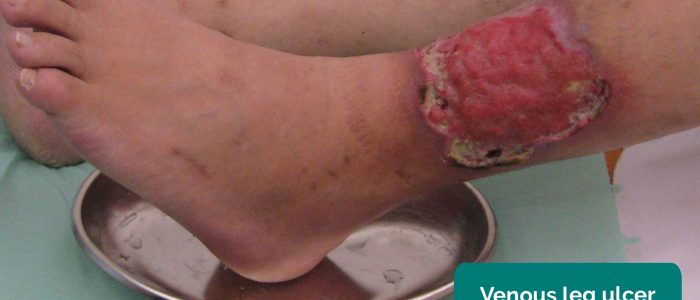
- Venous ulcers: typically large and shallow ulcers with irregular borders that are only mildly painful. These ulcers most commonly develop over the medial aspect of the ankle.
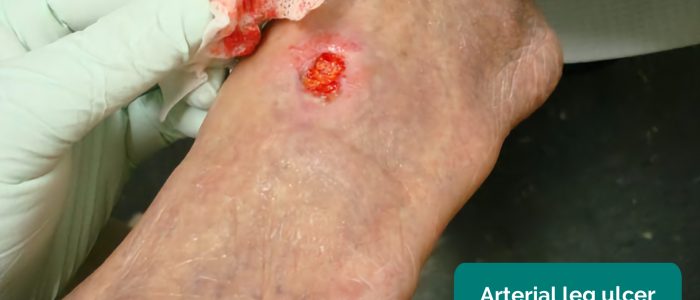
- Arterial ulcers: typically small, well-defined, deep ulcers that are very painful. These ulcers most commonly develop in the most peripheral regions of a limb (e.g. the ends of digits).
- Gangrene: tissue necrosis secondary to inadequate perfusion. Typical appearances include a change in skin colour (e.g. red, black) and breakdown of the associated tissue.
- Missing limbs, toes, fingers: due to amputation secondary to critical ischaemia.
- Scars: may indicate previous surgical procedures (e.g. bypass surgery) or healed ulcers.
- Hair loss: associated with PVD due to chronic impairment of tissue perfusion.
- Muscle wasting: associated with chronic peripheral vascular disease.
- Xanthomata: raised yellow cholesterol-rich deposits that may be present over the knee or ankle. Xanthomata are associated with hyperlipidaemia (typically familial hypercholesterolaemia), another important risk factor for cardiovascular disease.
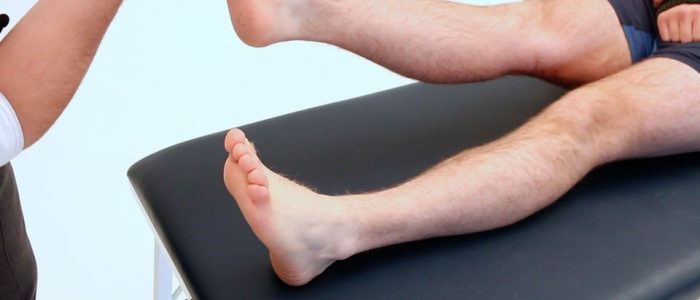
- Paralysis: critical limb ischaemia can cause weakness and paralysis of a limb. To perform a quick gross motor assessment, ask the patient to wiggle their toes.
Temperature and capillary refill time (CRT)
Temperature
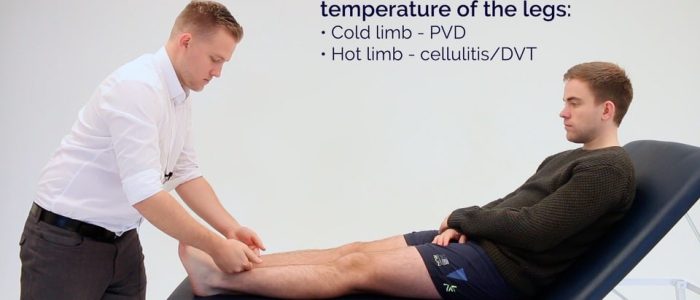
Place the dorsal aspect of your hand onto the patient’s lower limbs to assess and compare temperature:
- In healthy individuals, the lower limbs should be symmetrically warm, suggesting adequate perfusion.
- A cool and pale limb is indicative of poor arterial perfusion.
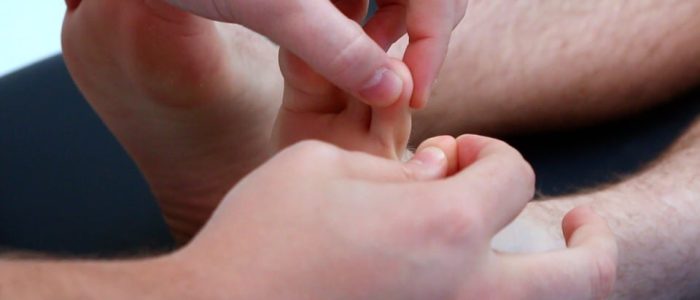
Capillary refill time (CRT)
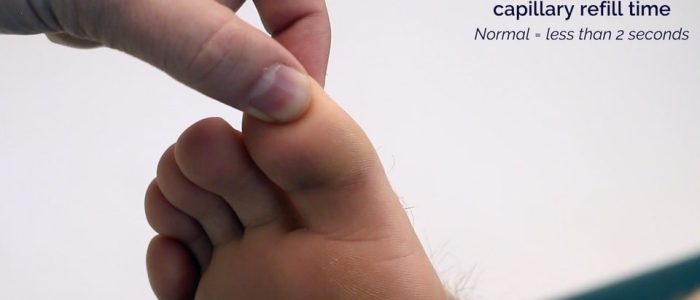
Measuring capillary refill time (CRT) in the lower limbs is a useful screening tool to quickly assess peripheral perfusion:
- Apply five seconds of pressure to the distal phalanx of one of a patient’s toes and then release.
- In healthy individuals, the initial pallor of the area you compressed should return to its normal colour in less than two seconds.
- A CRT that is greater than two seconds suggests poor peripheral perfusion.
- Prior to assessing CRT, check that the patient does not currently have pain in their toes.
Pulses
When assessing the pulses of the lower limbs work proximal to distal – this allows you to assess and compare arterial inflow into each leg. If pulses are not palpable, a doppler can be used to assess blood flow through a vessel.
Femoral pulse
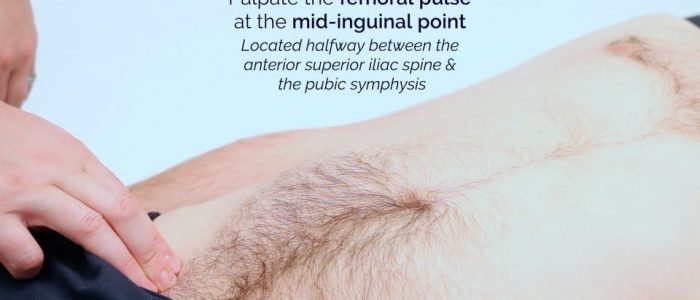
Palpate the femoral pulse:
- The femoral pulse can be palpated at the mid-inguinal point, which is located halfway between the anterior superior iliac spine and the pubic symphysis.
- Check that the pulse is present and assess the pulse volume.
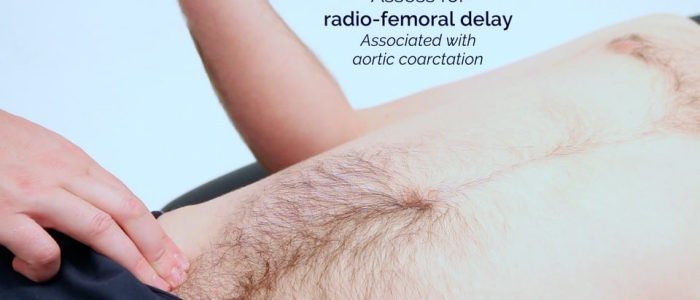
Assess for radio-femoral delay:
- Palpate the femoral pulse and radial pulse simultaneously.
- In healthy individuals, the pulses should occur at the same time.
- If the pulses are out of sync, this indicates radio-femoral delay.
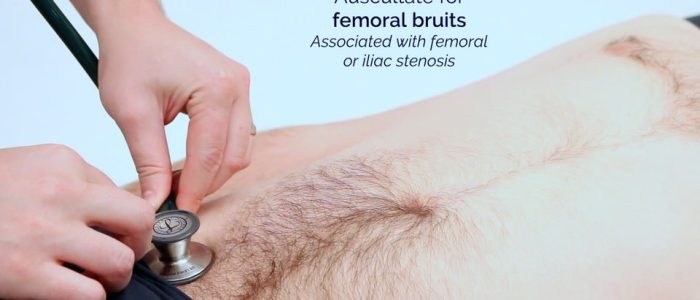
Auscultate over the femoral pulse to screen for bruits:
- Bruits in this region suggest either femoral or iliac stenosis.
Popliteal pulse
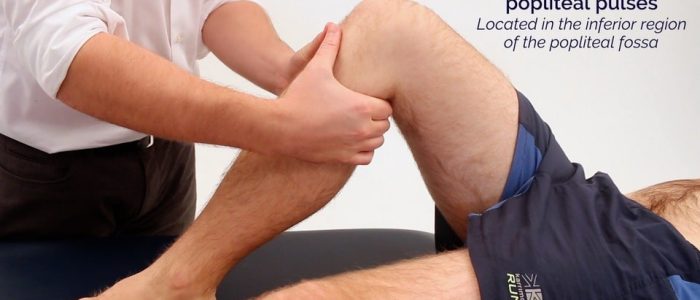
Palpate the popliteal pulse:
- The popliteal pulse can be palpated in the inferior region of the popliteal fossa.
- With the patient supine, ask them to relax their legs and place your thumbs on the tibial tuberosity.
- Passively flex the patient’s knee to 30º as you curl your fingers into the popliteal fossa. This should allow you to feel the pulse, as you compress the popliteal artery against the tibia.
- This pulse is often difficult to palpate, so don’t pretend you can feel it if you can’t. The popliteal artery is one of the deepest structures within the fossa, so the examiner will understand if you are unable to locate the artery.
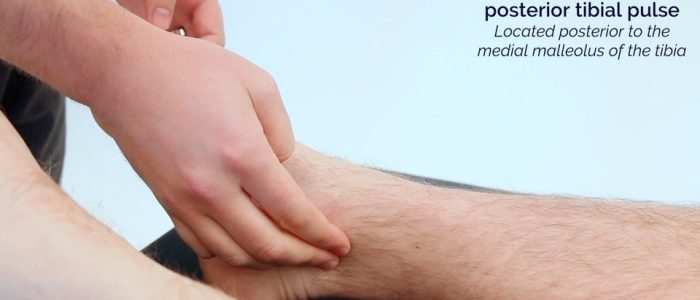
Posterior tibial pulse
Palpate the posterior tibial pulse:
- The posterior tibial pulse can be located posterior to the medial malleolus of the tibia.
- Palpate the pulse to confirm its presence and then compare pulse strength between the feet.
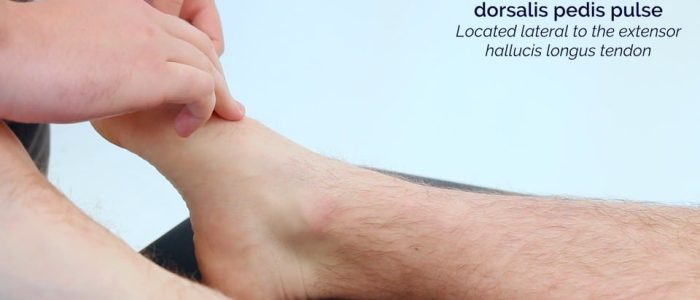
Dorsalis pedis pulse
Palpate the dorsalis pedis pulse:
- The dorsalis pedis pulse can be located over the dorsum of the foot, lateral to the extensor hallucis longus tendon, over the second and third cuneiform bones.
- Palpate the pulse to confirm its presence and then compare pulse strength between the feet.
Sensation
Slowly progressive peripheral neuropathy is common in patients with significant peripheral vascular disease. This results in a glove and stocking distribution of sensory loss. Acute critical limb ischaemia causes rapid onset parathesia in the affected limb.
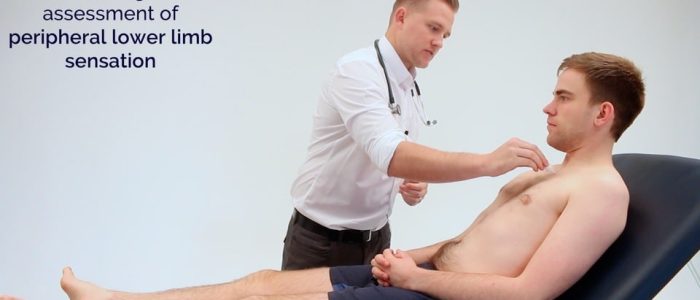
Gross peripheral sensation assessment
Perform a gross assessment of peripheral sensation:
1. Ask the patient to close their eyes whilst you touch their sternum with a wisp of cotton wool to provide an example of light touch sensation.
2. Ask the patient to say “yes” when they feel the sensation.
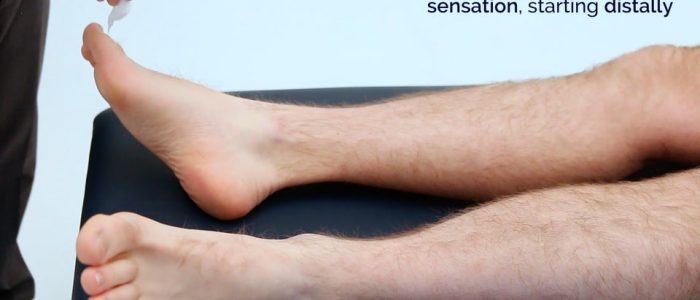
3. Using the wisp of cotton wool, begin to assess light touch sensation moving distal to proximal, comparing each side as you go by asking the patient if it feels the same:
- If sensation is intact distally, no further assessment is required.
- If there is a sensory deficit, continue to move proximally until the patient is able to feel the cotton wool and note the level at which this occurs.
Buerger’s test
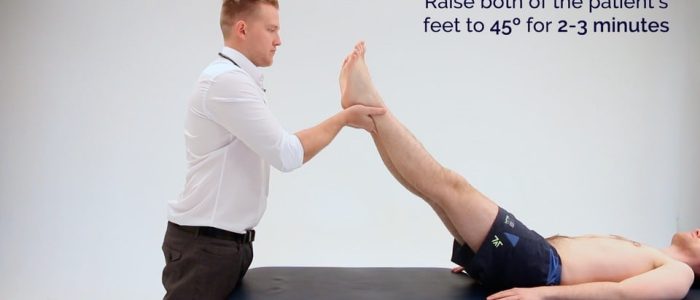
Buerger’s test is used to assess the adequacy of the arterial supply to the leg.
To perform Buerger’s test:
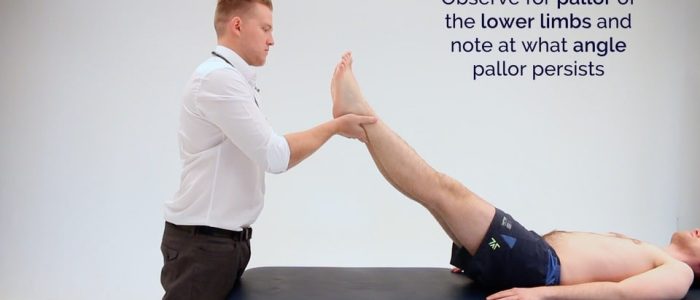
1. With the patient positioned supine, stand at the bottom of the bed and raise both of the patient’s feet to 45º for 1-2 minutes.
2. Observe the colour of the limbs:
- The development of pallor indicates that peripheral arterial pressure is unable to overcome the effects of gravity, resulting in loss of limb perfusion. If a limb develops pallor, note at what angle this occurs (e.g. 25º), this is known as Buerger’s angle.
- In a healthy individual, the entire leg should remain pink, even at an angle of 90º.
- A Buerger’s angle of less than 20º indicates severe limb ischaemia.
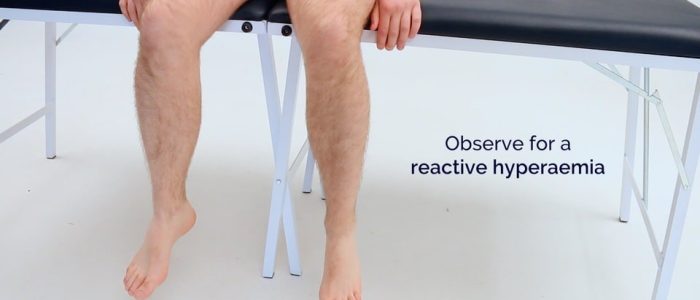
3. Sit the patient up and ask them to hang their legs down over the side of the bed:
- Gravity should now aid reperfusion of the leg, resulting in the return of colour to the patient’s limb.
- The leg will initially turn a bluish colour due to the passage of deoxygenated blood through the ischaemic tissue. Then the leg will become red due to reactive hyperaemia secondary to post-hypoxic arteriolar dilatation (driven by anaerobic metabolic waste products).
To complete the examination…
Explain to the patient that the examination is now finished.
Thank the patient for their time.
Dispose of PPE appropriately and wash your hands.
Summarise your findings.
Example summary
“Today I examined Mr Smith, a 64-year-old male. On general inspection, the patient appeared comfortable at rest and there were no objects or medical equipment around the bed of relevance.”
“The upper limbs had no stigmata of peripheral vascular disease and were symmetrically warm, with a normal capillary refill time.”
“The pulse was regular and there was no radio-radial delay. On auscultation of the carotid arteries, there was no evidence of carotid bruits and on palpation, the carotid pulse had normal volume and character.”
“Abdominal examination was unremarkable.”
“The lower limbs had no stigmata of peripheral vascular disease and were symmetrically warm, with a normal capillary refill time. Pulses were normal throughout both lower limbs and there were no gross neurological deficits noted.”
“Buerger’s test was negative.”
“In summary, these findings are consistent with a normal peripheral vascular examination.”
“For completeness, I would like to perform the following further assessments and investigations.”
Further assessments and investigations
Suggest further assessments and investigations to the examiner:
- Blood pressure measurement: to identify significant discrepancies between the two arms suggestive of aortic dissection.
- Cardiovascular examination: to complete assessment of the vascular system.
- Ankle-brachial pressure index (ABPI) measurement: to further assess lower limb perfusion.
- Upper and lower limb neurological examination: if gross neurological deficits were noted during the peripheral vascular examination.
Reviewers
Mr Craig Nesbitt (MD, FRCS, MBChB Hons)
Vascular and Endovascular Consultant
Mr Sandip Nandhra
Vascular Surgery Registrar
References
- James Heilman, MD. Adapted by Geeky Medics. Peripheral pallor. Licence: CC BY-SA.
- James Heilman, MD. Adapted by Geeky Medics. Cyanosis. Licence: CC BY-SA.
- James Heilman, MD. Adapted by Geeky Medics. Tar staining. Licence: CC BY-SA.
- James Heilman, MD. Adapted by Geeky Medics. Acute limb ischaemia. Licence: CC BY-SA.
- Milorad Dimić M.D. Adapted by Geeky Medics. Venous ulcer. Licence: CC BY 3.0.
- Jonathan Moore. Adapted by Geeky Medics. Arterial ulcer. Licence: CC BY 3.0.
- James Heilman, MD. Adapted by Geeky Medics. Gangrene. Licence: CC BY-SA.
- Drgnu23. Adapted by Geeky Medics. Amputated toe. Licence: CC BY-SA.
- Min.neel. Xanthoma. Adapted by Geeky Medics. Licence: CC BY-SA.


