- 📖 Geeky Medics OSCE Book
- ⚡ Geeky Medics Bundles
- ✨ 1300+ OSCE Stations
- ✅ OSCE Checklist PDF Booklet
- 🧠 UKMLA AKT Question Bank
- 💊 PSA Question Bank
- 💉 Clinical Skills App
- 🗂️ Flashcard Collections | OSCE, Medicine, Surgery, Anatomy
- 💬 SCA Cases for MRCGP
To be the first to know about our latest videos subscribe to our YouTube channel 🙌
Shoulder examination frequently appears in OSCEs and you’ll be expected to identify the relevant clinical signs using your examination skills. This shoulder examination OSCE guide provides a clear step-by-step approach to examining the shoulder, with an included video demonstration. Musculoskeletal examinations can be broken down into four key components: look, feel, move and special tests. This can be helpful as an aide-memoire if you begin to feel like you’ve lost your way during an OSCE.
Introduction
Wash your hands and don PPE if appropriate.
Introduce yourself to the patient including your name and role.
Confirm the patient’s name and date of birth.
Briefly explain what the examination will involve using patient-friendly language.
Gain consent to proceed with the examination.
Adequately expose the patient’s upper body and provide a blanket to cover the patient when not being examined.
Position the patient standing for initial inspection of the shoulders.
Ask the patient if they have any pain before proceeding with the clinical examination.
Look
General inspection
Clinical signs
Perform a brief general inspection of the patient, looking for clinical signs suggestive of underlying pathology:
- Body habitus: obesity is a significant risk factor for joint pathology due to increased mechanical load (e.g. osteoarthritis).
- Scars: may provide clues regarding previous upper limb surgery.
- Wasting of muscles: suggestive of disuse atrophy secondary to joint pathology or a lower motor neuron lesion.
Objects or equipment
Look for objects or equipment on or around the patient that may provide useful insights into their medical history and current clinical status:
- Aids and adaptations: support slings are often used to manage shoulder joint pathology.
- Prescriptions: prescribing charts or personal prescriptions can provide useful information about the patient’s recent medications (e.g. analgesia).
Closer inspection of the shoulder
Ask the patient to stand and turn in 90° increments as you inspect the upper limbs from each angle for evidence of pathology.
Anterior inspection
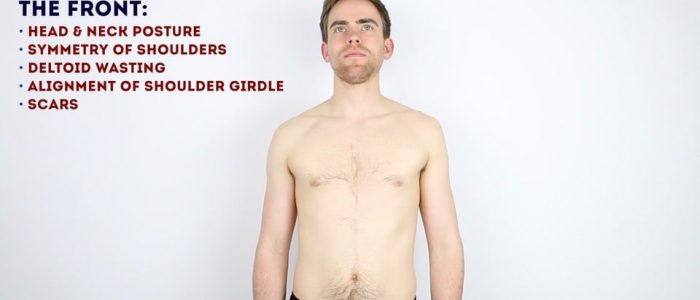
Inspect the anterior aspect of the shoulder joints and upper limbs, noting any abnormalities:
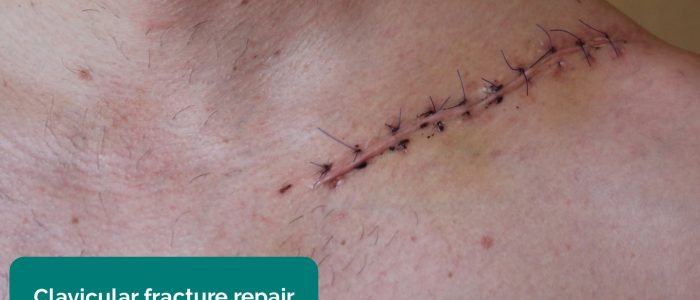
- Scars: note the location of the scar as this may provide clues as to the patient’s previous surgical history or suggest previous joint trauma.
- Bruising: suggestive of recent trauma or surgery.
- Asymmetry of the shoulder girdle: may be caused by scoliosis, arthritis, fractures or dislocation.
- Swelling: note any evidence of asymmetry in the size of the shoulder joints that may suggest unilateral swelling (e.g. effusion, inflammatory arthropathy, dislocation).
- Abnormal bony prominence: may indicate fracture (e.g. clavicular fracture) or anterior dislocation of the glenohumeral joint.
- Deltoid wasting: note any asymmetry in the bulk of the deltoid muscles which may be due to disuse atrophy or axillary nerve injury.
Lateral inspection
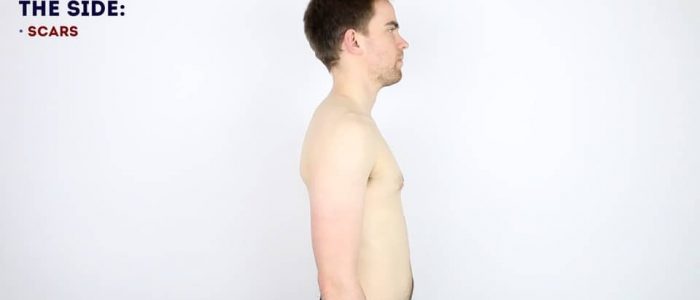
Inspect the lateral aspect of the shoulder joints, noting any abnormalities:
- Scars: again look for scars indicative of previous trauma or surgery.
- Deltoid wasting: note any asymmetry in the bulk of the deltoid muscles which may be due to disuse atrophy or axillary nerve injury.
Posterior inspection
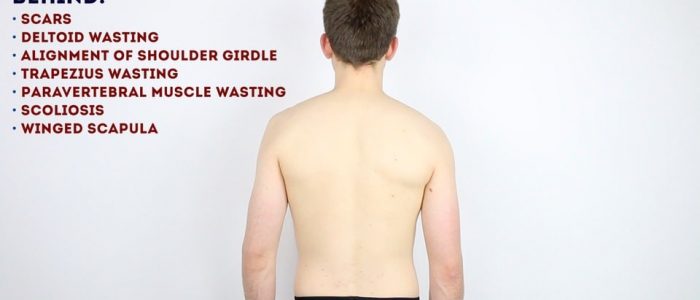
Inspect the posterior aspect of the shoulder joints, noting any abnormalities:
- Scars: again look for scars indicative of previous trauma or surgery.
- Trapezius muscle asymmetry: suggestive of muscle wasting secondary to disuse atrophy or a spinal accessory nerve lesion.
- Supraspinatus and infraspinatus asymmetry: suggestive of muscle wasting secondary to chronic rotator cuff tear or a suprascapular nerve lesion.
- Scoliosis: lateral curvature of the spine that may be congenital or acquired.
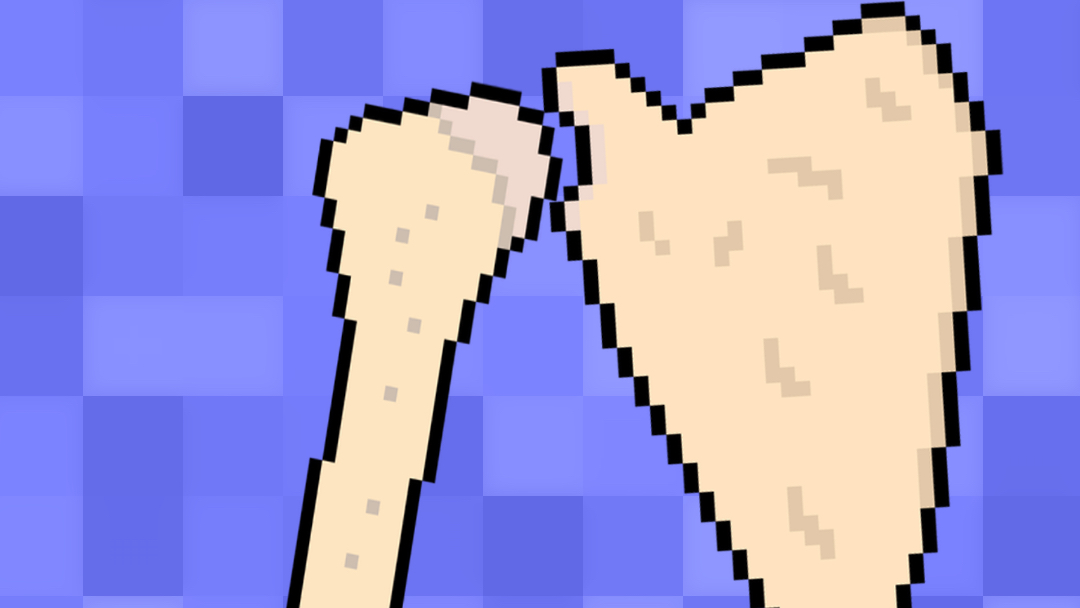
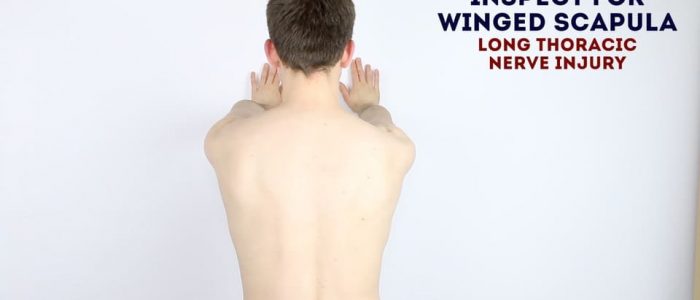
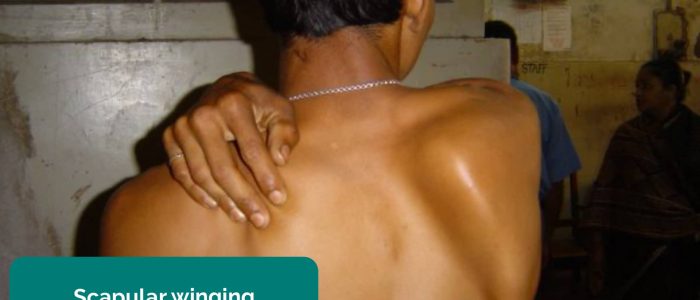
- Winged scapula: ask the patient to push against a wall with both hands spaced shoulder-width apart whilst you inspect the back. The protrusion of a scapula (known as scapular winging) is suggestive of ipsilateral serratus anterior muscle weakness, typically secondary to a long thoracic nerve injury.
Feel
Temperature
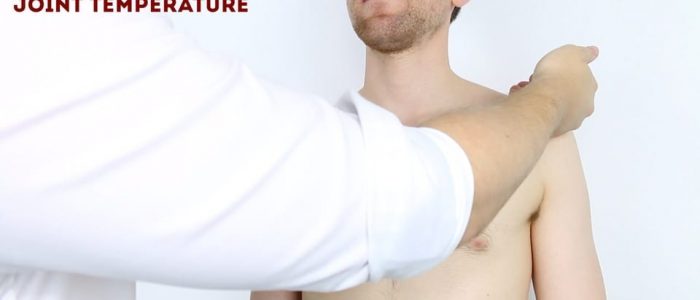
Assess and compare shoulder joint temperature using the back of your hands.
Increased temperature of a joint, particularly if also associated with swelling and tenderness may indicate septic arthritis or inflammatory arthritis.
Shoulder joint palpation
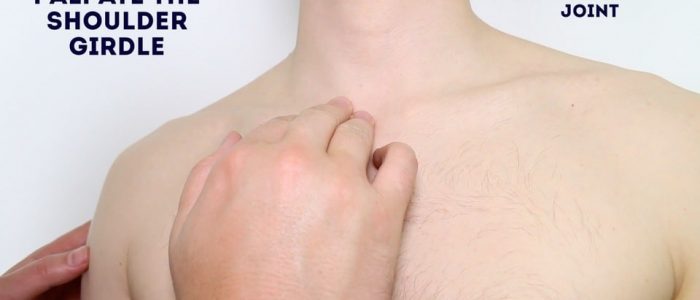
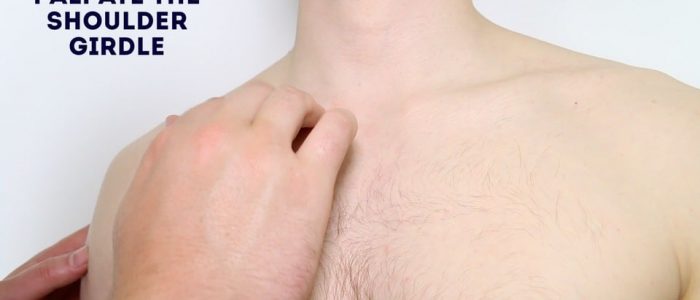
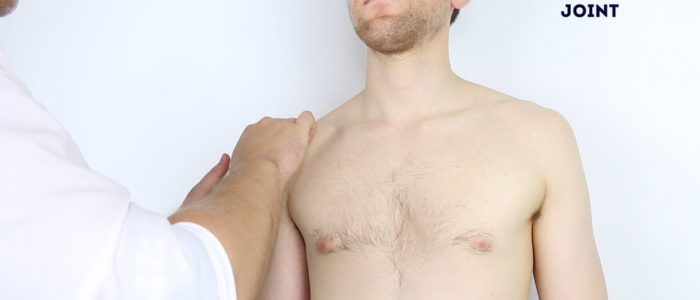
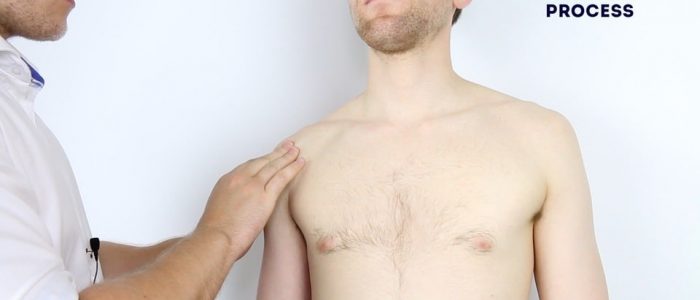
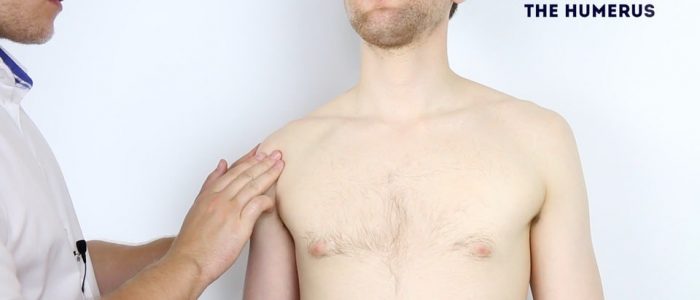
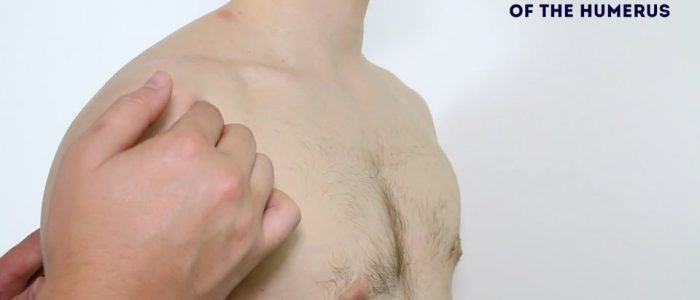
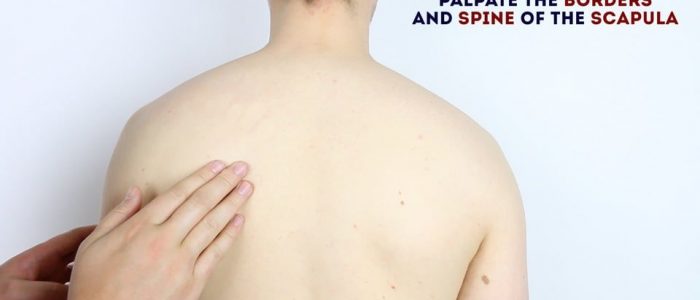
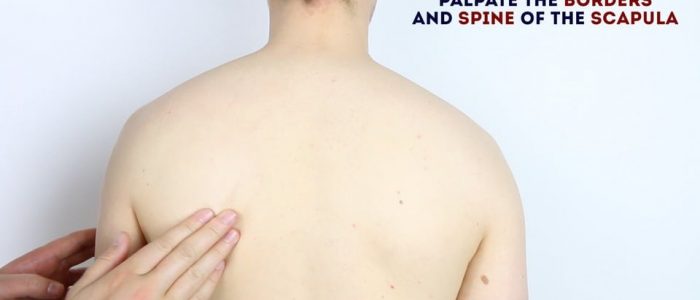
Palpate the various components of the shoulder girdle, noting any swelling, bony irregularities and tenderness:
- Sternoclavicular joint: the joint between the sternum and the clavicle.
- Clavicle: extends between the sternum and the acromion of the scapula.
- Acromioclavicular joint: the joint between the acromion and the clavicle.
- Acromion: a continuation of the scapular spine and the most superolateral bony prominence of the shoulder.
- Coracoid process of the scapula: a small hook-like bony prominence located 2cm inferior and medial to the clavicular tip.
- Head of the humerus: located 1cm inferolateral to the coracoid process.
- Greater tubercle of the humerus: located slightly anterolateral to the head of the humerus.
- The spine of the scapula: easily palpable on the posterior aspect of the scapula, running from the acromion towards the thoracic vertebrae.
Move
The shoulder joint of each arm should be assessed and compared.
If the patient is known to have an issue with a particular shoulder, you should assess the ‘normal’ shoulder first for comparison.
Active movement
Active movement refers to a movement performed independently by the patient. Ask the patient to carry out a sequence of active movements to assess joint function. As the patient performs each movement, note any restrictions in the range of the joint’s movement and also look for signs of discomfort.
It’s important to clearly explain and demonstrate each movement you expect the patient to perform to aid understanding.
Compound movements (screening)
Compound movements are often used as a rapid screening tool for shoulder joint pathology as they test a number of the rotator cuff muscles in one go. If the patient experiences pain or is unable to perform these movements you would then proceed to perform a more detailed examination of the shoulder joint including the further movements explained below.
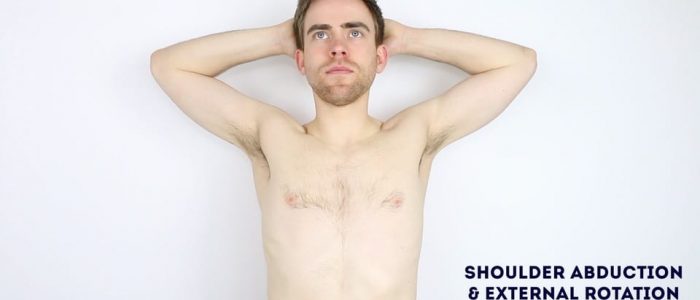
External rotation and abduction of the shoulder joint: Ask the patient to put their hands behind their head and point their elbows out to the side.
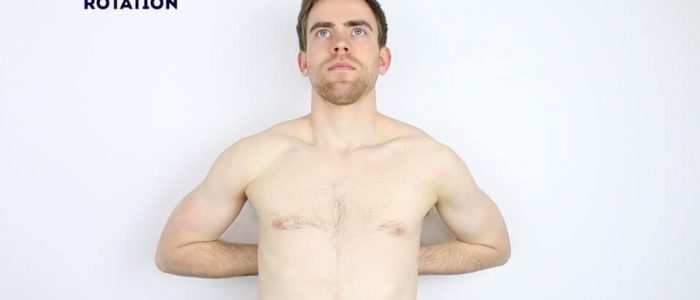
Internal rotation and adduction of the shoulder joint: Ask the patient to place each hand behind their back and reach as far up their spine as they are able to.
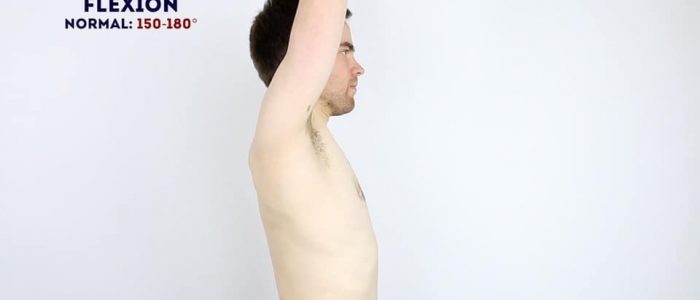
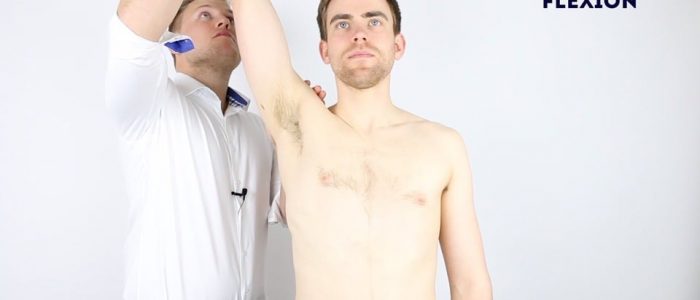
Active shoulder flexion
Normal range of movement: 150°- 180°
Instructions: Ask the patient to raise their arms forwards until they’re pointing up towards the ceiling.
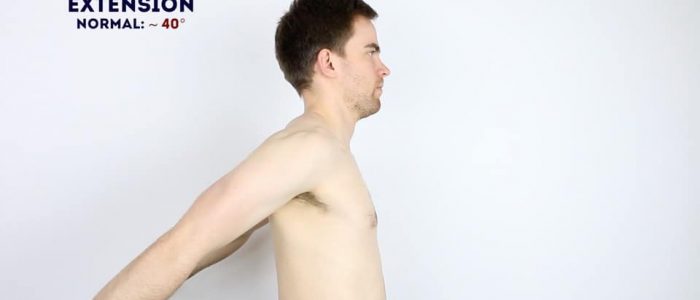
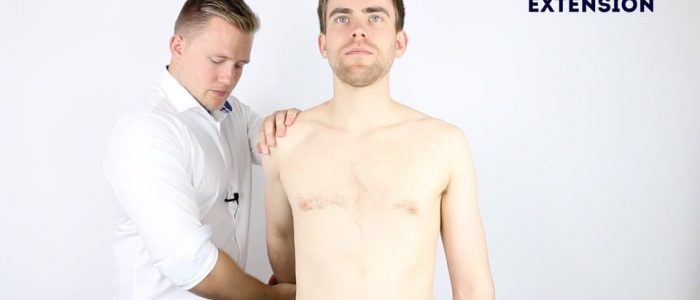
Active shoulder extension
Normal range of movement: 40°
Instructions: Ask the patient to stretch out their arms behind them.
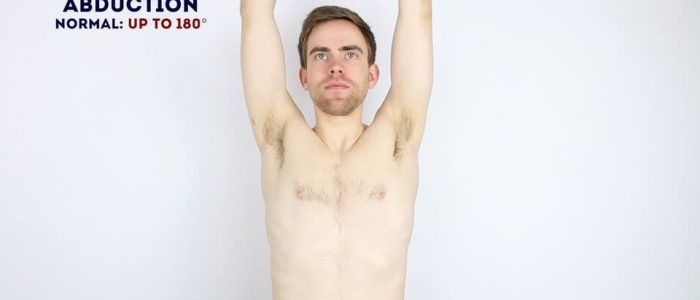
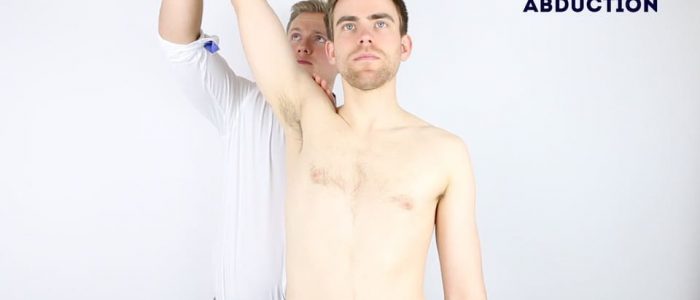
Active shoulder ABduction
Normal range of movement: 180°
Instructions: Ask the patient to raise their arms out to the sides in an arc-like motion until their hands touch above their head.
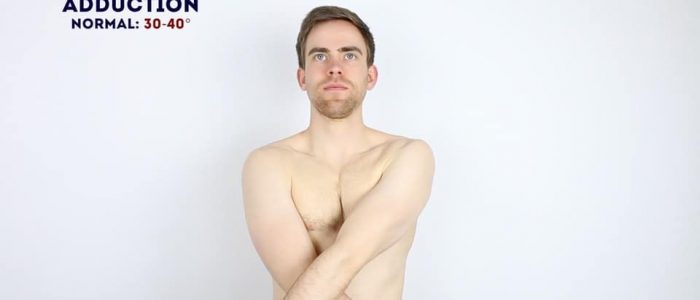
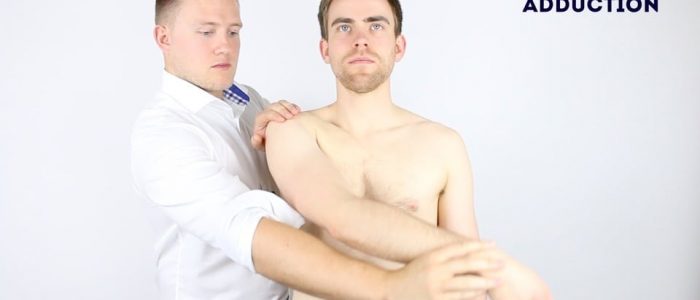
Active shoulder ADduction
Normal range of movement: 30°- 40°
Instructions: Ask the patient to keep their arms straight and move them across the front of their body to the opposite side.
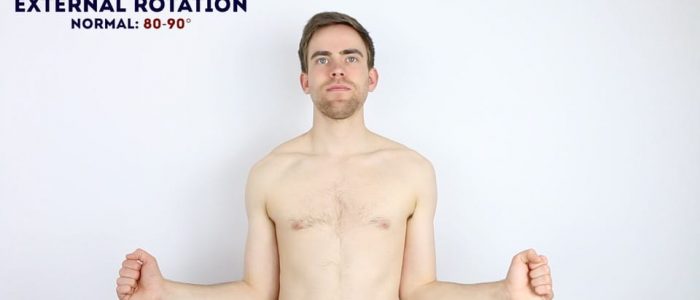
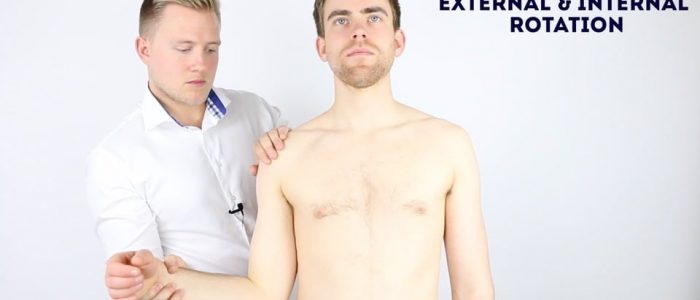
Active external rotation
Normal range of movement: 80° – 90°
Instructions: Ask the patient to keep their elbows by their sides flexed at 90° whilst they move their forearms outwards in an arc-like motion.
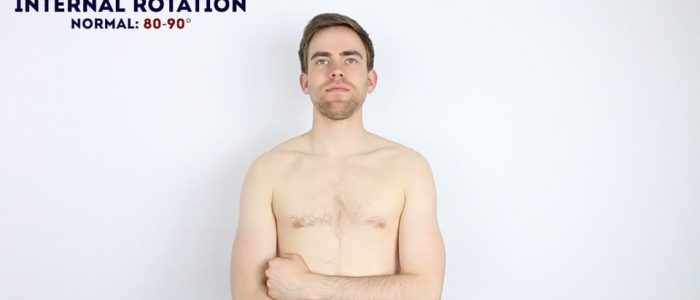
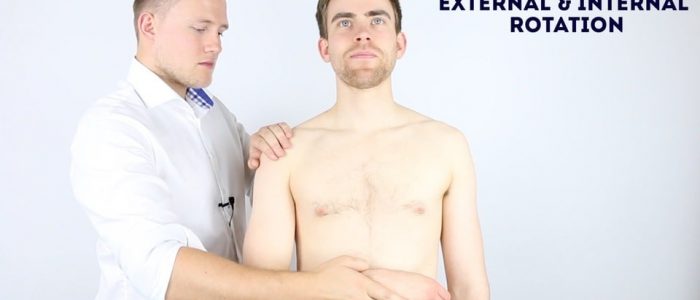
Active internal rotation
Normal range of movement: 80° – 90°
Instructions: Ask the patient to keep their elbows by their sides flexed at 90° whilst they move their forearms inwards across their body.
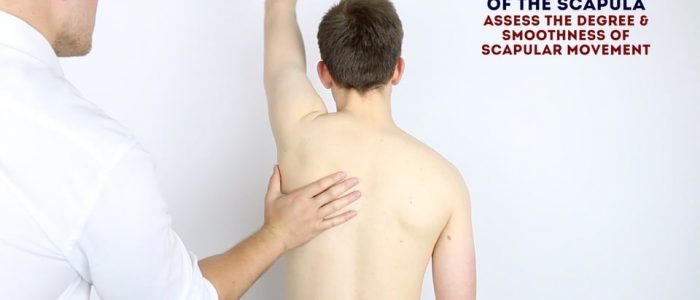
Scapular movement
Instructions: Ask the patient to abduct their shoulder, whilst you simultaneously palpate the inferior pole of the scapula. Assess the degree and smoothness of scapular movement.
On average 50-70% of the scapula’s initial movement occurs at the glenohumeral joint.
If the glenohumeral joint’s movement is reduced due to injury or inflammation then the majority of abduction will occur via increased scapular movement over the chest wall.
Passive movement
Passive movement refers to a movement of the patient, controlled by the examiner. This involves the patient relaxing and allowing you to move the joint freely to assess the full range of joint movement. It’s important to feel for crepitus as you move the joint (which can be associated with osteoarthritis) and observe any discomfort or restriction in the joint’s range of movement.
If abnormalities are noted on active movements (e.g. restricted range of movement), assess joint movements passively.
Ask the patient to fully relax and allow you to move their arm for them.
Warn them that should they experience any pain they should let you know immediately.
Repeat the above movements passively, feeling for any crepitus during the movement of the joint.
Adhesive capsulitis (frozen shoulder)
Adhesive capsulitis involves stiffness and pain in the shoulder joint associated with a significant reduction in the range of both active and passive movement. Palpation of the joint does not typically cause pain and clinical examination reveals a significantly reduced range of active and passive movement. The underlying aetiology is unclear however risk factors include surgery, prolonged immobility and trauma.
Axillary nerve palsy
Axillary nerve palsy is typically caused by shoulder dislocation. Clinical features include loss of sensation over the lateral deltoid region (known as the regimental patch) and deltoid muscle weakness (loss of shoulder abduction).
Special tests
There are a wide range of special tests that can be performed in a shoulder examination and the choice of which to include in an assessment will depend on what the examiner has asked you to do, the patient’s background and your clinical findings so far.
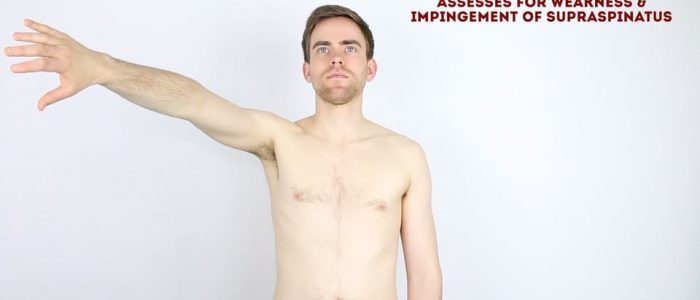
Supraspinatus assessment (empty can test/Jobe’s test)
This clinical test assesses the function of the supraspinatus muscle.
1. Abduct the patient’s arm to 90° and then angle the arm forwards by approximately 30° so that the shoulder is in the plane of the scapula.
2. Internally rotate the arm so that the thumb points down towards the floor.
3. Now push down on the arm whilst the patient resists.
Interpretation
This test assesses for weakness and/or impingement of supraspinatus. Weakness may represent a tear in the supraspinatus tendon or pain due to impingement.
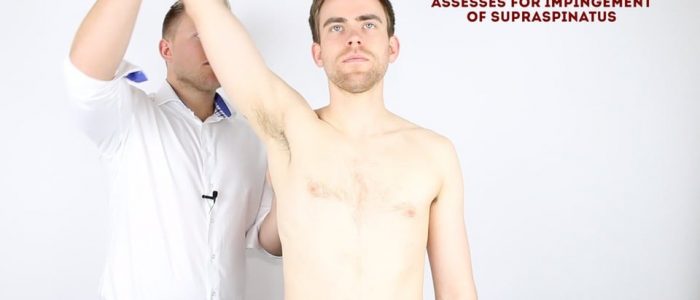
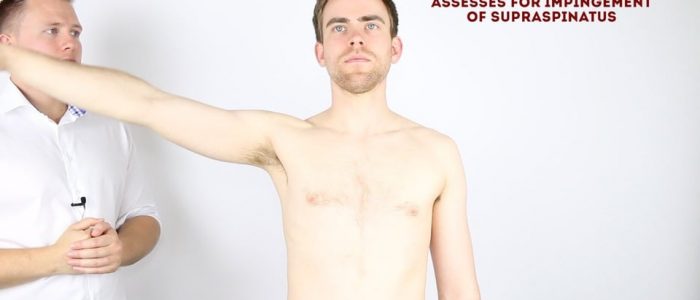
The painful arc (impingement syndrome)
This clinical test assesses for impingement of supraspinatus.
1. Passively abduct the patient’s arm to its maximum point of abduction.
2. Ask the patient to lower their arm slowly back to a neutral position.
Interpretation
Impingement or supraspinatus tendonitis typically causes pain between 60-120° of abduction, however, this test is not specific as many other conditions can cause pain in this arc of motion and therefore it should not be used in isolation for diagnosis.
Shoulder impingement syndrome
Shoulder impingement syndrome (SIS) involves the inflammation of tendons of the rotator cuff muscles as they pass through the subacromial space. SIS is most often associated with supraspinatus tendonitis. Symptoms of SIS include pain, weakness and a reduced range of active movement in the affected shoulder (normal passive range of motion is preserved). Symptoms are usually exacerbated by overhead movement of the limb, typically during abduction between 60-120°, which is referred to as a ‘painful arc’ of movement.
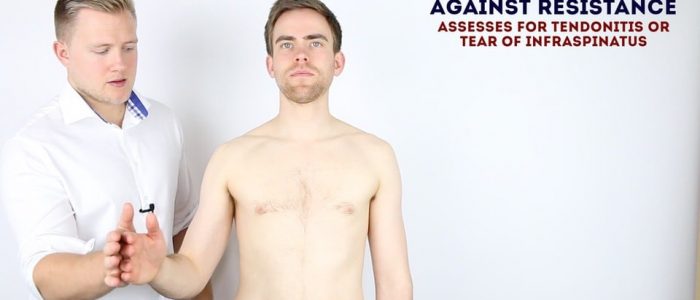
External rotation against resistance
This clinical test assesses the function of the infraspinatus muscle and teres minor.
1. Position the patient’s arm with the elbow flexed at 90°and in slight abduction (the abduction tests whether the patient can keep the arm externally rotated against gravity).
2. Passively externally rotate the arm to its maximum.
Interpretation
Pain on resisted external rotation may suggest tendonitis (infraspinatus/teres minor).
If the arm falls back to internal rotation or there is a loss of power it may suggest a tear in the infraspinatus or teres minor tendon, muscle wasting and/or a lower motor neurone lesion (suprascapular or axillary nerve).
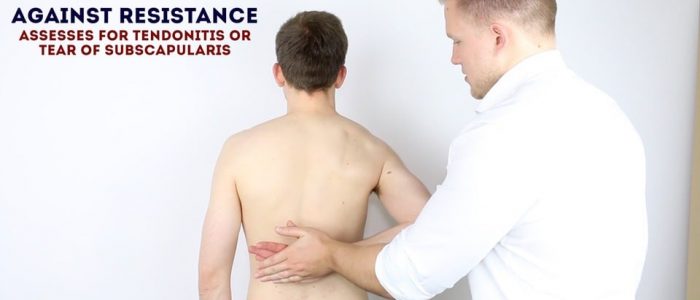
Internal rotation against resistance (Gerber’s lift-off test)
This clinical test assesses the function of the subscapularis muscle.
1. Ask the patient to place the dorsum of their hand on their lower back.
2. Apply light resistance to the hand (pressing it towards their back).
3. Ask the patient to move their hand off their back.
Interpretation
If the patient is unable to move their hand off their back this may indicate pathology of the subscapularis muscle (e.g. tendonitis/tear) or a subscapular nerve lesion.
Scarf test
The scarf test assesses the function of the acromioclavicular joint.
1. Passively flex the shoulder joint to 90° and ask the patient to place the hand on the side you are examining on to the contralateral shoulder.
2. Apply resistance to the elbow in the direction of the contralateral shoulder.
Interpretation
If the patient experiences pain the test is considered positive and suggestive of acromioclavicular joint pathology (e.g. osteoarthritis).
To complete the examination…
Explain to the patient that the examination is now finished.
Thank the patient for their time.
Dispose of PPE appropriately and wash your hands.
Summarise your findings.
Example summary
“Today I examined Mr Smith, a 32-year-old male. On general inspection, the patient appeared comfortable at rest, with no stigmata of musculoskeletal disease. There were no objects or medical equipment around the bed of relevance.”
“Assessment of the upper limbs revealed a normal shoulder joint appearance, with no tenderness on palpation. The range of movement of both shoulder joints was normal. “
“In summary, these findings are consistent with a normal shoulder joint examination.”
“For completeness, I would like to perform the following further assessments and investigations.”
Further assessments and investigations
- Neurovascular examination of the upper limbs.
- Examination of the joints above and below (cervical spine and elbow joint).
- Further imaging if indicated (e.g. X-ray and MRI).
Reviewer
Mr Tejas Yarashi
Consultant Trauma & Orthopaedic Surgeon
References
- Dwaipayanc. Adapted by Geeky Medics. Winged scapula. Licence: CC BY-SA.
- Dana, Charles Loomis. Adapted by Geeky Medics. Trapezius and deltoid muscle wasting.
- Siegertmarc. Adapted by Geeky Medics. Clavicular fracture repair. Licence: CC BY.


