

- 📖 Geeky Medics OSCE Book
- ⚡ Geeky Medics Bundles
- ✨ 1300+ OSCE Stations
- ✅ OSCE Checklist PDF Booklet
- 🧠 UKMLA AKT Question Bank
- 💊 PSA Question Bank
- 💉 Clinical Skills App
- 🗂️ Flashcard Collections | OSCE, Medicine, Surgery, Anatomy
- 💬 SCA Cases for MRCGP
To be the first to know about our latest videos subscribe to our YouTube channel 🙌
Introduction
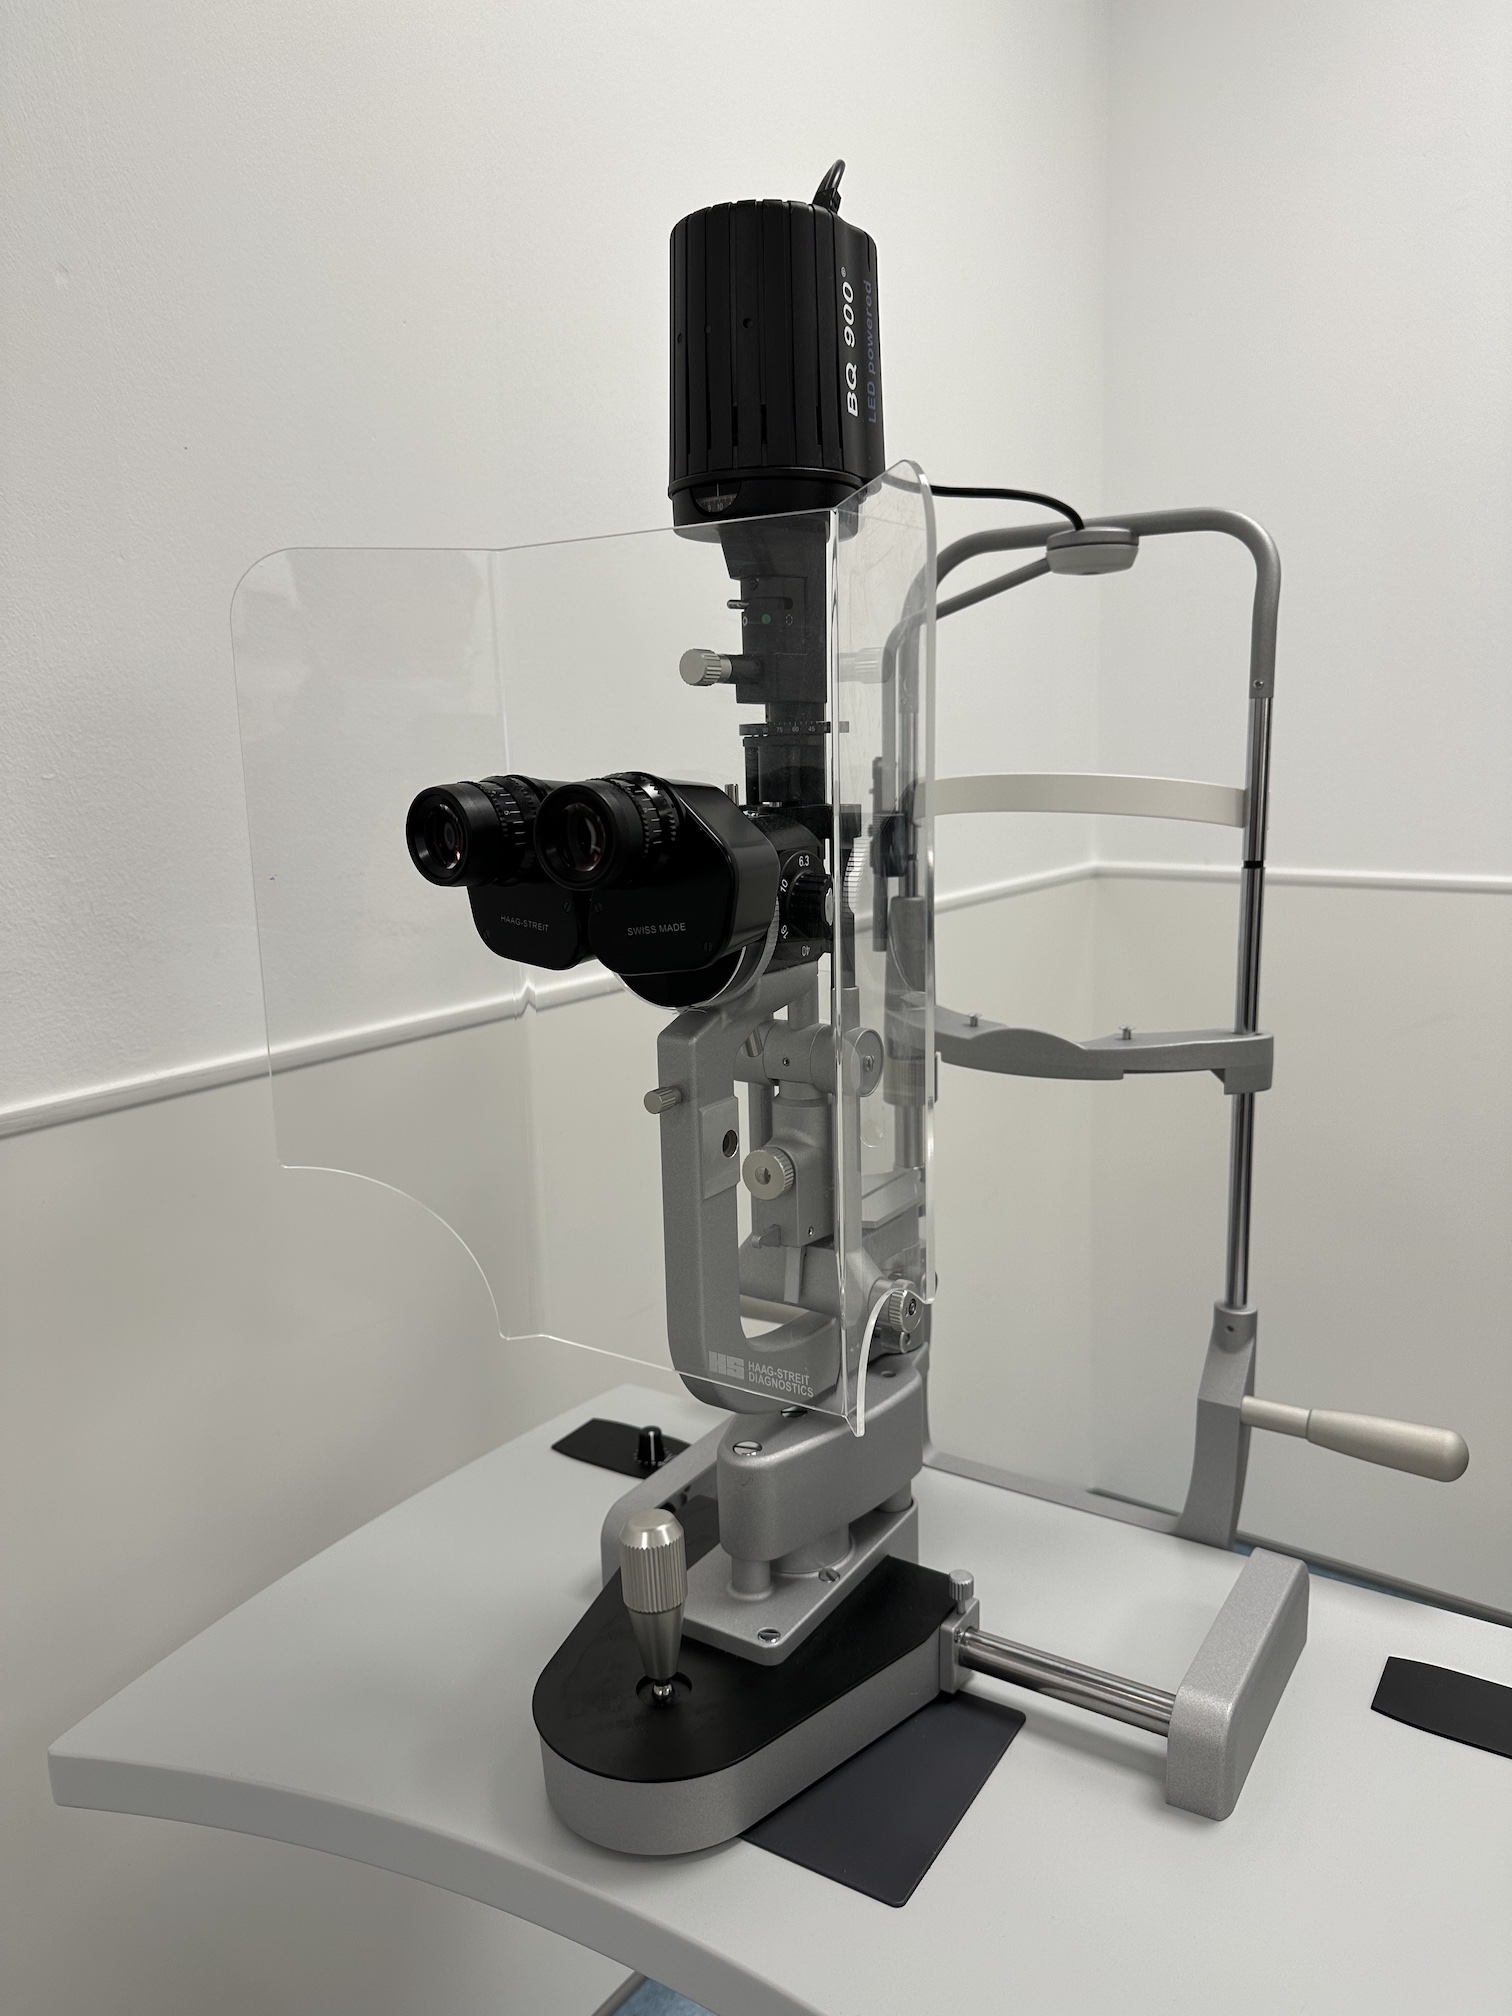
A slit lamp biomicroscope is a powerful tool for examining the eye. The illumination beam can be focused into a very thin ‘slit’, which allows the determination of the depth and size of any abnormalities.
The slit lamp allows a three-dimensional view of the anterior segment of the eye and, with the additional use of handheld lenses, binocular fundoscopy.
The article will provide an overview of slit lamp examination, including the components of a slit lamp, correct setup and positioning, and performing a systematic examination of the anterior segment of the eye.
Slit lamp overview
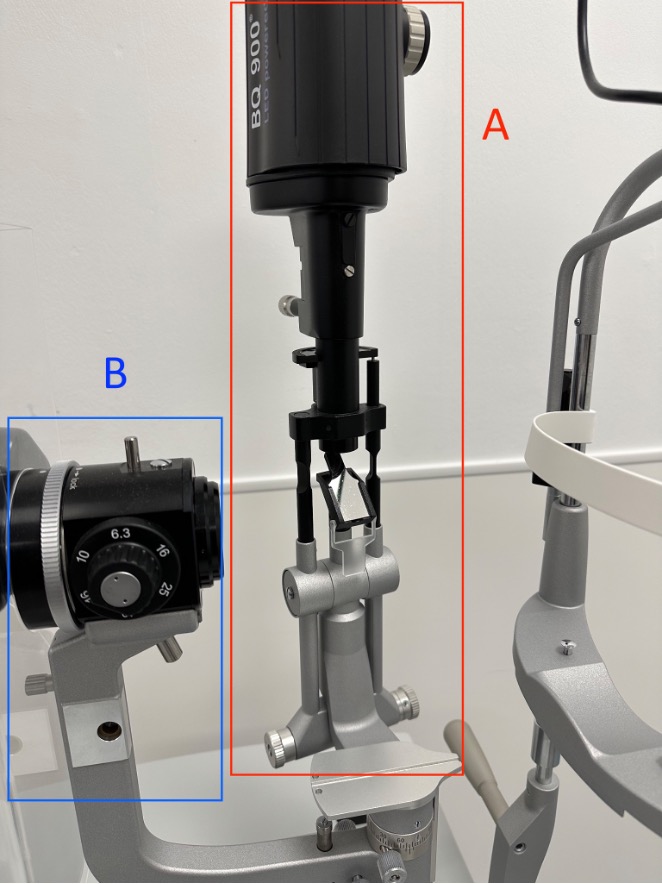
The slit lamp comprises two main parts: the illumination arm (A) and the viewing arm (B). The illumination arm has a light source which goes through a slit beam, and the viewing arm comprises two eyepieces and a biomicroscope.
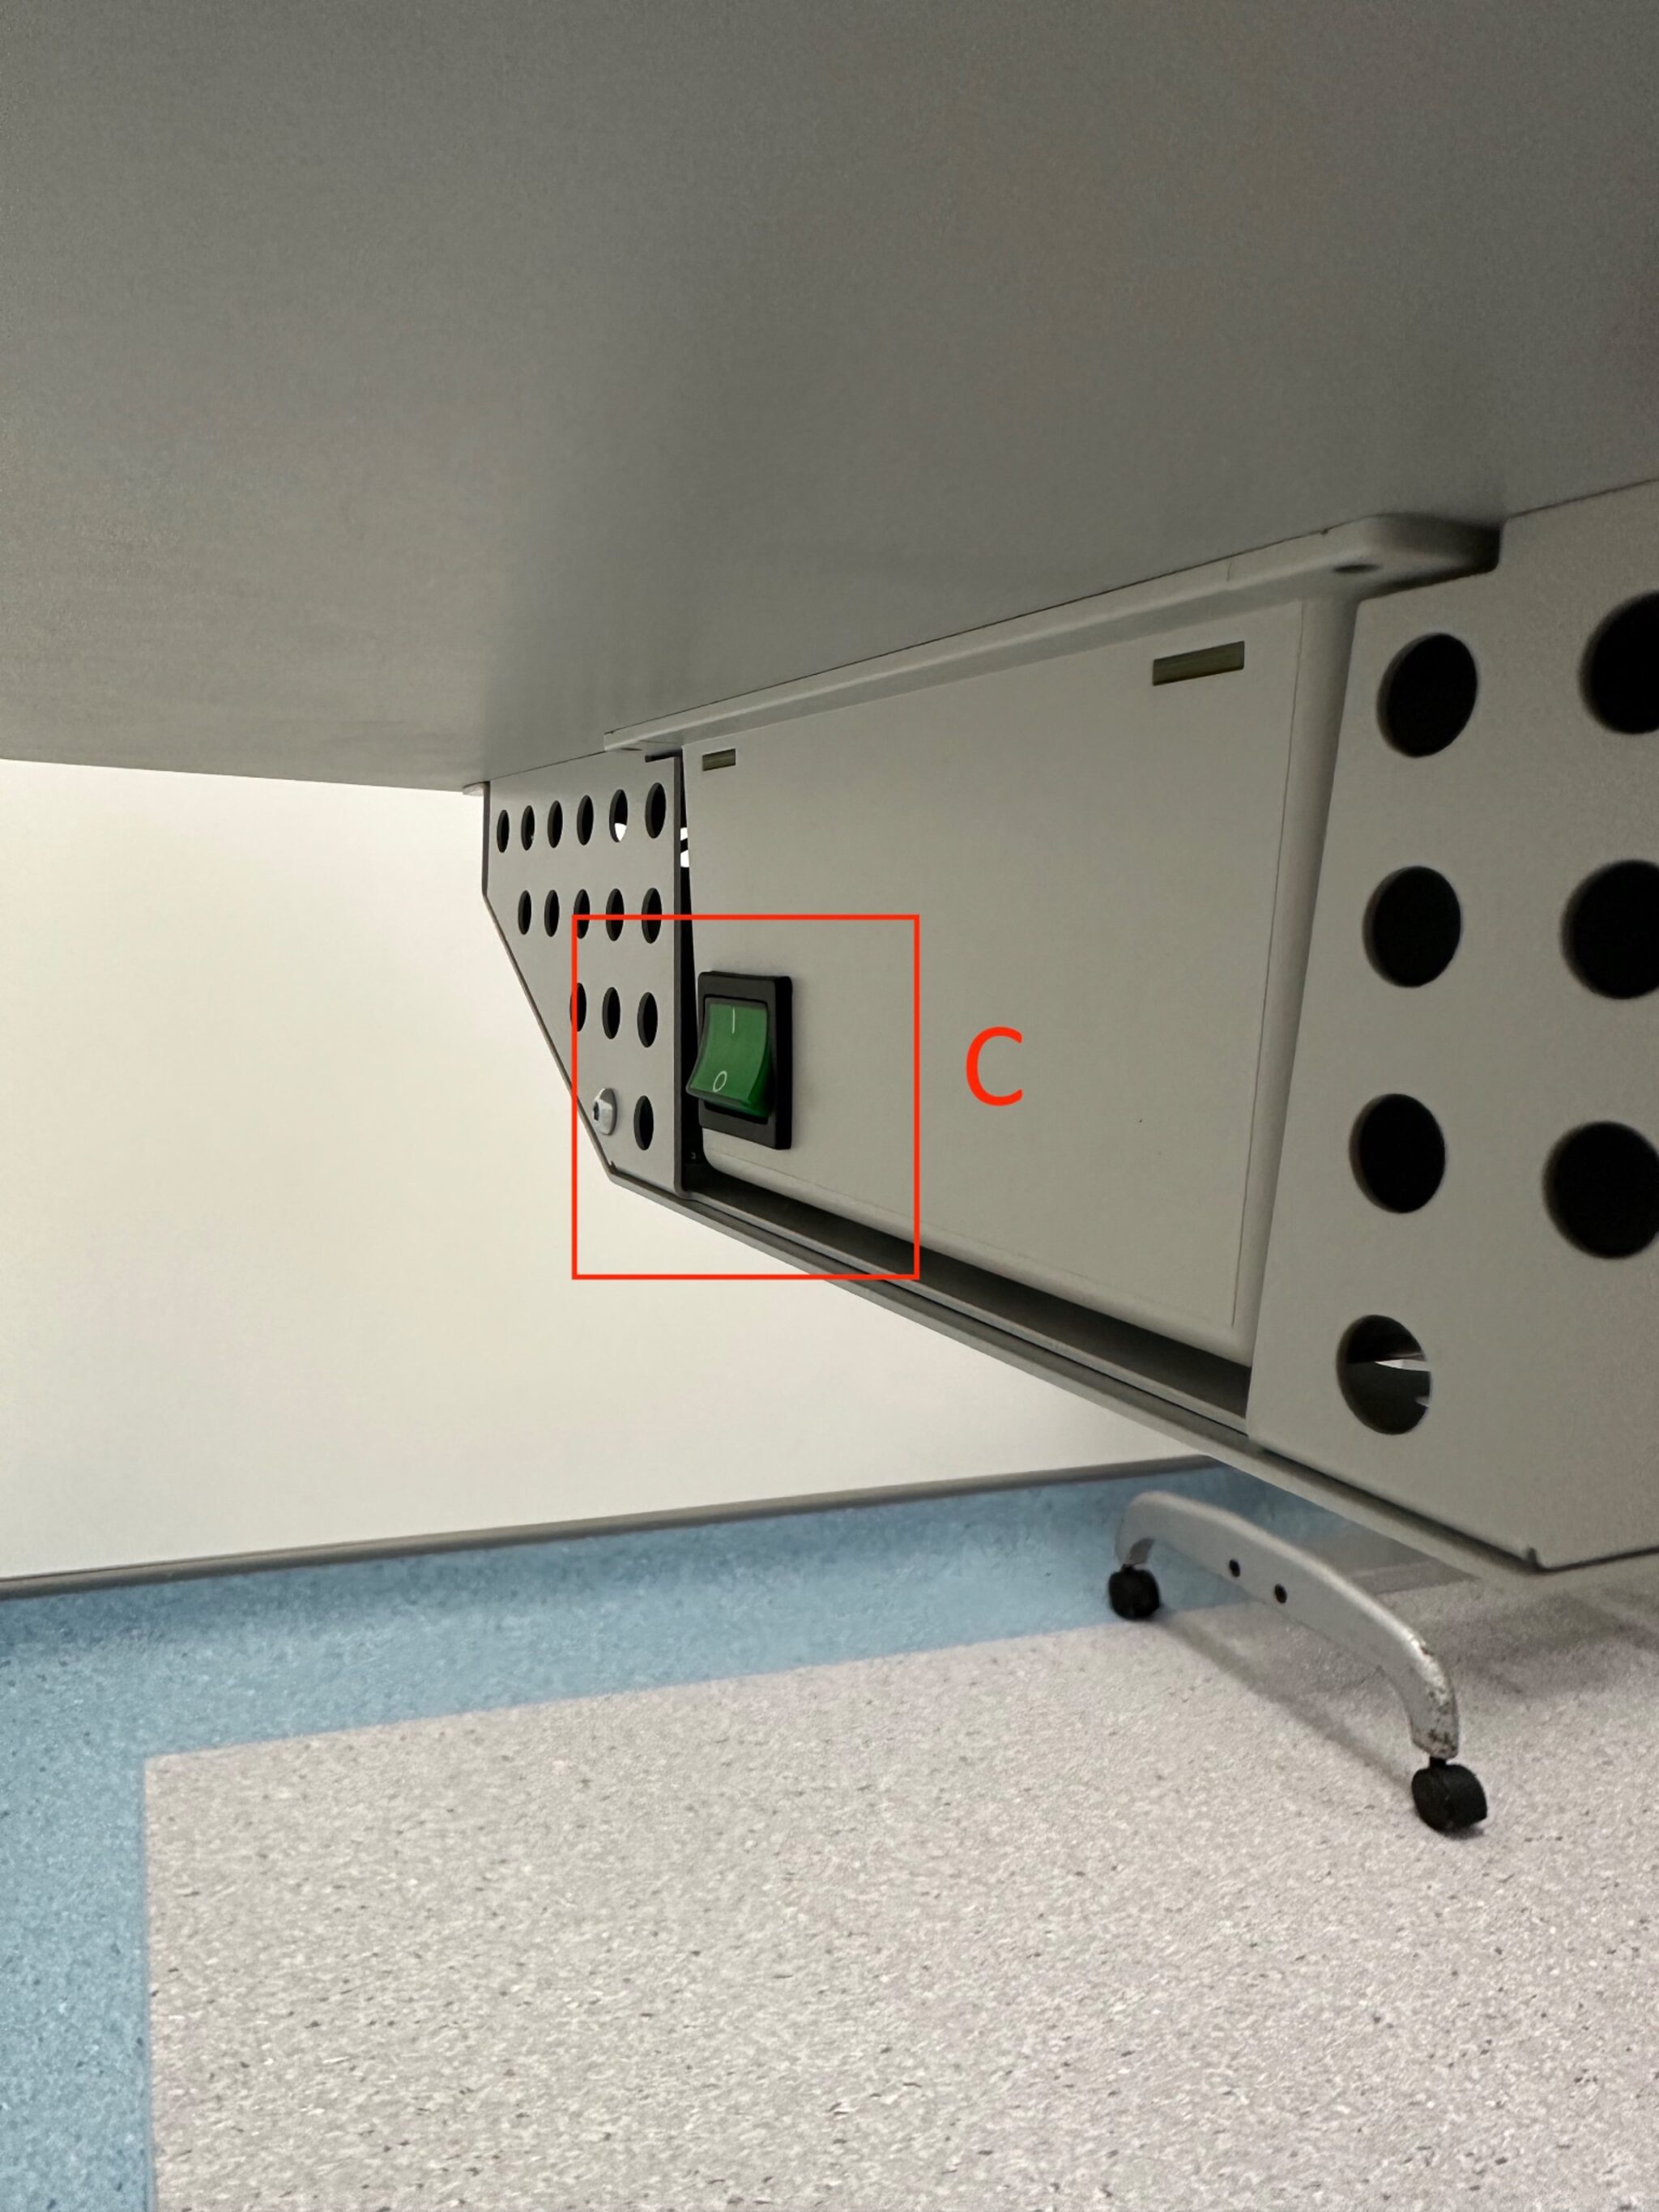
Both arms of the slit lamp rest on a base. Under the base is the switch (C) to turn the slit lamp on.
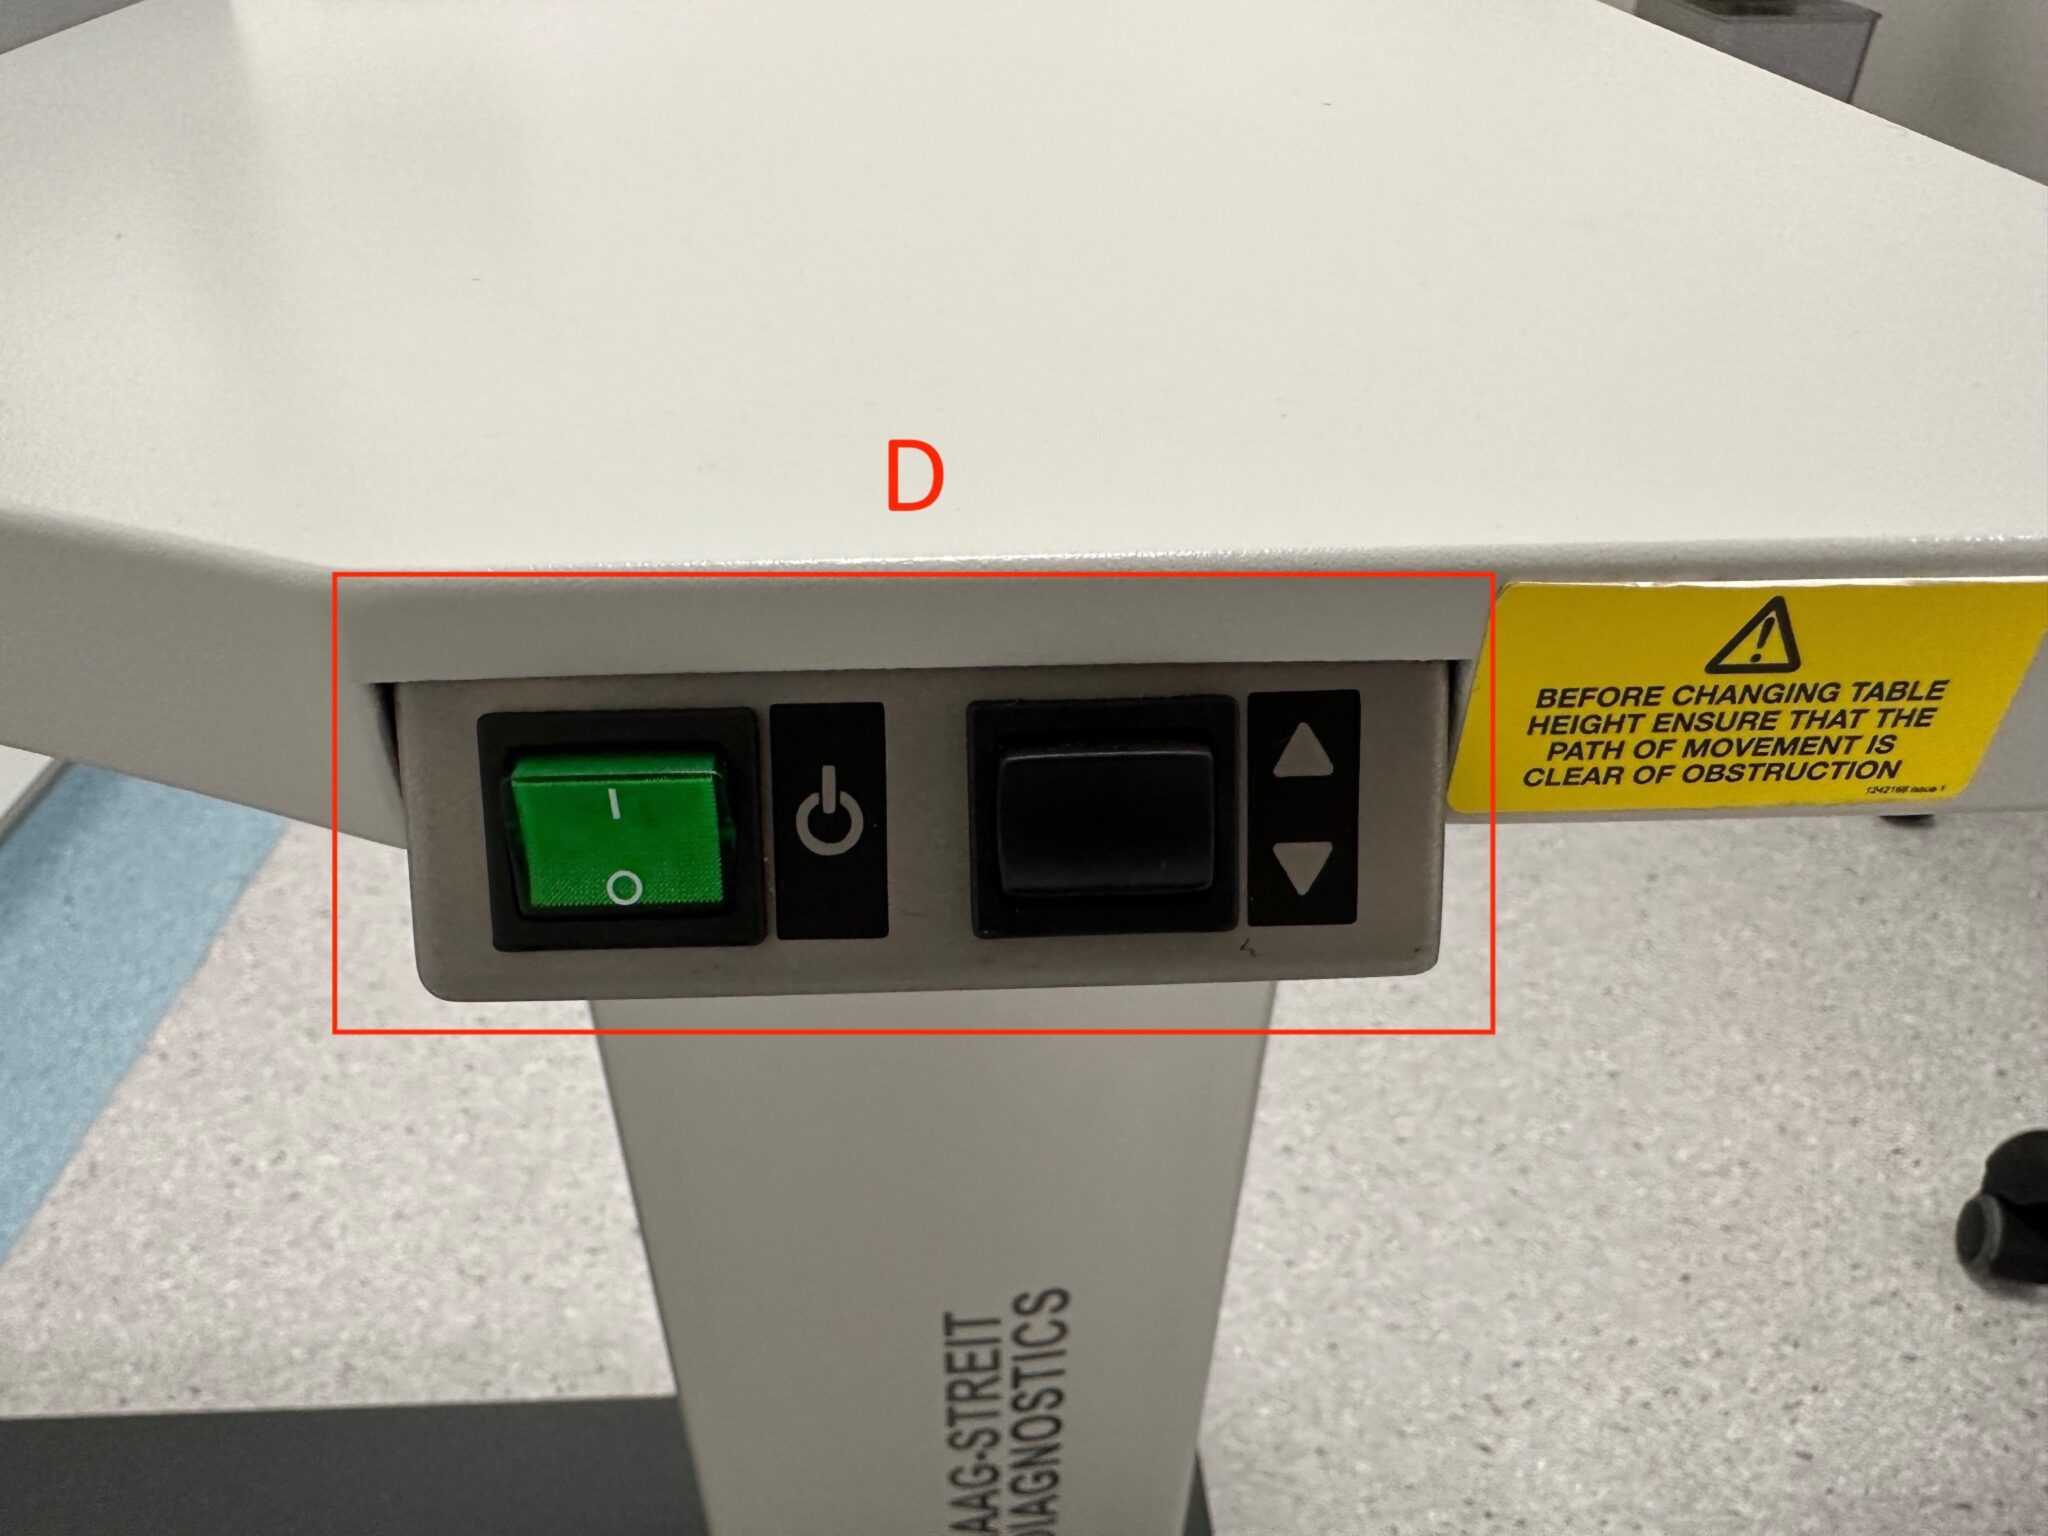
The base has a height-adjustable table with its own switch and buttons (D).
The slit lamp base is on an axle and rails, which enables coarse anterior-posterior and lateral movement. It has a locking screw (E) that must be fully unscrewed in the counterclockwise direction before the slit lamp can be moved.
The joystick (F) can push the entire slit lamp base to attain approximate focus. The joystick can then be gently tilted for fine movements to bring the image into sharp focus.
Turning the joystick clockwise lifts the entire column up, and a counter-clockwise motion brings it down.
The intensity knob (rheostat) is used to adjust the intensity of the light source (G). The pictured rheostat is in the off (O) position.


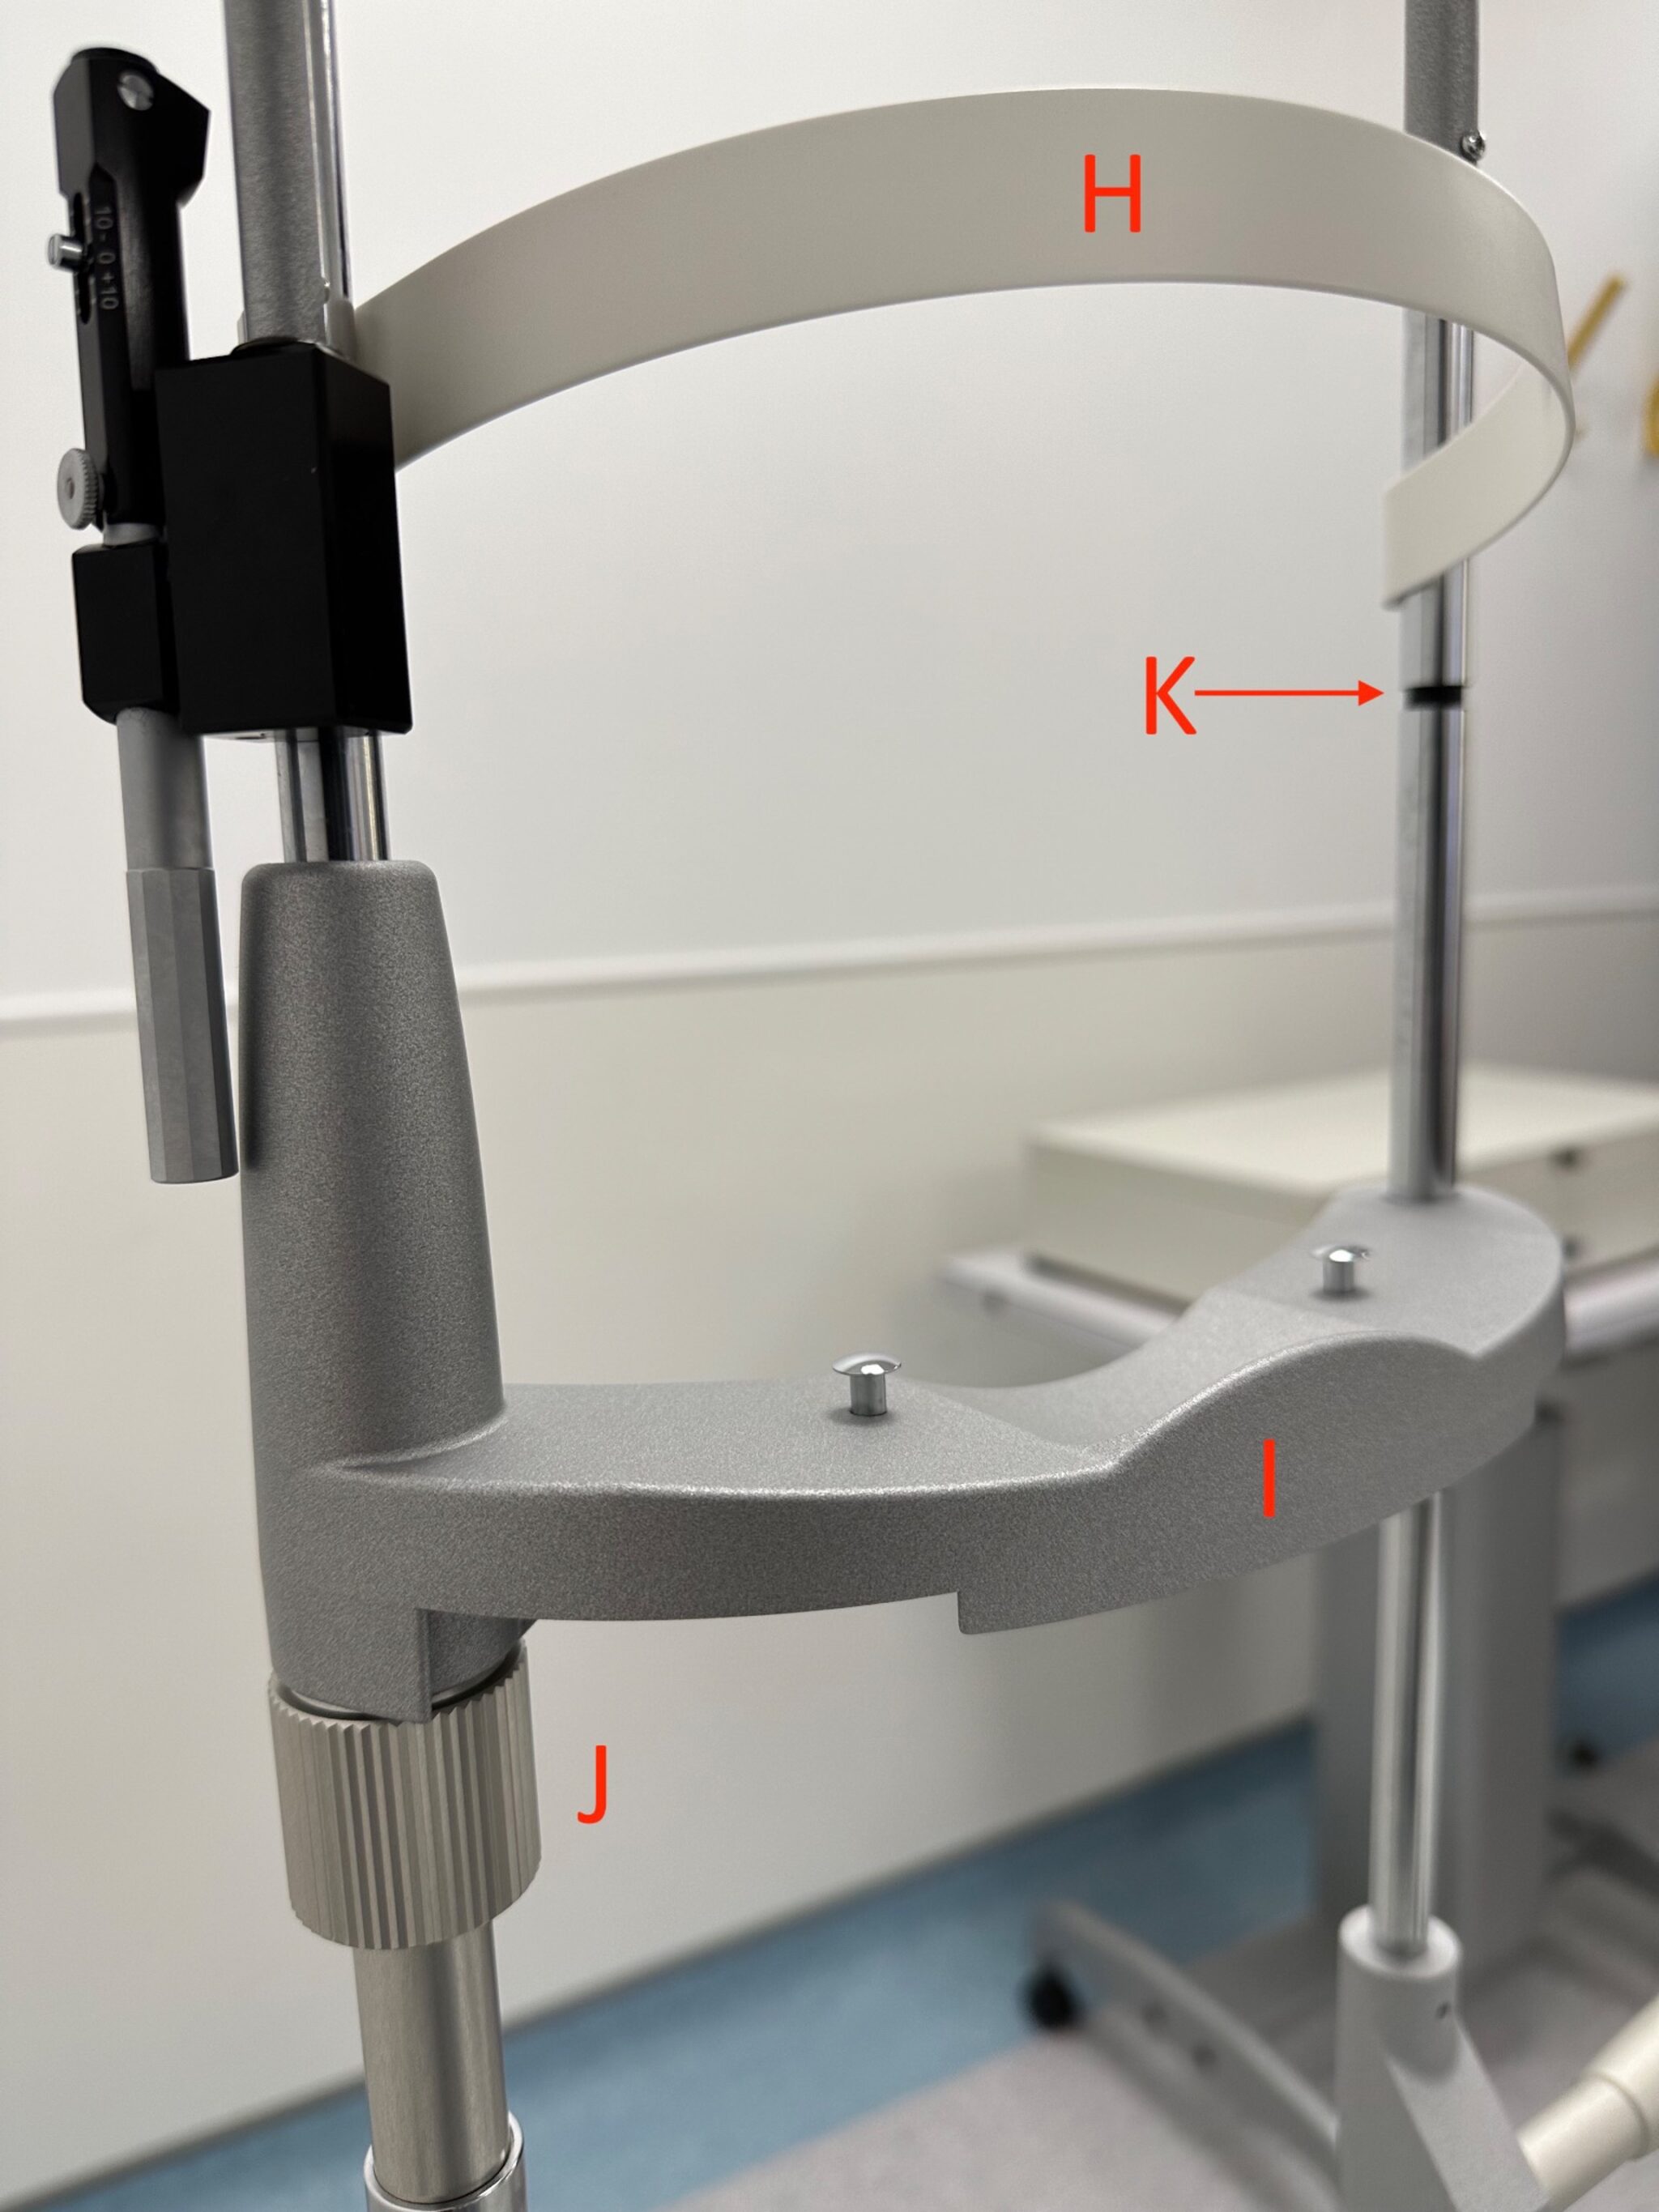
The patient’s head rests against the support frame: this consists of a forehead rest (H) and a chin rest (I), the height of which may be adjusted using the adjustment knob (J).
The canthus indicator is a black line which should be level with the lateral canthus of the patient’s eye (K).
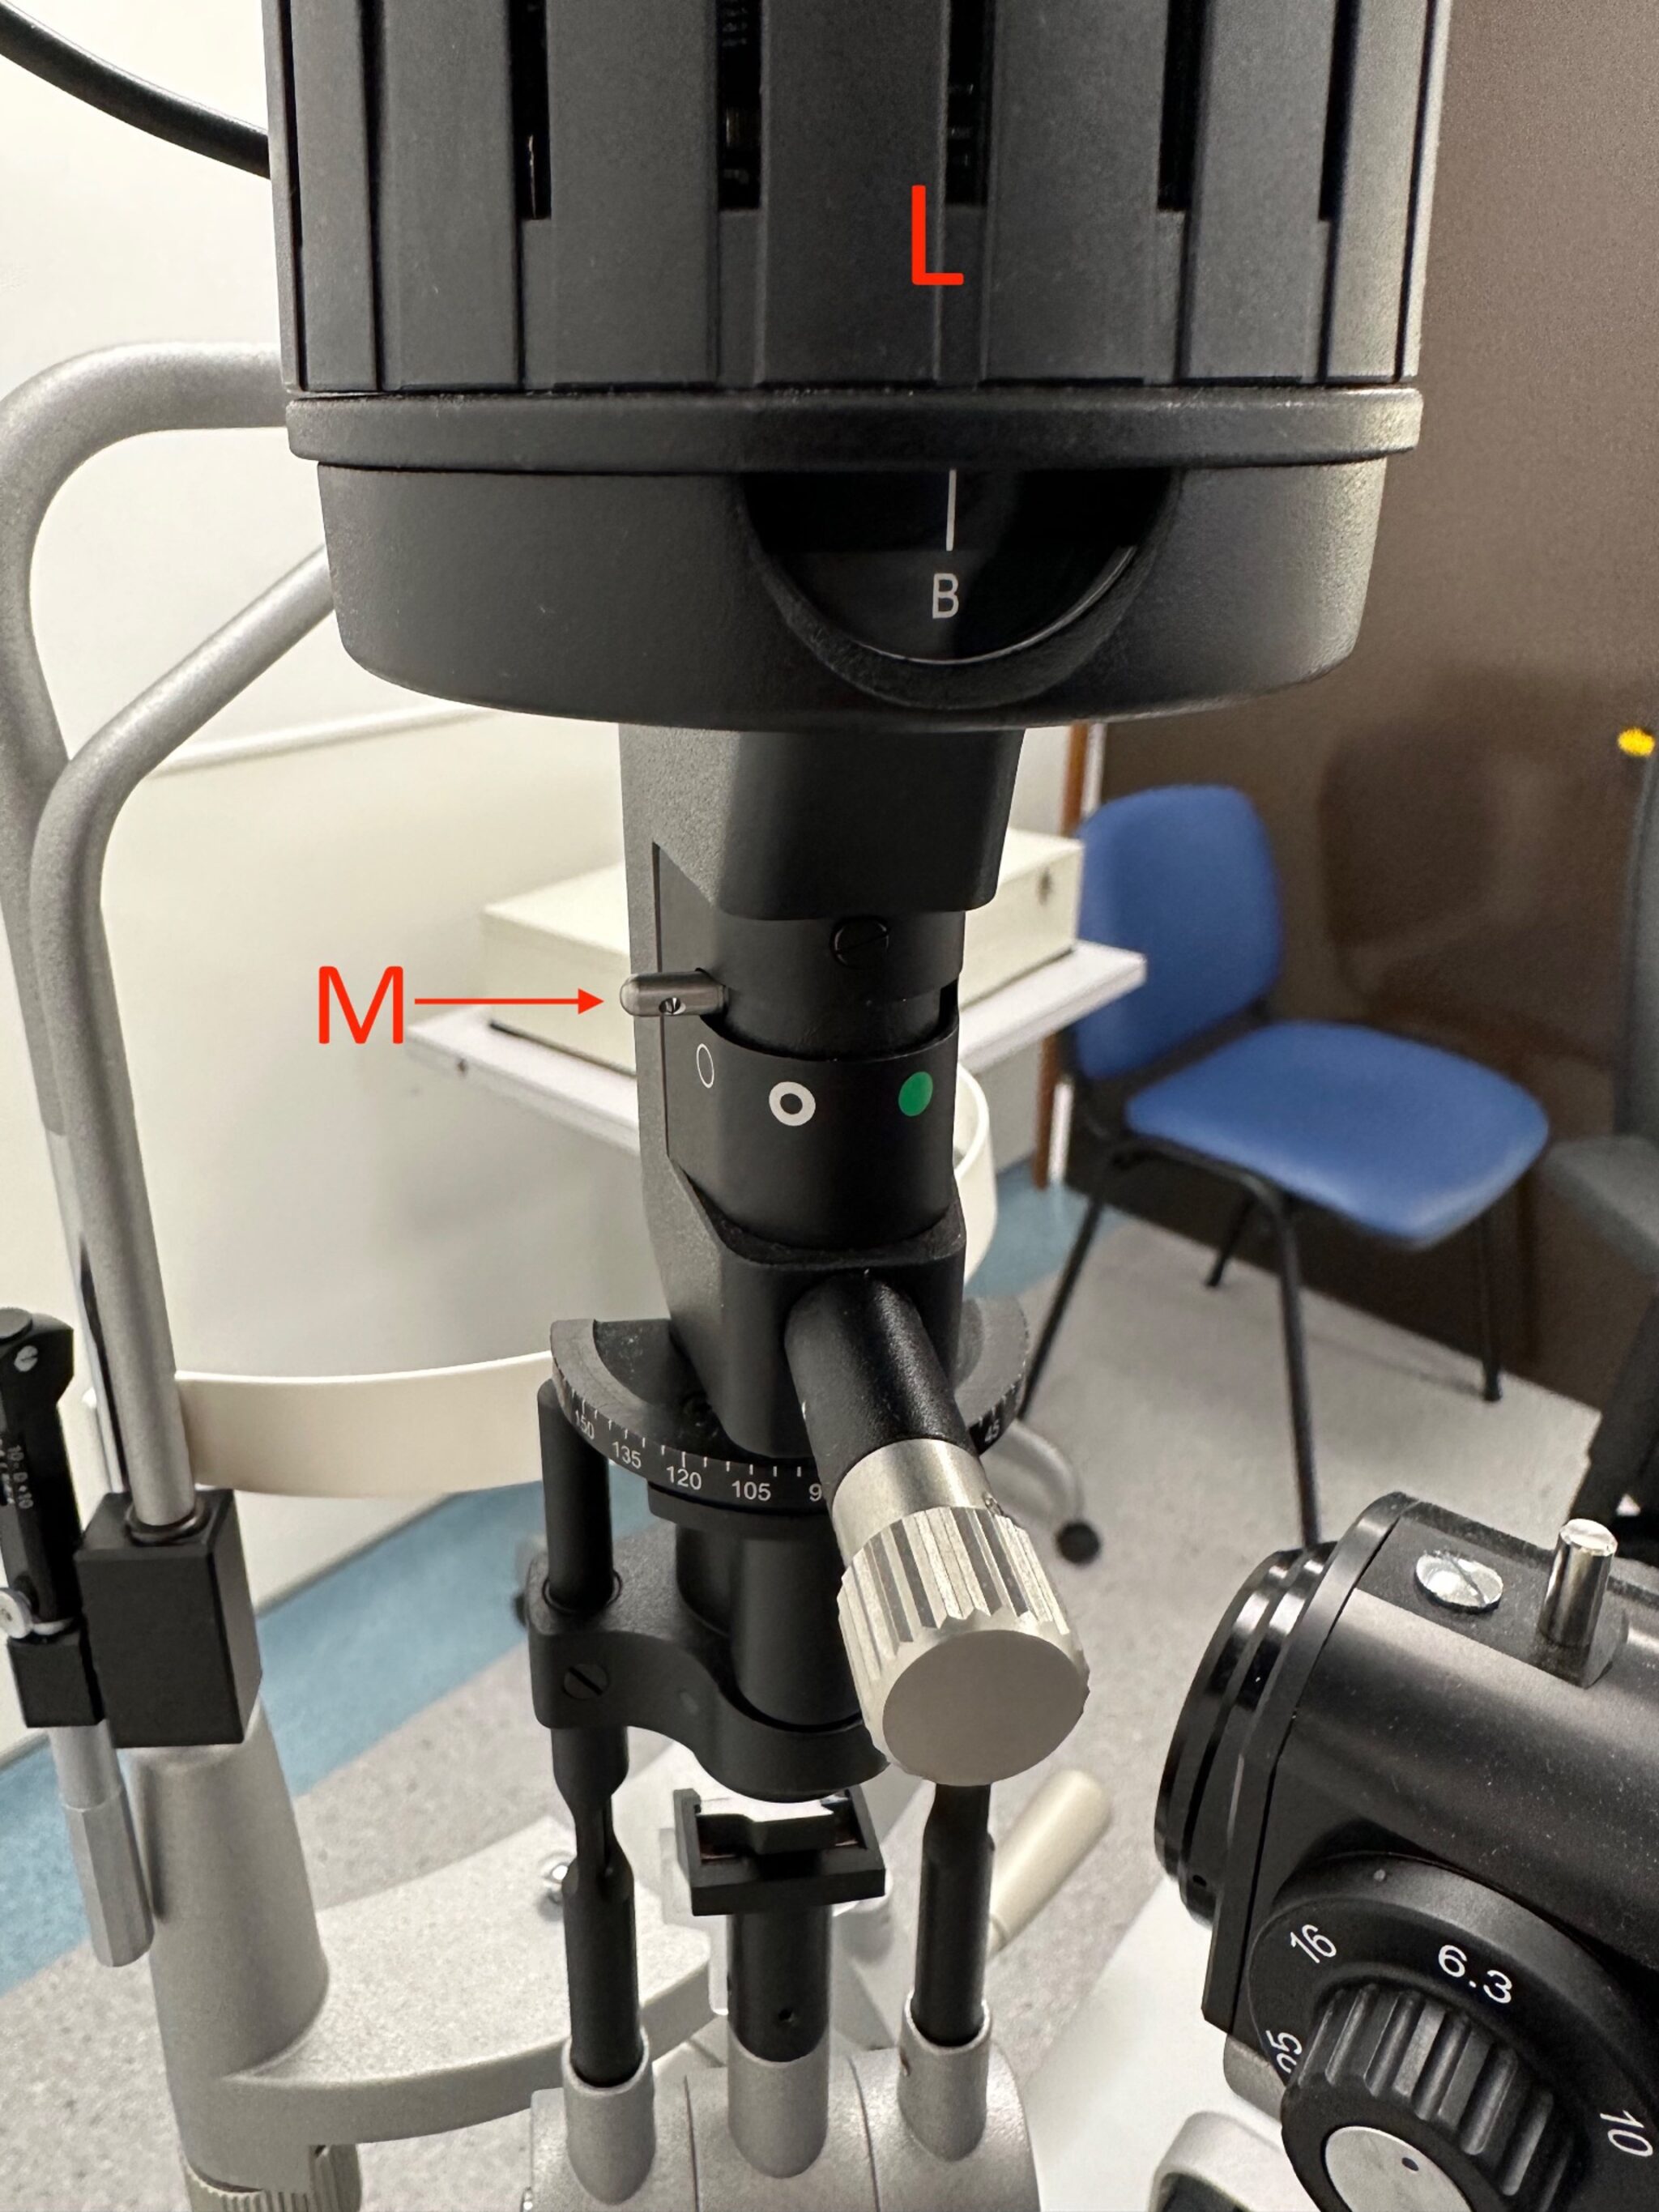
The illumination arm contains the light source (L); this has an adjustable lever with different filter types (M). The lever in the far left position (as pictured) is in the “open” position (i.e. unfiltered light).
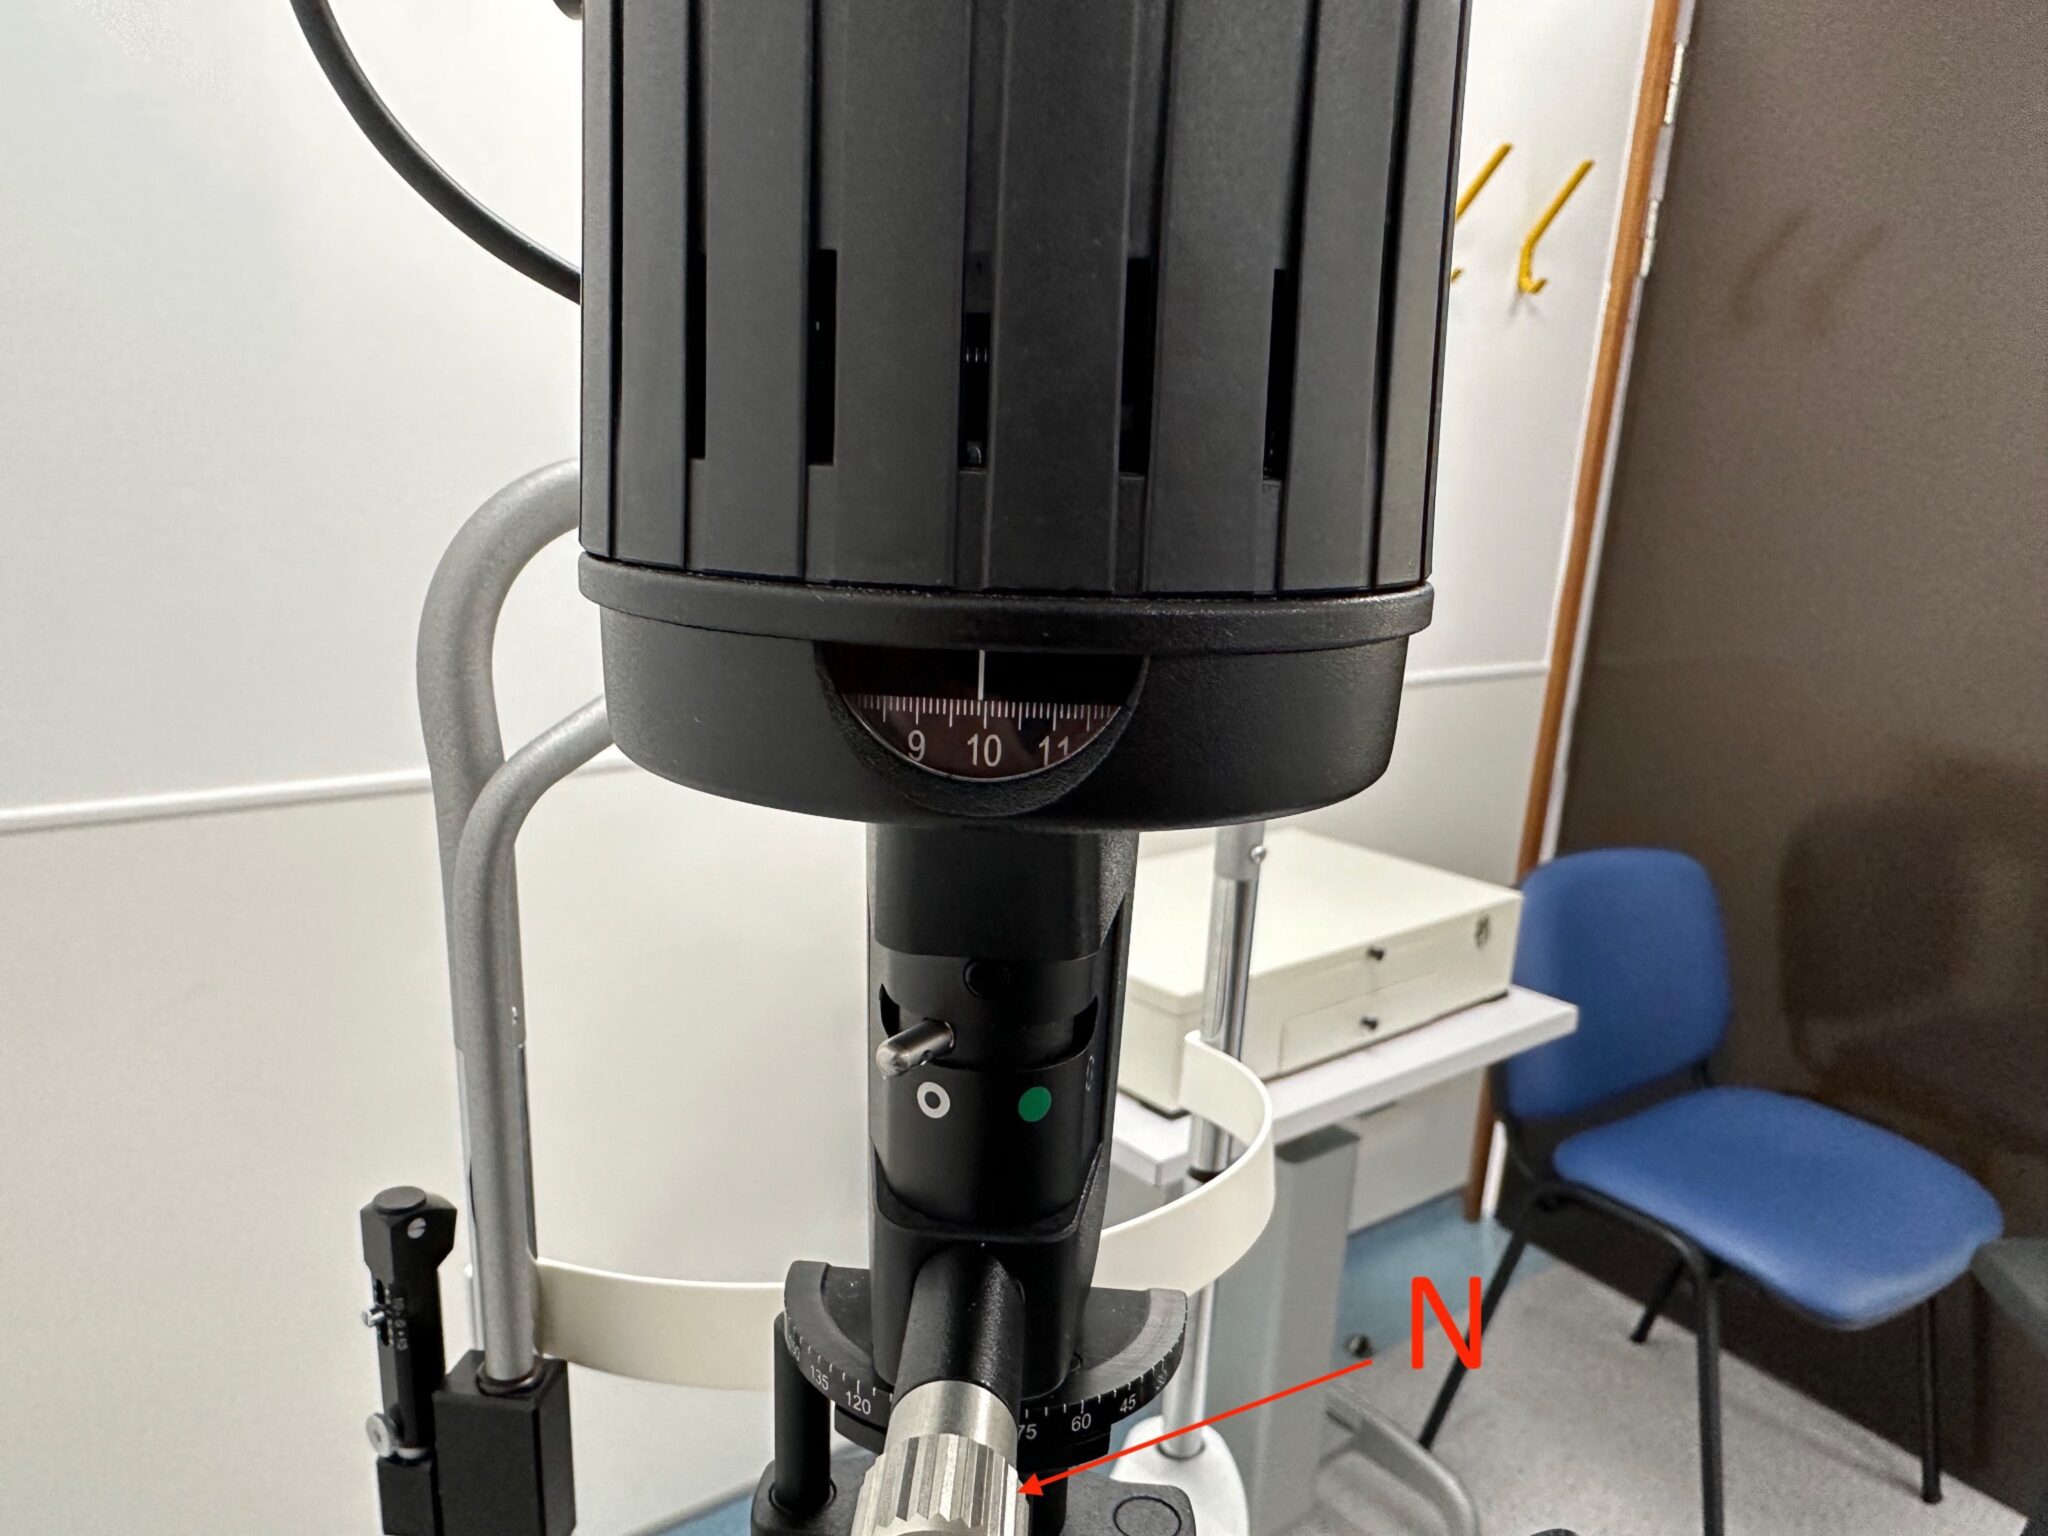
The beam height can be adjusted via the centre screw (N). Pictured is a beam height set to 10mm. The cobalt blue light (for fluorescein examination) can be found by rotating the screw counter-clockwise until a click is heard and the dial reads “B”.
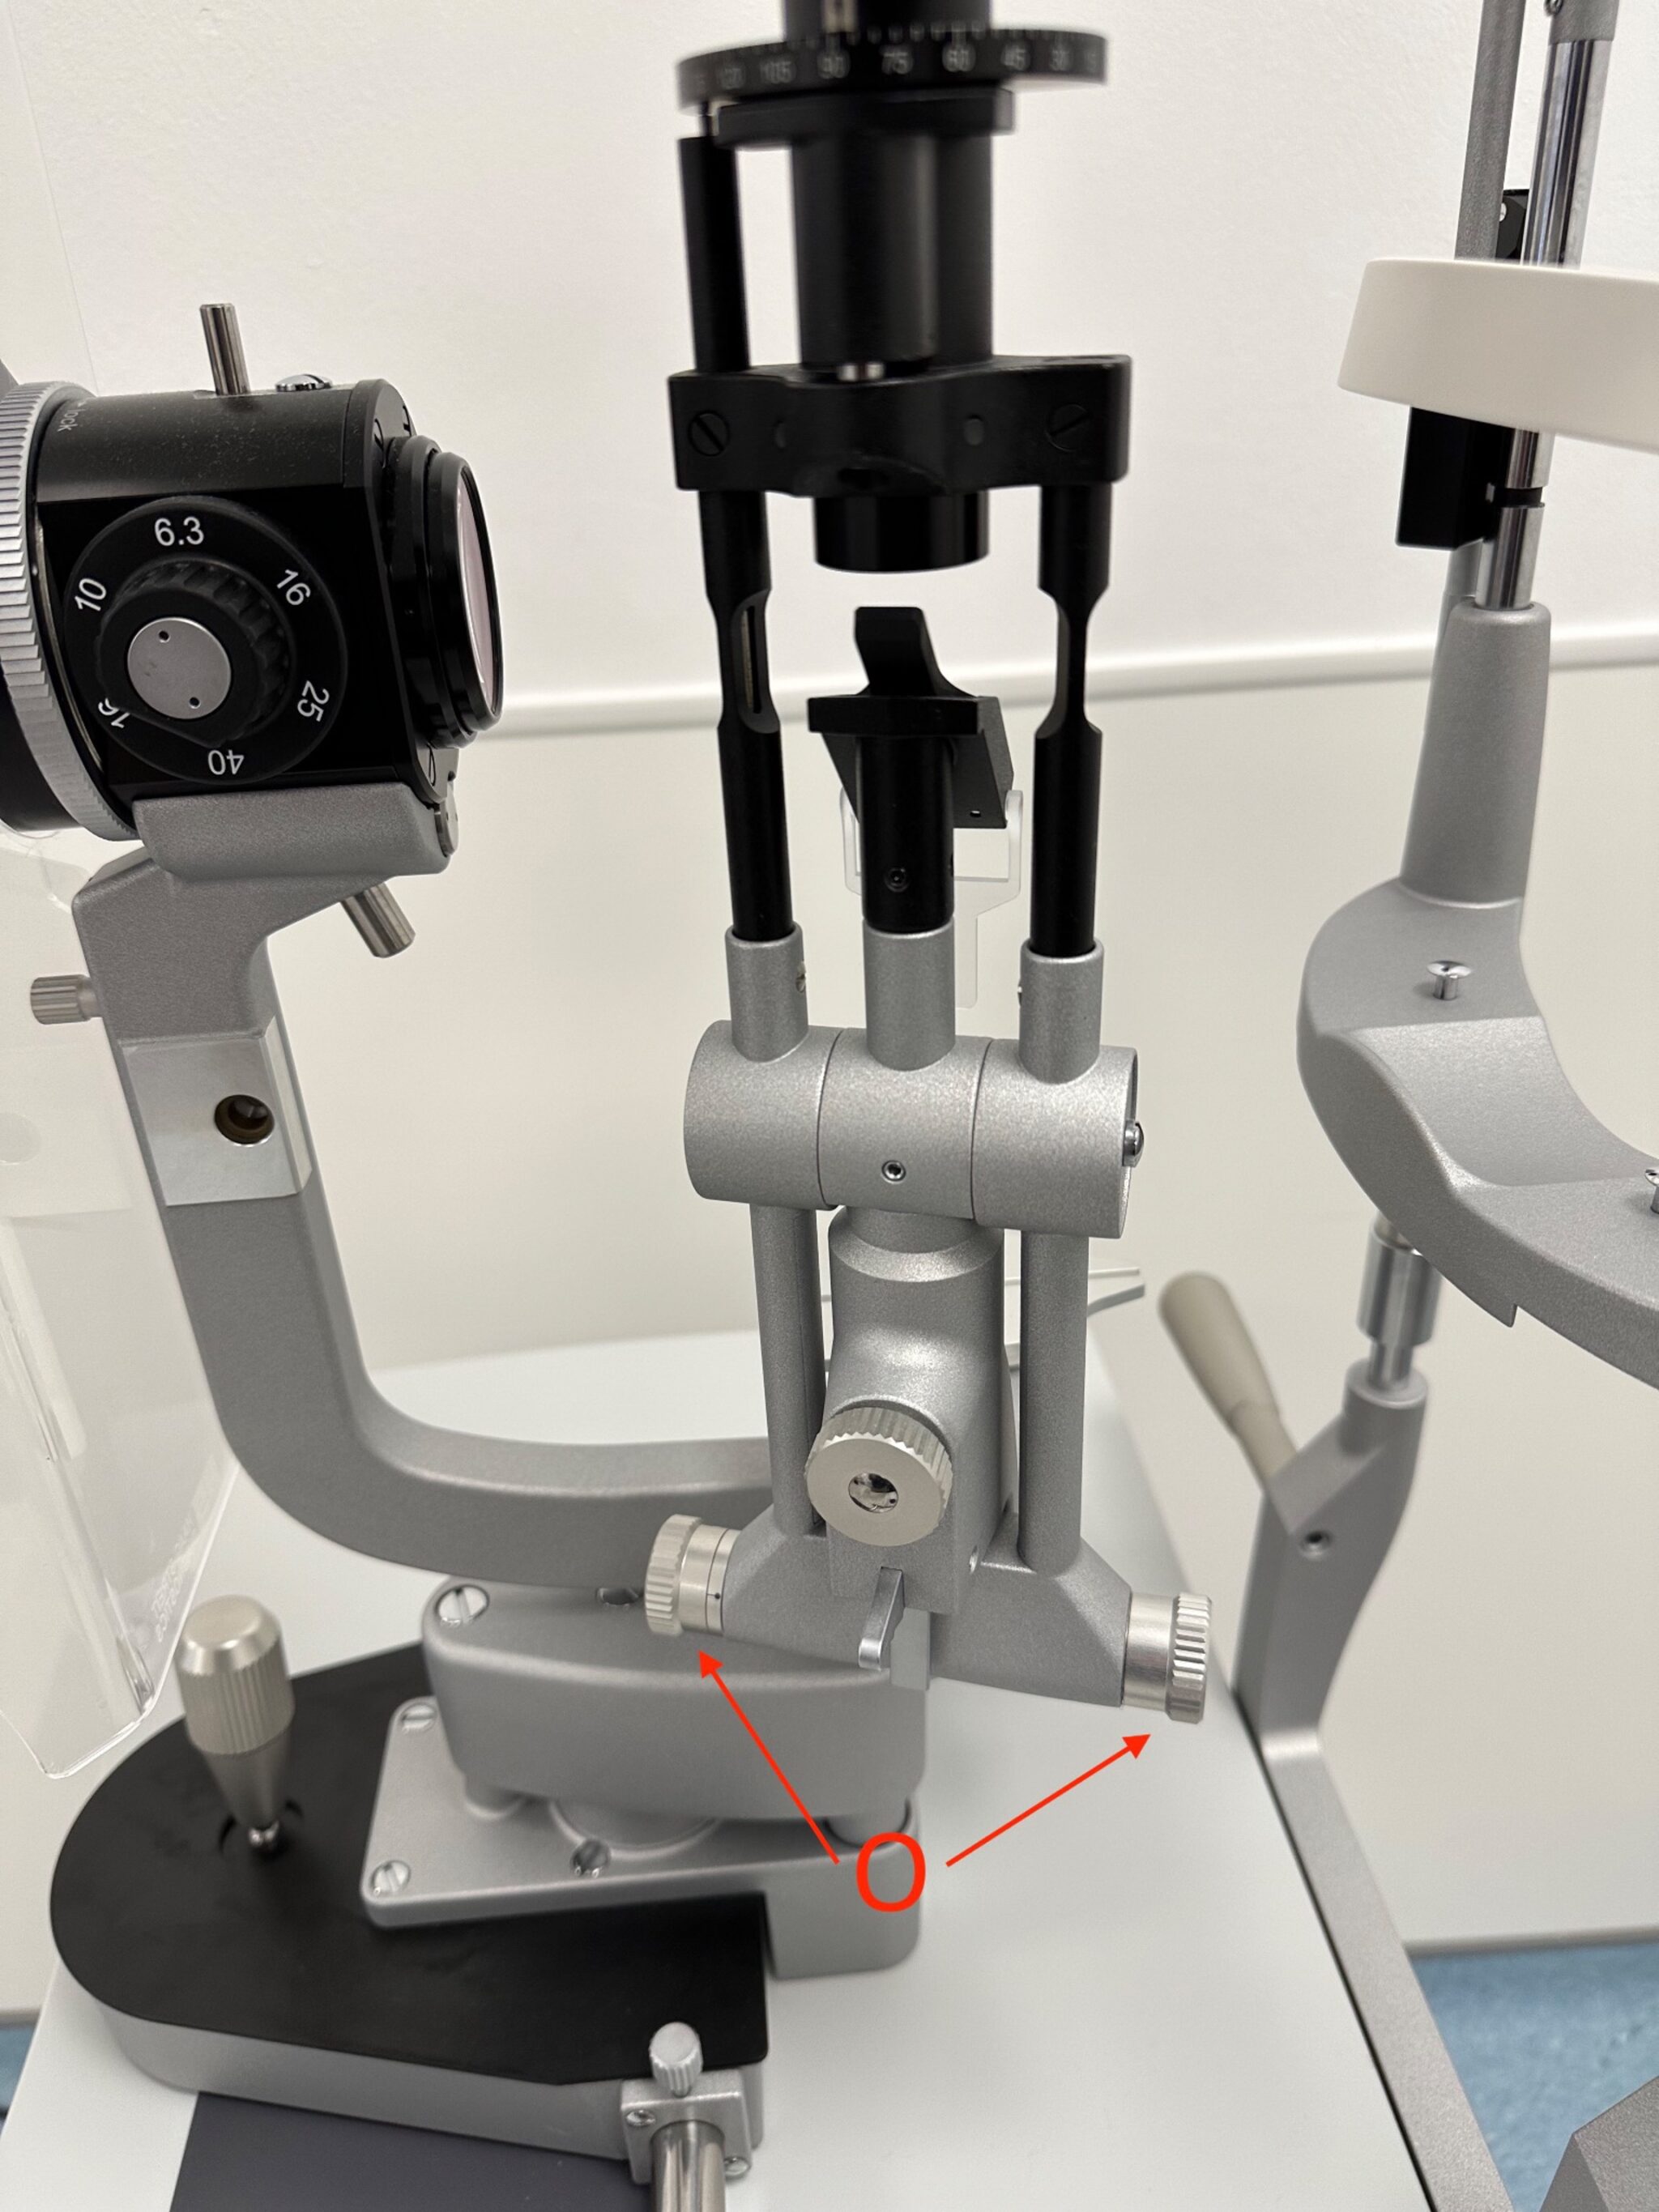
The beam width can be adjusted via the slit adjustment controls (O) on either side of the base of the illumination arm.
The viewing arm consists of two eyepieces, which may be adjusted for the examiner’s interpupillary distance and refractive power. It is generally recommended to keep glasses or contact lenses on and set the power to 0.
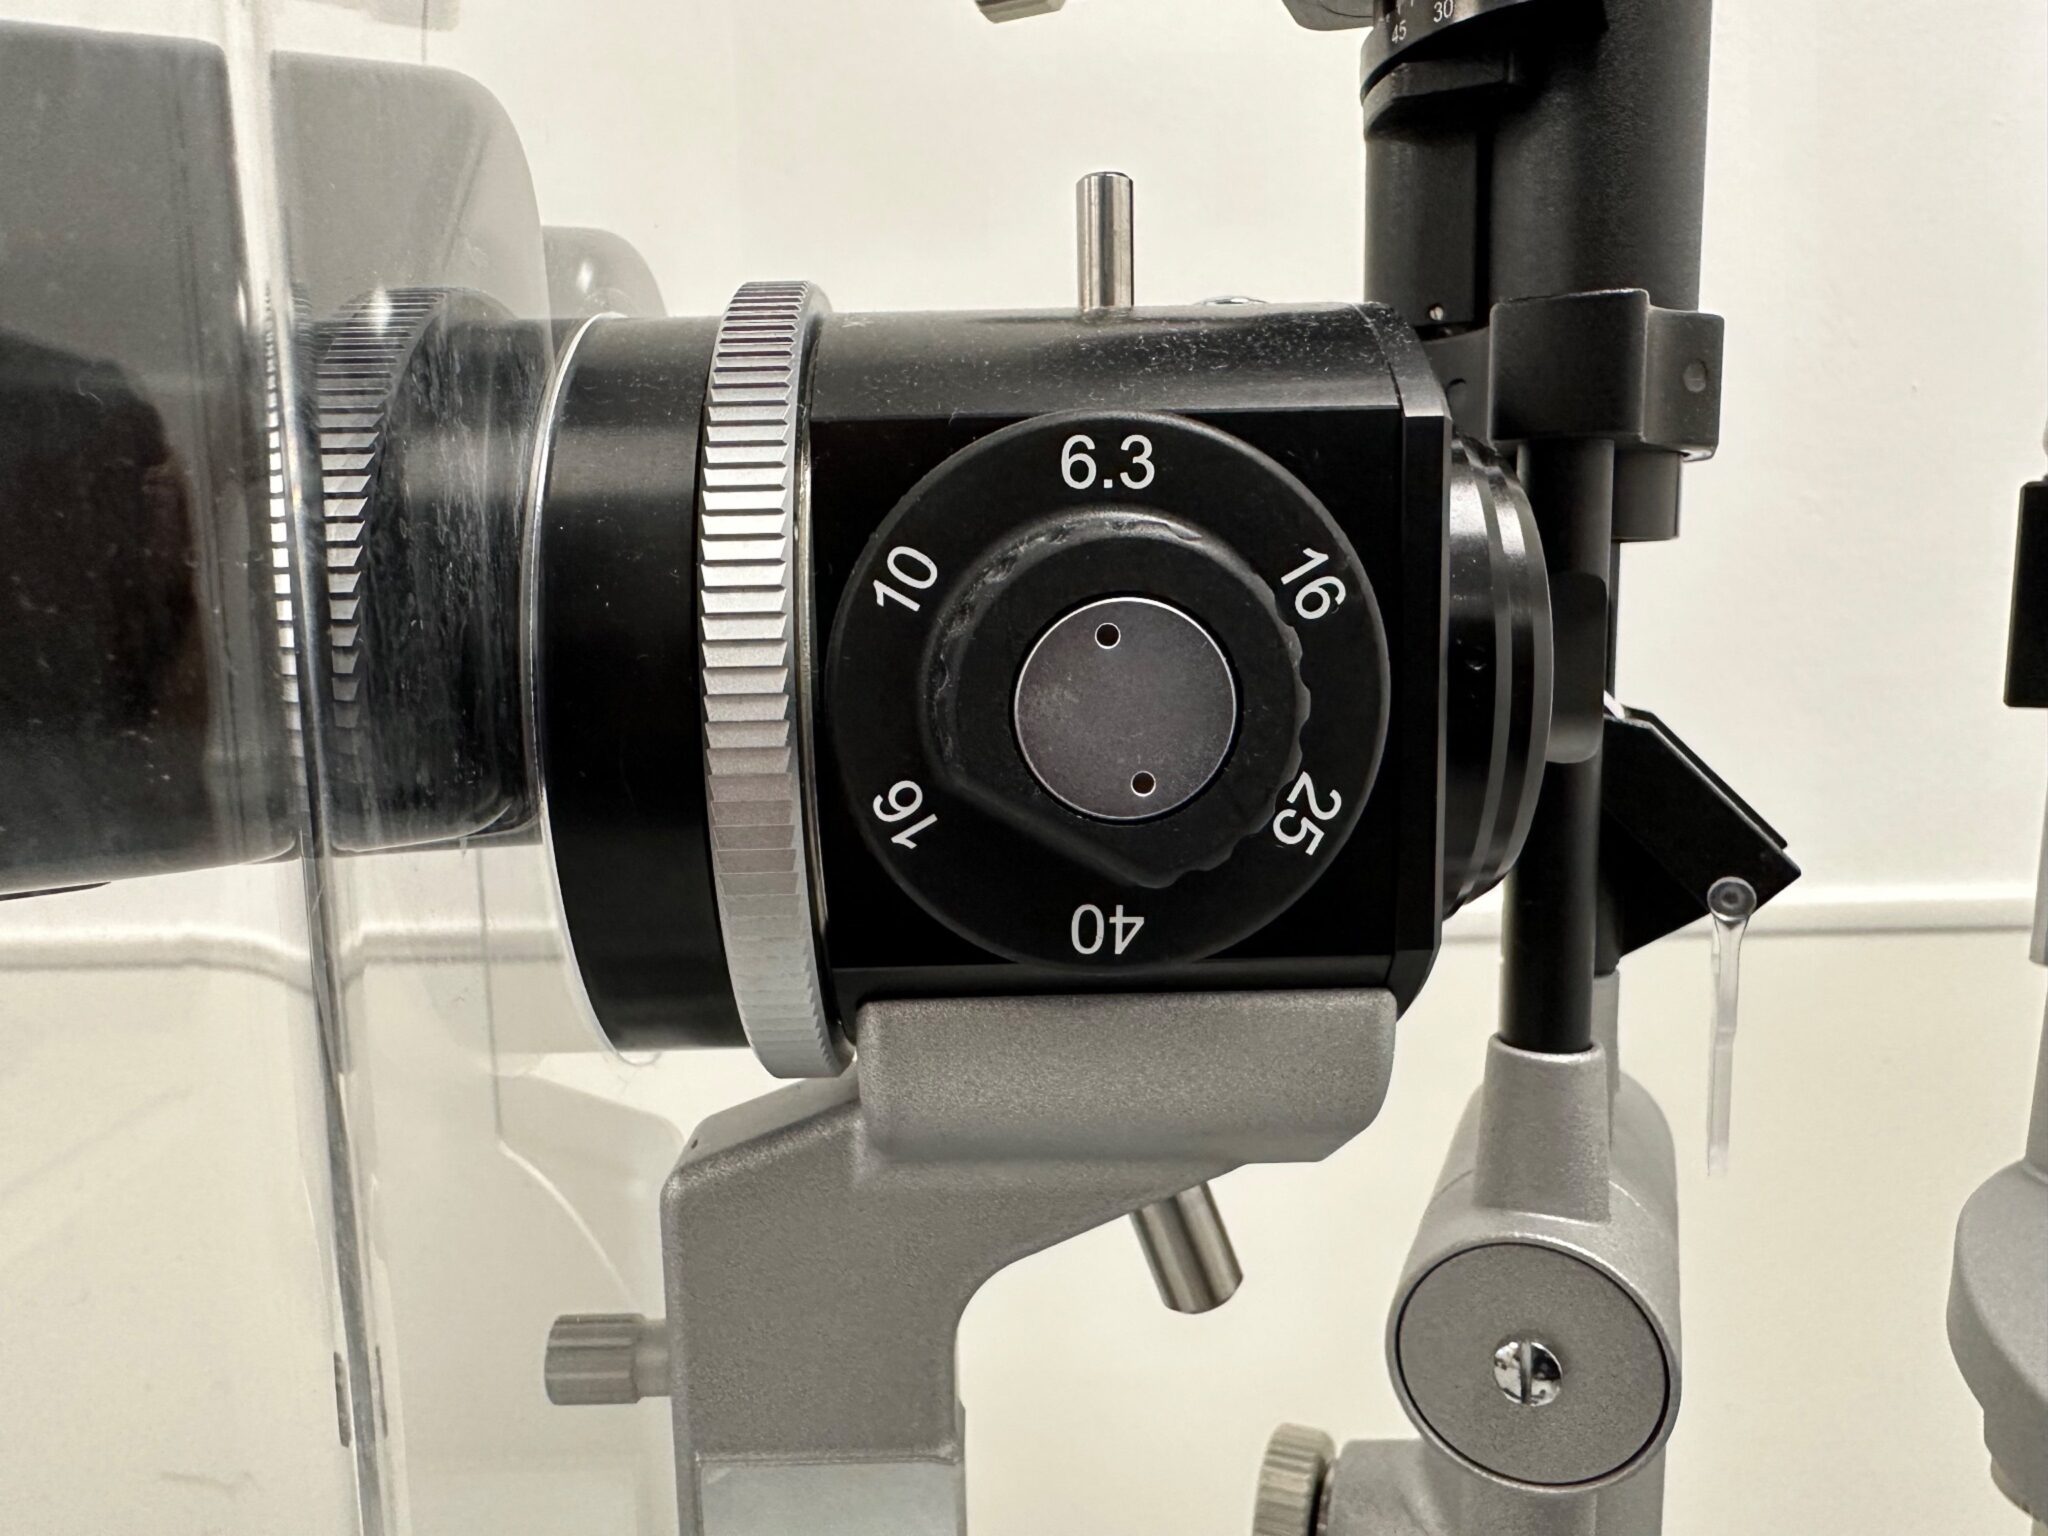
The magnification control dial is on the side of the biomicroscope (currently set to 6.3x magnification in the picture).

Examiner setup
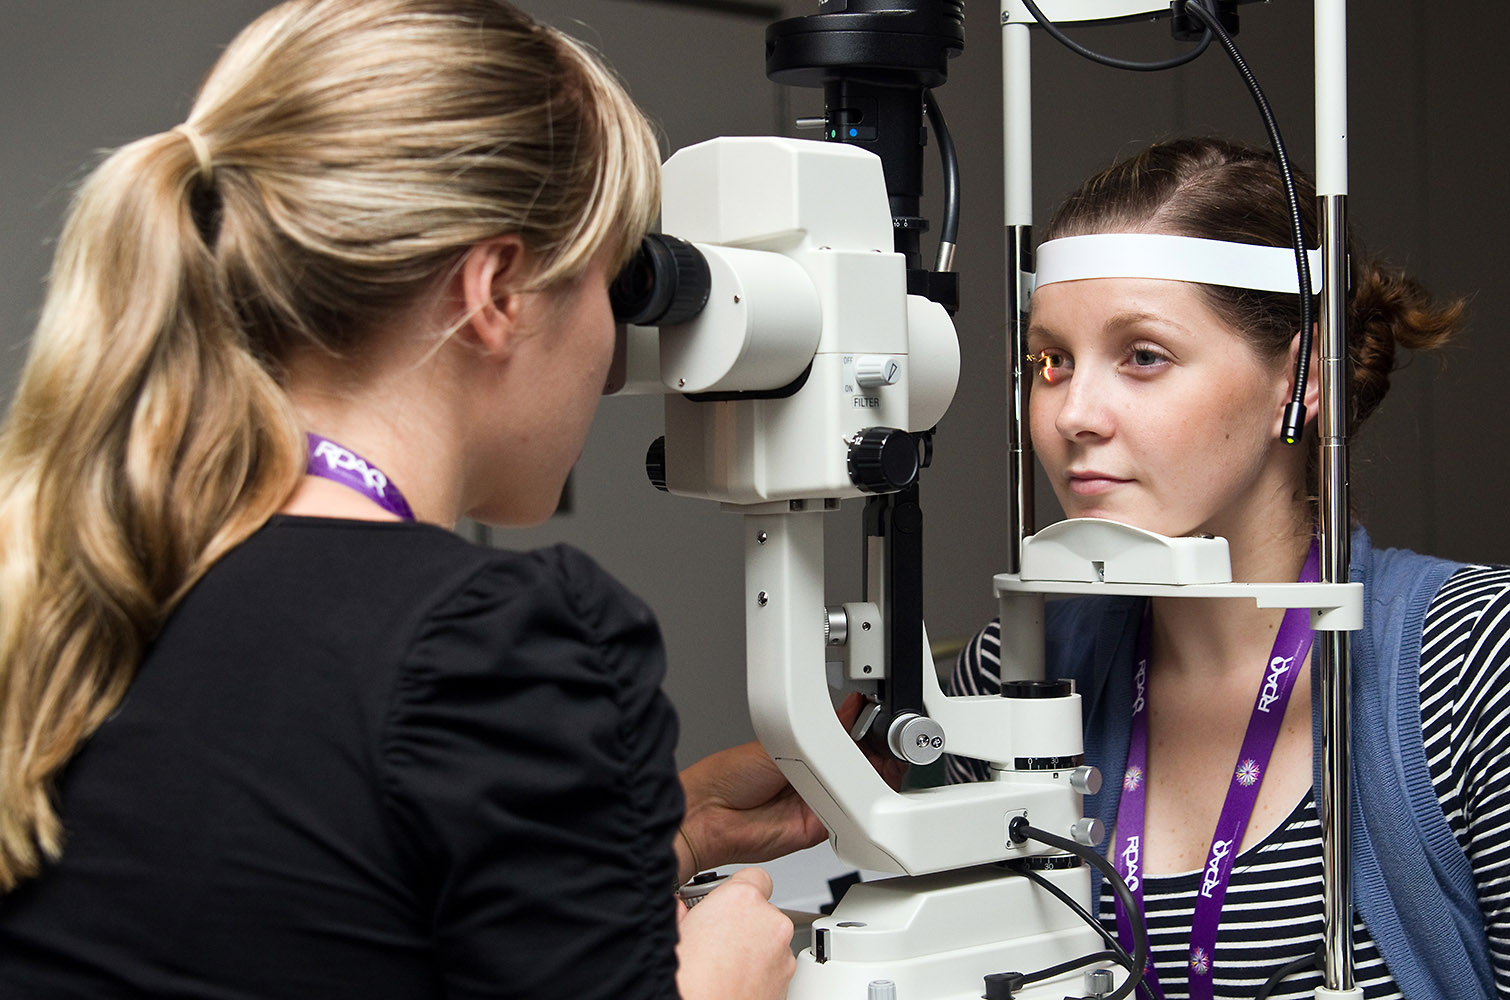
The examiner should adjust the height of the table for comfortable viewing. Ensure the eyepieces are adjusted to allow for a binocular view. This should be tested by closing each eye in turn.
One hand should be placed on the carriage and joystick and the other on the slit-adjustment control. This allows for dynamic adjustment of the angle and intensity of illumination.
Patient positioning
The chair height should be adjusted first. The patient’s chair should be brought forward, and they should rest against the forehead and chin frames, the height of which can be adjusted using the adjustment knob.
The black indicator mark should align with their lateral canthus, and their forehead should be positioned right up against the headrest.
Systematic slit lamp examination
After switching the slit lamp on, the rheostat should be dialled to 100%, and the filter lever should be set to the far left position to remove any light filters.
The slit beam width should be adjusted to display a beam of light via the controls on the base of the illumination arm.
The microscope should be set to an appropriate magnification (6.3x or 10x), and the carriage moved forward to obtain coarse focusing.
As the image comes into focus, the joystick can be tilted to adjust fine focus. It can also be twisted to move up and down the vertical axis. The height of the beam may be altered using the centre screw on the top of the illumination arm.
Lids and lashes
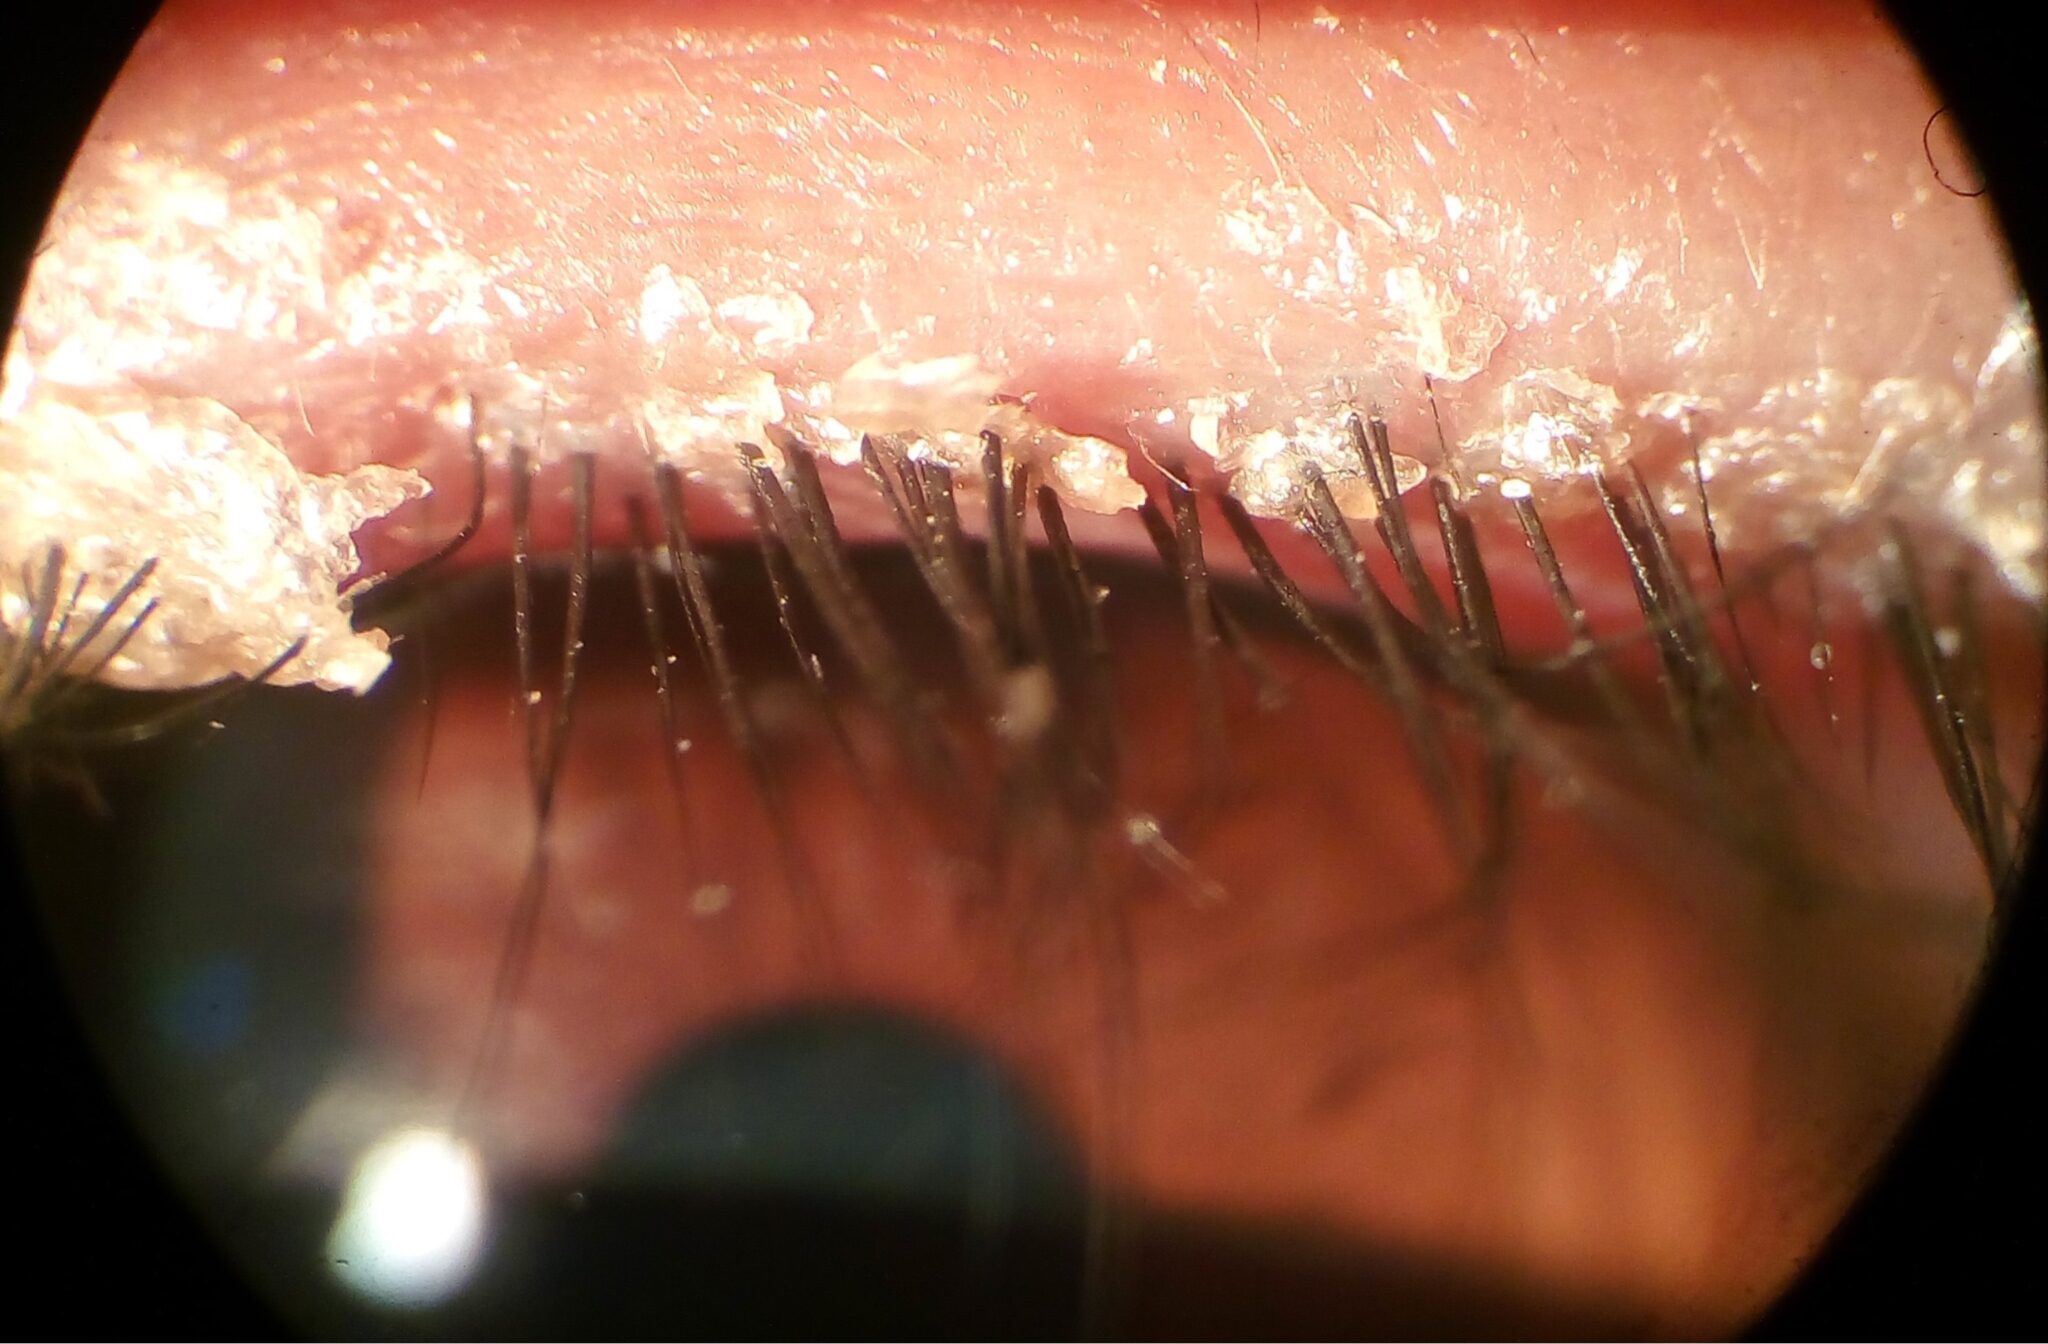
The light source should be guided towards the lower and upper lashes, using the joystick for fine control. Observe for any eyelid abnormalities such as entropion, ectropion and signs of blepharitis.
Press posteriorly using your fingertip under the patient’s lower eyelid to obtain a better view of the meibomian glands. The meibomian glands of the upper lid can be examined by asking the patient to look down and lifting the lid with your thumb.

Conjunctiva and sclera
Examine all areas of the conjunctiva and sclera by asking the patient to look in all four directions of gaze. Observe for any areas of injection, chemosis or foreign bodies.
The tarsal conjunctiva, found on the posterior surface of the eyelids, can be examined by pressing posteriorly under the lower eyelid when the patient is looking up. The upper tarsal conjunctiva can be examined following lid eversion.

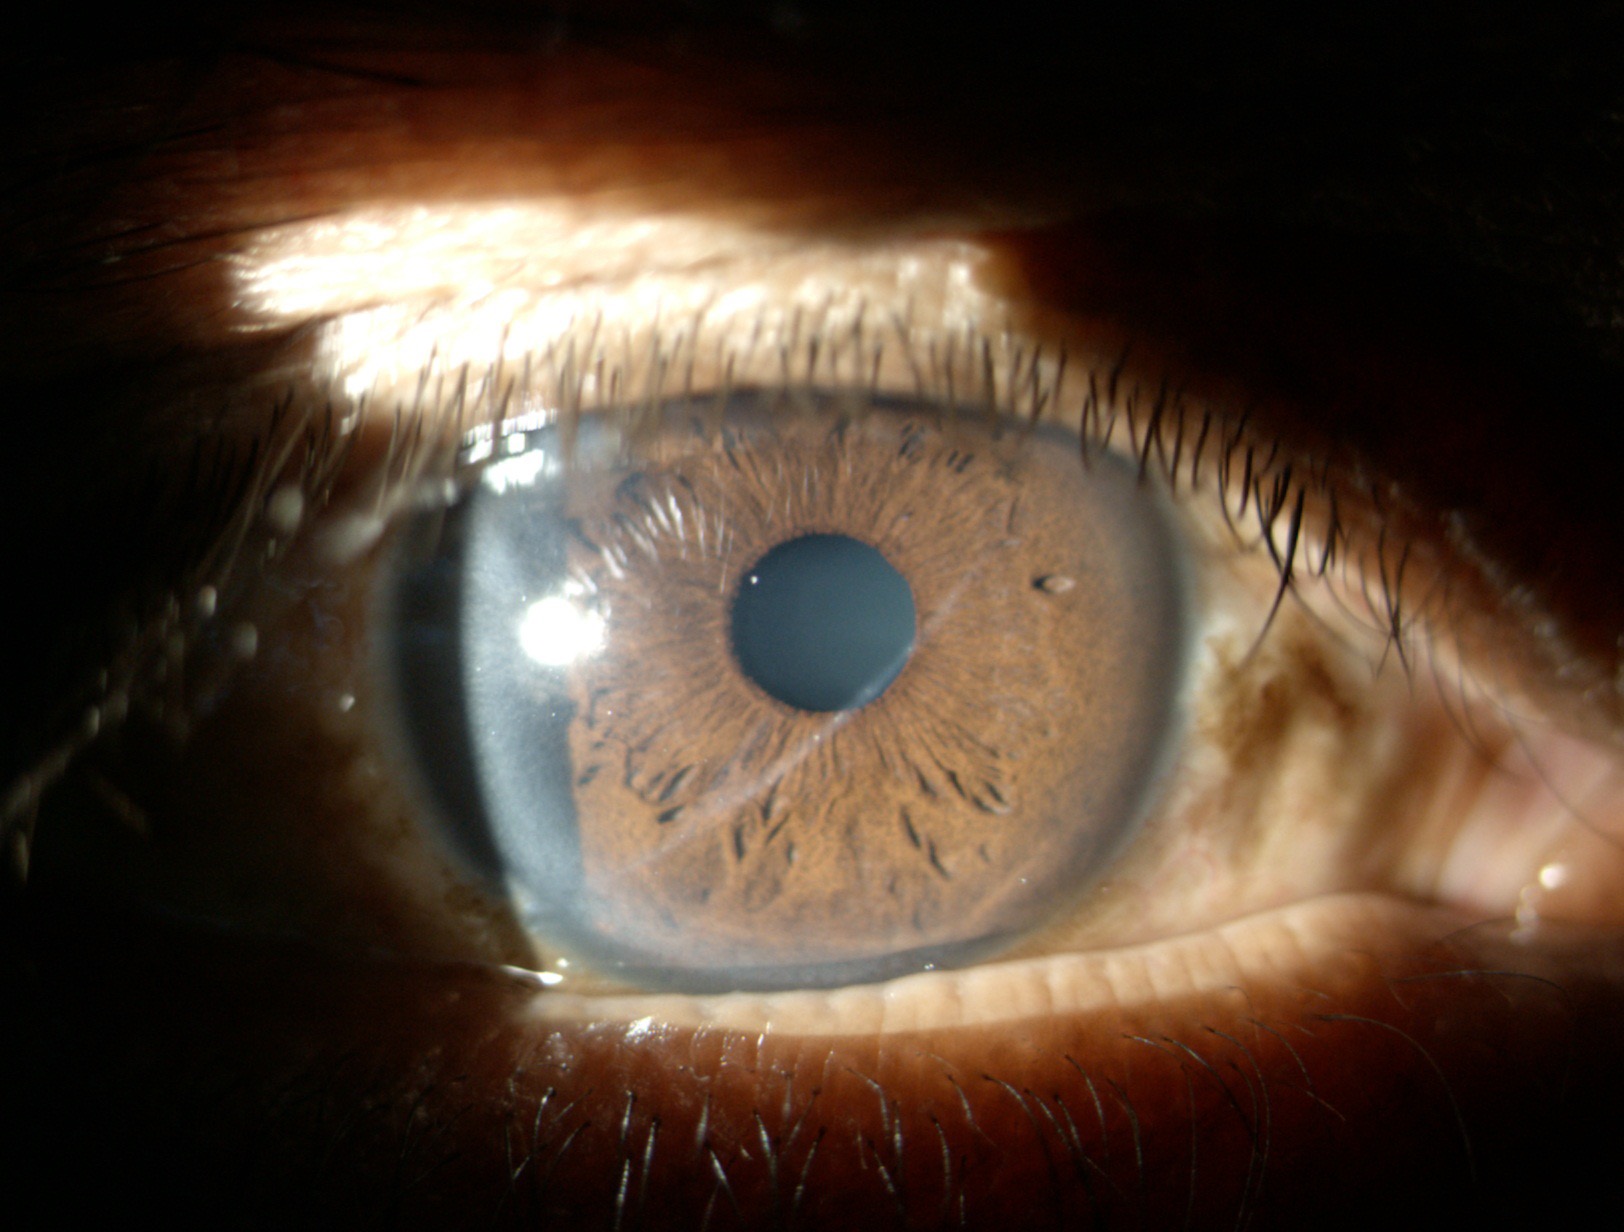
Cornea
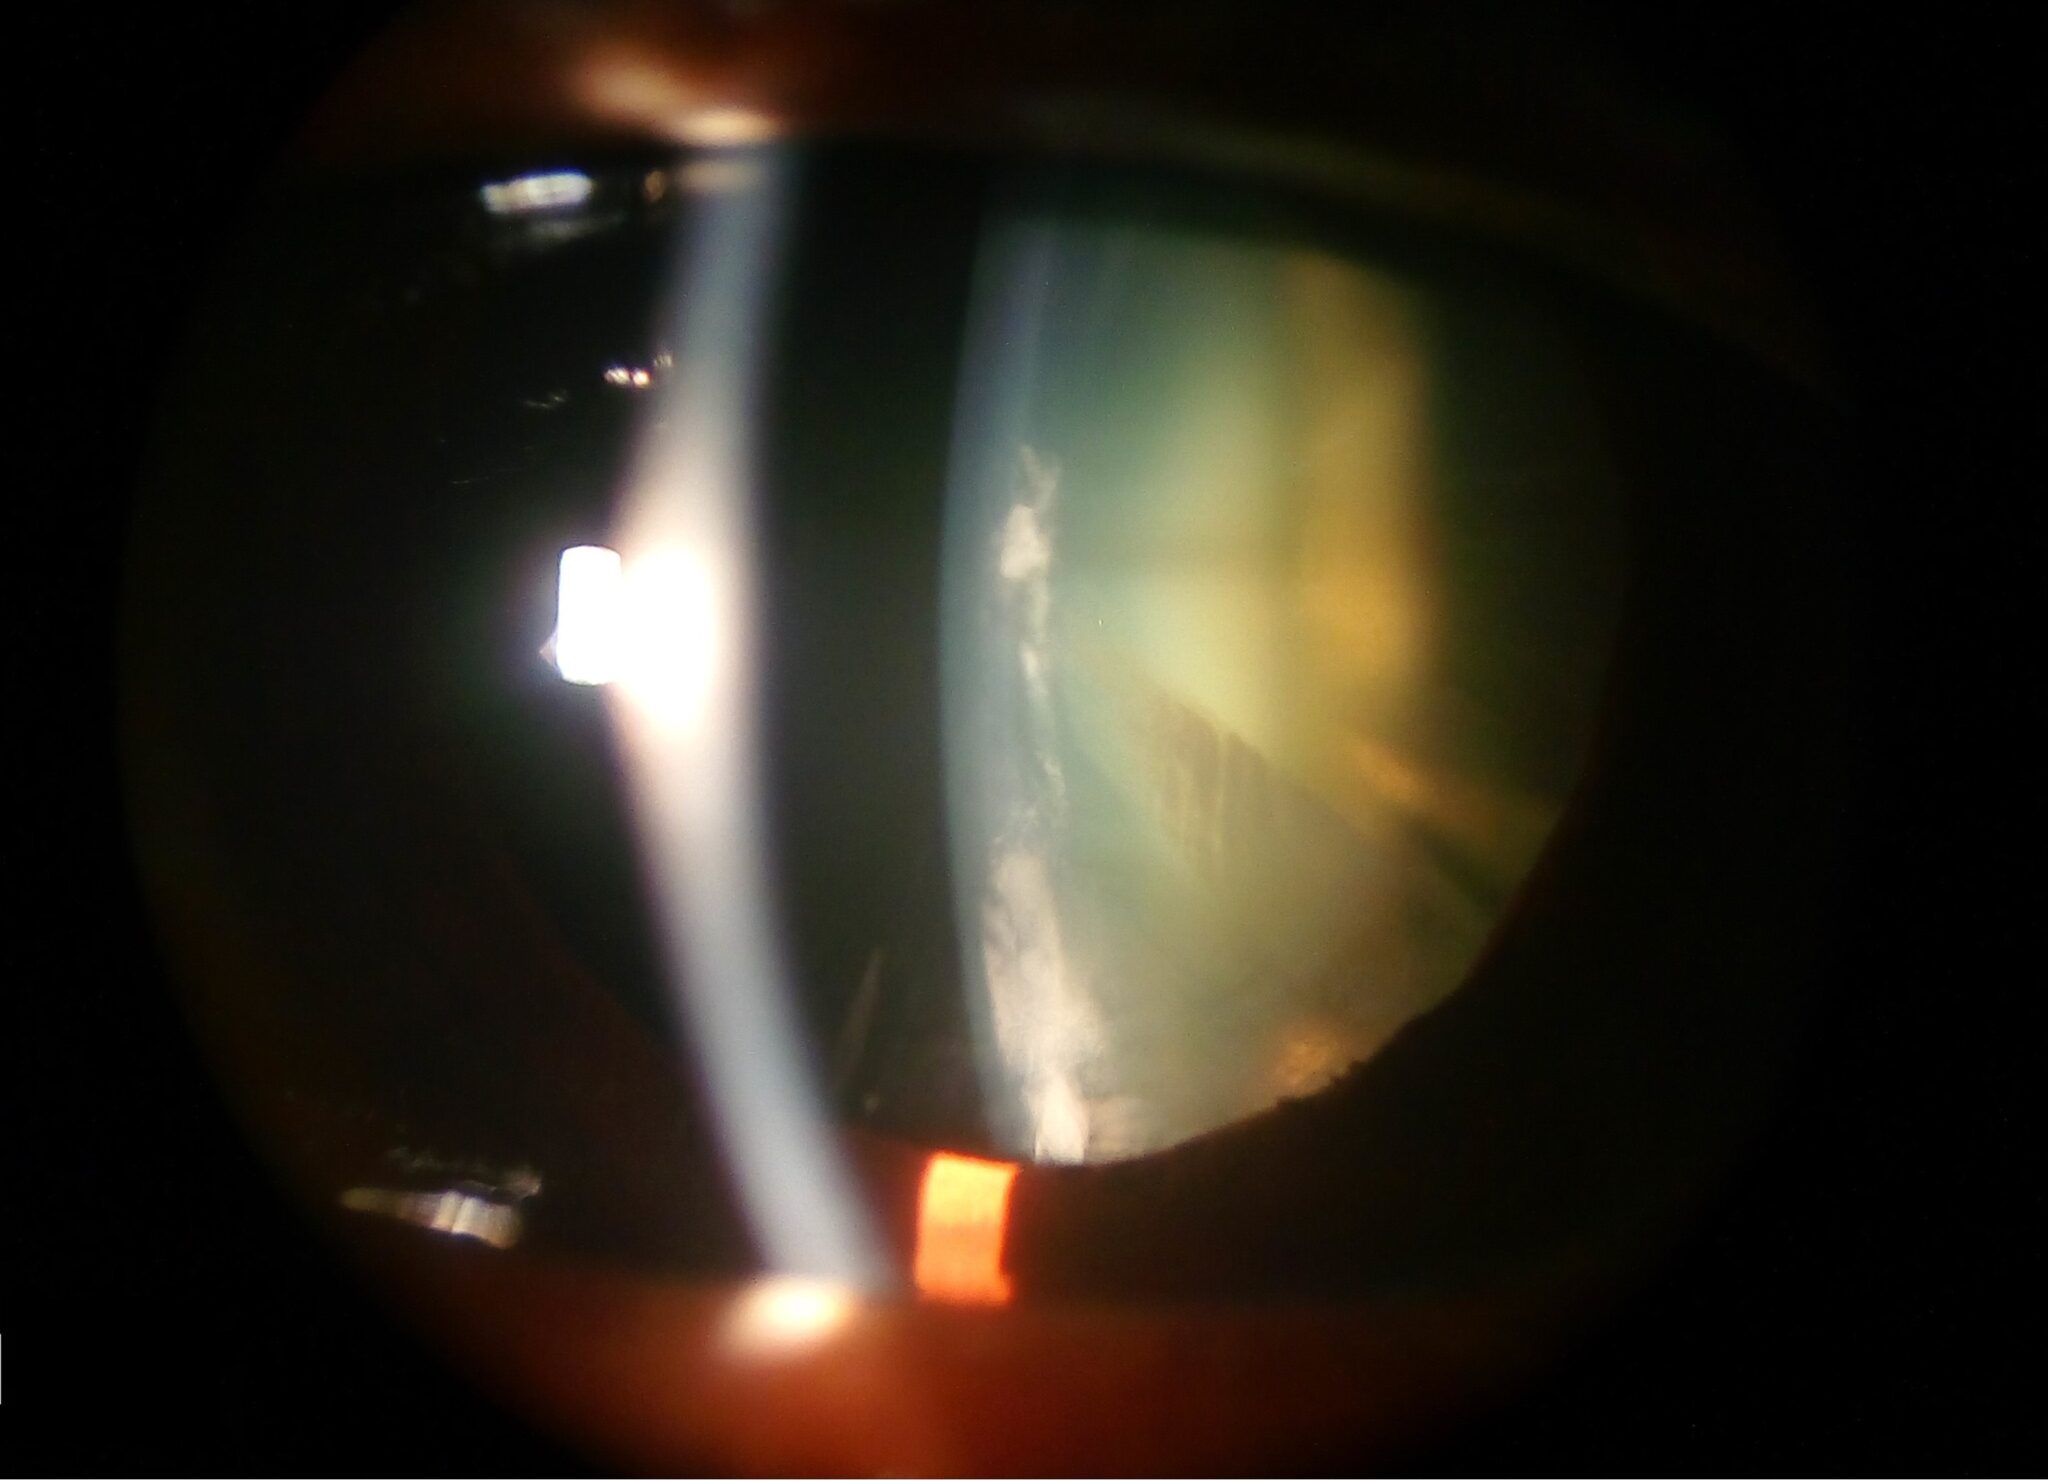
Examination of the cornea should begin with a wide beam of light. If abnormalities are identified, the beam should be made into a very thin slit, and the illumination arm moved to either side so the beam of light hits the cornea at an oblique angle.
This allows all layers of the cornea to be seen in three dimensions: epithelium (closest to light), stroma, descemet membrane and endothelium (furthest away).
Examples of abnormalities seen on slit lamp examination may include corneal abrasions and ulcers, foreign bodies and inflammatory cells adherent to the posterior surface of the cornea (keratic precipitates).
Anterior chamber
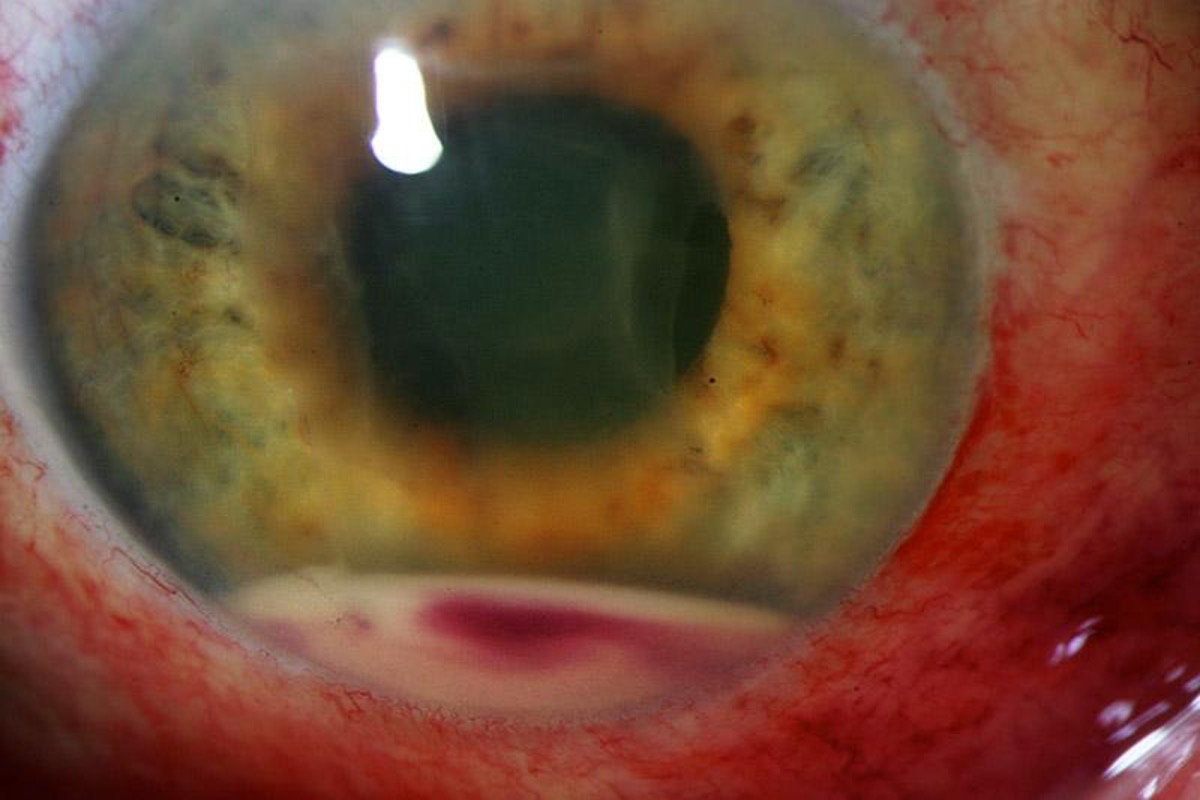
In a normal eye, the circulating aqueous humour is clear and, therefore, invisible. Slit lamp examination should exclude blood (hyphema) or pus cells (hypopyon).
Iris and pupil
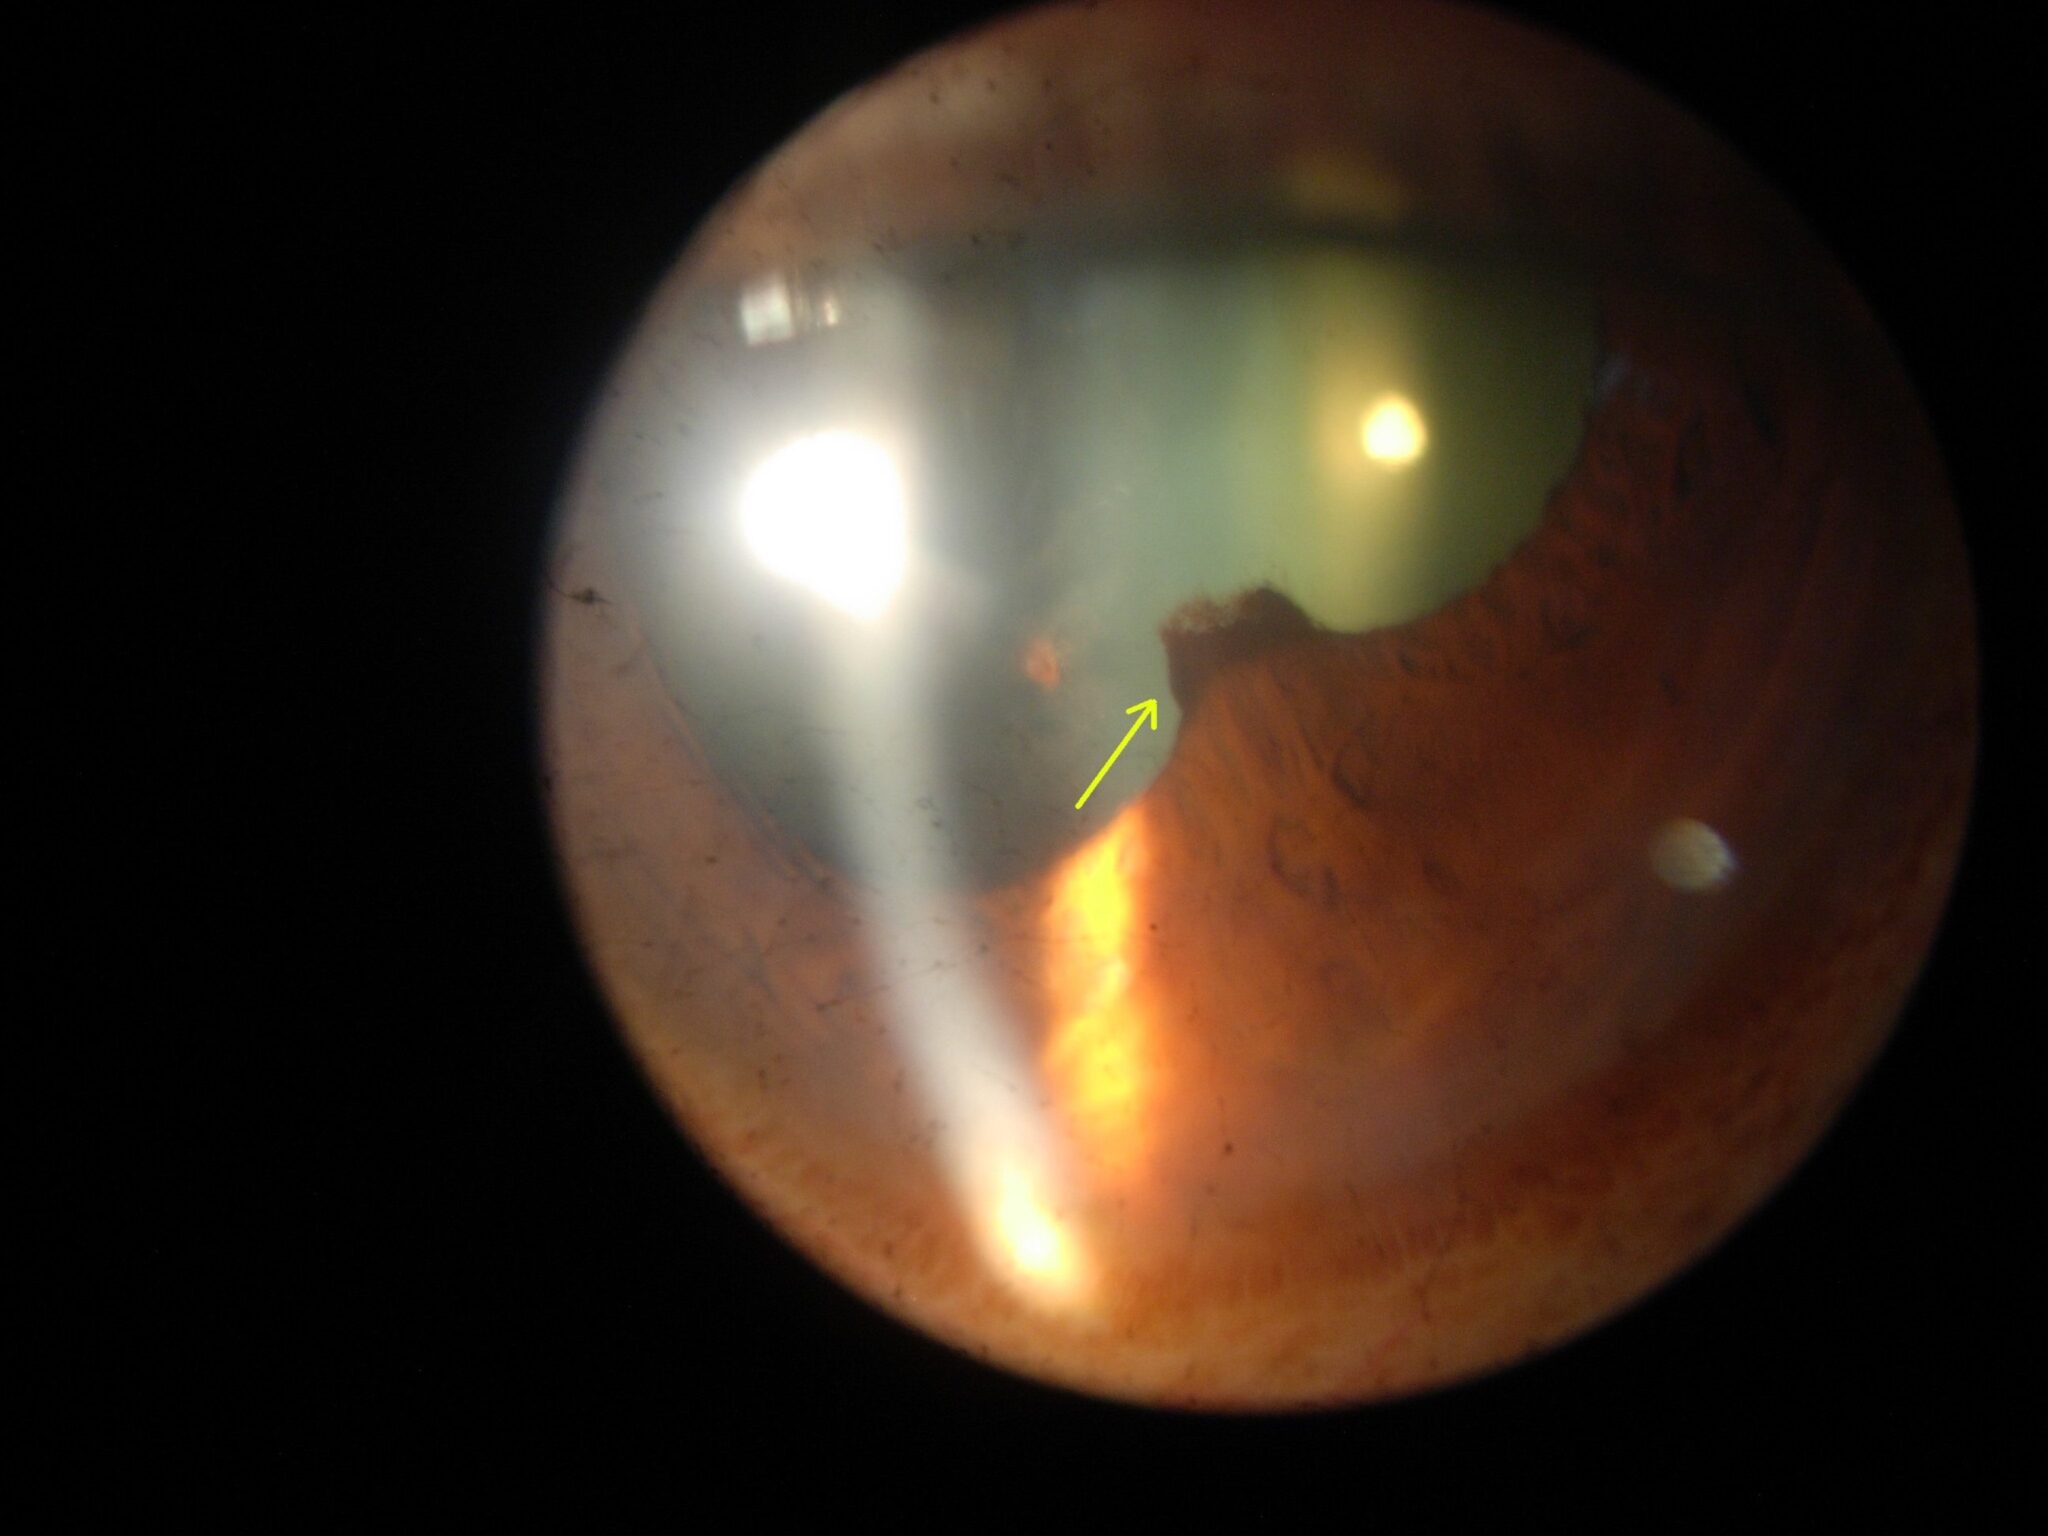
Examine the pigmented iris and the iridopupillary margin observing for abnormalities such as posterior synechiae that may be seen in acute anterior uveitis.
Lens
Similarly to the cornea, the lens layers can be distinguished using the three-dimensional power of the slit lamp. Cataracts can be further evaluated in terms of their anatomical location.
Documentation
Any abnormalities identified should be documented in an anatomical order starting from the eyelids and ending at the lens.
By convention, findings are recorded as seen on the slit lamp. The right eye is drawn on the left side of the page and vice versa.
Troubleshooting common errors
The illumination light doesn’t turn on
Check the power plug is securely inserted into the wall socket and the slit lamp base. There are three separate controls for turning on the light beam, and all must be checked:
- Power switch underneath the table
- Rheostat on the table
- Slit width control on the illumination arm
Unable to see out of one or both eyepieces
Ensure the column of the illumination arm is not blocking the microscope eyepiece and move it slightly to one side.
The magnification dial at the side of the microscope should be ‘clicked’ to a magnification setting and not halfway between two points.
Unable to see all parts of the patient’s eye
Ensure the patient’s eye is aligned with the canthus marker on the side of the headrest and that they are not sitting too far back. Their forehead should be resting on the forehead rest.
Editor
Dr Chris Jefferies
References
- Ashraf Saleh. Correct examiner and patient head positioning for a slit lamp examination. License: [CC BY-NC-ND]
- Imrankabirhossain. Blepharitis. License: [CC BY-SA 4.0]
- Michal Klajban. Eversion of the lower eyelid reveals a chalazion. License: [CC BY-SA 3.0]
- Community Eye Health Journal. Embedded foreign body. License: [CC BY-NC 2.0]
- Dr Sahib Tuteja. Slit lamp images. Reused with permission.
- Community Eye Health Journal. Hypopyon. License: [CC BY-NC 2.0]
- Manimury. Posterior synechia. License: [Public domain]
- Imrankabirhossain. Slit lamp section through a cataract. License: [CC BY-SA 4.0]
