
- 📖 Geeky Medics OSCE Book
- ⚡ Geeky Medics Bundles
- ✨ 1300+ OSCE Stations
- ✅ OSCE Checklist PDF Booklet
- 🧠 UKMLA AKT Question Bank
- 💊 PSA Question Bank
- 💉 Clinical Skills App
- 🗂️ Flashcard Collections | OSCE, Medicine, Surgery, Anatomy
- 💬 SCA Cases for MRCGP
To be the first to know about our latest videos subscribe to our YouTube channel 🙌
Introduction
The aim of Trendelenburg’s test is to assess the strength of the hip abductors, specifically the gluteus medius and minimus.1
Background
The test is named after Friedrich Trendelenburg, who described the test in 1895.
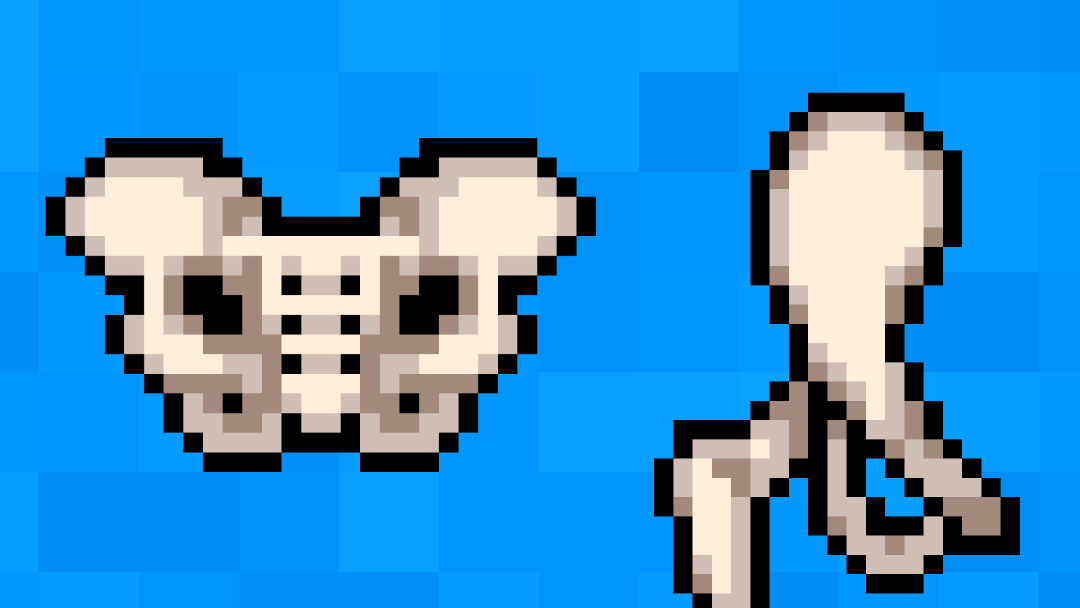
Hip abductors assessed in Trendelenburg’s test 2
The hip abductors which are assessed with Trendelenburg’s test are shown in the table below.
| Hip abductor | Origin | Insertion | Action | Nerve |
| Gluteus medius | Gluteal surface of the ilium | Greater trochanter of the femur | All fibres: abduct the hip Anterior fibres: flex and medially rotate the hip Posterior fibres: extend and laterally rotate the hip |
Superior gluteal nerve |
| Gluteus minimus | Gluteal surface of the ilium | Greater trochanter of the femur | Abduct, medially rotate and flex the hip | Superior gluteal nerve |
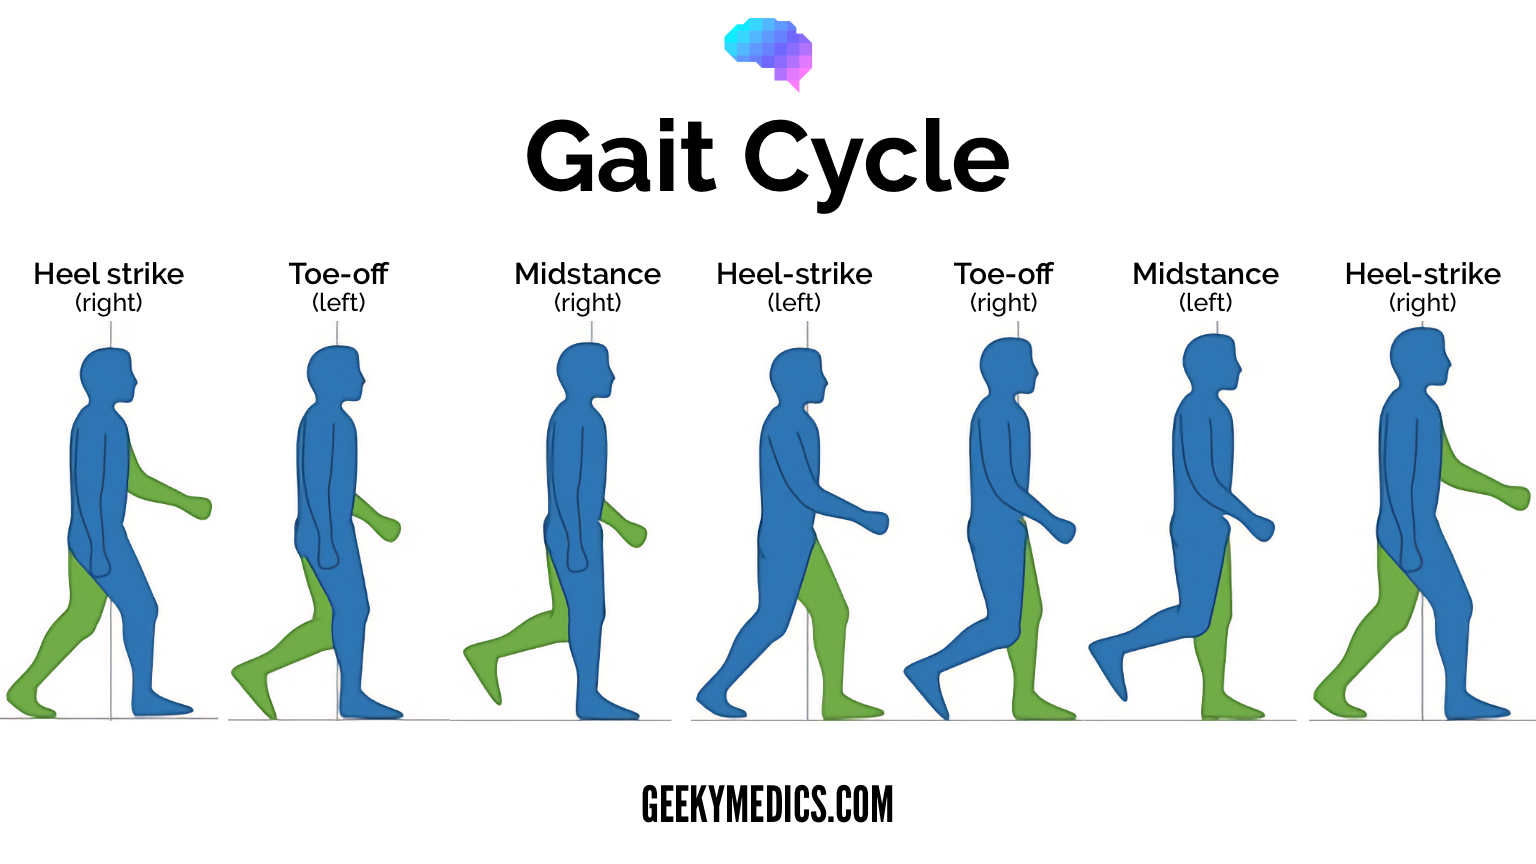
Gait cycle in brief
The gait cycle is the sequence of events between the time one foot touches the ground and the time the same foot returns to the same position. Events of the gait cycle include heel strike; foot flat; push off (heel off + toe-off) and the stance and swing phases.1
During the foot flat phase of the gait cycle, the contralateral leg is lifted to do the heel strike. While the contralateral leg is in the air and the ipsilateral leg is on the floor (mid-stance/single leg stance), the position of the hip during this stage is important to observe when assessing the strength of the hip abductors (because all the weight of the body is being borne on one leg).
If the hip abductors aren’t strong enough, or there’s pain inhibition, the patient can’t counterbalance the weight of the upper body on the affected limb. As a result, the pelvis will sag towards the floor while standing on the affected limb, as opposed to being lifted.
When would you perform Trendelenburg’s test?
When a patient complains of a limp, or hip pain or as part of a normal physical examination assessing gait.
How to perform Trendelenburg’s test
See our hip examination guide for more details.
Position patient
If the patient is comfortable to stand alone, stand behind the patient. Alternatively stand in front of the patient, with their forearms positioned on yours to support them.
Single-leg stance
Ask the patient to lift each foot in turn off the ground.
When the patient lifts their right foot, the left hip abductors are being tested.
When the patient lifts their left foot, the right hip abductors are being tested.
Observe
Position your hands on the patient’s iliac crests (make sure to clearly explain each of the steps and gain consent prior to doing this).
Observe carefully if the hip on the unsupported side lifts or droops.
If the patient is using your arms for support, you will feel them pressing down on one of your arms if their hip abductors are unable to support their weight.
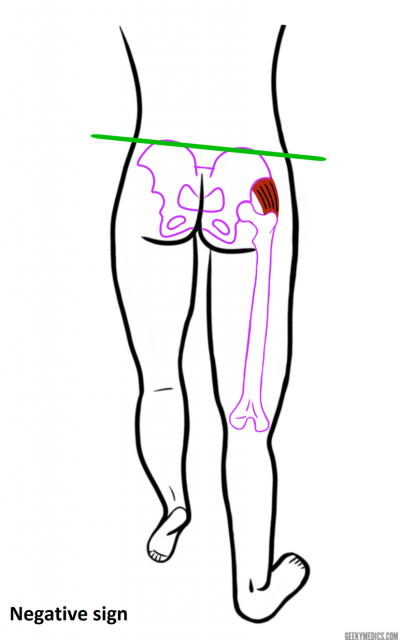
Abductors should be sufficiently strong to keep the pelvis level during a single leg stance, but it is normal to see a slight elevation of the pelvis on the unsupported site (this is due to the abductor muscles contracting – see Figure 1).3
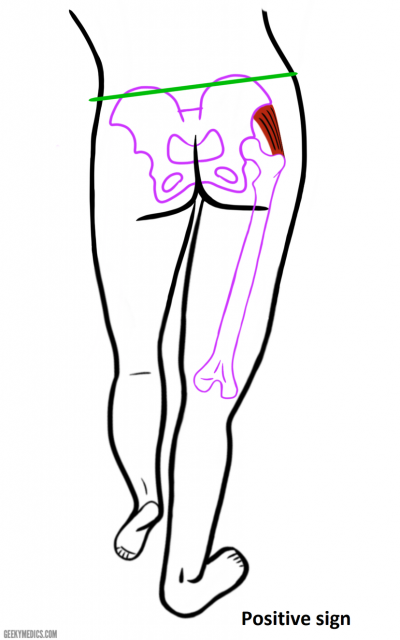
Positive sign
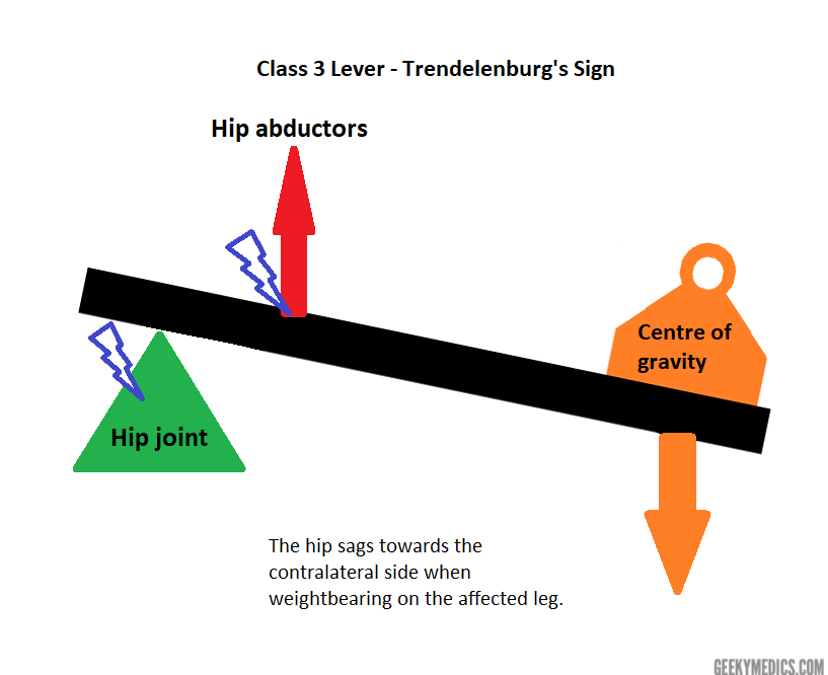
A positive Trendelenburg’s sign (pathological) involves sagging of the pelvis on the unsupported side due to the abductor muscles failing to stabilise the hip towards the weight-bearing femur (see Figure 2).
Trendelenburg’s gait
Trendelenburg’s gait involves excessive up-down motion of the pelvis whilst walking.
It occurs as a result of compensatory mechanisms due to the drooping pelvis.3
Unilateral positive Trendelenburg’s sign produces a lurching gait.
Bilaterally positive Trendelenburg’s sign produces a waddling gait.
Pathophysiology
Imagine a chair…when you remove a leg what happens? The chair will normally fall towards the side that had the leg removed. The human body is the same, the centre of gravity passes midway through the body and through the pubic symphysis.
When standing on one leg, the centre of gravity, much like the chair, shifts to the unsupported leg.
We don’t fall because the hip abductors pull the pelvis towards the femur of the weight-bearing leg.
Lever mechanics of the hip joint
The operation of most skeletal muscles involves leverage – using a lever to move an object.
A lever is a rigid bar that moves on a fixed point called the fulcrum when a force is applied to it.
In the human body, the joints are fulcrums, and the bones act as levers.
Forces can be exerted across levers in the form of load and effort.
Muscle contraction provides the effort that is applied at the muscle’s insertion point on the bone.
The load is the bone itself, along with the overlying tissues.
There are 3 types of levers and they differ depending on where the fulcrum, load and effort are positioned relative to each other.6
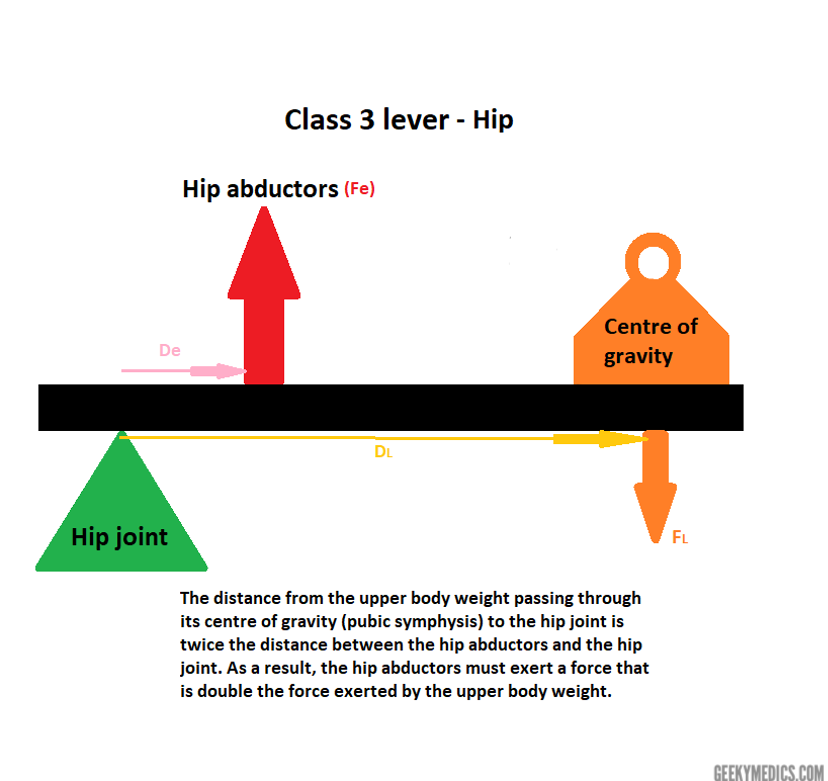
The hip, in this case, is a class 3 lever. This means that the effort (force exerted by hip abductors) is positioned between the fulcrum (hip joint) and the load (upper body weight), across a lever (the neck of the femur) – see Figure 3.

In order to keep the structure absolutely level, the forces of effort and load applied across their distances from the fulcrum must be balanced and cancel each other out (Figure 4).

Applying this to the hip joint (Figure 5), as the distance between the hip joint and the hip abductors is half of the distance between the hip joint and the centre of gravity (pubic symphysis), it so follows that the effort exerted by the hip abductors must be twice the force exerted by the upper body weight.
Causes of Trendelenburg’s sign
Any problems that affect the hip can cause a positive Trendelenburg’s sign (Figure 6). As upper body weight cannot be changed or affected, this leaves conditions affecting the hip joint or femur (skeletal abnormalities) and hip abductors (neuromuscular abnormalities).8
Skeletal abnormalities
Examples of skeletal abnormalities which can result in Trendelenburg’s sign:7,8,9
- Developmental dysplasia of the hip (DDH) – a spectrum of disorders that cause spontaneous dislocation of the hip
- Coxa vara – the angle between the femoral neck and femoral shaft is less than 120°
- Slipped capital femoral epiphysis (SCFE) – the femoral metaphysis slides in relation to the epiphysis
- Legg-Calve-Perthes disease – a childhood hip disorder marked by femoral head necrosis
- Chronic subluxation/dislocation of the hip – resulting in hip instability
- Greater trochanter fracture (acute or non-united) – insertion of the gluteus medius and minimus are compromised
Neuromuscular abnormalities
Examples of neuromuscular abnormalities which can result in Trendelenburg’s sign:7,8,9
- Superior gluteal nerve injury – often iatrogenic following total hip replacement/hemiarthroplasty or due to trauma
- L5 radiculopathy – the superior gluteal nerve is formed from L4, L5 and S1 spinal roots; often accompanied by foot drop
- Gluteus medius and minimus weakness or damage (e.g. tears or tendonitis)
- Poliomyelitis – causing paralysis of the hip abductors
- Muscular dystrophy and other neuromuscular disorders
- Pain inhibition leading to gluteal weakness (e.g. osteoarthritis of the hip)
Limitations of the test
A positive Trendelenburg’s sign may be concealed in early stages of osteonecrosis and pelvic drop can occur in healthy individuals with normal hip abductor mechanism but inadequate function.8
False positives can occur with lack of understanding/compliance, significant hip pain, and scoliosis (the costal margin may impinge on the iliac crest).
False negatives may occur when patients compensate by shifting their torso (and centre of gravity) over the weight-bearing hip, so be vigilant for upper body movements.9
Further investigations
The goal is to identify the underlying cause of the abnormal gait. A thorough history and clinical examination are essential before further investigations are considered.
Imaging:
- X-ray of the local joints (e.g. knee, hip, lumbar spine)
- Consider ultrasound, CT or MRI
Laboratory investigations:
- Baseline blood tests may be performed to screen for evidence of system diseases (e.g. inflammatory arthropathies)
Special investigations:
- Muscle biopsy
- Nerve conduction studies
Differential diagnosis
It is useful to be able to differentiate Trendelenburg gait from other common gait patterns including:3,4
- Antalgic gait: occurs due to pain upon weight-bearing, causing the patient to only briefly step on the painful side
- Short-leg gait: caused by a discrepancy in length between the two legs; a consistent dip of the pelvis on the shorter side is observed
Key points
- Trendelenburg’s test assesses the strength of the hip abductors.
- It is performed as part of a routine gait examination or when a patient complains of a limp or hip pain.
- A positive Trendelenburg’s sign (pathological) involves sagging of the pelvis on the unsupported side due to the abductor muscles failing to stabilise the hip towards the weight-bearing femur.
- If a positive sign is present, Trendelenburg’s gait may also be observed.
- Causes of a positive Trendelenburg’s sign include skeletal and neuromuscular abnormalities affecting the hip and hip abductors respectively.
- Trendelenburg’s gait should be differentiated from antalgic gait (due to pain) and short-leg gait (due to differences in leg length).
Reviewer
Miss Margaret Brooks
Orthopaedic Registrar
University Hospitals of Birmingham NHS Foundation Trust
References
- The Orthopaedic Physical Examination 2nd ed, Elsevier, 2005
- Trail Guide to the Body 3rd ed, Books of Discovery, 2005
- Hamblen and Simpson. Adams’s Outline of Orthopaedics 14th ed, Churchill Livingstone Elsevier, 2010
- Solomon, Warwick and Nayagam. Apley and Solomon’s Concise System of Orthopaedics and Trauma, 4th ed, Taylor & Francis Group, 2014
- Duckworth and Blundell. Lecture Notes: Orthopaedics and Fractures 4th ed, Wiley-Blackwell, 2010
- Marieb and Hoehn. Human Anatomy and Physiology, 7th ed, Benjamin Cummings, 2011
- Azar, Beaty and Canale. Campbell’s Operative Orthopaedics 13th ed, Elsevier, .2017
- Gandbhir VN, Rayi A. Trendelenburg Gait, StatPearls Publishing; 2020 Jan – [NCBI]
- Hardcastle and Nade. The Significance of the Trendelenburg Test (JBJS Br, 67-B no 5. 1985)
Images
- Figure 1 and 2: Illustrated by Leyla Noury, Sketchbook, 2020
- Figures 3 to 6: Illustrated by Leyla Noury, Paint, 2020
- Adapted by Geeky Medics. BoH, CC BY-SA 4.0
