- 📖 Geeky Medics OSCE Book
- ⚡ Geeky Medics Bundles
- ✨ 1300+ OSCE Stations
- ✅ OSCE Checklist PDF Booklet
- 🧠 UKMLA AKT Question Bank
- 💊 PSA Question Bank
- 💉 Clinical Skills App
- 🗂️ Flashcard Collections | OSCE, Medicine, Surgery, Anatomy
- 💬 SCA Cases for MRCGP
To be the first to know about our latest videos subscribe to our YouTube channel 🙌
Introduction
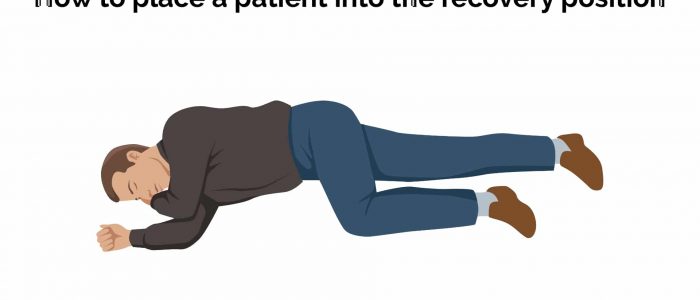
The recovery position is designed to reduce the risk of aspiration in the unconscious but breathing casualty. It allows for postural drainage of any liquid inside the mouth and reduces the risk of the tongue occluding the airway. The recovery position is a component of the larger basic life support (BLS) algorithm and as such many of the initial steps are similar.
Whilst there is little evidence of either benefit or harm with its use, the recovery position remains part of the latest resuscitation guidelines from the Resus Council UK.1,2
This OSCE guide aims to provide an overview of how to place a patient in the recovery position.
Check for danger
To ensure the area around the casualty is safe, check for things that could injure you or the casualty.
Continue to check the scene for safety as there may be dangers which only become apparent as you get closer to the casualty.
Check for a response
Kneel next to the casualty and establish if they are conscious by gently shake their shoulders whilst asking loudly “Are you alright?”.
If they respond you should try to establish if they need medical attention.
If they do not respond you need to shout for help and establish if they are breathing. Seeking assistance is absolutely essential, as you will not be able to effectively assess and treat the patient alone.
Open airway and check breathing
Position the patient on their back.
Head-tilt chin-lift manoeuvre
Perform a head-tilt chin-lift manoeuvre by placing one hand on the casualty’s forehead and the other on the chin to tilt their head back.
Jaw thrust
If the patient is suspected to have suffered significant trauma (with potential spinal involvement) perform a jaw-thrust rather than a head-tilt chin-lift manoeuvre:
1. Identify the angle of the mandible.
2. With the index and other fingers placed behind the angle of the mandible, apply steady upwards and forward pressure to lift the mandible.
3. Using the thumbs, slightly open the mouth by downward displacement of the chin.
Check for breathing
Check for breathing by placing your ear next to the casualty’s mouth. Listen for breathing, look for the chest rising and feel for breath on your cheek for 10 seconds. It is important you are checking for normal breathing, often casualties can make rasping sounds before their heart stops known as agonal breathing. If agonal breathing is present you should commence CPR (see our basic life support guide).
Place the casualty in the recovery position
1. Before placing the casualty in the recovery position, it is important to ensure there is nothing on the ground that could hurt them. You should also check there is nothing in their pockets that could hurt them when they are rolled onto their side. If the patient is wearing glasses, these should also be removed.
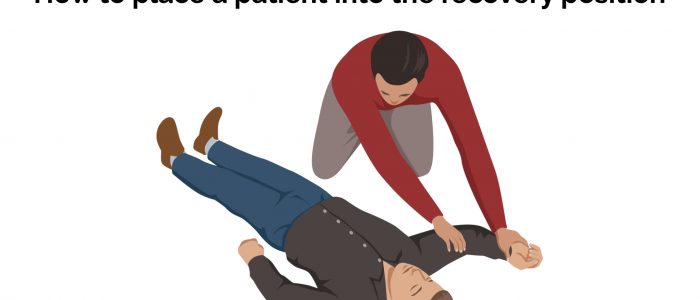
2. With the patient on their back, place the arm nearest to you in a right angle at the shoulder joint (90º abduction) and the elbow joint (90º flexion).
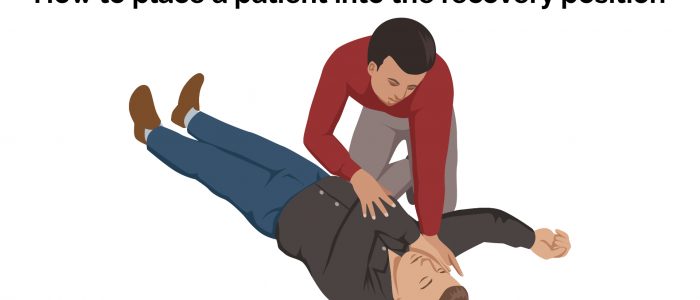
3. Lift the casualty’s hand that is furthest away from you and place the dorsum of the hand against the casualty’s cheek on the side closest to you to cushion their head.
4. Grasp the underside of the casualty’s knee furthest away from you and lift it up.
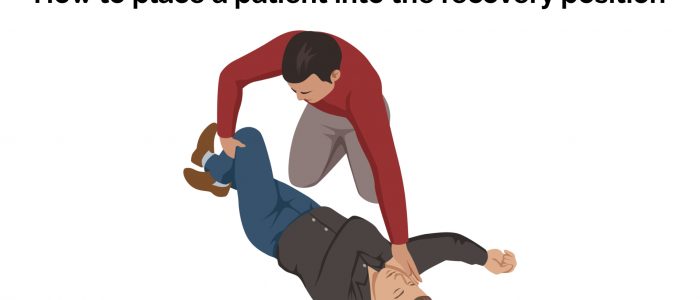
5. Whilst holding the casualty’s hand that is against their cheek, use your other hand underneath their knee to gently roll them towards you.
6. Once they are on their side, ensure the knee and hip joints of the leg you used to roll them are flexed to 90º. This ensures the casualty does not roll back onto their back.
Ensure the position is safe
Once the casualty is in the recovery position it is vitally important to check their breathing again. Perform the same head-tilt chin-lift manoeuvre as you did previously and check they are breathing normally for 10 seconds, making sure to look, listen and feel for breathing.
You should then call an ambulance and explain the casualty’s condition and your location.
Continue to check for breathing every minute using the same technique. If the casualty stops breathing at any point, roll them onto their back and commence CPR.
To prevent pressure sores, you should roll the casualty onto their other side every 15 minutes. Do this by rolling them onto their back gently and performing the same steps as above from the other side of the casualty.
References
- Handley Anthony J.Should we still be teaching the recovery position? Resuscitation. Available from: [LINK].
- Resuscitation Council (UK). Resuscitation Guidelines 2015. Authors: Carl Gwinnutt, Robin Davies, Jasmeet Soar. Accessed May 10th 2020. Available from: [LINK].


