
- 📖 Geeky Medics OSCE Book
- ⚡ Geeky Medics Bundles
- ✨ 1300+ OSCE Stations
- ✅ OSCE Checklist PDF Booklet
- 🧠 UKMLA AKT Question Bank
- 💊 PSA Question Bank
- 💉 Clinical Skills App
- 🗂️ Flashcard Collections | OSCE, Medicine, Surgery, Anatomy
- 💬 SCA Cases for MRCGP
To be the first to know about our latest videos subscribe to our YouTube channel 🙌
Introduction
Manual handling describes any act that moves a patient, objects, or equipment from one place to another. We may need manual handling for many reasons where the patient cannot move safely from one place to another independently, and they may be frail, unable to move certain limbs, or unable to move altogether.
The General Medical Council (GMC) includes manual handling on their practical skills and procedures list.
Hospital inpatients will usually be assessed by a physiotherapist or an occupational therapist who will recommend which mode of transfer will best suit the patient. Knowing where to find this information is important before attempting a transfer of a patient.
This guide provides a general overview of manual handling principles and describes basic manual handling techniques for moving patients in hospital settings. It is not designed to replace formal manual handling training. You should never attempt to move a patient without adequate training or supervision.
Principles of manual handling
Basic principles of manual handling include:
- Double-check what is safe for the patient, as any hazards may already be documented in the notes by the ward staff, or you can ask one of the nursing team members who is looking after the patient
- Where possible, try to have another member of trained staff with you to ensure everyone’s safety
- If you come across a piece of equipment that is not working or damaged, do not use it under any circumstances. Tell a senior member of ward staff, and label the equipment so that no one else uses it (note – each hospital will have different policies for defective equipment)
- Do not try to do anything that you are not comfortable with (even if you have had training), as this may endanger the patient and yourself
- When working with other staff members, verbalise everything you’re doing and encourage other staff to do the same. This is particularly important when transfers require synchronised movements. It is helpful to verbalise this clearly and check that everyone has understood you (e.g. “Ready, Steady, [Action: Stand, Pull, Move]”)
How to be safe
Whilst patient safety may be at the forefront of your mind when thinking about manual handling, you must ensure that you are safe and not acting in a way that could cause you injury.
- Raise (or lower) the bed accordingly so that you are not bending down for long periods
- Assess the patient’s strength before making a transfer. If you do not think the patient could use their legs to reach a standing position, you should not ‘replace’ this with your own strength, as this can lead to injury.
- With any of these transfers, you should never feel like you have to use a lot of strength to move a patient. If this is the case, stop and seek some help.
Patient transfers
There are many ways to transfer a patient that you may see in hospitals or community settings. Before you attempt a transfer, you should consider the following:
- What is the medical background of the patient? If the patient has known postural hypotension, BPPV or a fracture, then a different approach may be required
- Are they confused and not able to follow instructions? The patient may be delirious or have a background of dementia or cognitive impairment. In this case, how your explanation and transfer technique may change
- Does the patient have any sensory deficits? If the patient cannot see or hear, then the way you explain things and the transfer of the patient may be slightly different. In this case, it may be very useful to ask if there is documentation regarding the manual handling of the patient
Floor rescue
A floor rescue is used to move patients from the floor (e.g. following a collapse or a fall). There are different methods used, depending on the equipment available. A full body hoist or inflatable mattress (HoverJack®) can be used.
Inflatable mattress
1. Assess the patient for injuries (e.g. cervical spine) and ensure it is safe to move the patient
2. Place a pillow underneath the patient’s head; this will make them more comfortable and prevent damage to the back of the skull
3. Next, roll the patient towards your partner and slide a sling underneath the patient as far as it will go – this may involve a log roll if needed
4. Roll the patient the other way (towards you) and pull the remaining part of the sling out from underneath the patient
5. The patients’ arms should be crossed over their chest, and the patient should be strapped to the sling using the straps found on the sling
6. Now, we need to get the inflatable mattress, unroll it, and place it so that the sling overlaps the mattress on top of it
7. You can now slide the patient onto the inflatable mattress, and once the patient is on the mattress it can be inflated to the desired level
8. Once the patient is at the same level as the bed, laterally transfer the patient onto the bed (detailed below)
9. Remove the inflatable mattress by rolling the patient to each side and removing the mattress from underneath them
Lateral transfer
A lateral transfer is used when a patient needs to be transferred from one bed to another (e.g. hospital bed to CT machine)
1. Firstly, roll the patient away from you and place a sliding sheet underneath them
2. Roll them towards you, and your partner needs to unroll the slide sheet from their side
3. Now you need to place a patient transfer board (e.g. PATSLIDE®) underneath the sliding sheet so it covers the gap between the two beds
4. Once this is done, you can slide the patient from one bed to another, making sure everyone is communicating well (as above)
Sit to stand
One assistant
1. Assist the patient in shuffling to the edge of the seat so that their buttocks are on the edge of the seat
2. Move the patients’ feet (if they cannot do this themselves) so that they are in front of the seat
3. Ask the patient to lean forward, and tell them that you’re going to rock backwards and forwards in the chair, counting up each time, and on the third time, you’re going to stand
4. On the third rock forward, encourage the patient to stand “and…stand” whilst standing next to the patient with a hand on their lower back and the other hand on the front of their shoulder (the closest shoulder to you)
5. Wait a few moments before moving, and check that the patient hasn’t developed dizziness, nausea, motion sickness, weakness etc.
Two assistants
A similar method can be done with two assistants, one on either side of the patient.
Bed repositioning
Bed repositioning is performed to prevent pressure ulcers and should be performed regularly for patients who cannot move themselves in bed. For example, if a patient has been lying on their right-hand side for 3 hours, it may be time to reposition them onto their back for the next period and so on.
Wedges may also be used to prevent excess pressure at one particular site on the patient’s body.
Hoist transfers
Principles of using a hoist
A hoist is a large piece of equipment used to help move patients. Specific training is required to use hoists, and should never be operated without adequate training. General principles of using hoists include:
- Equipment should be checked before being used with a patient (hoist wheels are working, battery is charged etc)
- You should have two trained healthcare staff using these, one person is not enough
- Communication is critical when using hoists; ensure everyone knows their role and the objective of the move
- If using a sling, check that it is the right size for the patient
Sara Stedy (standing aid)
A Sara Stedy is used when a patient has lost leg strength, balance, or cognition – however, they can still follow instructions and have some upper body strength.
How they work:
- The patient sits on the edge of the bed, and their feet will sit on the raised platform (make sure the brakes are on when you have the right position)
- The patient will reach out and grab the purple bar
- The patient will then stand up, pulling on the purple bar to lift themselves
- The carer will push the two-seat flaps into the sitting position (so they are safely behind the patient creating a chair)
- At this point, the patient can sit down on the purple “chair” behind them
- They can be transferred to their next location
Standing hoist
A standing hoist is used when a patient has significantly reduced leg strength, balance, or cognition.
How they work:
- The patient sits on the edge of the bed, and their feet will sit on the raised platform
- A sling will be placed on the patient’s back and around their waist and clipped on the hoist
- Some slings have a seatbelt and Velcro strap that goes across the patient’s torso
- Double-check that all the clips are in place
- The patient can grab onto handlebars
- Use the remote control to raise the patient off the bed into a comfortable position
- They can then be transferred to their next location
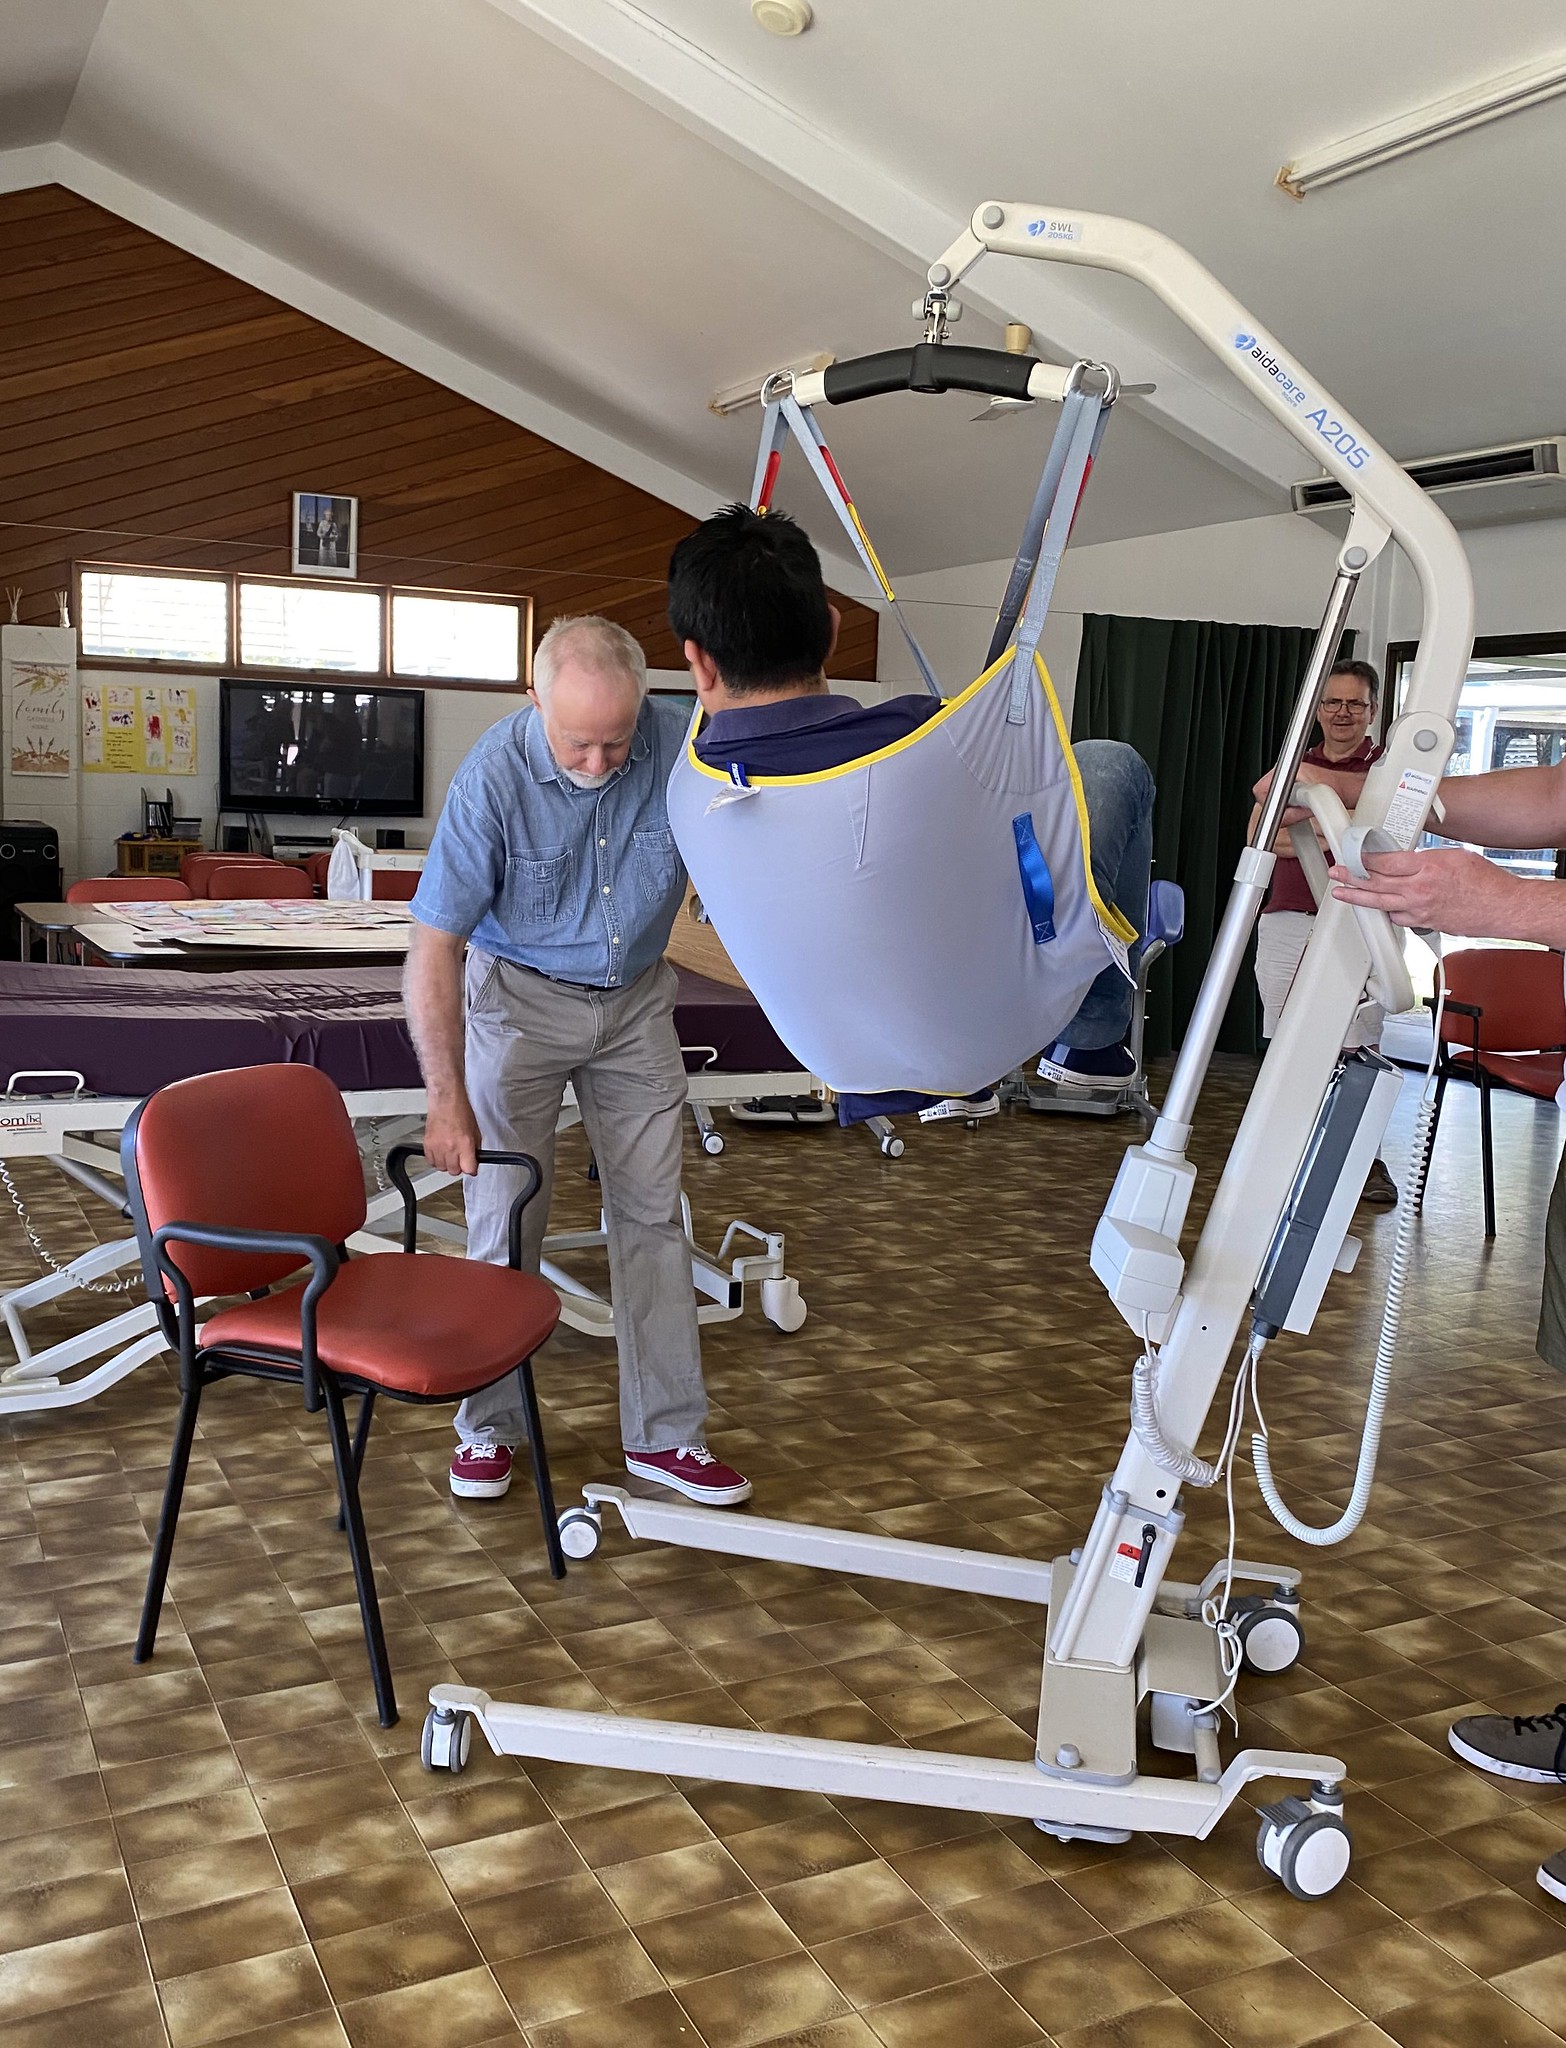
Full body hoist
A full body hoist is used when a patient cannot stand at all.
How they work:
- Lie the patient flat in bed
- Ask the patient to roll to one side (if they cannot do this, you can assist them in rolling to one side)
- Place the sling on the patient’s back, with the wash label of the sling facing outwards (you should also check this label for the correct size, condition etc)
- Ensure the sling covers the patient’s back (and head if the sling has good head support)
- Ask the patient to lie on their back (or assist)
- The patient can then roll to the other side, and the rest of the sling can be pulled out from underneath them
- Make sure that the sling is comfortably placed underneath the patient
- Using the remote control, bring the hoist over and lower it down over the patient
- Attach the hoist to the sling – and double-check that all the clips/loops are in place
- You can then raise the patient using the remote, checking for patient comfort and safety
- When you reach the location, use the remote to put the patient sitting, and lower them into the new location
ReTurn hoist
A ReTurn hoist is used when a patient has reduced leg strength, balance, or cognition. However, they can use their arms and maintain a standing position.
How they work:
- Sit the patient on the edge of the bed; their feet should be on the raised platform
- Put the brakes on
- The patient should grab onto the metal bars wherever the patient feels comfortable reaching to
- Support the patient as they pull themselves up to a standing position
- Unlock the brakes and turn the patient around using the hoist
- The patient can now sit in their new location
Sliding sheet
Sliding sheets have multiple uses. Mainly, they are used to reposition a supine patient. They work by sliding one layer of a double-layer sheet over another.
How they work:
- Roll the patient to one side
- Place the sliding sheet underneath the patient
- Roll the patient to the other side
- Straighten the sliding sheet on the other side and lay the patient flat
- Hold the top layer of the sliding sheet with both hands (one person on each side)
- Using the communication skills above, move the patient at the same time
Reviewer
David Makepeace
Physiotherapist
Editor
Dr Chris Jefferies
References
- South Tees Hospitals Manual Handling Team. Manual Handling Book. 2020. Available from: [LINK]
- Smith, J. The Guide to The Handling of People – a systems approach. 6th edition. Backcare; 2011.
- Health and Safety Executive. Getting to grips with hoisting people. Published in 2011. Available from: [LINK]
- Health and Safety Executive. Moving and Handling in Social Care. Moving and Handling Equipment. Published in 2021. Available from: [LINK]
Image references
- Figure 1. Owen Allen. ManualHandlingTraining. License: [CC BY]
