

- 📖 Geeky Medics OSCE Book
- ⚡ Geeky Medics Bundles
- ✨ 1300+ OSCE Stations
- ✅ OSCE Checklist PDF Booklet
- 🧠 UKMLA AKT Question Bank
- 💊 PSA Question Bank
- 💉 Clinical Skills App
- 🗂️ Flashcard Collections | OSCE, Medicine, Surgery, Anatomy
- 💬 SCA Cases for MRCGP
To be the first to know about our latest videos subscribe to our YouTube channel 🙌
Introduction
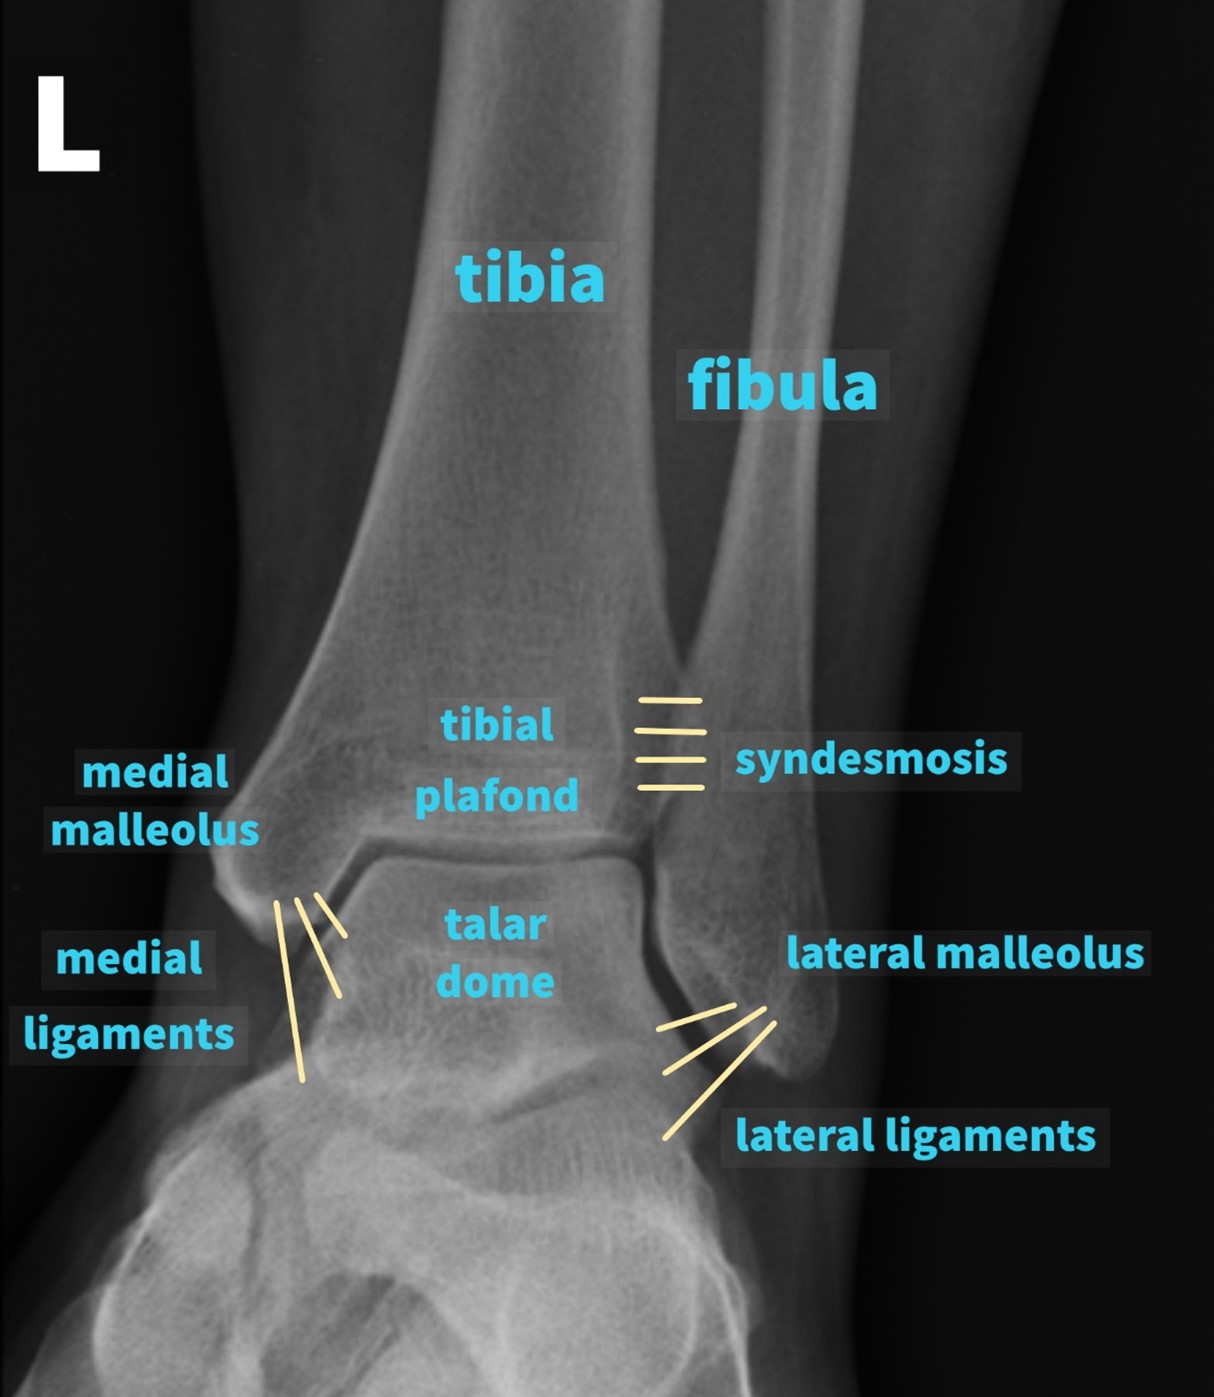
The ankle is a hinge joint formed by three bones: the tibia, the fibula and the talus.
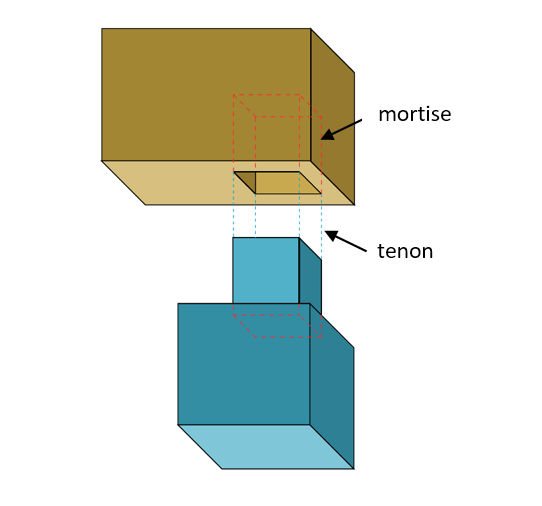
Proximally, the joint comprises the medial malleolus (the distal end of the tibia), the tibial plafond and the lateral malleolus (the distal end of the fibula) which collectively form a rectangular socket called the mortise into which fits the talar dome distally.
This comes from the similarity to the mortise and tenon joint used in carpentry to create stable connections (Figure 1).
Further reinforcement of the ankle joint is provided by a strong fibrous complex between the distal tibia and fibula called the syndesmosis, and the medial (or deltoid) and lateral ligaments which arise from the medial and lateral malleolus respectively.
The ankle joint allows dorsiflexion and plantarflexion and is one of the weight-bearing joints. For more information, see the Geeky Medics guides to the bones of the lower limb and the bones of the foot.
Principles of ankle X-ray interpretation
Demographics
Begin by checking that you are looking at the correct radiograph of the correct patient.
It is important to confirm the following details:
- Patient details (name, date of birth, unique identification number)
- Date and time the radiograph was taken
- Correct side (right vs. left)
Views
In the United Kingdom, two views of the ankle joint are routinely performed:
- Mortise view: this is a modified anteroposterior (AP) view of the ankle in 10-20° internal rotation so that the medial and lateral malleoli are in the same horizontal plane and joint visualisation is optimised
- Lateral view
In some cases, a weight-bearing or a stress radiograph (gravity stress or manual stress) may also be required.
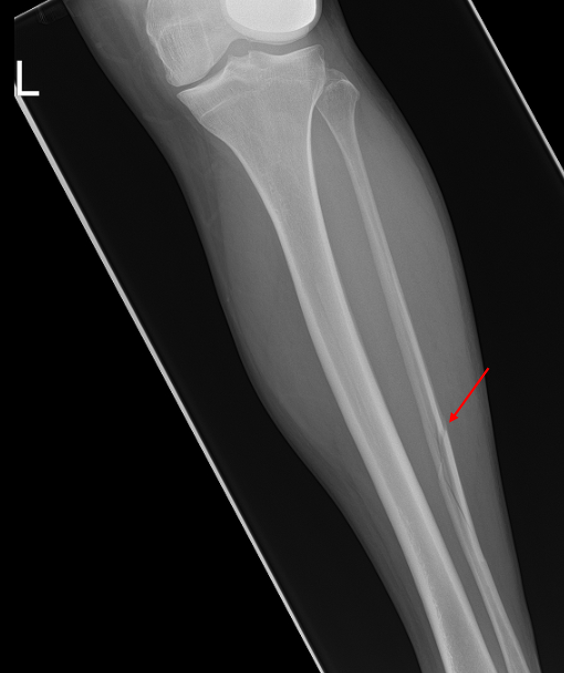
Consider additional views such as a full-length tibia/fibula radiograph and imaging of the joint above and below (i.e. a knee and a foot radiograph) to rule out additional fractures.
Comparison
Comparison to previous radiographs, if available, can be especially useful when interpreting radiographs.
Asymptomatic contralateral sides are not routinely radiographed, however,§ if a recent or old image of the contralateral side is available, these may also be compared as the skeletal system is generally symmetrical and could therefore act as a reference point.
Interpreting an ankle X-ray
Use a methodical approach such as ABCs to look at a radiograph.
Adequacy
Ideally, you should be able to see at least the distal third of the tibia and fibula and the talus on the mortise view and in addition to those, you should be able to see the calcaneum and the base of the 5th metatarsal on the lateral view.
Penetration is adequate if you can clearly distinguish between bones and soft tissues.
Look out for artefacts.
Bones
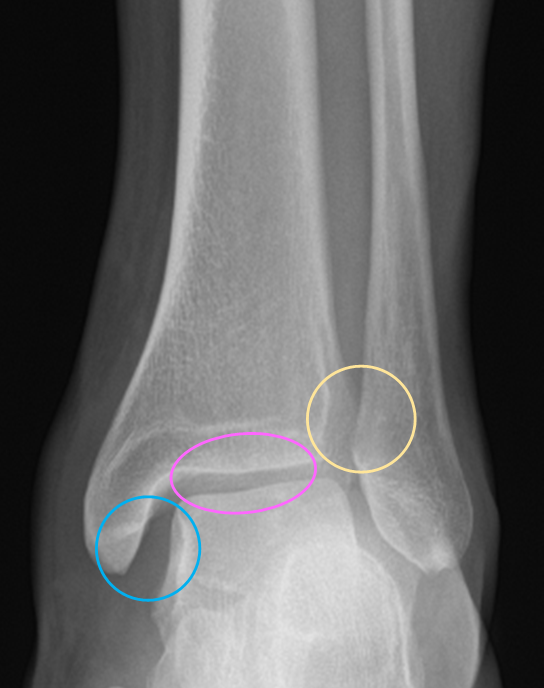
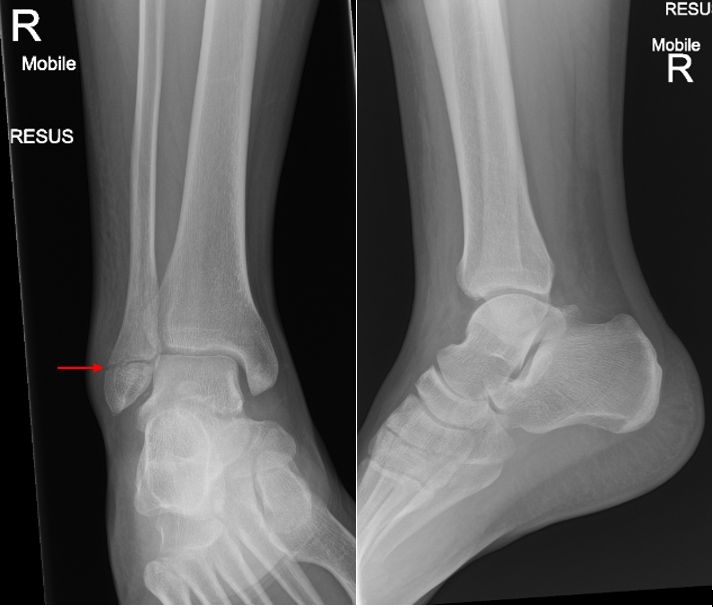
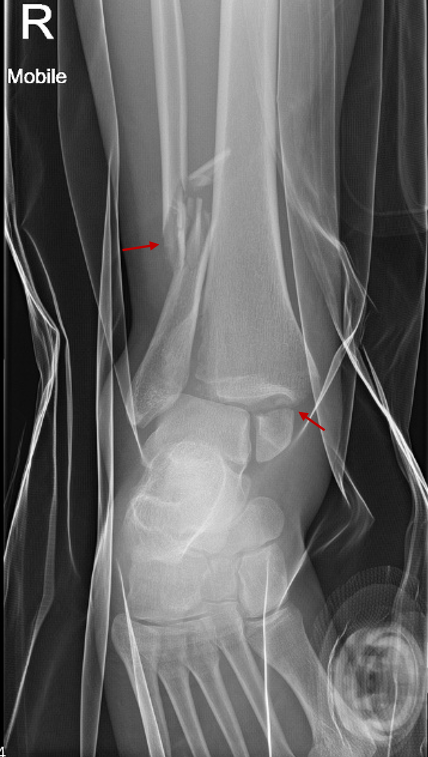
In both views, trace the cortical outline of all the bones visible on the radiograph. On the mortise view, trace the mortise and the talar dome surface. On the lateral view, assess the medial, lateral and posterior malleoli, the calcaneum and the base of the fifth metatarsal.
A loss in bone or joint alignment may be a result of a fracture, joint subluxation (partial dislocation) or dislocation. Note any other abnormalities such as osteophytes or calluses.
Look at the internal architecture of the bone (e.g. a thinner cortex and an increased bone lucency indicate osteopenia or osteoporosis). A fracture in an abnormal bone is termed a pathological fracture.
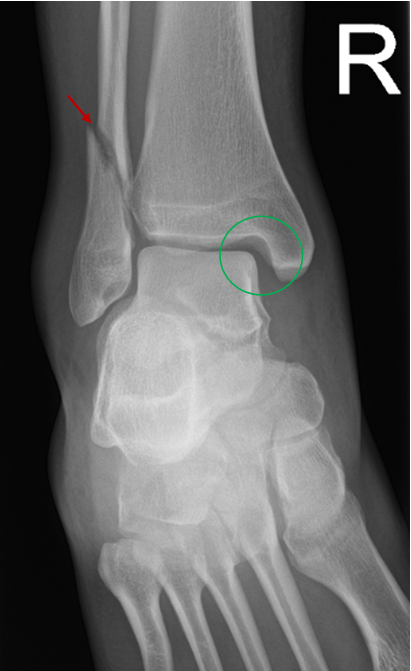
Beware of normal developmental variants such as accessory ossicles which may be mistaken for fractures.
Cartilages (joint involvement)
Assess the joint space on the mortise view. A loss of joint space may be due to a loss of cartilage and is commonly seen in conditions such as osteoarthritis. Joint widening may be due to fracture or dislocation.
Look at the medial clear space. This is the widest distance between the medial border of the talar bone and the lateral border of the medial malleolus. It should be approximately equal to the superior clear space (the distance between the articular surfaces of the tibia and the talus).
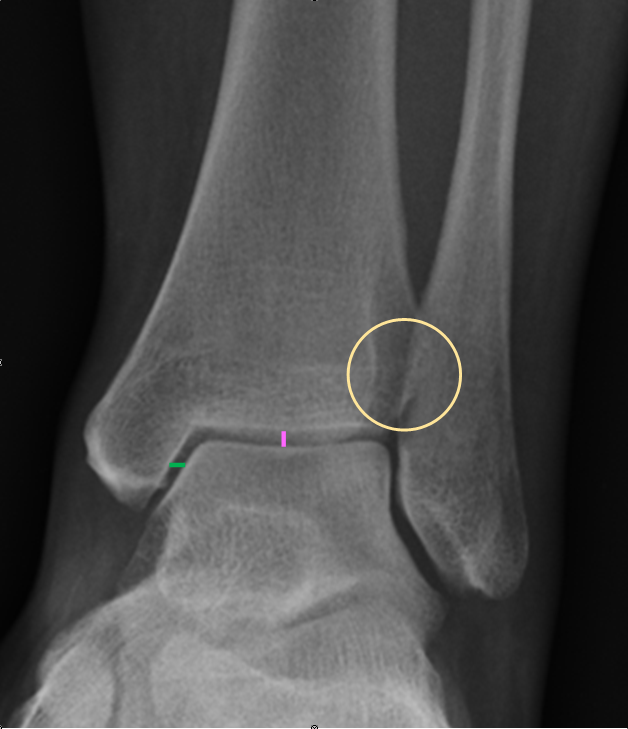
Widening of the medial clear space (i.e. lateral talar shift) suggests syndesmosis disruption and therefore joint instability.
A loss of tibiofibular overlap also suggests syndesmosis injury.
Joint widening with no obvious fracture on the ankle radiograph may also indicate a more proximal fracture such as a Maisonneuve fracture (this is a combination of an unstable ankle due to a ligamentous and/or bony injury together with a proximal fibular fracture). In these situations, consider asking for additional X-rays.
Soft tissues
Carefully inspect the soft tissues, as this can provide helpful information. For example, soft tissue swelling or a joint effusion may sometimes indicate the presence of a subtle fracture.
Describing a fracture on an ankle radiograph
When describing an ankle X-ray, use the following structure:
- Details of the radiograph and the patient
- Site of fracture: which bone, which part of the bone, left or right
- Type of fracture (e.g. transverse, oblique, spiral)
- Simple or comminuted
- Displacement and angulation of the distal fracture fragment in relation to the proximal fracture fragment
- Intra-articular or extra-articular (i.e. Does the fracture line extend into a joint?)
Classification of ankle fractures
Anatomical descriptors of ankle fractures include (but are not limited to):
- Isolated medial malleolus fracture
- Isolated lateral malleolus fracture
- Bimalleolar fracture (medial + lateral malleoli fractures)
- Trimalleolar fracture (medial + lateral + posterior malleoli fractures)
Lateral malleolus fractures can be further classified, as per the Danis-Weber classification (commonly referred to as just the Weber classification), into:
- Type A: below the syndesmosis
- Type B: at the level of the syndesmosis
- Type C: above the syndesmosis
Tips for ankle X-ray interpretation
- Familiarise yourself with normal radiographs of the ankle, so that you are able to recognise when things don’t look quite right.
- If you spot an abnormality on a radiograph, continue to examine the entire area visible before stopping in order not to miss any further abnormalities.
- Fractures can sometimes be very subtle; carefully examine the patient and correlate imaging with clinical findings.
- If in doubt, always ask for senior input.
Reviewer
Mr Jack Turnbull
Trauma & Orthopaedics Registrar
Editor
Dr Chris Jefferies
References
- Adapted by author. Diagram of a mortise (on left) and tenon joint. Licence: [CC BY-SA].
- Department of Trauma & Orthopaedics, Lancashire Teaching Hospitals NHS Foundation Trust. Adapted by author.
- Hellerhoff, adapted by author. Os trigonum. Licence: [CC BY-SA].
