- 📖 Geeky Medics OSCE Book
- ⚡ Geeky Medics Bundles
- ✨ 1300+ OSCE Stations
- ✅ OSCE Checklist PDF Booklet
- 🧠 UKMLA AKT Question Bank
- 💊 PSA Question Bank
- 💉 Clinical Skills App
- 🗂️ Flashcard Collections | OSCE, Medicine, Surgery, Anatomy
- 💬 SCA Cases for MRCGP
To be the first to know about our latest videos subscribe to our YouTube channel 🙌
This guide provides a step-by-step approach to performing vaginal swabs in an OSCE setting.
Gather equipment
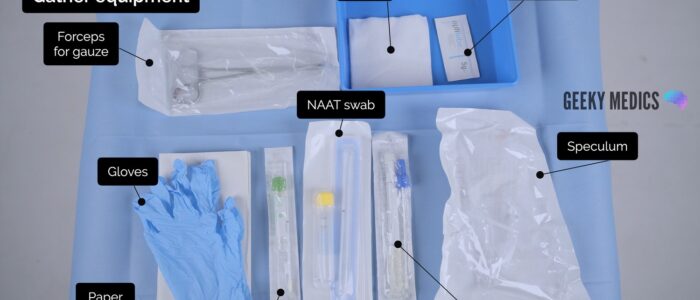
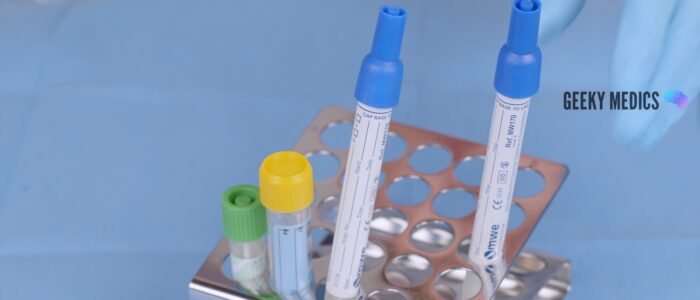
Collect the relevant equipment, remove the outer packaging and place it in a clean tray:
- Gloves
- Lubricant
- Speculum
- A light source
- Paper towels
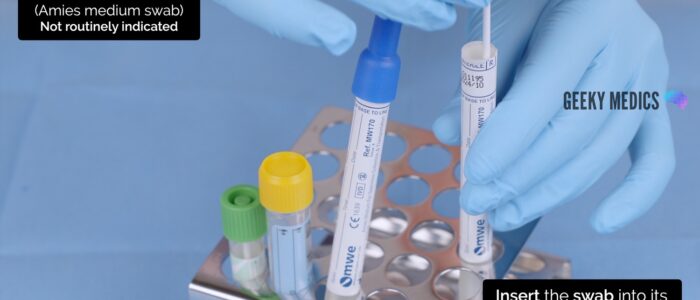
- Amies (charcoal) medium swab x 2 (high vaginal and endocervical if required)
- Nucleic acid amplification test (NAAT) swab (vulvovaginal)
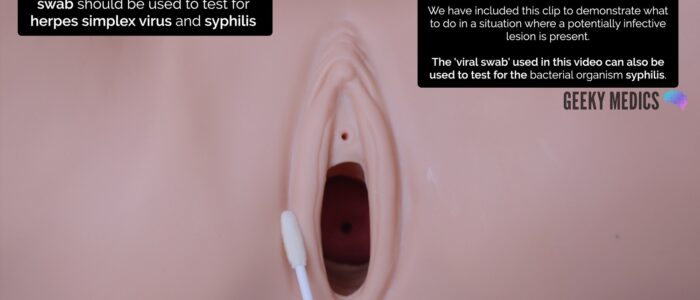
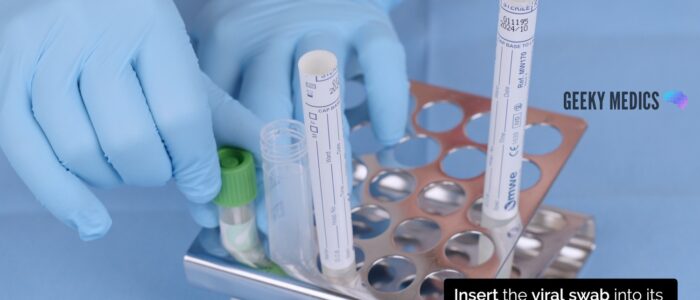
- Viral swab (for genital ulcers, if required)
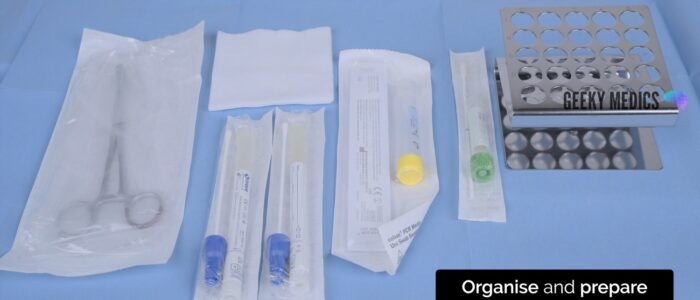
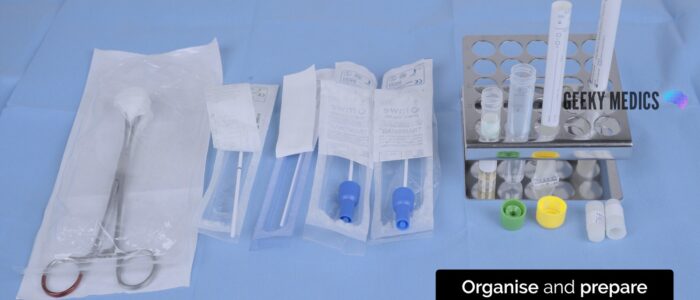
Organise and prepare the swabs for taking samples.
Double vs triple swabs
Depending on your local guidelines, for vaginal swabs, you may be expected to take “double swabs” or “triple swabs”:
- Double swabs: a NAAT swab (vulvovaginal) and a high vaginal Amies (charcoal) medium swab.
- Triple swabs: a NAAT swab (vulvovaginal), a high-vaginal Amies (charcoal) medium swab and an endocervical Amies (charcoal) medium swab.
The NAAT kit usually contains two swabs, an endocervical and vulvovaginal. Usually, only the vulvovaginal swab (large-tipped white swab) is required as it is better at detecting chlamydia and gonorrhoea.
Introduction
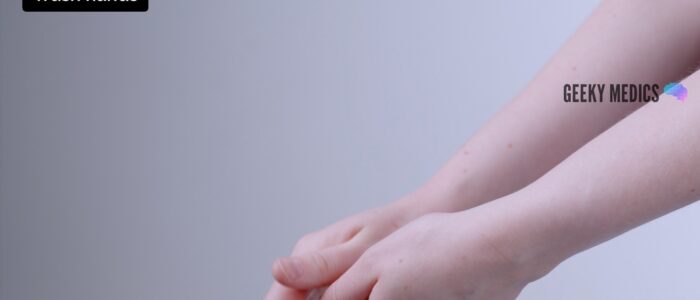
Wash your hands and don PPE if appropriate.
Introduce yourself to the patient including your name and role.
Confirm the patient’s name and date of birth.
Explain what the procedure will involve using patient-friendly language: “Today I need to take some vaginal swabs. The procedure will involve me inserting a small plastic device called a speculum into the vagina and then taking several swabs from the vagina and neck of the womb. It shouldn’t be painful, but it will feel a little uncomfortable. You can ask me to stop at any point. You may experience some light vaginal bleeding or spotting after the procedure.”
Explain the need for a chaperone: “One of the female ward staff members will be present throughout the examination, acting as a chaperone, would that be ok?”
Gain consent to proceed with the procedure: “Do you understand everything I’ve said? Do you have any questions? Are you happy for me to carry out the procedure?”
Ask the patient if they have any pain or if they think they may be pregnant before proceeding with the procedure.
Provide the patient with the opportunity to pass urine before the procedure.
Explain to the patient that they’ll need to remove their underwear and lie on the clinical examination couch, covering themselves with the sheet provided.
Provide the patient with privacy to undress and check whether it is okay to re-enter the room before doing so.
Preparation
1. Wash your hands
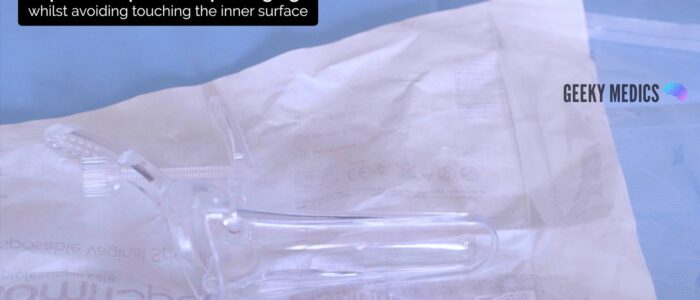
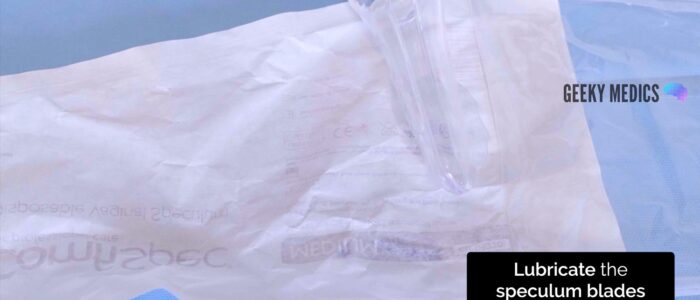
2. Open the speculum packaging whilst avoiding touching the speculum or the inner surface of the packaging
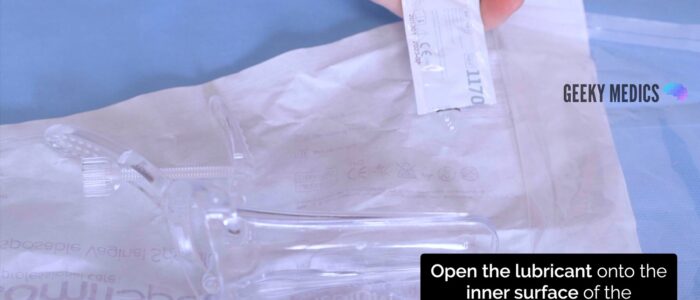
3. Open the lubricant onto the inner surface of the speculum packaging
Position the patient
1. Re-check consent and that the patient is happy to proceed with the examination: “I’m going to move on and examine your genitals. Are you happy for me to do this?”
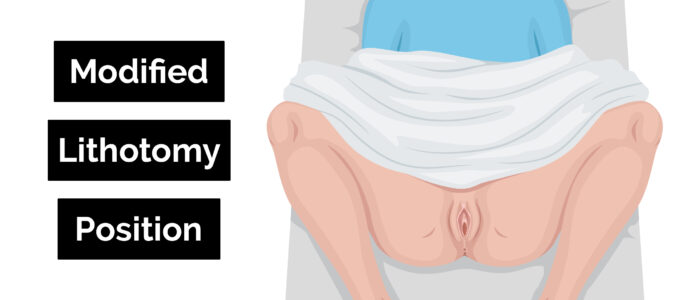
2. Position the patient in the modified lithotomy position: “Draw your ankles up towards your buttocks, keep your feet flat on the bed, and then let your legs fall open”.
Vulval examination
A vulval examination should be performed before moving on to taking the vaginal swabs. This is to look for any vulval pathology or lymphadenopathy.
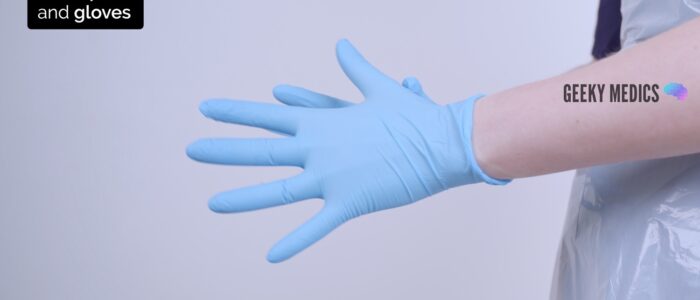
1. Don a pair of non-sterile gloves and an apron
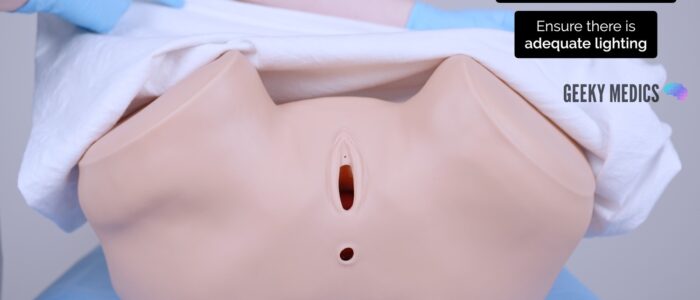
2. Expose the patient’s external genitalia and ensure there is adequate lighting
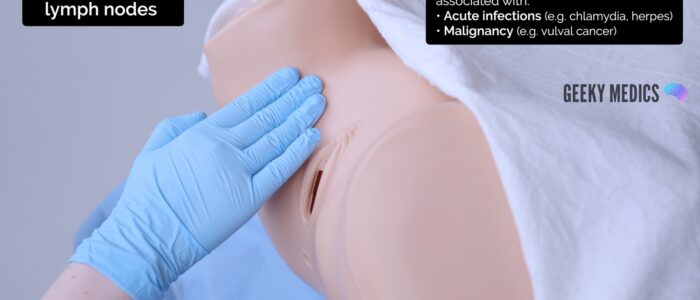
Palpate the inguinal lymph nodes
1. Palpate the inguinal lymph nodes to identify lymphadenopathy, which may be associated with:
- Acute infections (e.g. chlamydia, herpes)
- Malignancy (e.g. vulval cancer)
Inspect the vulva
1. Inspect the vulva for abnormalities:
- Ulcers: typically associated with genital herpes
- Abnormal vaginal discharge: causes include candidiasis, bacterial vaginosis, chlamydia and gonorrhoea
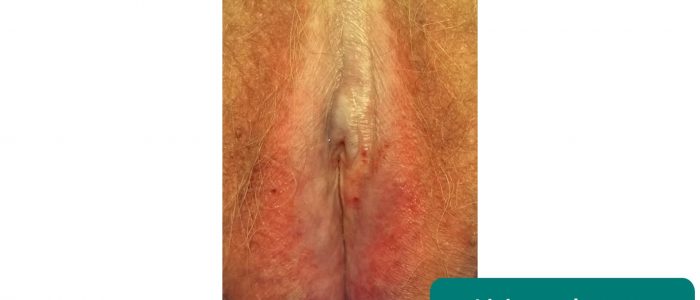
- Scarring: may relate to previous surgery (e.g. episiotomy) or lichen sclerosus (scarring with associated abnormal architecture)
- Vulvovaginal atrophy: most commonly occurs in postmenopausal women
- White lesions (leukoplakia): may be patchy or in a figure-of-eight distribution around the vulva and anus, associated with lichen sclerosus
- Other lesions: causes include folliculitis, molluscum, genital warts and vulval malignancy
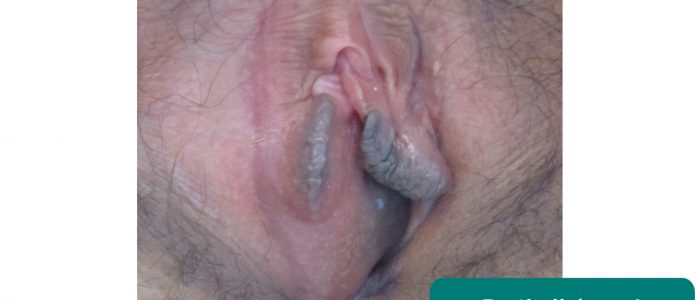
- Masses: causes include Bartholin’s cyst and vulval malignancy
- Varicosities: varicose veins secondary to chronic venous disease or obstruction in the pelvis (e.g. pelvic malignancy)
- Female genital mutilation: total or partial removal of the clitoris and/or labia and/or narrowing of the vaginal introitus
Vulval swab
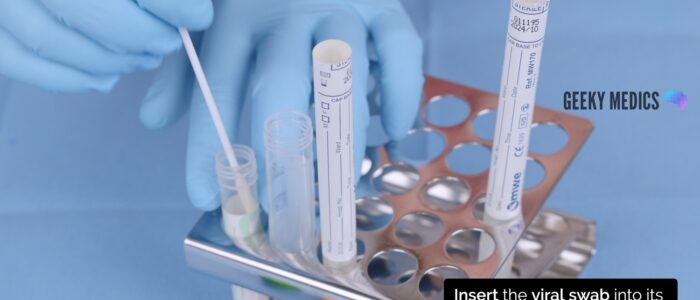
If ulcer(s) are noted on the vulva, an additional swab should be taken to exclude syphilis or HSV. Follow local guidelines, but in many areas, this can be done using a “viral” swab.
Vulvovaginal swab
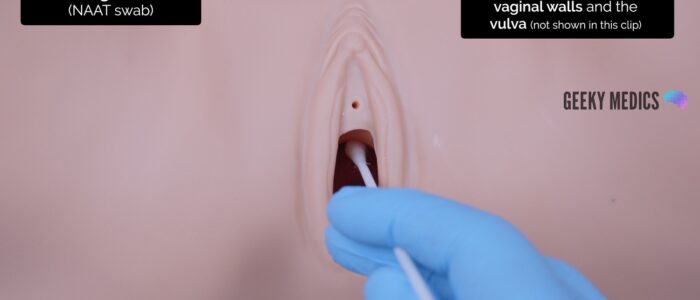
The vulvovaginal swab (NAAT) is used to detect chlamydia and gonorrhoea.
To take a vulvovaginal swab:
1. Remove the large tipped vulvovaginal swab from the packet
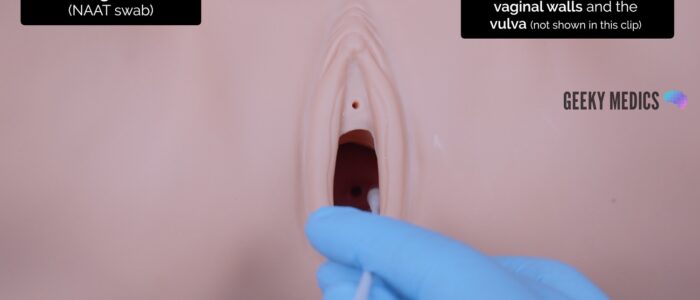
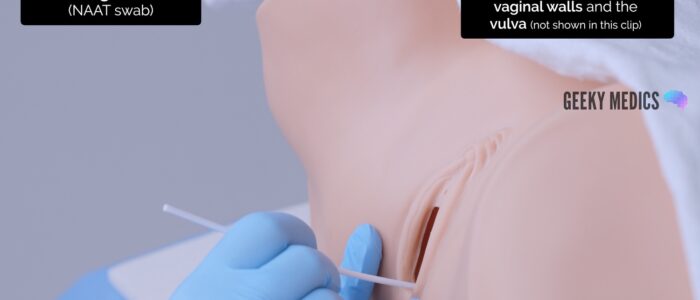
2. Pass the tip of the swab through the introitus approximately 5cm into the vagina
3. Rotate the swab for 10-30 seconds against the vaginal walls
4. Remove the swab from the vagina
5. Swab the vulva (around the introitus)
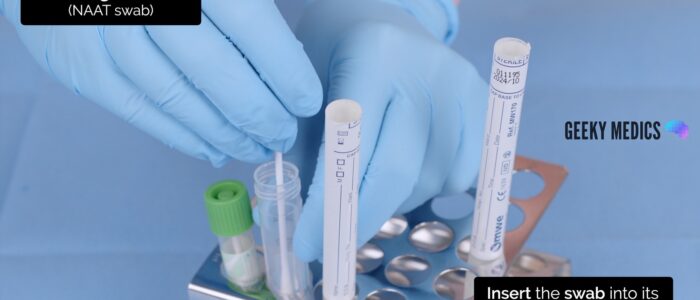
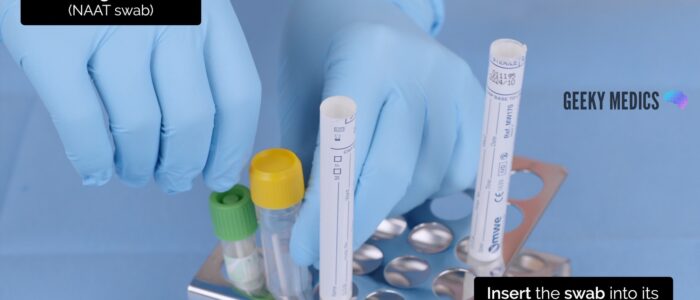
6. Open the NAAT test tube from the packet. An assistant can help open the NAAT test tube. It is important not to spill any fluid from the test tube or place the swab on any surface, as this may contaminate the sample.
7. Insert the swab into the NAAT test tube and snap the swab against the side of the test tube along the indicated black line.
8. Screw the lid onto the NAAT test tube.
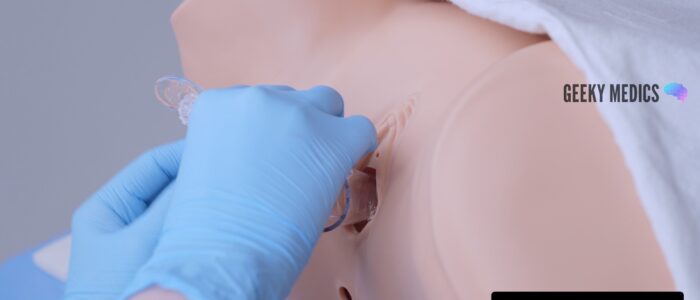
Inserting the speculum
Warn the patient that you are going to insert the speculum and ask if it is still okay for you to do so.
If the patient consents to continuing the procedure, lubricate the speculum by dipping the speculum into the lubricant on the internal packaging.
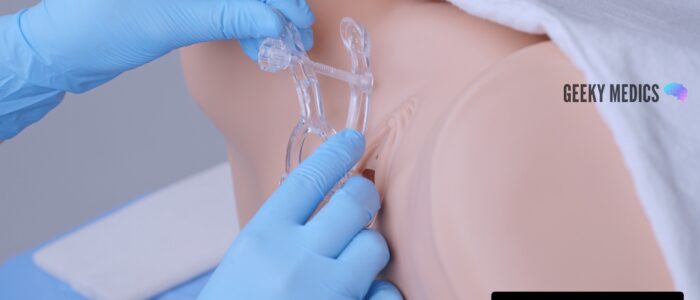
Then, proceed to insert the speculum:
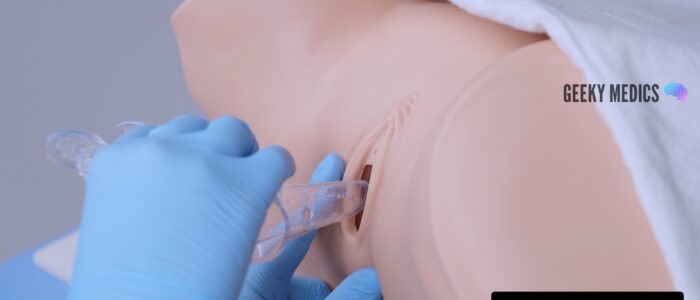
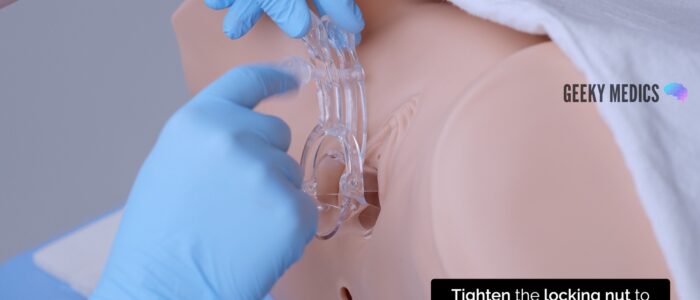
1. Carefully separate the labia using the thumb and index finger of your non-dominant hand
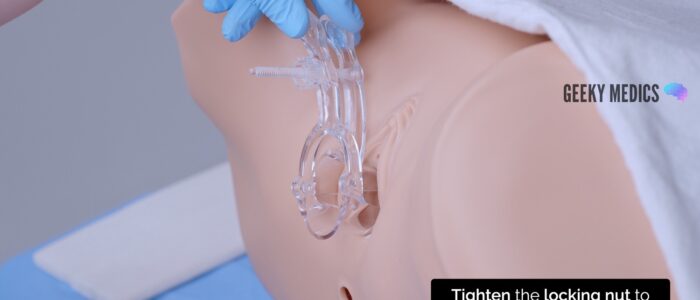
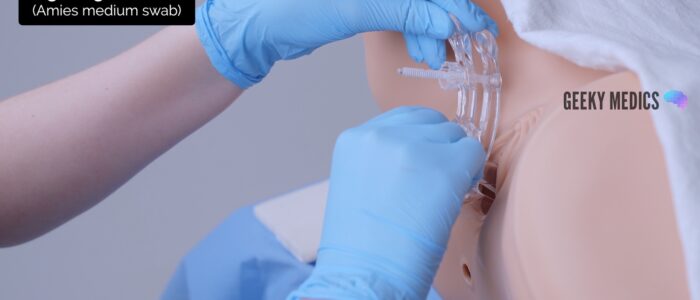
2. With the blades closed, gently insert the speculum. Usually, the speculum is inserted with the handle pointing sideways (at 9 or 3 o’clock)
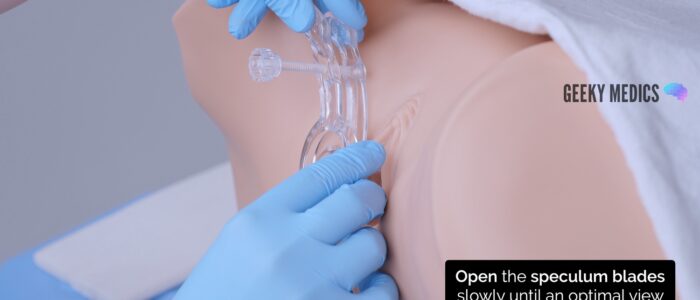
3. Once inserted, rotate the speculum so that the handle is facing upwards
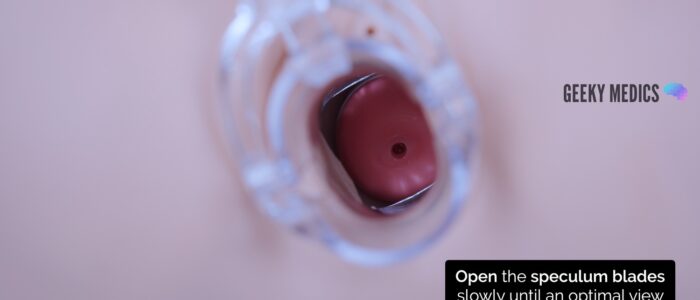
4. Open the speculum blades until an optimal view of the cervix is achieved
5. Tighten the locking nut to fix the position of the blades
Inspection of the cervix and vagina
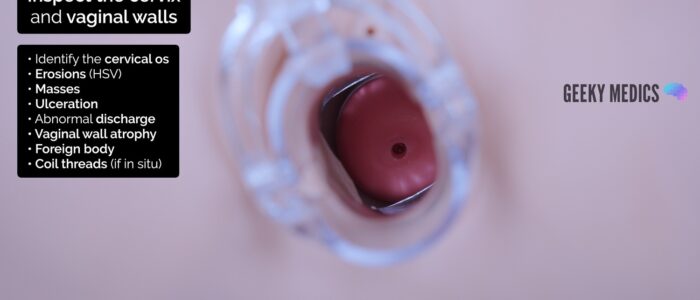
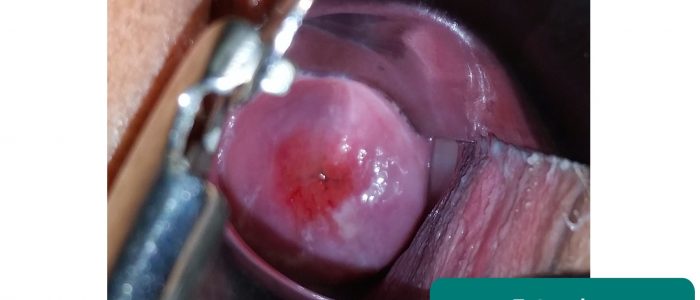
Inspect the cervix for:
- The cervical os: if open and the patient is pregnant, this may indicate an inevitable or incomplete miscarriage
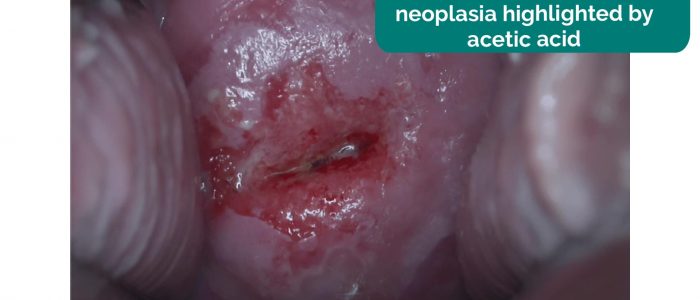
- Erosions around the os: most commonly associated with ectropion; however, early cervical cancer can have similar appearances
- Cervical masses: typically associated with cervical malignancy
- Scarring: from a previous colposcopy procedure (e.g. LLETZ)
Inspect the cervix and vagina for:
- Ulceration: most commonly associated with genital herpes
- Atrophy: in post-menopausal patients
- Foreign body: for example, a retained tampon or condom
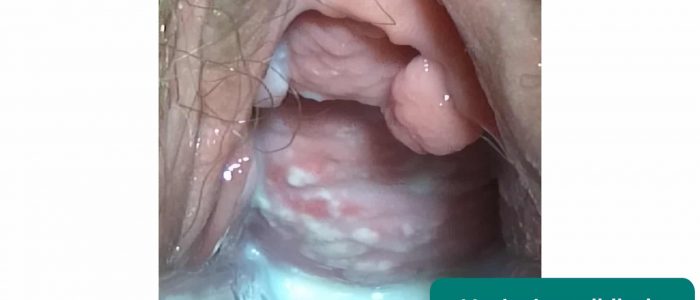
- Abnormal discharge: several possible causes, including bacterial vaginosis, vaginal candidiasis, trichomonas, chlamydia and gonorrhoea
High vaginal swab
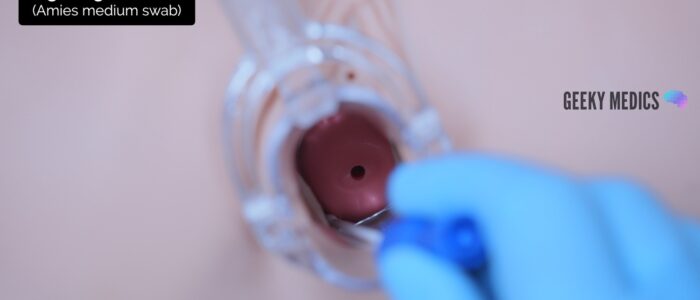
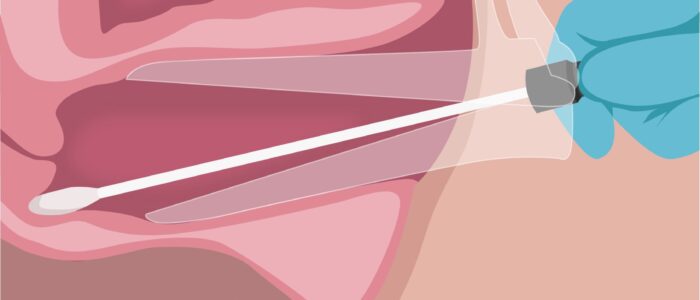
The high-vaginal Amies (charcoal) medium swab is used to detect infections, including bacterial vaginosis, trichomonas vaginalis, candida and Group B streptococcus.
To take a high-vaginal swab:
1. Remove the testing swab from the tube
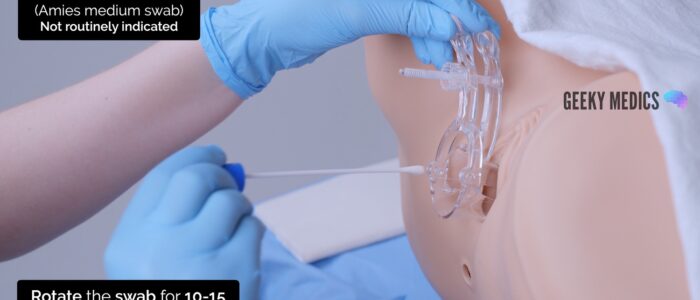
2. With the speculum in situ, pass the tip of the swab through the speculum to the posterior fornix of the vagina
3. Rotate the swab in the posterior fornix, ensuring you swab any discharge present
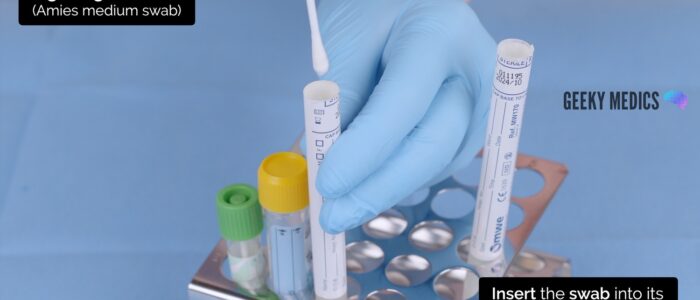
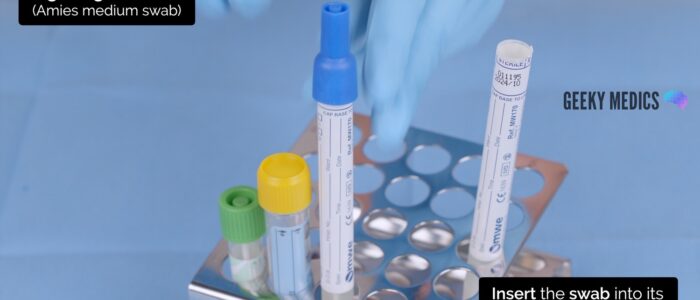
4. Remove the swab and insert it into the tube from which the swab was removed from
5. Secure the swab into the tube
Endocervical swab
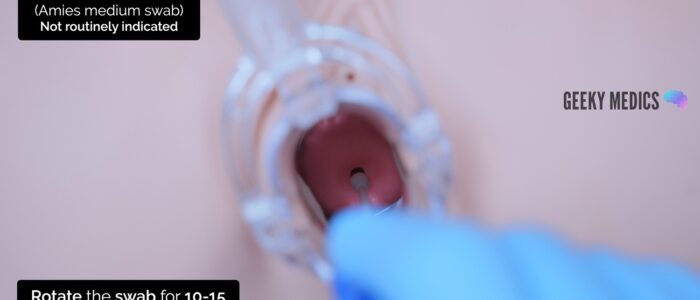
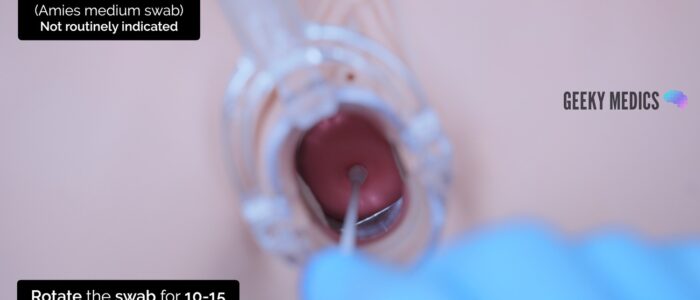
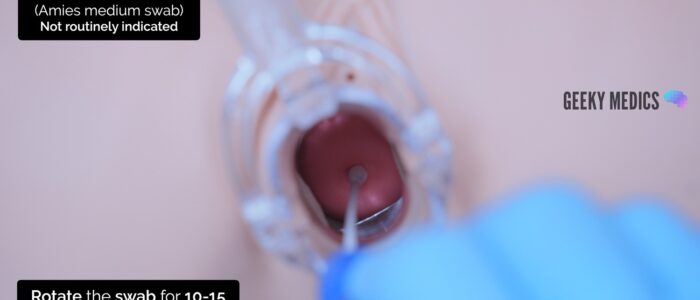
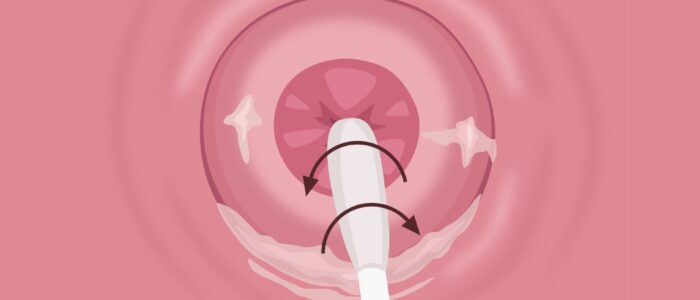
Amies (charcoal) medium endocervical swab
The endocervical Amies (charcoal) medium swab is used to perform microscopy, culture and sensitivities for gonorrhoea. It is now often performed only when gonorrhoea has been detected on a NAAT before the initiation of treatment.
To take an endocervical Amies (charcoal) medium swab:
1. Remove the testing swab from the tube
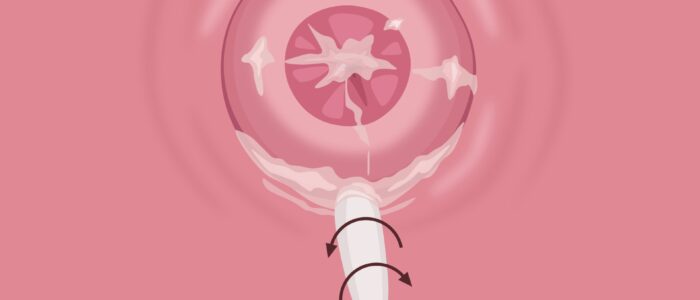
2. With the speculum in situ, pass the tip of the swab through the speculum to the cervical os
3. Insert the swab gently into the cervical os. If there is excess discharge covering the cervical os, consider using a spare swab to remove this before inserting the endocervical swab.
4. Rotate the swab in the endocervix
5. Remove the swab and insert it into the tube from which the swab was removed from
6. Secure the swab into the tube
NAAT endocervical swab (not usually required)
Note: Always follow local guidelines. Most areas will ask for a vulvovaginal NAAT sample, not an endocervical NAAT sample. Only one type of swab needs to be taken for a NAAT. An endocervical NAAT swab is not required if you have taken a vulvovaginal NAAT swab.
To take an endocervical NAAT swab:
1. Remove the thin endocervical swab from the packet.
2. With the speculum in situ, pass the tip of the swab through the speculum to the cervical os.
3. Insert the swab gently into the cervical os. If there is excess discharge covering the cervical os, consider using a spare swab to remove this before inserting the endocervical swab.
4. Rotate the swab in the endocervix.
5. Remove the swab and open the NAAT test tube from the packet. An assistant may be helpful to open the NAAT test tube. It is important not to spill any of the fluid from the test tube.
6. Insert the swab into the NAAT test tube and snap the swab against the side of the test tube along the indicated black line.
7. Screw the lid onto the NAAT test tube.
Removing the speculum
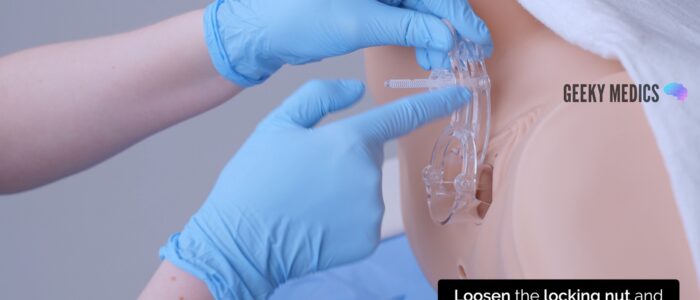
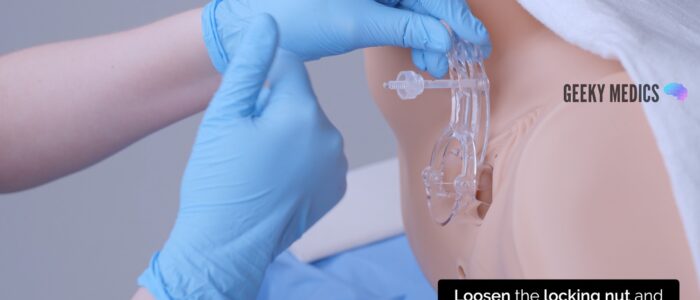
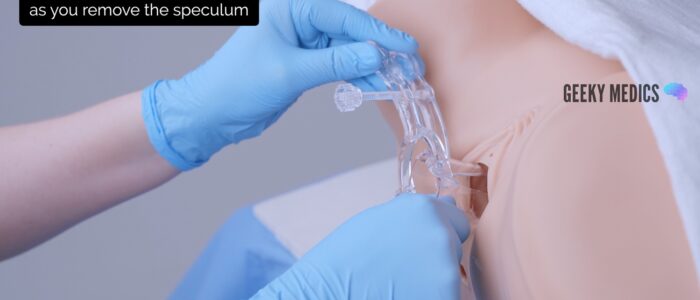
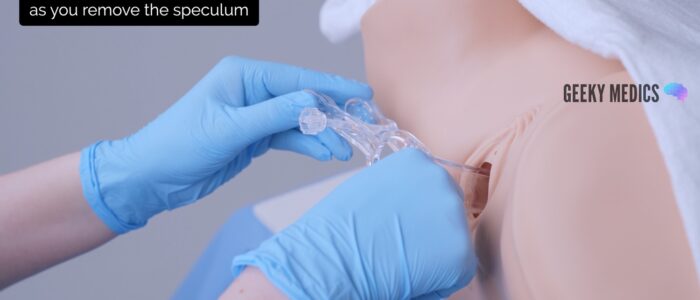
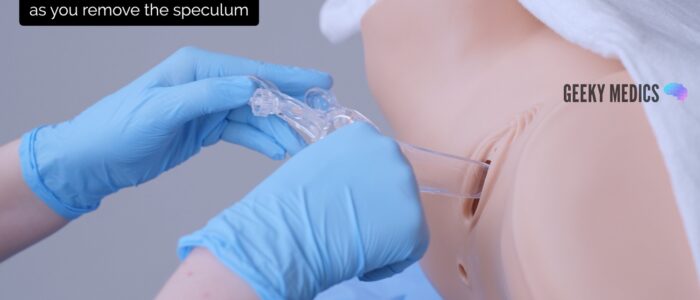
1. With your non-dominant hand, hold the blades of the speculum whilst you loosen the locking nut with your dominant hand. This ensures the blades do not snap shut when the locking nut is loosened.
2. Gently remove the speculum whilst slowly closing the blades and inspecting the walls of the vagina
3. Cover the patient with the sheet, explain that the procedure is now complete and provide the patient with privacy so they can get dressed. Provide paper towels for the patient to clean themselves.
4. Dispose of the used equipment into a clinical waste bin
To complete the procedure…
Label the samples with the relevant details.
Thank the patient for their time.
Advise the patient that they’ll be contacted with results via their preferred method (e.g. face to face or text message).
Dispose of PPE appropriately and wash your hands.
Document the procedure in the medical notes including the details of the chaperone.
Send the vaginal swabs to the lab for processing.
Summarise your findings.
Example summary
“Today I took vaginal swabs on Mrs Smith, a 28-year-old female.“
“There were no abnormalities noted on inspection of the vulva and speculum examination revealed a healthy cervix with a closed external os. I was able to obtain adequate samples.”
“In summary, these findings are consistent with a normal speculum examination. I have completed the vaginal swab request forms and labelled the samples appropriately.”
“I have explained the process for receiving results to the patient.”
Further assessments and investigations
- Urinalysis: including β-HCG to rule out pregnancy and urinary tract infection
- Bimanual vaginal examination: to assess the uterus/adnexa for masses and cervical motion tenderness
- Complete abdominal examination: if there are concerns about intraabdominal pathology
- HIV and syphilis serology: as part of a routine sexual health screen
- Sexual history: if not already taken
Reviewers
Dr Ashley Jefferies
Community Sexual and Reproductive Health Registrar
References
- Medimage. Adapted by Geeky Medics. Bartholin’s cyst. Licence: CC BY-SA.
- Mikael Häggström. Adapted by Geeky Medics. Lichen sclerosus. Licence: CC0.
- Mikael Häggström. Adapted by Geeky Medics. Vaginal candidiasis. Licence: CC0.
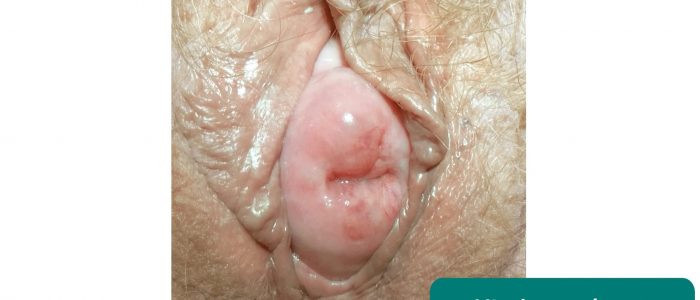
- Mikael Häggström. Adapted by Geeky Medics. Uterine prolapse. Licence: CC0.
- GynaeImages. Adapted by Geeky Medics. Cervical ectropion. Licence: CC BY-SA.


